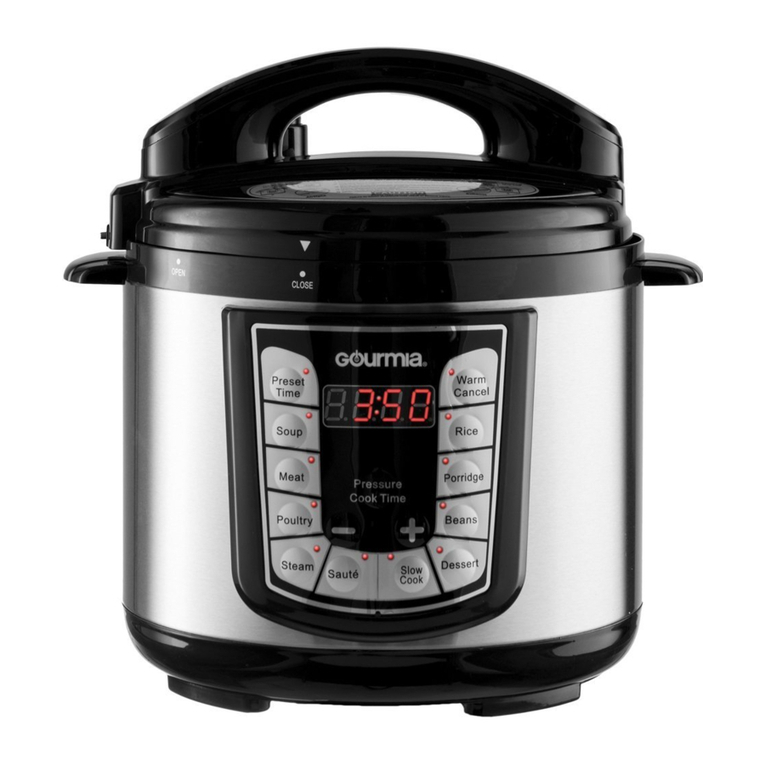
Gourmia SmartPot GPC419 User manual

GPC419
SmartPot PRESSURE COOKER

2
Model: GPC419
© 2019 Gourmia
www.gourmia.com
The Steelstone Group
Brooklyn, NY
All rights reserved. No portion of this manual may be reproduced by any means
whatsoever without written permission from The Steelstone Group, except for
the inclusion of quotations in a media review.
Although every precaution has been taken in the preparation of this manual,
The Steelstone Group assumes no responsibility for errors or omissions. Nor is
any liability assumed for damages resulting from the use of the information con-
tained herein. Although every eort has been made to ensure that the informa-
tion contained in this manual is complete and accurate, The Steelstone Group is
not engaged in rendering professional advice or services to the individual con-
sumer; further, The Steelstone Group shall not be held responsible for any loss
or damage allegedly arising from any information or suggestion in this manual.
IMPORTANT,
RETAIN FOR FUTURE REFERENCE:
READ CAREFULLY
FOR CUSTOMER SERVICE
QUESTIONS OR COMMENTS
VISIT WWW.GOURMIA.COM
EMAIL [email protected]
OR CALL 888.552.0033
MON-THU 9:00AM TO 6:00PM ET
AND FRI 9:00AM TO 3:00PM ET

3
Congratulations on the purchase of your
SmartPot Pressure Cooker from Gourmia!
Here at Gourmia, we’re all about helping cooks make easy, healthy, and delicious
meals an everyday possibility. We know how fast-paced life is and that sometimes
a home cooked meal doesn’t make the top of the priority list, no matter how bad
you want it. Our dependable, easy-to-use units are here to help you change that.
We’re giving you the tools to eat better and healthier without spending hours in
the kitchen prepping and cooking.
We want you to get the most out of your unit, which is why our team is available to
help with any questions you may have. Whether you have a question with setup
or need some guidance on which preset to use, we’re happy to walk you through
it. Welcome to the ease of cooking with Gourmia.
This manual provides instructions for all of the unit’s functions and features along
with directions for assembling, operating, cleaning, and maintaining the appliance.
Please read all safety instructions and directions for safe usage at all times. Keep
this manual for future use.
Thank you for choosing Gourmia!
We love hearing from you! Share your thoughts, recipes, and photos with us.
@gourmia
IMPORTANT,
RETAIN FOR FUTURE REFERENCE:
READ CAREFULLY

4FOR CUSTOMER SERVICE VISIT WWW.GOURMIA.COM OR CALL 888.552.0033
1. This appliance is not intended for
use by persons (including children
younger then 8) with reduced
physical, sensory or mental
capabilities, or lack of experience
and knowledge, unless they have
supervision.
2. Check if the voltage indicated
on the appliance corresponds to
the local main voltage before you
connect the appliance.
3. Do not use with an extension
cord. There is a short cord
provided specifically to prevent
entanglement and similar
dangerous scenarios.
4. Do not use the appliance if
the plug, the main cord or the
appliance itself is damaged
Always make sure that the plug is
inserted properly into a wall outlet.
5. Do not operate any appliance with
a damaged cord or plug or after
the appliance malfunctions, or
has been damaged in any manner
Return appliance to the nearest
authorized service facility for
examination, repair or adjustment.
6. Close supervison is neccesary
when any appliance is used by
or near children. Children should
be supervised to ensure that they
do not play with the appliance.
Cleaning and user maintenance
shall not be done by children
unless they are older than 8 and
supervised.
7. Do not let the cord hang over the
edge of table or counter or touch
hot surfaces.
8. To protect against electric shock
do not immerse cord, plugs, or
appliance in water or other liquid.
Do not plug in the appliance or
operate the control panel with wet
hands.
9. Never connect this appliance to an
external timer switch or separate
remote-control system in order
to avoid a hazardous situation.
Always attach plug to appliance
first, then plug cord in the wall
outlet. To disconnect,turn o the
appliance, then remove plug from
wall outlet.
10. Do not place the appliance on or
near combustible materials such
as a tablecloth or curtain. The
accessible surfaces may become
hot during use. Do not place on or
near a hot gas or electric burner,
or in a heated oven.
11. Do not place the appliance against
a wall or against other appliances.
Leave at least 4 inches of free
space on the back and sides and
4 inches of free space above the
appliance. Do not place anything
on top of the appliance.
12. Do not use the appliance for any
other purpose than described in
this manual. The use of accessory
attachments not recommended
by the appliance manufacturer
may cause injuries.
13. Do not let the appliance operate
unattended. Extreme caution
must be used when moving an
appliance containing hot oil or
other hot liquids.
14. Do not use outdoors.
15. Do not touch the hot surfaces,
use handles and knobs only. Keep
your hands and face at a safe
distance from the steam and from
the air outlet openings. Also be
careful of hot steam and air when
you remove the cover from the
appliance.
16. After using the appliance, the
IMPORTANT SAFEGUARDS
When using electric appliances, basic safety precautions should always
be followed:
IMPORTANT SAFEGUARDS

5
FOR CUSTOMER SERVICE VISIT WWW.GOURMIA.COM OR CALL 888.552.0033
IMPORTANT SAFEGUARDS
Power: 120V 60HZ 800W
CORD SAFETY:
• A short power-supply cord is provided to reduce risk of becoming
entangled in or tripping over a longer cord.
• Extension cords may be used if care is exercised in their use.
• If an extension cord is used:
a. The marked electrical rating of the extension cord should be at least
equal to the electrical rating of the appliance; and
b.The longer cord should be arranged so that it will not drape over
the countertop or tabletop where it can be pulled on by children or
tripped over.
ELECTRICAL 3PRONG PLUG:
Appliance is equipped with a 3-prong grounding-type plug. It
should be properly connected to a grounding-type outlet. The plug
is designed to fit ONLY a 3-grounding outlet unit, and as such, the
grounding prong should never be removed. If needed, a 2-prong
adapter may be used if local codes allow it.
SAVE THESE INSTRUCTIONS
the inside of the metal lid is very
hot. Unplug from outlet when
not in use and before cleaning.
Allow to cool before putting on
or taking o parts, and before
cleaning the applinace.
17. Immediately unplug the appliance
if you see dark smoke coming
out of the appliance. Wait for the
smoke emission to stop, before
you remove the pan from the
appliance.
18. Do not alter or tamper with any
component or accessory included
with this unit. Do not use with any
accessory that was not designed
specifically for this unit.
19. FOR HOUSEHOLD USE ONLY.

6FOR CUSTOMER SERVICE VISIT WWW.GOURMIA.COM OR CALL 888.552.0033

7
FOR CUSTOMER SERVICE VISIT WWW.GOURMIA.COM OR CALL 888.552.0033
TABLE OF CONTENTS
TABLE OF CONTENTS
Your Pressure Cooker......................................8
Using Pressure Cooker...................................10
Preset Chart.......................................................17
Troubleshooting................................................18
Cleaning & Maintenance..............................20
Warranty & Service..........................................21

8FOR CUSTOMER SERVICE VISIT WWW.GOURMIA.COM OR CALL 888.552.0033
YOUR PRESSURE COOKER
Handle
Condensation
Cup
Spoon
Stainless Steel Steaming Rack
Float Valve
Nonstick
Inner Pot
Measuring
Cup
Lid

9
FOR CUSTOMER SERVICE VISIT WWW.GOURMIA.COM OR CALL 888.552.0033
YOUR PRESSURE COOKER
DISPLAY AND CONTROL PANEL
YOUR PRESSURE COOKER
Time Adjustment Arrows
Preset buttons
Start
button
Cancel
button
Power
button

10 FOR CUSTOMER SERVICE VISIT WWW.GOURMIA.COM OR CALL 888.552.0033
USING PRESSURE COOKER
CAUTION:
• Ensure that the appliance is resting on a flat, heat resistant surface before use
• A minimum of four inches around the appliance should remain clear of all objects
including walls, cupboards, curtains etc. while it is in operation. The lid should be clear
of all objects as well.
• Always attach the cord to the appliance before inserting into the socket. To disconnect,
ensure the appliance is set to the o position and then remove the cord from the wall
socket.
• Never operate the appliance near any flammable objects.
• Cook only in the inner pot. Using the electrical base can result in electric shock.
• Make sure the lid is properly closed before operating. Improper use may result in
scalding or other injuries.
• Always inspect the steam release valve to ensure it is clear of any clogging before use.
• Never open the lid before the product has cooled and all internal pressure has been
released. Diculty rotating the lid indicates that contents are still under pressure – it
should never be forced open. After all the steam is released the pressure will decline
and the lid will be able to rotate with ease.
• Tilt the lid away from you when removing it, in order to better protect your hands and
face from the excess steam.
• Do not fill above the FULL line located within the inner pot. When cooking foods that
expand such as rice or dried vegetables, do not fill the inner pot more than half-way.
Over-filling may result in a clogged vent pipe or excess pressure.
• Not all foods are compatible with a pressure cooker. Applesauce, cranberries, barley,
oatmeal, cereals, split peas, pasta and rhubarb create foam which clogs the steam vent.
They should not be used in a pressure cooker.
• Do not use oil to fry foods in this appliance.
• Paper, cardboard and plastic materials can never be placed within the appliance while
it is in operation.
• Never pour cold water into a hot pressure cooker.
• Ensure that the appliance has completely cooled down before attaching or removing
components, and before cleaning.
• Do not use the inner pot with any source of heat other than this unit. Do not replace the
inner pot with any accessory not created specifically for this unit.
• To ensure that it retains its quality and freshness, food should not be kept warm within
this unit for more than 4 hours.
• Steam emitting from the circumference of the lid symbolizes a malfunction in the unit.
Disconnect from its power supply and contact a local authorized repairman.

11
FOR CUSTOMER SERVICE VISIT WWW.GOURMIA.COM OR CALL 888.552.0033
USING PRESSURE COOKER
BEFORE USING FOR THE FIRST TIME
Warning: Be careful not to put anything near the steam release
valve at any time.
1. Clean all surfaces of the appliance base using a damp cloth
and wipe dry. Properly wash the removable inner pot and lid
with warm soapy water.
2. Inspect the machine to ensure that it is ready for use with the
pressure and safety valves clean and clear of any blockage
and the rubber seal ring clean and in place around the lid.
3. To ensure that the unit is assembled and working properly, it
is recommended that you fill the pressure cooker to the 2/5
line and allow the pressure cooker to operate for a half-hour.
Upon completion, remove the water then rinse and dry the
Inner Pot. The unit is now ready for use!
USING PRESSURE COOKER
Warning: Be careful not to put anything near the steam release
valve at any time.
1. Position the pressure cooker on a dry, flat and heat resistant
surface.
2. Ensure that the Seal Ring is properly secured around the
removable Y-Ring. Then align the center of the Y-Ring with
the metal pin in the center of the lid and press down firmly to
secure it into place.
3. Insert ingredients into the Inner Pot, making sure not to fill
the pot above the FULL line.
Seal Ring
Y-Ring

12 FOR CUSTOMER SERVICE VISIT WWW.GOURMIA.COM OR CALL 888.552.0033
NOTE:
• When cooking foods that expand such as rice or dried
vegetables, do not fill the inner pot more than half-way. Over-
filling may result in a clogged steam release valve or excess
pressure.
• A minimum of ½ cup of water must be used during any
cooking process with this pressure cooker.
4. Place the inner pot into the base.
5. Plug the pressure cooker into a wall outlet.
Arrow Indicator
CLOSED
Steam Release Valve
Airtight
USING PRESSURE COOKER

13
FOR CUSTOMER SERVICE VISIT WWW.GOURMIA.COM OR CALL 888.552.0033
6. Place the Steam Release Valve into the space on the lid by
pressing down until it clicks into place. Rotate the Steam
Release Valve to the “Airtight” position by aligning the arrow
on the Valve to “Airtight” Do not rotate past "Airtight").
7. Secure the lid by aligning the Arrow Indicator on the lid with
OPEN on the base. Press down firmly to seal and rotate
counter-clockwise until the arrow is aligned with the CLOSE
on the base.
8. Press the Power button to turn on.
9. Press your desired Preset button, or the Pressure button for
manual cooking. The default cook times are programmed for
portions under 3 lbs. Adjust for larger portions.
USING PRESSURE COOKER
Note: See chart on page 17 for details of each presets default
programming.
10. The selected button will illuminate blue, and the display will
show the default cook time. Use the Time Adjustment Arrows
to adjust the cook time.
11. Press the Start button. The display will show a pressure build-
up animation as the internal pressure increases.
Note: The Keep Warm button will illuminate by default, indicating
that the pressure cooker will enter the Keep Warm mode after
cooking. To deactivate, press the Keep Warm Button until the blue
light goes away.
12. Once the proper pressure level has been reached, the
countdown timer display will begin.
13. You can reset or cancel any function by pressing the Cancel
button at any time.
14. After cooking, the unit will automatically shift to Keep Warm
mode. The pressure will naturally begin to drop.

14 FOR CUSTOMER SERVICE VISIT WWW.GOURMIA.COM OR CALL 888.552.0033
WARNING:
• For the duration of time the unit is cooking with pressure,
and until the pressure is released, the Float Valve will be
raised and the Lid is locked.
• NEVER ATTEMPT TO OPEN THE LID FOR THE DURATION
OF THE PRESSURE COOKING TIME.
• You can only open once the pressure is released
15. To open the Lid, grip the Handle and rotate clockwise.
USING PRESSURE COOKER
Note: Following the Soup cooking cycle, or after cooking any other
recipe with a lot of liquid, the Steam Release Valve should not be
rotated to “Exhaust." The steam must be released naturally.
TURNING THE STEAM RELEASE VALVE TO “EXHAUST” MAY CAUSE
HOT LIQUID TO SPRAY FROM THE STEAM RELEASE VALVE.
Airtight
Exhaust

15
FOR CUSTOMER SERVICE VISIT WWW.GOURMIA.COM OR CALL 888.552.0033
USING PRESSURE COOKER
USING THE STEAM RELEASE VALVE
This Pressure Cooker is equipped with two forms of pressure
release:
1. Natural Release
It allows the cooker to rest after cooking until the pressure naturally
subsides so the Lid can be opened. When foods have high liquid
contents, such as soups, stews and beans, they will respond best
to using the natural release method. This avoids splattering and
foaming when the Lid is opened. Foods that can rest and continue
while the pressure drops, such as roasts and whole chickens, can
be used with the natural release method. To use the natural release
method, rotate the Steam Release Valve to “Airtight” (do not rotate
the Valve past “Airtight”) and keep it in that position during and after
cooking until the Float Valve drops, indicating the pressure inside
has dissipated.
2. Quick Release
It allows the cooker to release pressure quickly when cooking
is done so the Lid can be opened. Do not use this feature when
pressure cooking grains, beans, rice, oatmeal, and other foods
that can splatter or foam when the Lid is opened. To use the quick
release method, set the Steam Release Valve to “Airtight” during
cooking and turn it to “Exhaust” when the cooking is done to release
steam.
If foods such as vegetables or seafood require a precise cooking
time, turn the steam release valve to "Exhaust" to quickly release the
pressure and open the Lid.
See page 14

16 FOR CUSTOMER SERVICE VISIT WWW.GOURMIA.COM OR CALL 888.552.0033
USING THE SAUTÉ PRESET
Before pressure cooking, many recipes will benefit from the golden
color, richer flavors and moist results gained from sautéing. This
setting allows cooking over high heat, without the lid.
To sauté your meats or vegetables prior to pressure cooking:
1. Remove the Lid from the unit.
2. Add oil or butter into the inner pot, then add the food.
3. Select the Sauté Preset. Press the Start button.
4. Stir or turn the food as needed until the desired color and
consistency is reached.
5. Press the Cancel button if you want to cancel the sauté preset
before the timer finishes counting down.
6. Allow the unit to rest 2-3 minutes after canceling the Sauté
Preset before beginning to pressure cook. If the unit will not
begin pressure cooking, allow it to cool for a longer period
after sautéing before selecting another Preset.
USING PRESSURE COOKER
CAUTION: When using this function, ensure that the foods being
cooked are not sensitive to warm temperatures and will not spoil
from remaining at room temperature for an extended period of time.
USING THE DELAY START FUNCTION
This function postpones the cooking time from beginning for up to
24 hours.
1. Prepare desired food and place into cooking pot.
2. Secure the Lid onto the unit, turn in counter-clockwise to lock
it in place.
3. Make sure the Steam Release Valve is set to the “Airtight”
position.
4. Plug the pressure cooker into the wall outlet.
5. Select a preset or set the desired cooking time manually.
6. Press the Delay Start button. The display will show 0:30 which
is equal to 30 minutes of delay time. Use the Time Adjustment
Arrows to adjust cooking time. The Delay Start time can
be increased or decreased by 30 minute increments. The
maximum delay period is 24 hours.
7. Press the Start button. The cooking cycle will begin after the
delay start time elapses.

17
FOR CUSTOMER SERVICE VISIT WWW.GOURMIA.COM OR CALL 888.552.0033
PRESET CHART
PRESET CHART
GENERAL TIPS AND TRICKS:
• Use the Sauté Preset to sear or brown foods in the Inner Pot
before cooking a full meal using a pressure setting.
• If cooking frozen food without defrosting, add ten minutes to
the recommended cooking time
• Pressure cooking requires a dierent liquid to solid ratio. Use
recipes written for pressure cooker cooking.
• The Condensation Cup drains excess liquid that gathers
around the rim. Insert and remove the container by sliding it
on and o the rails.
WARNING:
• The Lid cannot be opened until the pressure is fully released
- Do not attempt to force it open.
• The Lid is very hot during and after use
- Do not touch any of the metal parts.
FUNCTIONS DEFAULT COOK TIME
Meat 15 Min
Soup 25 Min
Beans 40 Min
Poultry 13 Min
Dessert 18 Min
Vegetable 10 Min
Rice 12 Min
Eggs 5 Min
Sauté 5 Min
Steam 15 Min
Yogurt 12 Hours
COOK TIME RANGE
1 - 120 Min
1 - 120 Min
1 - 120 Min
1 - 120 Min
1 - 120 Min
1 - 120 Min
1 - 120 Min
1 - 120 Min
1 - 30 Min
1 - 120 Min
0.5 - 24 Hours
Grains 15 Min
Slow Cook 6 Hours
Pressure Cook 1 Min
1 - 120 Min
0.5 - 24 Hours
1 - 120 Min

18 FOR CUSTOMER SERVICE VISIT WWW.GOURMIA.COM OR CALL 888.552.0033
TROUBLESHOOTING
TROUBLESHOOTING
PROBLEM POSSIBLE CAUSE
Lid will not close
Seal Ring is not in place
or missing
SOLUTION
Adjust or insert Seal
Ring
Lid will not open
Excess steam leaking
between the Lid and the
pressure cooker housing
Float Valve will not rise
(lock) so pressure can
not build
Lid is not properly
aligned with pressure
cooker base
Align the Arrow
Indicator on the edge
of the Lid with OPEN on
the base and rotate the
lid clockwise
Pressure cooker is still
pressurized
The stream needs to
be released by either
the “natural” or “quick”
release method
The Float Valve at is
stuck in the locked (up)
position
Ensure the pressure has
been released then use
a long utensil to gently
press the Float Valve
down
Damaged Seal Ring Replace the Seal Ring
Missing Seal Ring Insert the Seal Ring
Build up or debris on
Seal Ring
Remove the Seal Ring
and clean it according to
instructions
Lid not properly
attached
Ensure Lid is aligned
and closed. Gently push
down on the Lid Handle
Not enough liquid added
to the recipe
Remove Lid and add
liquid
Silicone stopper on Float
Valve is dirty or worn
out
Clean Float Valve and
silicone stopper/replace
silicone stopper

19
FOR CUSTOMER SERVICE VISIT WWW.GOURMIA.COM OR CALL 888.552.0033
TROUBLESHOOTING
TROUBLESHOOTING
PROBLEM POSSIBLE CAUSE
Occasional popping
noise coming from
pressure cooker
SOLUTION
Excessive steam coming
from the Steam Release
Valve
Rice is not fully cooked
Adjust the rice to water
ratio to use less water
The control board
component cycles with
the thermostat during
use
This is normal
The Inner Pot is wet
Make sure the Inner Pot
and the inside of the
pressure cooker are
completely dry before
use
Steam Release Valve is
not properly connected
Remove the Steam
Release Valve and place
it back inside correctly
Rice is too soft Too much water added
Adjust the rice to water
ratio to use more water
Not enough water added
Lid removed too early
After the cook cycle has
ended leave the Lid in
place for an additional 5
minutes
Pressure cooker won’t
energize.
Power cord is
disconnected from
the pressure cooker
Ensure cord is secured
to the pressure cooker.

20 FOR CUSTOMER SERVICE VISIT WWW.GOURMIA.COM OR CALL 888.552.0033
CLEANING & MAINTENANCE
STORAGE
• Unplug the appliance and let it cool down.
• Make sure all parts are clean and dry.
• Store the appliance in a clean and dry place.
ENVIRONMENT
Do not throw away the appliance with the normal household waste
at the end of its life, but hand it in at an ocial collection point for
recycling. By doing this, you help to preserve the environment.
GUARANTEE AND SERVICE
If you need service or information or if you have a problem, please
visit our website or contact your distributor.
WARNING: Never immerse cord, plug, or appliance in water or
other liquid. Do not plug in the appliance or operate the control
panel with wet hands.
• Clean the appliance after every use.
• Always unplug the appliance and let it cool down completely
before cleaning.
• Never use metel kitcehn utensils or abrasive cleaning material, to
clean the appliance.
• The interior and exterior of the electrical base can be wiped down
with a slightly damp and soft cloth, using mild detergent as needed.
• The following components can be removed and washed
thoroughly using mild detergent and warm running water: Lid, Seal
Ring, Steam Release Valve, rubber ring on the Float Valve, Inner
Pot, Steaming Rack and Condensation Cup.
• Allow all parts to dry completely before reassembling.
Table of contents
Other Gourmia Electric Pressure Cooker manuals

Gourmia
Gourmia R-GPC-965 User manual

Gourmia
Gourmia GPA2060 User manual

Gourmia
Gourmia GPC1000 User manual

Gourmia
Gourmia GPC-800 User manual

Gourmia
Gourmia GPC 600 User manual

Gourmia
Gourmia GPC-965 User manual

Gourmia
Gourmia GPC-655 User manual

Gourmia
Gourmia GPC400 User manual

Gourmia
Gourmia GPC-800 User manual

Gourmia
Gourmia GPC1000 User manual