manuals.online logo
Brands
  1. Home
  2. •
  3. Brands
  4. •
  5. Elvox
  6. •
  7. Intercom System
  8. •
  9. Elvox 6931 User manual

Elvox 6931 User manual

Other manuals for 6931

1

Other Elvox Intercom System manuals

Elvox Vimar K40517G.01 User guide

Elvox

Elvox Vimar K40517G.01 User guide

Elvox 6931 Assembly instructions

Elvox

Elvox 6931 Assembly instructions

Elvox 6614 User manual

Elvox

Elvox 6614 User manual

Elvox Vimar 40540 Mounting instructions

Elvox

Elvox Vimar 40540 Mounting instructions

Elvox Vimar TAB User guide

Elvox

Elvox Vimar TAB User guide

Elvox 735B User manual

Elvox

Elvox 735B User manual

Elvox 6901 User manual

Elvox

Elvox 6901 User manual

Elvox Vimar 8000 Series User manual

Elvox

Elvox Vimar 8000 Series User manual

Elvox Giotto 6329/C Assembly instructions

Elvox

Elvox Giotto 6329/C Assembly instructions

Elvox GIOTTO Series User manual

Elvox

Elvox GIOTTO Series User manual

Elvox Giotto 6329 Assembly instructions

Elvox

Elvox Giotto 6329 Assembly instructions

Elvox 68TU/93V User manual

Elvox

Elvox 68TU/93V User manual

Elvox 8100 Series User manual

Elvox

Elvox 8100 Series User manual

Elvox 41018 Assembly instructions

Elvox

Elvox 41018 Assembly instructions

Elvox 6358 User manual

Elvox

Elvox 6358 User manual

Elvox Giotto 6341 User manual

Elvox

Elvox Giotto 6341 User manual

Elvox 69RH Assembly instructions

Elvox

Elvox 69RH Assembly instructions

Elvox TAB 7529 User manual

Elvox

Elvox TAB 7529 User manual

Elvox 68TU/930 User manual

Elvox

Elvox 68TU/930 User manual

Elvox 1300 Series User manual

Elvox

Elvox 1300 Series User manual

Elvox 560A User manual

Elvox

Elvox 560A User manual

Elvox 0930/000.04 User manual

Elvox

Elvox 0930/000.04 User manual

Elvox GIOTTO 2011 User manual

Elvox

Elvox GIOTTO 2011 User manual

Elvox Digibus 1284 Guide

Elvox

Elvox Digibus 1284 Guide

Popular Intercom System manuals by other brands

Videx VRDK1 (25H) Technical manual

Videx

Videx VRDK1 (25H) Technical manual

Auta COMPACT VISUALTECH manual

Auta

Auta COMPACT VISUALTECH manual

Aiphone LC-10S instructions

Aiphone

Aiphone LC-10S instructions

Aiphone PD-1 instructions

Aiphone

Aiphone PD-1 instructions

Aiphone JF-DVF-HID-I instructions

Aiphone

Aiphone JF-DVF-HID-I instructions

Comelit 4893M Technical manual

Comelit

Comelit 4893M Technical manual

MGL Avionics V16 manual

MGL Avionics

MGL Avionics V16 manual

SSS Siedle BVI 750-0 Installation & programming

SSS Siedle

SSS Siedle BVI 750-0 Installation & programming

urmet domus AIKO 1716/1 quick start guide

urmet domus

urmet domus AIKO 1716/1 quick start guide

urmet domus IPerVoice 1039 Installation

urmet domus

urmet domus IPerVoice 1039 Installation

Alpha Communications STR QwikBus TT33-2 Installation, programming, and  user's manual

Alpha Communications

Alpha Communications STR QwikBus TT33-2 Installation, programming, and user's manual

Monacor ICM-20H instruction manual

Monacor

Monacor ICM-20H instruction manual

Logenex A202CR Installation & programming

Logenex

Logenex A202CR Installation & programming

Quantum QR5 Installation and programming manual

Quantum

Quantum QR5 Installation and programming manual

EVGA XR1 quick guide

EVGA

EVGA XR1 quick guide

CyberData 011211 series Installation quick reference

CyberData

CyberData 011211 series Installation quick reference

Vidos duo M1021 user manual

Vidos

Vidos duo M1021 user manual

Savant DOR-SMS-00 Deployment guide

Savant

Savant DOR-SMS-00 Deployment guide

manuals.online logo
manuals.online logoBrands
  • About & Mission
  • Contact us
  • Privacy Policy
  • Terms and Conditions

Copyright 2025 Manuals.Online. All Rights Reserved.

Installation and operation manual
Art. 6931
Audio speech unit “Due Fili Elvox”
2
GB
The expansion modules (type 12TS, 12TS/0, 693p, 8051, 8052, 8053,
8054) can be connected to speech unit type 6931 to increase the num-
ber of the call push-buttons according to the type of panel.
12TS Additional module with 4 call push-buttons to install in panels
series 1200.
12TS/0 Additional module for connecting 8 push-buttons, applicable
also to entrance panels not belonging to the Elvox series.
693P Addition module with reduced dimensions: 48x70x19 mm (W
x H x D), to be applied also to non ELVOX entrance panels.
8054 (8051, 8052, 8053) additional modules with 4, 1, 2, 3 call
push-buttons with plates, for entrance panels series 8000.
Cable for additional
push-button modules to
CN10
Cable for “Engaged – Please
wait” to C3.3
(Two coloured wires: one red
and one black)
Cable for two push-buttons
to C 3.4 - CH1
to C 3.2 - CH2
((Two coloured green wires)
Cable for name-tag lighting
a C3.6 - Name-tag led
(Two coloured wires: one
green and one black)
Microphone
C3.2 - C3.4
Bracket with fixing
screws for speech unit
GENERAL INFORMATION
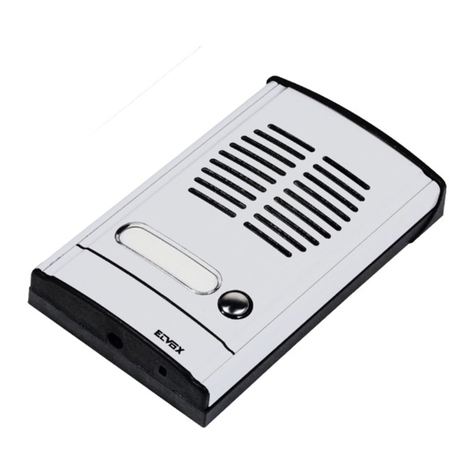
Article 6931 is a speech unit for DUE FILI ELVOX “ELVOX TWO-
WIRE” audio door entry systems. Article 6931 can manage up to 200
calls and can be used as a Master speech unit, making it possible to
create audio door entry systems. In addition, it can co-exist with video
panels in a mixed DUE FILI ELVOX “ELVOX TWO-WIRE” system (in-
terphone/monitor), by using concentrators art. 692C.
It can be installed in entrance panels series:
- 8000
- 8100
- Patavium
- 3300
- Mail boxes (2550/301 and 2550/302)
- 1200 (for more than 2 push-buttons it is necessary to couple one or
more additional plates with push-buttons type 125x).
Speech unit type 6931 is completely equivalent to type 6930. The
only difference is that, in case of connection of camera type 6570,
657C or interface for TVCC camera type 693T it enables a higher di-
stance between the speech unit and the camera (see wiring diagrams
N. SI559, SI560 for the maximum length of wiring).
Type 6931 can be coupled with B/W or colour cameras, or with conver-
ter module for external camera type CCTV.
Type 6570 B/W camera without speech unit
Type 657C Colour camera without speech unit
Type 693T Converter module for external B/W or colour camera
(type CCTV) in 4 DIN modules enclosure.
Series of en-
trance panels
With internal camera
type 6931 + type 6570
type 6931 + type 657C
With external camera
type 6931 + type 693T
8000 YES
by applying
type 8010 + 8020 (for
6570)
type 8010 + 8T20 (for
657C)
YES
8100 NO YES
PATAVIUM NO YES
3300 NO YES
2550/301-302 YES YES
1200 NO YES
GB
3
Fig. 1
C3.1 Microphone
Speech unit adjustments
External volume
Speech unit activation time
Internal volume
The settings are printed on the back of the speech unit (see Fig. 1)
M
VL
CN10
C B A
CN9
Connector
for
Art. 950C or
Art. 692I or
Art. 692I/U
M
CAB2 B1 S- S+
C3.5 Video
C3.2- CH2
C3.3 Wait/busy
C3.4 - CH1
C3.6 Internal LED power supply
RESET
Speech unit terminals
M VL GROUND
VL POWER SUPPLY OF LEDS FOR SUPPLEMENTARY MODULES
M GROUND
CA DOOR LOCK COMMAND (CONNECT TO “M”)
B2 2-WIRE BUS
B1 2-WIRE BUS
S- LOCK OUTPUT
S+ LOCK OUTPUT
The speech unit gives a current peak IT> 1A for 10 mS after which there follows a holding current IM= 200mA for the entire
duration of the lock command (see lock time).
LED supply
voltage for
additional
modules
C3.2- C3.4
4
GB
Series of
entrance pa-
nels
Number of
push-buttons Entrance panel type Cables Substitutive
lamp holder
type
Figure
8000
1 88T1 C3.4, C3.6 Fig. 5, page 10
1 8911 C3.4, C3.6 R263 Fig. 6, page 10
2 88T2 C3.2, C3.4, C3.6 Fig. 5, page 10
2 891D C3.2, C3.4, C3.6 R263 Fig. 6, page 10
More than 2
push-buttons 80PA + 8054 (o 8051,
8052, 8053) + module
holder frames, boxes se-
ries 8000
CN10, C3.3 Fig. 4B, page 9
More than 2
push-buttons RPF3 + 8054 (o 8051,
8052, 8053) + module
holder frames, boxes se-
ries 8000
CN10 Fig. 4A, page 9
8100 1 8101 C3.4, C3.6 Fig. 8, page 12
2 8102 C3.2, C3.4, C3.6 Fig. 8, page 12
PATAVIUM 1 2101 C3.4, C3.6 Fig. 9, page 12
2 2102 C3.2, C3.4, C3.6 Fig. 9, page 12
More than 2
push-buttons 21xx + 693P C3.6, CN10
3300 1 3301 + Back box Serie
3300 C3.4, C3.6 R261 Fig. 11, page 13
2 3302 + Back box Serie
3300 C3.2, C3.4, C3.6 R261 Fig. 11, page 13
More than 2
push-buttons 3300 + 3958 + Back box
Serie 3300 CN10
330X + 39xx + Back box
Serie 3300 C3.6, CN10
2550/301-302
1 2550/301 C3.4, C3.6 R261 Fig. 10, page 13
2 2550/302 C3.2, C3.4, C3.6 R261 Fig. 10, page 13
1200 1 1200 C3.4, C3.6 R264 Fig. 7, page 11
2 1200 C3.2, C3.6, C3.4 R264 Fig. 7, page 11
1200 with
more than 2
calls
1200 (only for speech unit
Art. 6931) + 125x + 12TS CN10, C3.6 R264 Fig. 7, page 11
Cabinet 1 25V2* C3.4, C3.6 R264 Fig. 13, page 14
2 25V2 C3.2, C3.4, C3.6 R264 Fig. 13, page 14
Up to 8 pu-
sh-buttons 25V4 or 25V6 or 25V8,
693P C3.6 R264 Fig. 13, page 14
Up to 12 pu-
sh-buttons 25V8, 2508, 2x693P C3.6, C3.10 R264 Fig. 13, page 14
Up to 24 pu-
sh-buttons 25V8, 2526, 693P,
2x693P CN10 and cable of
art. 693P and art.
693P/M
R264 Fig. 13, page 14
GB
5
C
B
A
Fig. 2
CN9
ON
1234
ON
1234
ON
1234
ON
1234
ON
1234
ON
1234
ON
1234
ON
1234
ON
1234
ON
1234
ON
1234
ON
1234
ON
1234
ON
1234
ON
1234
ON
1234
1234
DIP SWITCH ID TARGA
ON
ON
ON ON
ON
ON ON
ON ON
ON ON ON
ON
ON ON
ONON
ON ON ON
ON ON
ON ONON
ON ONON
NON ASSEGNATO
1 (MASTER)
2
3
4
5
6
7
8
9
10
11
12
13
14
15ON ONONON
SOFTWARE CONFIGURATIONS
The software configurations can be carried out in two dif-
ferent ways:
- basic configuration of software
- advanced software configurations
INSTALLATION
Assembling and installing the speech unit Art. 6931 requires
the following phases:
- installing the speech unit
- wiring the leads
- installing and wiring any additional modules
- connecting the speech unit to the system
- assigning identification
- programming the speech unit
N.B. Do not connect the bus of the speech unit to the system
until the speech unit wirings have been connected to the
entrance panel.
BUS TERMINATION
On the bottom left side, above the terminal block, there is
the 3-position connector CN9 (Fig. 2). A jumper in one of
the 3 possible positions (A, B, C) enables terminating the
bus correctly as regards the video signal for mixed systems
(audio and video door entry systems). Try out the condition
providing the best vision. If the system is solely an audio
door entry system, insert it in position A.
ASSIGNING
IDENTIFICATION
CN10 ADDITIONAL PU-
SHBUTTONS ART. 8054
ASSIGNING IDENTIFICATION
The identifier is assigned with 4 dip switches on the bot-
tom left side above the terminal block (Fig. 2), outside the
enclosure and under the safety lid. The correspondence
between the position of the dip switch and the ID is speci-
fied in the following table.
MICROPHONE
ENTRANCE
PANEL ID
NOT ASSIGNED
6
GB
Fig. 3A
1
1
2
2
2
Fig. 3B
3
4
2
RESETTING PROGRAMS TO THE DEFAULT VALUE
It is possible to bring the programs back to the default value
with a straightforward procedure.
• Open the speech unit by levering on the fastener hooks
(see Fig. 4A).
• Raise the fastener labelled 1 (up arrow).
• Raise the fastener labelled 2 (up arrow).
• Momentarily move the jumper of the termination from CN9
onto terminals 2 and 3 of the programming connector (see
Fig. 4B).
• Momentarily press the reset button RST with the aid, if ne-
cessary, of a plastic screwdriver.
DO NOT USE ANY METAL INSTRUMENTS THAT CAN
MECHANICALLY DAMAGE THE ELECTRONIC CIR-
CUIT OR CREATE SHORT CIRCUITING.
• The speech unit emits a continuous tone for two seconds.
• As the tone is being emitted, press one of the call buttons.
The programs are now reset.
The speech unit restarts by itself. Afterwards put the jumper
back into its original position CN9.
BASIC SOFTWARE CONFIGURATIONS
PUSH-BUTTONS RESET
For the outdoor station it is possible to reset the two push-but-
tons CH1 and CH2 without using external helps. This can be
done with the following procedure, described for a generic pu-
sh-button. It is applied either to CH1 either to CH2.
- Remove the terminal block protection cover prizing up on
the closing hooks (see fig. 3A, arrow 1).
- Raise the hooks indicated with 1 (arrow upward)
- Hold down the RESET push-button using, if necessary, a
plastic screwdriver.
DO NOT USE METALLIC INSTRUMENTS WHICH CAN
DAMAGE MECHANICALLY THE ELECTRONIC CIRCUIT
OR CAUSE SHORT-CIRCUITS.
- Holding down the RESET push-button, keep pressed also
the call push-button to be reprogrammed.
- Hold down the call push-button, release the RESET pu-
sh-button.
- After two seconds the loudspeaker emits a tone. Simulta-
neously all the sets with the hook lifted emit a three tone
scale.
- Release the call push-button.
- Press, from the internal unit you want to call with the pu-
sh-button, one of the push-buttons: lock release, actuator
activation, stair light, F1, F2. Pay attention that if you want
to call a group, this manoeuvre is to be effected by the
leader of the group. You have 25 seconds to carry out this
operation, after that the outdoor station goes back to the
rest mode emitting a tone.
- The outdoor unit confirms the programming with a tone.
- To return to default programming, instead of acting on the
internal unit, press again the push-button you want to pro-
gram.
- As an option, verify if the association is correct by pressing
the just programmed push-button and control if the desired
internal unit is called.
- At the end fit the protection cover again.
Fig. 3C
GB
7
ON
123
16
8
4
ON
123
128
64
32
ON
123
16
8
4
ON
123
128
64
32
ON
123
16
8
4
ON
123
128
64
32
ON
123
16
8
4
ON
123
128
64
32
ON
123
16
8
4
ON
123
128
64
32
ON
123
16
8
4
ON
123
128
64
32
ON
123
16
8
4
ON
123
128
64
32
ON
123
16
8
4
ON
123
128
64
32
ON
123
16
8
4
ON
123
128
64
32
ON
123
16
8
4
ON
123
128
64
32
ON
123
16
8
4
ON
123
128
64
32
ON
123
16
8
4
ON
123
128
64
32
ON
123
16
8
4
ON
123
128
64
32
ON
123
16
8
4
ON
123
128
64
32
ON
123
16
8
4
ON
123
128
64
32
ON
123
16
8
4
ON
123
128
64
32
ON
123
16
8
4
ON
123
128
64
32
ON
123
16
8
4
ON
123
128
64
32
Non utilizzare 1 ... 4
5 ... 8
13 ... 16
21 ... 24
29 ... 32
37 ... 40
45 ... 48
53 ... 56
61 ... 64
9 ... 12
17 ... 20
25 ... 28
33 ... 36
41 ... 44
49 ... 52
57 ... 60
65 ... 68
{7 ... 10}
][
{ 3 ... 6 }
][
{11 ... 14}
][
{15 ... 18}][ {19 ... 22}][
{23 ... 26}]
[{27 ... 30}][
{31 ... 34}]
[{35 ... 38}]
[
{39 ... 42}
]
[{43 ... 46}
]
[
{47 ... 50}]
[{51 ... 54}]
[
{55 ... 57}]
[{59 ... 62}]
[
{63 ... 66}]
[{67 ... 70}]
[
ON
123
16
8
4
ON
123
128
64
32
ON
123
16
8
4
ON
123
128
64
32
ON
123
16
8
4
ON
123
128
64
32
ON
123
16
8
4
ON
123
128
64
32
ON
123
16
8
4
ON
123
128
64
32
ON
123
16
8
4
ON
123
128
64
32
ON
123
16
8
4
ON
123
128
64
32
ON
123
16
8
4
ON
123
128
64
32
ON
123
16
8
4
ON
123
128
64
32
ON
123
16
8
4
ON
123
128
64
32
ON
123
16
8
4
ON
123
128
64
32
ON
123
16
8
4
ON
123
128
64
32
69 ... 72
77 ... 80
73 ... 76
81 ... 84
85 ... 88 89 ... 92
93 ... 96 97 ... 100
101 ... 104 105 ... 108
109 ... 112 113 ... 116
{71 ... 74}]
[{75 ... 78}]
[
{79 ... 82}]
[{83 ... 86}]
[
{87 ... 90}]
[{91 ... 94}
]
[
{95 ... 98}]
[{99 ... 102}]
[
{103 ... 106}]
[ {107... 110}][
{111 ... 114}][ {115 ... 118}]
[
ON
123
16
8
4
ON
123
128
64
32
ON
123
16
8
4
ON
123
128
64
32
ON
123
16
8
4
ON
123
128
64
32
ON
123
16
8
4
ON
123
128
64
32
ON
123
16
8
4
ON
123
128
64
32
ON
123
16
8
4
ON
123
128
64
32
ON
123
16
8
4
ON
123
128
64
32
ON
123
16
8
4
ON
123
128
64
32
ON
123
16
8
4
ON
123
128
64
32
ON
123
16
8
4
ON
123
128
64
32
ON
123
16
8
4
ON
123
128
64
32
ON
123
16
8
4
ON
123
128
64
32
125 ... 128 129 ... 132
133 ... 136
141 ... 144
149 ... 152
157 ... 160
165 ... 168
137 ... 140
145 ... 148
153 ... 156
161 ... 164
169 ... 172
ON
123
16
8
4
ON
123
128
64
32
ON
123
16
8
4
ON
123
128
64
32
117 ... 120 121 ... 124
{119 ... 122}]
[{123 ... 126}
]
[
{127 ... 130}]
[{131 ... 134}]
[
{135 ... 138}]
[{139 ... 142}]
[
{147 ... 150}]
[
{143 ... 146}]
[
{151 ... 154}]
[{155 ... 157}]
[
{159 ... 162}
]
[{163 ... 166}
]
[
{167 ... 170}]
[{171 ... 174}]
[
ADDITIONAL MODULE PUSHBUTTON HARDWARE
PROGRAMMING (ART. 8051, 8052, 8053, 8054, 12TS,
12TS/0, 639P)
The dip-switches modify the hardware code of the first pu-
shbutton at the top right of the module, while the other pu-
shbuttons are associated consecutively from top to bottom,
right to left (see Tables 1 and 2). Take care not to overlap the
codes of pushbuttons on the same panel. When using the
modules with pushbuttons in single or double columns the
parameter “Single/Double pushbuttons” must be program-
med according to the type of module (see programming).
The configuration of parameter “single push-buttons”
determines the numbering of push-buttons. If the “sin-
gle push-buttons” parameter is set to 2 or 3 take into
account the values in [ ] bracket, on the contrary if the
value is set to 0 or 1 take into account the values in {
} bracket.
TABLE 1 - PUSHBUTTONS IN A SINGLE COLUMN
Not to be used
8
GB
ON
12
16
8
ON
12
16
8
ON
12
16
8
ON
12
16
8
ON
123
128
64
32
ON
123
128
64
32
ON
123
128
64
32
ON
123
128
64
32
ON
12
16
8
ON
12
16
8
ON
12
16
8
ON
12
16
8
ON
123
128
64
32
ON
123
128
64
32
ON
123
128
64
32
ON
123
128
64
32
ON
12
16
8
ON
12
16
8
ON
12
16
8
ON
12
16
8
ON
123
128
64
32
ON
123
128
64
32
ON
123
128
64
32
ON
123
128
64
32
ON
12
16
8
ON
12
16
8
ON
12
16
8
ON
12
16
8
ON
123
128
64
32
ON
123
128
64
32
ON
123
128
64
32
ON
123
128
64
32
ON
12
16
8
ON
12
16
8
ON
12
16
8
ON
123
128
64
32
ON
123
128
64
32
ON
123
128
64
32
ON
12
16
8
ON
12
16
8
ON
12
16
8
ON
123
128
64
32
ON
123
128
64
32
ON
123
128
64
32
ON
12
16
8
ON
123
128
64
32
ON
12
16
8
ON
123
128
64
32
ON
12
16
8
ON
123
128
64
32
ON
12
16
8
ON
123
128
64
32
Non utilizzare 1 ... 8
9... 16
25 ... 32
41 ... 48
57 ... 64
73 ... 80
89 ... 96
105 ... 112
121 ... 128
137 ... 144
153 ... 160
169 ... 176
17 ... 24
33 ... 40
49 ... 56
65 ... 72
81 ... 88
97 ... 104
113 ... 120
129 ... 136
145 ... 152
161 ... 168
177 ... 184
185 ... 192 193 ... 200
{3 ... 10}]
[
{11 ... 18}
]
[{19 ... 26}
]
[
{27 ... 34}]
[{35 ... 42}]
[
{43 ... 50}]
[{51 ... 58}]
[
{59 ... 66}]
[{67 ... 74}]
[
{75 ... 82}]
[{83 ... 90}]
[
{91... 98}]
[{99 ... 106}
]
[
{107 ... 114}]
[{115 ... 122}]
[
{123 ... 130}
]
[{131 ... 138}
]
[
{139 ... 146}]
[{147 ... 154}]
[
{155 ... 162}]
[{163 ... 170}]
[
{171 ... 178}]
[{179 ... 186}
]
[
{187 ... 194}]
[{195 ... 200}]
[
TAB. 2 - PUSH-BUTTONS IN TWO ROWS OR TO BE
USED WITH ADDITIONAL MODULES TYPES 12TS/0
AND 693P
Not to be used
ON
123
16
8
4
ON
123
128
64
32
ON
123
16
8
4
ON
123
128
64
32
ON
123
16
8
4
ON
123
128
64
32
ON
123
16
8
4
ON
123
128
64
32
ON
123
16
8
4
ON
123
128
64
32
ON
123
16
8
4
ON
123
128
64
32
ON
123
16
8
4
ON
123
128
64
32
173 ... 176
181 ... 184
189 ... 192
197 ... 200
177 ... 180
185 ... 188
193 ... 196
{175 ... 178}
]
[{179 ... 182}
]
[
{183 ... 186}
]
[{187 ... 190}
]
[
{191 ... 194}
]
[{195 ... 198}
]
[
{199 ... 200}
]
[
GB
9
Art. RPF3
Additional module with
push-buttons
Art 6931
Audio speech unit
Art. 9192
Flush-mounted box
Art. RPF3
Microphone
Frame
Bracket with fixing screws for
speech unit
Fig. 4B
If using the “BUSY - WAIT” si-
gnal, use the entrance panel
module 8000 series, Art.
80PA, otherwise Art. RPF3.
Art. 80PA
Fig. 4A
10
GB
Fig. 5
Fig. 6
Art. 8911 + ART. R263
Art. 891D + ART. R263
Art. 88T1
Art. 88T2
ART. R263