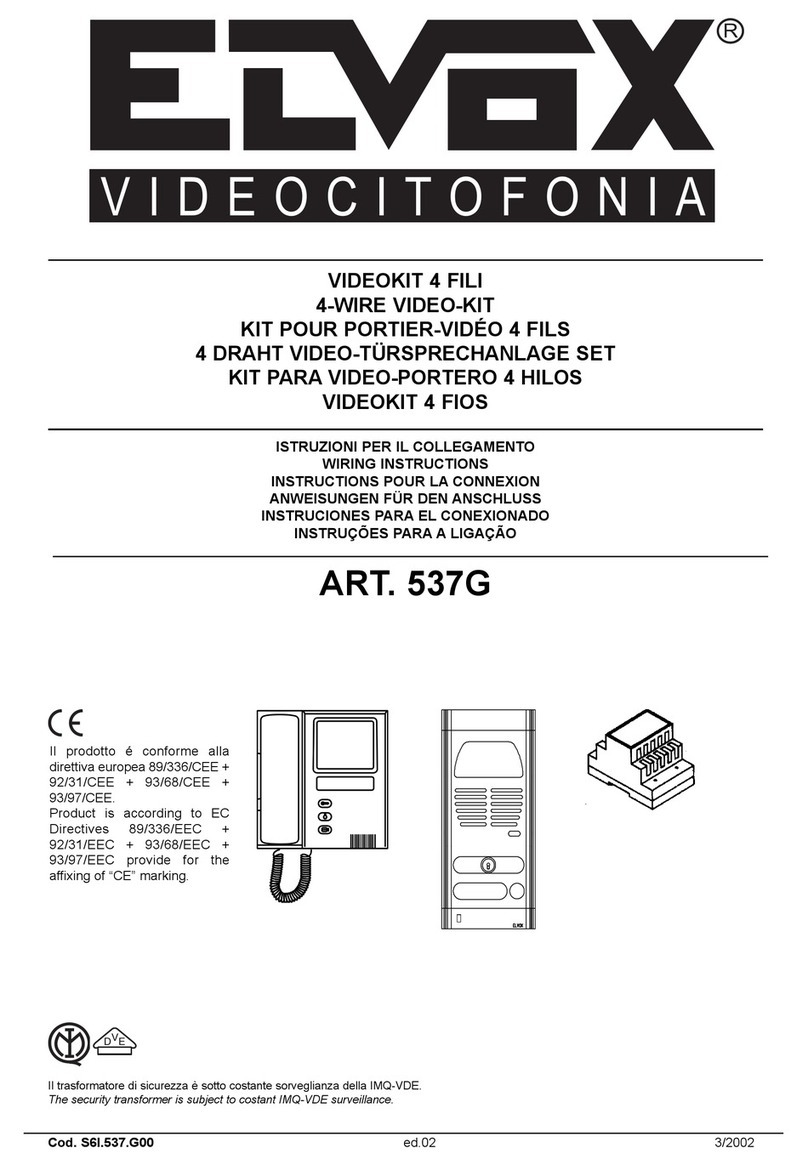
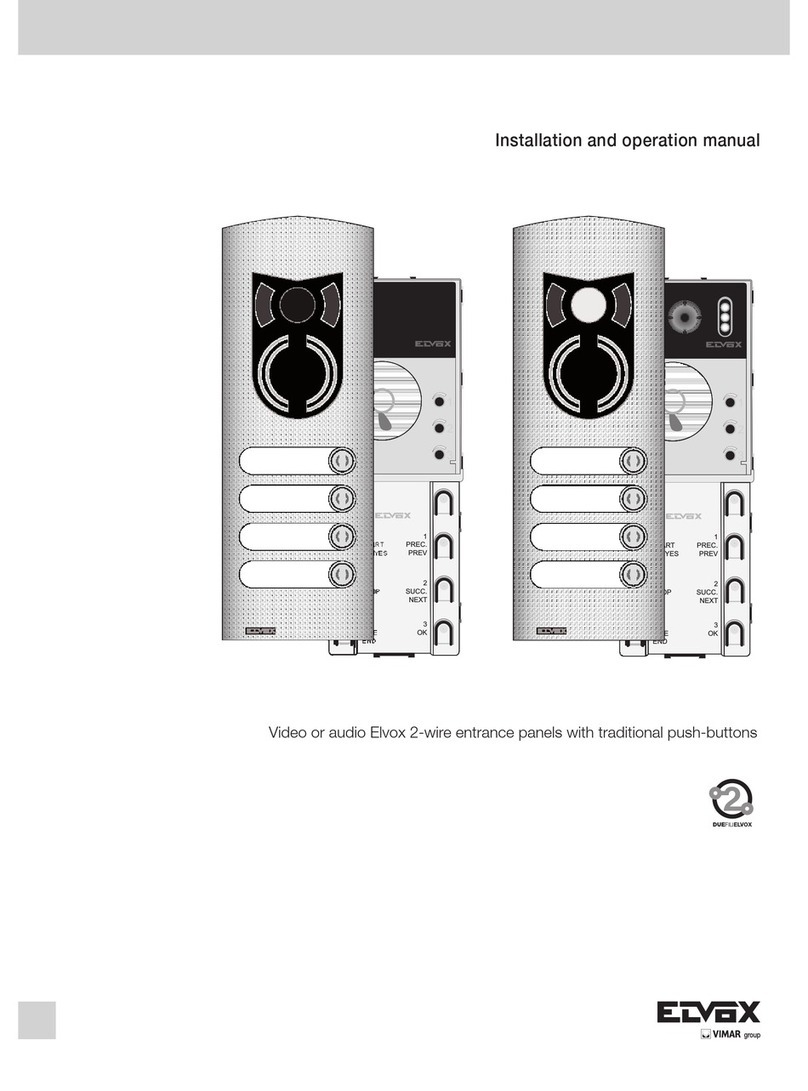
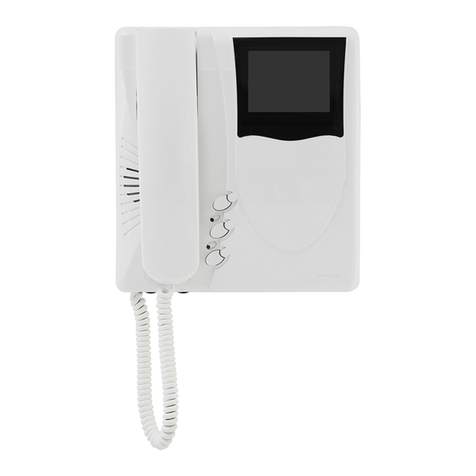
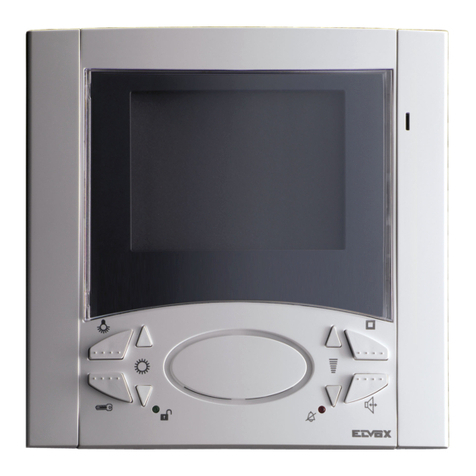
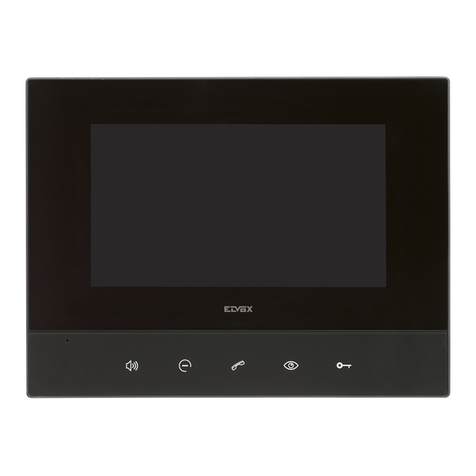
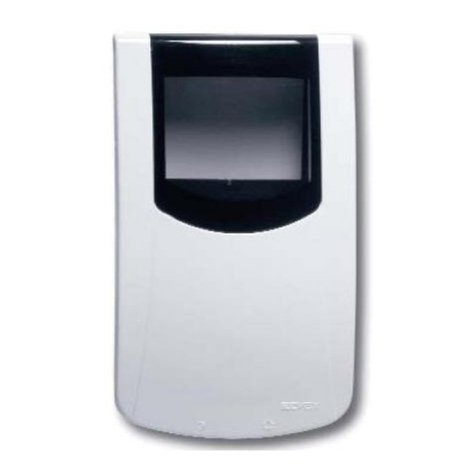
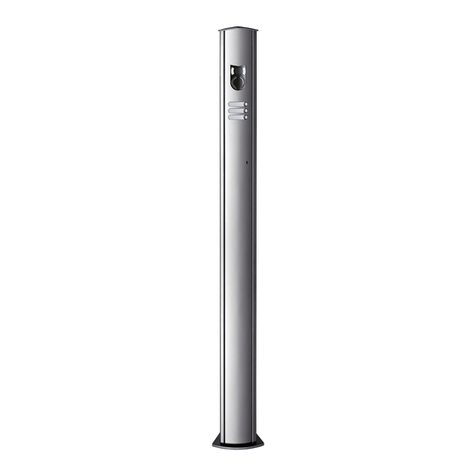
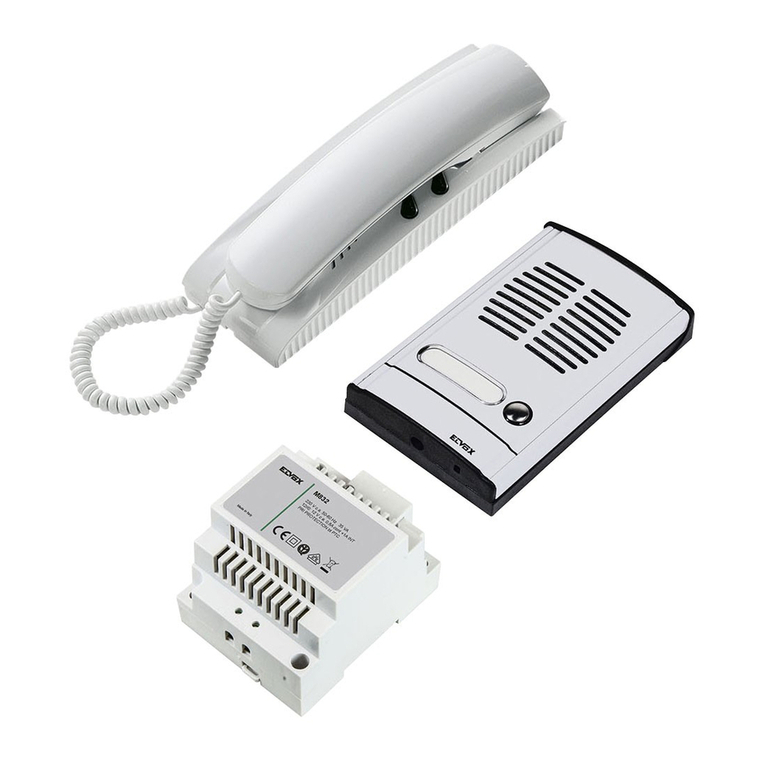
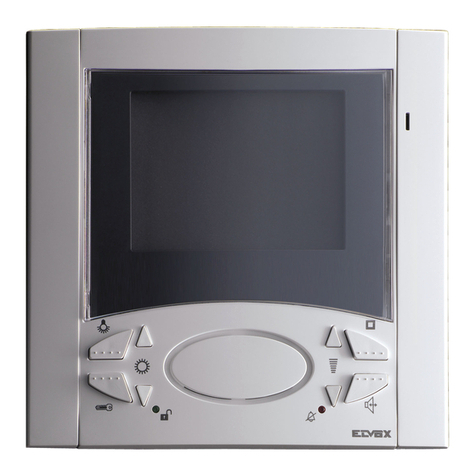
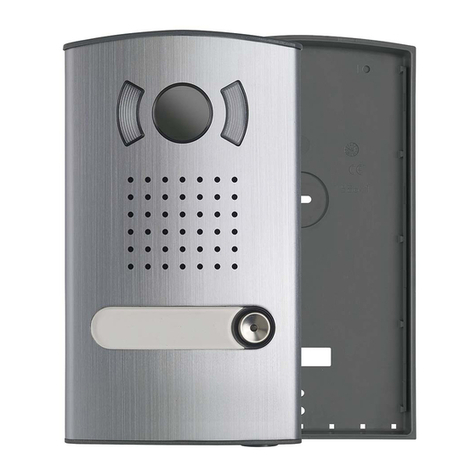
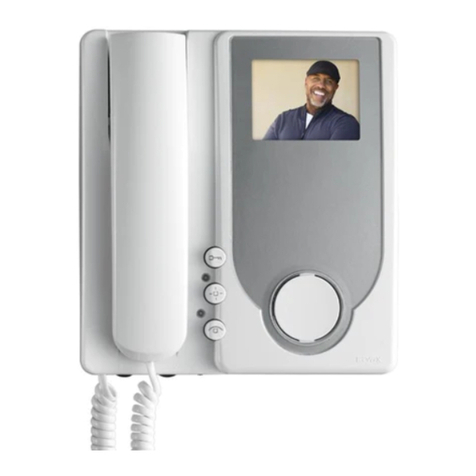
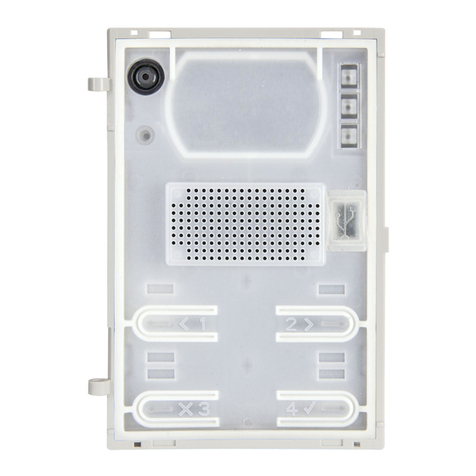
Elvox Vimar K40517G.01 User guide

K40517G.01
Kit videocitofonico Due Fili Plus monofamiliare
Due Fili Plus one-family video door entry kit
Kit portier-vidéo Due Fili Plus pour un logement
Set Videohaustelefon Due Fili Plus für Einfamilienhäuser
Kit de videoportero Due Fili Plus unifamiliar
Kit de videoporteiro Due Fili Plus monofamiliar
Due Fili Plus
Manuale installatore - Installer manual
Manuel installateur - Installationsanleitung
Manual del instalador - Manual do instalador
Εγχειρίδιο τεχνικού εγκατάστασης -

2
K40517G.01

1
K40517G.01
Indice
• Kit videocitofonico K40517G.01 .................................................. 2
- Contenuto della confezione .......................................... 3
• Videocitofono 40517 ............................................................ 4
• Targa serie Pixel ...................................................................... 24
• Unità elettronica 41005 ....................................................... 25
• Alimentatore 40110 .............................................................. 34
• Schemi di collegamento ..................................................... 36
• Conformità normative e avvertenze .............................. 39
Index
• Video door entry kit K40517G.01 ................................................... 2
- Package Contents .............................................................. 3
• Video entryphone 40517 ...................................................... 4
• Pixel series entrance panel ................................................... 24
• Electronic unit 41005 ............................................................ 25
• Power supply unit 40110 ...................................................... 34
• Wiring diagrams .................................................................... 36
• Regulatory compliance and warnings ............................. 39
Sommaire
• Kit portier-vidéo K40517G.01 ....................................................... 2
- Contenu de l'emballage................................................... 3
• Portier-vidéo 40517............................................................... 4
• Platine série Pixel.................................................................... 24
• Unité électronique 41005.................................................... 25
• Alimentation 40110 .............................................................. 34
• Schémas de raccordement ................................................ 36
• Conformité aux normes et recommandations ........... 39
Inhalt
• Set Videohaustelefon K40517G.01................................................. 2
- Verpackungsinhalt ............................................................. 3
• Videohaustelefon 40517....................................................... 4
• Klingeltableau Serie Pixel...................................................... 24
• Elektronikeinheit 41005 ........................................................ 25
• Netzteil 40110.......................................................................... 34
• Anschlusspläne ....................................................................... 36
• Normkonformität und Hinweise......................................... 39
Índice
• Kit de videoportero K40517G.01 ................................................. 2
- Contenido del paquete...................................................... 3
• Videoportero 40517 ............................................................. 4
• Placa serie Pixel ...................................................................... 24
• Unidad electrónica 41005 .................................................. 25
• Alimentador 40110 ............................................................... 34
• Esquemas de conexión ....................................................... 36
• Conformidad a las normas y advertencias ................... 39
Índice
• Kit de videoporteiro K40517G.01 ................................................... 2
- Conteúdo da embalagem ................................................ 3
• Videoporteiro 40517 ............................................................. 4
• Botoneira série Pixel .............................................................. 24
• Unidade eletrónica 41005 ................................................... 25
• Alimentador 40110 ................................................................ 34
• Esquemas de ligação ............................................................ 36
• Conformidade normativa e advertências ....................... 39
Περιεχόμενα
• Κιτ θυροτηλεόρασης K40517G.01 .............................................. 2
- Περιεχόμενο συσκευασίας ............................................. 3
• Θυροτηλεόραση 40517 ....................................................... 4
• Μπουτονιέρα σειράς Pixel .................................................. 24
• Ηλεκτρονική μονάδα 41005 .............................................. 25
• Τροφοδοτικό 40110 ............................................................. 34
• Διαγράμματα σύνδεσης ...................................................... 36
• Συμμόρφωση με τα πρότυπα και προειδοποιήσεις .. 39
•
22................................................ K40517G.01
32.......................................................................... - •42.................................................................. 40517 •24 ............................................................................ Pixel •25 ...................................................................... 41005 •33 ............................................................................. 40110 •36 ............................................................................. •39 ..............................................................

2
K40517G.01
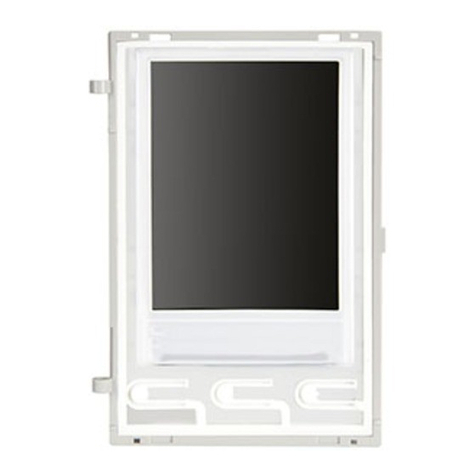
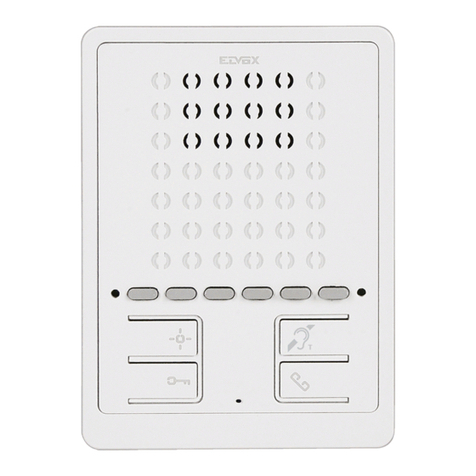
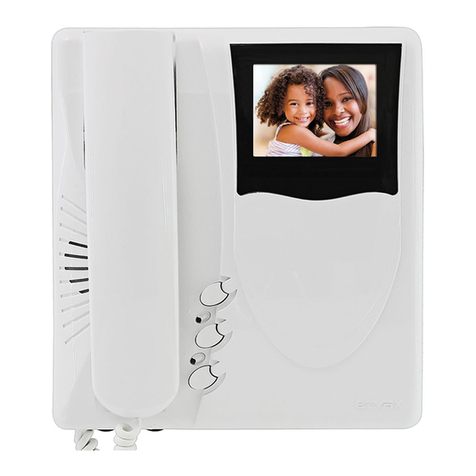
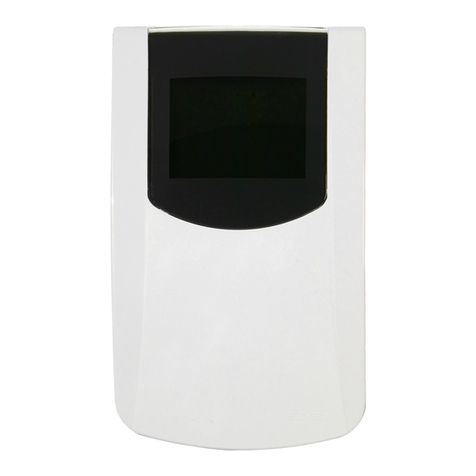
Kit videocitofonico monofamiliare vivavoce a colori Due Fili Plus contenente: 1 vi-
deocitofono TAB 5S UP 2F+ Wi-Fi 40517 bianco con Wi-Fi integrato per ripetizione
di chiamata su smartphone, 1 supporto + cornice 1M Pixel grigio 41131.01 grigio
con 1 pulsante, 1 unità elettronica audio/video teleloop grandangolo 41005, 1 Mo-
dulo frontale A/V Pixel teleloop grigio 41105.01, 1 copriforo singolo Pixel grigio
41113.01, 1 scatola da incasso 1 modulo 9191 per targa serie Pixel, 1 alimentatore
40110.
I componenti del kit sono forniti con codice identicativo ID, già precongurato.
Nel caso di installazione del Kit videocitofonico in un impianto più esteso per
esempio aggiunta di un posto esterno e/o di posti interni supplementari e per
eventuali congurazioni avanzate/opzionali (per esempio programmazione di ta-
sti per funzioni ausiliarie o chiamate intercomunicanti), fare riferimento ai manuali
istruzioni del videocitofono, dell’unità elettronica e di sistema Due Fili Plus, dispo-
nibili sul sito www.vimar.com.
• Kit videocitofonico K40517G.01
• Video door entry kit K40517G.01
• Kit portier-vidéo K40517G.01
• Set Videohaustelefon K40517G.01
• Kit de videoportero K40517G.01
• Kit de videoporteiro K40517G.01
• Κιτ θυροτηλεόρασης K40517G.01
•K40517G.01
Due Fili Plus one-family colour hands-free video door entry kit containing: 1 white TAB
5S UP 2F+ Wi-Fi video entryphone 40517 with integrated Wi-Fi for call forwarding to
smartphone, 1 support + 1M Pixel grey frame 41131.01 with 1 push button, 1 audio/
video electronic unit, wide-angle teleloop 41005, 1 grey A/V Pixel teleloop front module
41105.01, 1 Pixel grey single blank module 41113.01, 1 ush mounting box for 1
module 9191 for Pixel series entrance panel, 1 power supply unit 40110.
The kit parts come with a pre-congured ID code.
When installing the video entryphone kit in a larger system, such as adding an outdoor
unit and/or additional indoor units and for advanced/optional conguration (e.g.
programming buttons for auxiliary functions or intercom calls), refer to the instruction
manuals of the video entryphone, electronic unit and Due Fili Plus system, available on
the website www.vimar.com.
Kit portier-vidéo un logement mains libres couleurs Due Fili Plus comprenant: 1
portier-vidéo TAB 5S UP 2F+ Wi-Fi 40517 blanc avec Wi-Fi intégrée pour répétition
d’appel sur smartphone, 1 support + cadre 1M Pixel gris 41131.01 gris avec 1
poussoir, 1 unité électronique audio/vidéo téléboucle grand angle 41005, 1
module frontal A/V Pixel téléboucle gris 41105.01, 1 obturateur simple Pixel
gris 41113.01, 1 boîte d'encastrement 1 module 9191 pour platine série Pixel, 1
alimentation 40110.
Les composants du kit sont livrés avec un code d’identication ID préconguré.
Si le kit visiophonique est installé dans un circuit plus étendu, quand on souhaite,
par exemple, ajouter un poste extérieur ou des postes intérieurs supplémentaires,
et pour les congurations avancées/options (notamment, la programmation des
touches pour les fonctions auxiliaires ou les appels intercommunicants), se référer
aux manuels d’instruction du portier-vidéo, de l’unité électronique et du système
Due Fili Plus, disponibles sur le site www.vimar.com.
Set Freisprech-Farb-Videohaustelefon Due Fili Plus für Einfamilienhäuser mit: 1 weißem
Freisprech-Videohaustelefon TAB 5S UP 2F+ Wi-Fi 40507 mit integriertem WLAN für
Rufwiederholung auf Smartphone, 1 Halterung + Rahmen 1M Pixel grau 41131.01
mit 1 Taste, 1 Audio-/Video-Elektronikeinheit mit Teleschlinge und Weitwinkelkamera
41005, 1 A/V-Frontmodul Pixel Teleschlinge grau 41105.01, 1 einzelne Blindabdeckung
Pixel grau 41113.01, 1 1-Modul-Unterputzdose 9191 für Klingeltableau Serie Pixel, 1
Netzteil 40110
Die Bestandteile des Sets werden mit vorkongurierter ID-Kennnummer geliefert.
Bei Installation des Videohaustelefon-Sets in eine erweiterte Anlage, zum Beispiel
Ergänzung einer Außenstelle und/oder zusätzlicher Innenstellen, und für etwaige
erweiterte/optionale Kongurationen (zum Beispiel Programmierung der Tasten
für Zusatzfunktionen oder Internrufe) siehe die auf der Website www.vimar.com
verfügbaren Bedienungsanleitungen von Videohaustelefon, Elektronikeinheit und
System Due Fili Plus.
Kit de videoportero unifamiliar manos libres en color Due Fili Plus que incluye:
1 videoportero TAB 5S UP 2F+ Wi-Fi 40517 blanco con Wi-Fi integrado para
repetición de llamada por smartphone, 1 soporte + marco 1M Pixel gris 41131.01
gris con 1 pulsador, 1 unidad electrónica audio/vídeo transmisor inductivo gran
angular 41005, 1 módulo frontal A/V Pixel transmisor inductivo gris 41105.01, 1
tapa ciega Pixel gris 41113.01, 1 caja de empotrar 1 módulo 9191 para placa serie
Pixel, 1 alimentador 40110.
Los componentes del kit se suministran con código de identicación ID precon-
gurado.
En caso de instalación del kit de videoportero en una instalación más amplia, por
ejemplo con el añadido de un aparato externo y/o aparatos internos adicionales
y posibles conguraciones avanzadas/opcionales (por ejemplo, programación de
teclas para funciones auxiliares o llamadas intercomunicantes), consulte los ma-
nuales de instrucciones del videoportero, la unidad electrónica y el sistema Due Fili
Plus, disponibles en la página www.vimar.com.
Kit de videoporteiro monofamiliar alta-voz a cores Due Fili Plus com: 1 videoporteiro
TAB 5S UP 2F+ Wi-Fi 40517 branco com Wi-Fi integrado para repetição de chamada
no smartphone, 1 suporte + aro 1M Pixel cinzento 41131.01 cinzento com 1 botão, 1
unidade eletrónica áudio/vídeo teleloop de grande ângulo 41005, 1 Módulo frontal
A/V Pixel teleloop cinzento 41105.01, 1 tapa-furos simples Pixel cinzento 41113.01,
1 caixa de embeber 1 módulo 9191 para botoneira série Pixel, 1 alimentador 40110.
Os componentes do kit são fornecidos com código identicativo ID, já pré-congurado.
Em caso de instalação do Kit de videoporteiro num sistema mais alargado, por
exemplo, adição de um posto externo e/ou de postos internos suplementares e para
eventuais congurações avançadas/opcionais (por exemplo, programação de teclas
para funções auxiliares ou chamadas intercomunicantes), consulte os manuais
de instruções do videoporteiro, da unidade eletrónica e de sistema Due Fili Plus,
disponíveis no site www.vimar.com.
Κιτ έγχρωμης θυροτηλεόρασης μίας οικογένειας με ανοικτή ακρόαση Due Fili Plus
που περιλαμβάνει τα εξής: 1 θυροτηλεόραση TAB 5S UP 2F+ Wi-Fi 40517 λευκού
χρώματος με ενσωματωμένο Wi-Fi για επανάληψη κλήσης στο smartphone, 1
στήριγμα + κορνίζα 1M Pixel γκρι χρώματος 41131.01 γκρι χρώματος με 1 μπουτόν,
1 ηλεκτρονική μονάδα ήχου/εικόνας με teleloop και ευρυγώνιο φακό 41005, 1
μονάδα πρόσοψης A/V Pixel με teleloop γκρι χρώματος 41105.01, 1 μονό κάλυμμα
Pixel γκρι χρώματος 41113.01, 1 χωνευτό κουτί 1 στοιχείου 9191 για μπουτονιέρα
σειράς Pixel, 1 τροφοδοτικό 40110.
Τα εξαρτήματα του κιτ παρέχονται με ήδη προδιαμορφωμένο αναγνωριστικό
κωδικό ID.
Στην περίπτωση εγκατάστασης του κιτ θυροτηλεόρασης σε πιο εκτεταμένη εγκα-
τάσταση, για παράδειγμα, προσθήκη εξωτερικού σταθμού ή/και συμπληρωματι-
κών εσωτερικών σταθμών και για τυχόν προηγμένες/προαιρετικές διαμορφώσεις
(για παράδειγμα, προγραμματισμός πλήκτρων για βοηθητικές λειτουργίες ή κλή-
σεις ενδοεπικοινωνίας), ανατρέξτε στα εγχειρίδιο οδηγιών της θυροτηλεόρασης,
της ηλεκτρονικής μονάδας και του συστήματος Due Fili Plus που διατίθενται στην
ιστοσελίδα www.vimar.com.
TAB 5S UP 2F+ 1 : Due Fili Plus
1M Pixel + 1 Wi-Fi 40517
1 41005 teleloop / 1 1 41131.01
1 41113.01 Pixel 1 41105.01 A/V Pixel teleloop
.40110 Pixel 1 9191 1
. ID
/
) /
(
.www.vimar.com Due Fili Plus

3
K40517G.01
• Contenuto della confezione
• Package contents
• Contenu de l’emballage
• Verpackungsinhalt
• Contenido del paquete
• Conteúdo da embalagem
• Περιεχόμενο συσκευασίας
•
• Videocitofono/i serieTAB 5S UP 40517
- Videocitofono
- Piastra di ssaggio del videocitofono
- Sacchetto con due viti di ssaggio
• Targa esterna serie Pixel composta da:
- Telaio + cornice grigio 41131.01
- Frontale grigio 41105.01
- Tasto singolo assiale 41110
- Copriforo singolo 41113.01
- Scatola da incasso 9191
• Unita elettronica audio-video 41005
• Alimentatore di sistema Due Fili Plus 40110:
• Manuale di installazione e utilizzo
• TAB 5S UP 40517 series video entryphone(s)
- Video entryphone
- Video entryphone xing plate
- Bag with two xing screws
• Pixel series entrance panel comprising:
- Grey support + frame 41131.01
- Grey front 41105.01
- Single axial button 41110
- Single blank module 41113.01
- Flush mounting box 9191
• Audio-video electronic unit 41005
• Due Fili Plus system power supply unit 40110:
• Installation and user manual
• Portier(s)-vidéo série TAB 5S UP 40517
- Portier-vidéo
- Plaque de xation du portier-vidéo
- Sachet avec deux vis de xation
• Platine de rue série Pixel comprenant :
- Châssis + cadre gris 41131.01
- Façade grise 41105.01
- Touche simple axiale 41110
- Obturateur simple 41113.01
- Boîte d'encastrement 9191
• Unité électronique audio-vidéo 41005
• Alimentation système Due Fili Plus 40110
• Manuel d'installation et d’utilisation
• Videohaustelefon/e der Serie TAB 5S UP 40517
- Videohaustelefon
- Befestigungsplatte des Videohaustelefons
- Beutel mit zwei Befestigungsschrauben
• Klingeltableau Serie Pixel mit:
- Träger + Rahmen grau 41131.01
- Frontplatte grau 41105.01
- Einzelne Axialtaste 41110
- Einzelne Blindabdeckung 41113.01
- Unterputzdose 9191
• Audio-/Video-Elektronikeinheit 41005
• Netzteil für das System Due Fili Plus 40110:
• Installations- und Bedienungsanleitung
• Videoportero/s serieTAB 5S UP 40517
- Videoportero
- Placa de jación del videoportero
- Bolsita con dos tornillos de jación
• Placa externa serie Pixel integrada por:
- Bastidor + marco gris 41131.01
- Frente gris 41105.01
- Tecla axial individual 41110
- Tapa ciega individual 41113.01
- Caja de empotrar 9191
• Unidad electrónica audio-vídeo 41005
• Alimentador del sistema Due Fili Plus 40110:
• Manual de instalación y utilización
• Videoporteiro(s) série TAB 5S UP 40517
- Videoporteiro
- Placa de xação do videoporteiro
- Saco com dois parafusos de xação
• Botoneira externa série Pixel composta por:
- Caixilho + aro cinzento 41131.01
- Parte frontal cinzenta 41105.01
- Tecla simples axial 41110
- Tapa-furos simples 41113.01
- Caixa de embeber 9191
• Unidade eletrónica áudio/vídeo 41005
• Alimentador de sistema Due Fili Plus 40110:
• Manual de instalação e utilização
• Θυροτηλεόραση/θυροτηλεοράσεις σειράςTAB 5S UP 40517
- Θυροτηλεόραση
- Πλάκα στήριξης θυροτηλεόρασης
- Σακούλα με δύο βίδες στερέωσης
• Εξωτερική μπουτονιέρα σειράς Pixel που αποτελείται από:
- Πλαίσιο + κορνίζα γκρι χρώματος 41131.01
- Πρόσοψη γκρι χρώματος 41105.01
- Μονό αξονικό πλήκτρο 41110
- Μονό κάλυμμα 41113.01
- Χωνευτό κουτί 9191
• Ηλεκτρονική μονάδα ήχου-εικόνας 41005
• Τροφοδοτικό συστήματος Due Fili Plus 40110:
• Εγχειρίδιο εγκατάστασης και χρήσης
TAB 5S UP 40517 / •
-
-
-
: Pixel •
41131.01 + -
41105.01 -
41110 -
41113.01 -
9191 -
41005 / •
:Due Fili Plus 40110 •
•

4
K40517G.01
• Videocitofono 40517
• Video entryphone 40517
• Portier-vidéo 40517
• Videohaustelefon 40517
• Videoportero 40517
• Videoporteiro 40517
• Θυροτηλεόραση 40517
•40517
• Dati dimensionali
• Dimensional data
• Dimensions
• Maßangaben
• Medidas
• Dados dimensionais
• Δεδομένα διαστάσεων
•
• Si consiglia di installare il dispositivo facendo attenzione a non
esporlo a fonti dirette di illuminazione in modo da evitare fastidiosi
fenomeni di riessione sulla supercie dello schermo LCD.
• The device should be installed while taking care not to expose it to
direct sources of light so as to avoid annoying glare on the surface of
the LCD screen.
• Il est conseillé d'installer le dispositif en ayant soin de ne pas
l'exposer directement à une source d'éclairage an d'éviter tout
reet sur l'écran LCD.
• Das Gerät sollte keiner direkten Beleuchtung ausgesetzt werden, um
störende Spiegelungen auf dem LCD-Bildschirm zu vermeiden.
• Se recomienda montar el dispositivo comprobando que no quede
expuesto a fuentes directas de iluminación para evitar molestos
fenómenos de reexión en la supercie de la pantalla LCD.
• É aconselhável instalar o dispositivo tendo o cuidado de não o expor
a fontes diretas de iluminação de modo a evitar os incómodos
fenómenos de reexo na superfície do ecrã LCD.
• Συνιστάται η εγκατάσταση του μηχανισμού με ιδιαίτερη προσοχή
ώστε να προστατεύεται από πηγές άμεσου φωτισμού και να
αποφεύγονται τα ενοχλητικά φαινόμενα αντανάκλασης στην
επιφάνεια της οθόνης LCD.
•
.LCD
160/165 cm
120 cm
• Altezza consigliata salvo diversa normativa vigente.
• Recommended height, unless different regulations are specified.
• Hauteur recommandée sauf autre norme en vigueur.
• Empfohlene Höhe, falls die gesetzlichen Vorschriften nichts anderes vorschreiben.
• Altura recomendada salvo normativa vigente diferente
• Altura recomendada, salvo normativa vigente em contrário.
• Συνιστώμενο ύψος εκτός εάν ισχύει διαφορετική νομοθεσία.
•.
(*) Spessore del dispositivo installato a semi
incasso con scatola dedicata (40591).
Device thickness installed semi-ush mounting
with dedicated box (40591).
Épaisseur du dispositif à semi-encastrement
avec boîte dédiée (40591).
Stärke des in Halbeinbau installierten Geräts
mit dedizierter Dose (40591).
Espesor del dispositivo montado semi-
empotrado con caja especíca (40591).
Espessura do dispositivo instalado no modo de
semi-embeber com caixa dedicada (40591).
Πάχος μηχανισμού ημιχωνευτής
εγκατάστασης με ειδικό κουτί (40591).
.(40591)
189 mm
171 mm
24,4 mm
13,1 mm (*)

5
K40517G.01
• L’installazione deve essere eettuata da personale qualicato con l’osservanza
delle disposizioni regolanti l’installazione del materiale elettrico in vigore nel
paese dove i prodotti sono installati.
• Installation should be carried out by qualied personnel in compliance with
the current regulations regarding the installation of electrical equipment in the
country where the products are installed.
• L’installation doit être conée à des techniciens qualiés et eectuée dans le
respect des dispositions réglant.
• Die Installation muss durch Fachpersonal gemäß den im Anwendungsland des
Produkts geltenden Vorschriften zur Installation elektrischen Materials erfolgen.
• El montaje debe ser realizado por personal cualicado cumpliendo con las
correspondientes disposiciones en vigor.
• A instalação deve ser efetuada por pessoal qualicado de acordo com as
disposições que regulam a instalação de material elétrico, vigentes no país em
que os produtos são instalados.
• Η εγκατάσταση πρέπει να πραγματοποιείται από εξειδικευμένο προσωπικό
σύμφωνα με τις ισχύουσες ρυθμιστικές διατάξεις.
•
• Installazione
• Installation
• Installation
• Installation
• Montaje
• Instalação
• Εγκατάσταση
•
Possibilità di installazione:
• A parete con viti e tasselli, diametro 6 (non forniti).
• Installazione su scatola:
- Scatola semi-incasso 40591
- Scatola circolare (VimarV71701)
- Scatola rettangolare 3 moduli (VimarV71303, V71703) in verticale o
orizzontale.
- Scatola quadrata British standard.
- Scatole 720E, 7249 (con accessorio 40196)
- Scatole 6149,V71318, V71718 (con accessorio 755S)
•Da tavolo: con accessorio base da tavolo 40596.
Installation possibilities:
• Surface mounting with screws and plugs, diameter 6 (not supplied).
• Installation in mounting box:
- Semi-flush mounting box 40591
- Round mounting box (Vimar V71701)
- Vertical or horizontal rectangular mounting box with 3 modules (Vimar V71303,
V71703).
- British standard square mounting box.
- Mounting boxes 720E, 7249 (with accessory 40196)
- Mounting boxes 6149, V71318, V71718 (with accessory 755S)
•Desktop mounting: with desktop base accessory 40596.
Installations possibles :
• En saillie avec vis et goujons, diamètre 6 (non compris).
• Installation sur boîte :
- Boîte de semi-encastrement 40591
- Boîte ronde (VimarV71701)
- Boîte rectangulaire 3 modules (VimarV71303, V71703), pose verticale ou
horizontale.
- Boîte carrée standard britannique.
- Boîtes 720E, 7249 (avec accessoire 40196)
- Boîtes 6149,V71318,V71718 (avec accessoire 755S)
• De table : avec accessoire base de table 40596.
Posibilidades de montaje:
• De superficie con tacos y tornillos, diámetro 6 (no suministrados).
• Montaje en caja:
- Caja semi-empotrada 40591
- Caja redonda (Vimar V71701)
- Caja rectangular 3 módulos (VimarV71303,V71703) in verticale o orizzontale.
- Caja cuadrada estándar británico.
- Cajas 720E, 7249 (con accesorio 40196)
- Cajas 6149,V71318, V71718 (con accesorio 755S)
• De sobremesa: con accesorio de sobremesa 40596.
Installationsmöglichkeiten:
• Aufputz-Installation mit Schrauben und Dübeln, Durchmesser 6 (nicht beigestellt).
• Installation in Dose:
- Halbeinbau-Dose 40591
- Runde Dose (Vimar V71701)
- Rechteckige 3-Modul-Dose (Vimar V71303, V71703) vertikal oder horizontal.
- Quadratische Dose British Standard.
- Dosen 720E, 7249 (mit Zubehör 40196)
- Dosen 6149, V71318, V71718 (mit Zubehör 755S)
• Als Tischgerät: mit Tischzubehör 40596.
Possibilidade de instalação:
• Na parede com parafusos e buchas, diâmetro 6 (não fornecidos).
• Instalação em caixa:
- Caixa de semi-embeber 40591
- Caixa circular (Vimar V71701)
- Caixa retangular 3 módulos (Vimar V71303, V71703) na vertical ou horizontal.
- Caixa quadrada British standard.
- Caixas 720E, 7249 (com acessório 40196)
- Caixas 6149, V71318, V71718 (com acessório 755S)
• De mesa: com acessório base de mesa 40596.
Δυνατότητα εγκατάστασης:
• Επιτοίχια, με βίδες και ούπα, διαμέτρου 6 (δεν παρέχονται).
• Εγκατάσταση σε κουτί:
- Ημιχωνευτό κουτί 40591
- Στρογγυλό κουτί (VimarV71701)
- Ορθογώνιο κουτί 3 στοιχείων (Vimar V71303,V71703) κατακόρυφα ή οριζόντια.
- Τετράγωνο κουτί βρετανικού προτύπου.
- Κουτιά 720E, 7249 (με εξάρτημα 40196)
- Κουτιά 6149,V71318,V71718 (με εξάρτημα 755S)
• Επιτραπέζια: με εξάρτημα επιτραπέζιας βάσης 40596.
:
.( ) 6 •
: •
40591 -
(Vimar V71701) -
. (Vimar V71303, V71703) 3 -
. British -
(40196 ) 720E, 7249 -
(755S ) V71318, V71718 ,6149 -
.40596 : •

6
K40517G.01
UP UP
CH MIN E- E+ 21
FP
40591
-15°C
850°C
Ha
VIMAR SPA
VIALE VICENZA 14
36063 MAROSTICA VI
ITALY
Posizionamento staffa
40591
-15°C
850°C
Ha
VIMAR SPA
VIALE VICENZA 14
36063 MAROSTICA VI
ITALY
UP UP
CH MIN E- E+ 21
FP
Fissaggio staffa, cablaggio e riposizionamento morsettiera
40591
-15°C
850°C
Ha
VIMAR SPA
VIALE VICENZA 14
36063 MAROSTICA VI
ITALY
UP UP
CH MIN E- E+ 21
FP
2
3
1
• Installazione semi incasso con scatola dedicata 40591
• Example of fixing on box 40591
• Installation de semi-encastrement avec boîte dédiée 40591
• Halbeinbau-Installation mit dedizierter Dose 40591
• Montaje semi-empotrado con caja especíca 40591
• Instalação de semi-embeber com caixa dedicada 40591
• Ημιχωνευτή εγκατάσταση με ειδικό κουτί 40591
•40591
1
2

7
K40517G.01
UP UP
CH MIN E- E+ 21
FP
UP UP
CH MIN E- E+ 21
FP
Posizionamento staffa
Fissaggio staffa, cablaggio e riposizionamento morsettiera
UP UP
CH MIN E- E+ 21
FP
1
2
3
1
2
• Installazione a parete con ssaggio su scatola 3 moduli verticale (VimarV71303)
• Example of fixing on vertical mounting box with 3 modules (Vimar V71303)
• Installation en saillie avec xation sur boîte 3 modules verticale (VimarV71303)
• Halbeinbau-Installation mit dedizierter Dose V71303)
• Montaje de supercie con jación en caja vertical de 3 módulos (Vimar V71303)
• Instalação na parede com fixação em caixa de 3 módulos vertical (Vimar V71303)
• Επιτοίχια εγκατάσταση με στερέωση σε κατακόρυφο κουτί 3 στοιχείων (VimarV71303)
•(V71303 Vimar) 3

8
K40517G.01
CH MIN FP E- E+ 2
1
2
Aggancio (scatola 40591)
Morsettiera cablata riposizionata
40591
-15°C
850°C
Ha
VIMAR SPA
VIALE VICENZA 14
36063 MAROSTICA VI
ITALY
UP UP
CH MIN E- E+ 21
FP
6
78
40591
-15°C
850°C
Ha
VIMAR SPA
VIALE VICENZA 14
36063 MAROSTICA VI
ITALY
UP UP
CH MIN E- E+ 21
FP
Estrazione morsettiera
Cablaggio
40591
-15°C
850°C
Ha
VIMAR SPA
VIALE VICENZA 14
36063 MAROSTICA VI
ITALY
UP UP
CH MIN E- E+ 21
FP
40591
-15°C
850°C
Ha
VIMAR SPA
VIALE VICENZA 14
36063 MAROSTICA VI
ITALY
UP UP
CH MIN E- E+ 21
FP
Riposizionamento morsettiera cablata
34
5

9
K40517G.01
CH MIN E- E+ 2
FP
*
1
2
• Smontaggio
• Disassembly
• Démontage
• Ausbau
• Desmontaje
• Desmontagem
• Αποσυναρμολόγηση
•
• Vite antimanomissione
• Tamper protection screw
• Vis anti-eraction
• Manipulationsschutz-Schraube
• Tornillo antivandálico
• Parafusos anti-violação
• Βίδα προστασίας από
δολιοφθορά
•
*
UP
CH MIN E- E+ 21
FP
2
1

10
K40517G.01
Alloggiamento per micro SD Card
MicroSD card housing
Logement pour micro SD Card
MicroSD-Kartensteckplatz
Alojamiento para microtarjeta SD
Compartimento para Cartão micro SD
Υποδοχή για κάρτα micro SD
SD Card
• Vista frontale
• Front view
• Vue de face
• Frontansicht
• Vista frontal
• Vista frontal
• Μπροστινή πλευρά
•
7
2
5
11
9
6
3
4
1
10
8
Caratteristiche microSD card:
• Capacità microSD card: da 4 a 64 GB.
• Tipologia microSD card: SDHC o SDXC.
• Tipologia di le system: FAT32, exFAT, ext4.
MicroSD card specications:
• MicroSD card capacity: 4 to 64 GB.
• MicroSD card type: SDHC or SDXC.
• File system type: FAT32, exFAT, ext4.
Caractéristiques de la microSD card :
• Capacité microSD card : de 4 à 64 Go.
• Type microSD card : SDHC ou SDXC.
• Type de système de chiers : FAT32, exFAT, ext4.
Merkmale der microSD-Karte:
• Kapazität der microSD-Karte: von 4 bis 64 GB.
• microSD-Kartentyp: SDHC oder SDXC.
• Dateisystemtyp: FAT32, exFAT, ext4.
Características de la microtarjeta SD:
• Capacidad: de 4 a 64 GB.
• Tipo: SDHC o SDXC.
• Tipo de sistema de archivos: FAT32, exFAT, ext4.
Características do cartão micro SD:
• Capacidade do cartão micro SD: de 4 a 64 GB.
• Tipo de cartão micro SD: SDHC ou SDXC.
• Tipo de sistema de cheiros: FAT32, exFAT, ext4.
Χαρακτηριστικά κάρτας micro SD:
• Χωρητικότητα κάρτας micro SD: από 4 έως 64 GB.
• Τύπος κάρτας micro SD: SDHC ή SDXC.
• Τύπος συστήματος αρχείων: FAT32, exFAT, ext4.
:SD Card
. 64 4 :SD Card •
.SDXC SD Card: SDHC •
.FAT32, exFAT, ext4 : •

11
K40517G.01
1 - Microfono
2 - Display da 7”a 16.8 milioni di colori, risoluzione
1024x600, ratio 16:9, touch-screen capacitivo.
Segnalazioni (retroilluminazione bianca):
3 - Nuove notifiche e messaggi
4 - Mancanza di connettività
5 - Porta aperta / Stato funzione studio professionale
6 - Esclusione Suoneria / Non disturbare
Nota: Quando la retroilluminazione è spenta, il simbolo non
è visibile. L’intensità della retroilluminazione è regolabile
per l’insieme delle segnalazioni. Questa regolazione è
indipendente dall’intensità della retroilluminazione dei
tasti capacitivi. Le segnalazioni possono essere disabilitate
(spegnendo la retroilluminazione) tramite impostazione
utente.
1 - Microphone
2- 7” Display, 16.8 million colours, 1024x600 resolution, ratio
of 16:9, capacitive touch screen.
Indicators (white backlighting):
3 - New notifications and messages
4 - Lack of connectivity
5 - Door open / Professional firm function status
6 - Ringtone Mute / Do Not Disturb
Note: When the backlighting is off, the symbol is not visible. The
intensity of the backlighting is adjustable for all indicators. This
adjustment is independent of the intensity of the capacitive key
backlighting. The indicators can be disabled (by switching off
the backlighting) from the user setting.
1 - Microphone
2 - Écran tactile capacitif 7 pouces à 16,8 millions de
couleurs, résolution 1024x600, 16/9.
Signalisations (rétroéclairage blanc) :
3 - Nouvelles notifications et messages
4 - Absence de connectivité
5 - Porte ouverte / État fonction bureau/cabinet
6 - Exclusion Sonnerie / Ne pas déranger
Remarque : Lorsque le rétroéclairage est éteint, le
symbole n'est pas visible. L’intensité du rétroéclairage est
réglable pour l’ensemble des signalisations. Ce réglage est
indépendant de l’intensité du rétroéclairage des touches
capacitives. L’utilisateur peut désactiver les signalisations (en
éteignant le rétroéclairage).
1 - Micrófono
2 - Pantalla de 7”, 16,8 millones de colores, resolución
1024x600, relación 16:9, pantalla táctil capacitiva.
Señalizaciones (retroiluminación blanca):
3 - Nuevas notificaciones y mensajes
4 - Falta de conectividad
5 - Puerta abierta / Estado función Bufete profesional
6 - Exclusión del timbre / No molesten
Nota: cuando la retroiluminación está apagada, el símbolo
no es visible. La intensidad de la retroiluminación es
regulable para el conjunto de las señalizaciones. Esta
regulación es independiente de la intensidad de la
retroiluminación de las teclas capacitivas. Las señalizaciones
se pueden deshabilitar (apagando la retroiluminación) con
las configuración de usuario.
1 - Μικρόφωνο
2 - Οθόνη 7”16,8 εκατομμυρίων χρωμάτων, ανάλυση
1024x600, αναλογία 16:9, χωρητική οθόνη αφής.
Επισημάνσεις (λευκός οπίσθιος φωτισμός):
3 - Νέες ειδοποιήσεις και μηνύματα
4 - Απουσία συνδεσιμότητας
5 - Ανοικτή πόρτα / Κατάσταση λειτουργίας
επαγγελματικού γραφείου
6 - Απενεργοποίηση κουδουνιού / Μην ενοχλείτε
Σημείωση: Όταν ο οπίσθιος φωτισμός είναι
απενεργοποιημένος, το σύμβολο δεν είναι ορατό. Η ένταση
του οπίσθιου φωτισμού είναι ρυθμιζόμενη για το σύνολο
των επισημάνσεων. Αυτή η ρύθμιση είναι ανεξάρτητη
από την ένταση του οπίσθιου φωτισμού των χωρητικών
πλήκτρων. Οι επισημάνσεις μπορούν να απενεργοποιηθούν
(με απενεργοποίηση του οπίσθιου φωτισμού) μέσω της
ρύθμισης χρήστη.
1 - Mikrofon
2 - 7”-Display mit 16.8 Millionen Farben, Auflösung 1024x600,
Verhältnis 16:9, kapazitivem Touchscreen.
Anzeigen (weiße Hintergrundbeleuchtung):
3 - Neue Benachrichtigungen und Meldungen
4 - Keine Verbindung
5 - Tür geöffnet / Funktionsstatus professionelles Büro
6 - Ruftonabschaltung / Bitte nicht stören
Hinweis: Das Symbol ist bei ausgeschalteter
Hintergrundbeleuchtung nicht sichtbar. Die Helligkeit der
Hintergrundbeleuchtung kann für die Gesamtheit der Anzeigen
eingestellt werden. Diese Regelung ist von der Helligkeit
der Hintergrundbeleuchtung für die kapazitiven Tasten
unabhängig. Die Anzeigen können mittels Benutzereinstellung
(durch Ausschalten der Hintergrundbeleuchtung) deaktiviert
werden.
1 - Microfone
2 - Display de 7” com 16,8 milhões de cores, resolução
1024x600, rácio 16:9, touch-screen capacitivo.
Sinalizações (retroiluminação branca):
3 - Novas notificações e mensagens
4 - Falta de conectividade
5 - Porta aberta / Estado da função de gabinete profissional
6 - Exclusão da campainha / Não incomodar
Nota: Quando a retroiluminação está desligada, o símbolo
não é visível. A intensidade da retroiluminação é regulável para
o conjunto das sinalizações. Esta regulação é independente
da intensidade da retroiluminação das teclas capacitivas.
As sinalizações podem ser desabilitadas (desligando a
retroiluminação) através das definições do utilizador.
- 1
16:9 600×1024 16.8 "7 - 2
.
:( )
- 3
- 4
/ - 5
/ - 6
. :
.
) .
. (

12
K40517G.01
• Vista frontale
• Front view
• Vue de face
• Frontansicht
• Vista frontal
• Vista frontal
• Μπροστινή πλευρά
•
Tasti (funzioni di Default):
7 - Parla/Ascolta
- Risponde ad una chiamata
- Chiude una conversazione
8 - Auto-accensione: attiva il posto esterno principale.
(*)
9 - Esclusione suoneria
10 - Attivazione ausiliaria: attiva il primo relè del sistema 2
fili (Aux 1). (*)
11 - Apertura Porta (Serratura): attiva la serratura del
posto esterno. In stato di chiamata o conversazione,
attiva la la serratura del posto esterno in
comunicazione, altrimenti del posto esterno
principale. (*)
Nota (*) : la funzione associata ai tasti Auto-accensione,
Attivazione ausiliaria e Apertura Porta possono essere
modicate tramite programmazione. Per le funzioni
attivabili fare riferimento al manuale uso e congurazione
e al software di congurazione.
Keys (Default functions):
7 - Talk/Listen
- Answers a call
- Ends a conversation
8 - Self-start: it activates the main outdoor station. (*)
9 - Ringtone mute
10 - Auxiliary activation: it activates the first relay of the 2 fili
system (Aux 1). (*)
11 - Door Opening (Lock): it activates the outdoor station
lock. During a call or conversation, it activates the lock
on the outdoor station in communication, otherwise
that of the main outdoor station. (*)
Note (*) : the function associated with the Self-start,
Auxiliary activation and Door Opening keys can be
modied via programming. For the functions which can be
activated, please refer to the conguration software use and
conguration manual.
7
2
5
11
9
6
3
4
1
10
8
• Funzione di audiofrequenza per protesi acustiche (Teleloop)
Il videocitofono è utilizzabile da parte dei portatori di protesi acustiche.
Per un corretto funzionamento dell’apparecchio acustico, fare riferimento al relativo manuale di
istruzioni. La presenza di oggetti metallici o apparecchi elettronici, può compromettere la qualità
del suono percepito sull’apparecchio acustico.
• Audio frequency function for hearing aids (Teleloop)
The video entryphone can be used by people wearing hearing aids.
For correct functioning of the hearing aid, please refer to its instruction manual. Any metal objects or
electronic equipment in the vicinity may aect the quality of the sound received by the hearing aid.
• Fonction audiofréquence pour prothèses auditives (Téléboucle)
Le portier-vidéo est adapté aux porteurs de prothèses auditives.
Pour utiliser correctement l'appareil acoustique, consulter son mode d'emploi. La présence
d'objets métalliques ou d'appareils électroniques peut compromettre la qualité de la réception
sur l’appareil acoustique.
• Tonfrequenz-Funktion für Hörgeräte (Teleschlinge)
Das Videohaustelefon eignet sich für Hörgeräteträger.
Für den korrekten Betrieb des Hörgeräts wird auf die entsprechende Bedienungsanleitung verwiesen.
Eventuell vorhandene Gegenstände aus Metall oder elektronische Geräte können die am Hörgerät
empfangene Tonqualität beeinträchtigen.
• Función de audiofrecuencia para audífonos (transmisor inductivo)
El videoportero puede ser utilizado por personas con audífono.
Para el correcto funcionamiento del audífono, consulte el correspondiente manual de instrucciones.
La presencia de objetos metálicos o aparatos electrónicos puede perjudicar la calidad del sonido
percibido con el audífono.
• Função de audiofrequência para próteses auditivas (Teleloop)
O videoporteiro pode ser utilizado pelos portadores de próteses auditivas.
Para um funcionamento correto do aparelho auditivo, consulte o respetivo manual de instruções.
A presença de objetos metálicos ou aparelhos eletrónicos pode comprometer a qualidade do som
recebido no aparelho auditivo.
• Λειτουργία ακουστικής συχνότητας για βοηθήματα ακοής (Teleloop)
Η θυροτηλεόραση μπορεί να χρησιμοποιηθεί από άτομα με βοηθήματα ακοής.
Για τη σωστή λειτουργία του βοηθήματος ακοής, ανατρέξτε στο σχετικό εγχειρίδιο οδηγιών. Τα
μεταλλικά αντικείμενα ή οι ηλεκτρονικές συσκευές μπορεί να επηρεάσουν την ποιότητα του ήχου
που λαμβάνεται από το βοήθημα ακοής.
•(Teleloop)
.
.
.

13
K40517G.01
Touches (fonctions par défaut) :
7 - Parler/Écouter
- Répondre à un appel
- Conclure une conversation
8 - Auto-allumage, valide le poste extérieur principal. (*)
9 - Exclusion sonnerie
10 - Activation auxiliaire : valide le premier relais du
système 2 fili (Aux 1). (*)
11 - Ouverture Porte (Gâche) : active la gâche du
poste extérieur. En condition d’appel ou de
conversation, active la gâche du poste extérieur
en communication, sinon celle du poste extérieur
principal. (*)
Remarque (*) : les fonctions associées aux touches Auto-
allumage, Activation auxiliaire et Ouverture Porte peuvent
être modiées à travers une programmation. Pour les
fonctions activables, consulter le manuel d’utilisation et
de conguration et utiliser le logiciel de conguration.
Botones (funciones predeterminadas):
7 - Hablar/Escuchar
- Contestar una llamada
- Finalizar una conversación
8 - Autoencendido: activa el aparato externo principal. (*)
9 - Exclusión del timbre
10 - Activación auxiliar: activa el primer relé del sistema 2
hilos (Aux 1). (*)
11 - Abrepuertas (Cerradura): activa la cerradura
del aparato externo. En estado de llamada o
conversación, activa la cerradura del aparato
externo en comunicación o bien del aparato externo
principal. (*)
Nota (*) : la función asociada a los botones
Autoencendido, Activación auxiliar y Abrepuertas se
puede modicar con la programación. Para las funciones
activables, consulte el manual de uso y conguración y el
software de conguración.
Πλήκτρα (προεπιλεγμένες λειτουργίες):
7 - Ομιλία/Ακρόαση
- Απαντά σε μια κλήση
- Τερματίζει μια συνομιλία
8 - Αυτόματη ενεργοποίηση: ενεργοποιεί τον κύριο
εξωτερικό σταθμό. (*)
9 - Απενεργοποίηση κουδουνιού
10 - Βοηθητική ενεργοποίηση: ενεργοποιεί το πρώτο ρελέ
του συστήματος 2 fili (Aux 1). (*)
11 - Άνοιγμα πόρτας (κλειδαριά): ενεργοποιεί την
κλειδαριά του εξωτερικού σταθμού. Στην κατάσταση
κλήσης ή συνομιλίας, ενεργοποιεί την κλειδαριά
του εξωτερικού σταθμού που βρίσκεται σε φάση
επικοινωνίας, διαφορετικά του κύριου εξωτερικού
σταθμού. (*)
Σημείωση (*) : η λειτουργία που έχει αντιστοιχιστεί
στα πλήκτρα αυτόματης ενεργοποίησης, βοηθητικής
ενεργοποίησης και ανοίγματος πόρτας μπορεί να
τροποποιηθεί μέσω προγραμματισμού. Για τις λειτουργίες
που μπορούν να ενεργοποιηθούν, ανατρέξτε στο
εγχειρίδιο χρήσης και διαμόρφωσης και στο λογισμικό
διαμόρφωσης.
Tasten (Standardfunktionen):
7 - Sprechen/Hören
- Anruf entgegennehmen
- Gespräch beenden
8 - Selbsteinschaltung: aktiviert die Haupt-Außenstelle. (*)
9 - Ruftonabschaltung
10 - Zusatzaktivierung: aktiviert das erste Relais des Systems
2 Fili (Aux 1). (*)
11 - Türöffner (Schloss): aktiviert den Türöffner der
Außenstelle. Aktiviert im Ruf- oder Gesprächsstatus
den Türöffner der in Kommunikation befindlichen
Außenstelle, ansonsten die Haupt-Außenstelle. (*)
Hinweis (*) : die Funktion der Tasten Selbsteinschaltung,
Zusatzaktivierung und Türöffner kann mittels
Programmierung geändert werden. Für die
aktivierbaren Funktionen wird auf die Bedienungs- und
Kongurationsanleitung und die Kongurationssoftware
verwiesen.
Teclas (funções por defeito):
7 - Falar/Escutar
- Atender uma chamada
- Encerrar uma conversação
8 - Auto-acendimento: ativa o posto externo principal. (*)
9 - Exclusão da campainha
10 - Ativação auxiliar: ativa o primeiro relé do sistema 2 fili
(Aux. 1). (*)
11 - Abertura da Porta (Trinco): ativa o trinco do posto
externo. No estado de chamada ou de conversação,
ativa o trinco do posto externo em comunicação, senão,
do posto externo principal. (*)
Nota (*) : a função associada às teclas de Auto-acendimento,
Ativação auxiliar e Abertura da Porta podem ser modicadas
através de uma programação. Para as funções ativáveis,
consulte o manual de uso e conguração e o software de
conguração.
:( )
/ - 7
-
-
(*) . : - 8
- 9
(*) .(Aux 1) 2 : - 10
. :() - 11
(*) .
: (*)
.
.

14
K40517G.01
2 - Terminazione Bus Due Fili Plus (Dip Switch di
congurazione)
TABELLA SWITCH
A= Il cavo del BUS entra nei morsetti 1, 2 e prosegue ad
un altro posto interno
B= Il cavo BUS con impedenza caratteristica di 100 Ohm
(cavo Elvox 732I o 732H) entra nei morsetti 1, 2 ed il
montante si ferma nel posto interno
C= Il cavo BUS con impedenza caratteristica di 50 Ohm
(cavo Cat.5 o Cat.6 con i doppini accoppiati) entra nei
morsetti 1, 2 ed il montante si ferma nel posto interno
3 - Connettore (receptacle) USB type C: interfaccia di
connessione ad un PC per la congurazione e/o
aggiornamento rmware tramite il software SaveProg.
1 - Abilitazione alimentazione da BUS (*)
OFF = Alimentazione tramite alimentatore supplementare
(6923).
ON = Alimentazione tramite BUS.
2 - Due Fili Plus Bus termination (Conguration Dip Switch)
SWITCH TABLE
A= the BUS cable enters terminals 1, 2 and continues to
another indoor station
B= The BUS cable with a characteristic impedance of 100
Ohms (Elvox 732I or 732H cable) enters terminals 1, 2 and
the riser stops in the indoor station
C= The BUS cable with characteristic impedance of 50
Ohms (Cat. 5 or Cat. 6 twisted pair cable) enters terminals 1,
2 and the riser stops in the indoor station
3 - Connector (receptacle) USB type C: connection interface with
a PC for conguration and/or updating of rmware via the
SaveProg software.
1 - Enabling power supply from BUS (*)
OFF = Power supply via additional power supply unit (6923).
ON = Power supply via BUS.
• Vista retro
• Rear view
• Face arrière
• Rückansicht
• Vista posterior
• Vista traseira
• Πίσω πλευρά
•
2
3
1

15
K40517G.01
2 - Terminaison Bus Due Fili Plus (Dip-Switch de conguration)
3 - Connecteur (réceptacle) USB type C : interface de
connexion à un ordinateur pour la conguration et/ou la
mise à jour rmware à l’aide du logiciel SaveProg.
1 - Validation alimentation via BUS (*)
OFF = Alimentation supplémentaire (6923).
ON = Alimentation via BUS.
TABLEAU SWITCH
A= Le câble du BUS arrive aux bornes 1, 2 puis se dirige
vers un autre poste intérieur
B= Le câble BUS avec une impédance caractéristique de
100 ohms (câble Elvox 732I ou 732H) arrive aux bornes 1,
2 et la colonne montante s'arrête au poste intérieur
C= Le câble BUS avec une impédance caractéristique
de 50 ohms (câble cat. 5 ou cat. 6 à paires torsadées)
arrive aux bornes 1, 2 et la colonne montante s'arrête au
poste intérieur
2 - Bus-Abschluss Due Fili Plus (Dip-Schalter für Konguration)
3 - USB-Stecker Typ C (Receptacle): Schnittstelle zum
Anschluss an einen PC für die Konguration und/oder
Firmwareaktualisierung mittels der Software SaveProg.
1 - Freigabe der Versorgung über BUS (*)
OFF = Versorgung über Zusatznetzteil (6923).
ON = Versorgung über BUS.
SCHALTERTABELLE
A= Das BUS-Kabel tritt in die Klemmen 1, 2 ein und führt zu
einer anderen Innenstelle
B= Das BUS-Kabel mit typischer Impedanz 100 Ohm (Elvox
Kabel 732I oder 732H) tritt in die Klemmen 1, 2 ein und die
Steigleitung endet an der Innenstelle
C= Das BUS-Kabel mit typischer Impedanz 50 Ohm
(Kabel Cat.5 oder Cat.6 mit gepaarten Doppeladern) tritt
in die Klemmen 1, 2 ein und die Steigleitung endet an der
Innenstelle
2 - Terminación Bus Due Fili Plus (conmutador DIP de
conguración)
3 - Conector (receptacle) USB tipo C: interfaz de conexión a
un PC para la conguración y/o actualización del rmware
mediante el software SaveProg.
1 - Habilitación de la alimentación por BUS (*)
OFF = Alimentación mediante alimentador adicional
(6923).
ON = Alimentación mediante BUS.
TABLA DE LOS CONMUTADORES DIP
A= El cable del BUS entra en los bornes 1, 2 y continúa
hasta otro aparato interno
B= El cable BUS con impedancia característica de 100
ohmios (cable Elvox 732I o 732H) entra en los bornes 1, 2
y el montante termina en el aparato interno
C= El cable BUS con impedancia característica de 50
ohmios (cable Cat.5 o Cat.6 con los cables de pares
acoplados) entra en los bornes 1, 2 y el montante
termina en el aparato interno
2 - Terminação Bus Due Fili Plus (Dip Switch de conguração)
3 - Conector (receptacle) USB type C: interface de ligação a um PC
para a conguração e/ou atualização do rmware através do
software SaveProg.
1 - Habilitação da alimentação a partir do BUS (*)
OFF = Alimentação através de alimentador suplementar
(6923).
ON = Alimentação através de BUS.
TABELA SWITCH
A= O cabo do BUS entra nos terminais 1, 2 e continua para
um outro posto interno
B= O cabo BUS com impedância característica de 100
Ohm (cabo Elvox 732I ou 732H) entra nos terminais 1, 2 e a
coluna montante para no posto interno
C= O cabo BUS com impedância característica de 50 Ohm
(cabo Cat.5 ou Cat.6 com os pares entrançados acoplados)
entra nos terminais 1, 2 e a coluna montante para no posto
interno
2 - Τερματισμός Bus Due Fili Plus (Dip Switch διαμόρφωσης)
3 - Συνδετήρας (υποδοχή) USB τύπου C: interface σύνδεσης
σε Η/Υ για τη διαμόρφωση ή/και την ενημέρωση
υλικολογισμικού μέσω του λογισμικού SaveProg.
1 - Ενεργοποίηση τροφοδοσίας από BUS (*)
OFF = Τροφοδοσία μέσω συμπληρωματικού τροφοδοτικού
(6923).
ON = Τροφοδοσία μέσω BUS.
ΠΙΝΑΚΑΣ SWITCH
A= Το καλώδιο του BUS εισάγεται στις επαφές κλέμας 1,
2 και συνεχίζει προς άλλο εσωτερικό σταθμό
B= Το καλώδιο BUS με χαρακτηριστική σύνθετη
αντίσταση 100 Ohm (καλώδιο Elvox 732I ή 732H)
εισάγεται στις επαφές κλέμας 1, 2 και η κεντρική γραμμή
τερματίζεται στον εσωτερικό σταθμό
Γ= Το καλώδιο BUS με χαρακτηριστική σύνθετη
αντίσταση 50 Ohm (καλώδιο κατ.5 ή κατ.6 με τα ζεύγη
συνδεδεμένα) εισάγεται στις επαφές κλέμας 1, 2 και η
κεντρική γραμμή τερματίζεται στον εσωτερικό σταθμό
(Dip switch) ) Bus Due Fili Plus - 2
(
:C USB () - 3
.SaveProg /
(*) BUS - 1
.(6923) = () OFF
.BUS = () ON
2 1 BUS = A
Elvox 732I ) 100 BUS = B
2 1 (732H
Cat.6 Cat.5 ) 50 BUS = C
2 1 (

16
K40517G.01
(*) Interruttore BUS POWER
Per uso senza alimentatore supplementare, posizionare il BUS POWER su ON (factory default).
Per uso con alimentatore supplementare, è preferibile posizionare il BUS POWER su OFF, onde
evitare sovraccarico dell’impianto nel caso in cui l’alimentatore supplementare non sia operativo.
Note sull'alimentazione del dispositivo
- Con alimentazione da bus o ausiliaria
Una volta alimentato il dispositivo impiega circa 60 secondi per essere operativo. Durante la
fase di avvio il LED busta, dopo essere rimasto acceso sso per 5 secondi, comincia a pulsare, e
inne lampeggia con tempistiche: acceso per 0.2 secondi, spento per 0.8 secondi. Il dispositivo è
operativo quando il LED busta
• lampeggia con tempistiche acceso per 0.8 secondi, spento per 0.2 secondi: il dispositivo è pronto
e in attesa di congurazione;
• è spento sso: il dispositivo è congurato e non ci sono notiche non lette;
• è acceso sso: il dispositivo è congurato e ci sono notiche non lette.
In caso di riavvio in seguito ad aggiornamento, la fase di avvio può richiedere più tempo.
- Con alimentazione da USB
Una volta alimentato il dispositivo impiega circa 40 secondi per essere operativo: il PC rileva la
porta seriale (tramite cui fare la congurazione con SaveProg) e l’unità disco (tramite cui fare
l’aggiornamento del dispositivo). LED e schermo restano spenti in quanto non alimentati.
- Modalità risparmio energetico
Questa impostazione è irrilevante in caso di uso con alimentatore supplementare.
Senza alimentatore supplementare, quando la modalità risparmio energetico è attiva, lo schermo si
accende solo se l’impianto videocitofonico è a riposo (nessun altro dispositivo con schermo acceso).
In caso contrario lo schermo resta spento e un feedback sonoro informa l’utente dell’impossibilità
ad accendersi. Nei casi di chiamata o conversazione non prioritarie in corso (autoaccensione,
intercomunicante, chiamata a mobile) o di accensione per altri motivi (navigazione nel menu
impostazioni, consultazione del registro di chiamate, ecc.), lo schermo verrà istantaneamente
spento in caso di chiamata prioritaria diretta ad un qualsiasi dispositivo dell’impianto.
E’possibile realizzare un impianto videocitofonico con singolo alimentatore di sistema e no a
14 posti interni art. 40517 sprovvisti di alimentatore supplementare e con modalità risparmio
energetico attiva.
Disattivando la modalità risparmio energetico è possibile accendere contemporaneamente più
videocitofoni e usufruire delle funzioni del dispositivo senza le limitazioni precedentemente
descritte, in impianti con no a 4 posti interni art. 40517.
(*) POWER BUS 1-way switch
For use without additional power supply unit, set the POWER BUS to ON (factory default).
For use with an additional power supply unit, it is preferable to set the POWER BUS to OFF, in order to
avoid overloading the system when the additional power supply unit is not operational.
Notes about the device power supply
- With power supply from bus or auxiliary
Once powered, the device takes approximately 60 seconds to be operational. During the start-up
phase, the LED with the envelope icon, after remaining on steady for 5 seconds, begins to blink, and
then ashes at specic intervals: on for 0.2 seconds, o for 0.8 seconds. The device is operational when
the LED with the envelope icon
• ashes with at the following intervals: on for 0.8 seconds, o for 0.2 seconds: the device is ready
and awaiting conguration;
• is o steady: the device is congured and there are no un-read notications;
• is on steady: the device is congured and there are un-read notications.
In the event of a reset following an update, the start-up phase may take longer.
- With power supply via USB
Once powered, the device takes approximately 40 seconds to be operational: the PC detects the serial
port (via which conguration can take place using SaveProg) and the disc unit (via which the device
can be updated). LED and screen remain o since they are not powered.
- Energy saving mode
This setting is irrelevant in the event of use with an additional power supply unit.
Without an additional power supply unit, when the energy saving mode is active, the screen only
turns on if the video door entry system is on standby (no other device with a screen on). If this is not
the case, the screen stays o and a sound feedback informs the user that it cannot be turned on. In the
event of non priority calls or conversations under way (self-start, intercom calls, call to mobile device)
or power-on for other reasons (to navigate the settings menu, consult the call log, etc.), the screen will
instantly be turned o in the event of a priority call directed at any device in the system.
A video door entry system can be created with a single system power supply unit and up to 14 indoor
stations art. without an additional power supply unit and with the energy saving mode active.
By deactivating the energy saving mode, you can turn on several video entryphones simultaneously
and make use of the device functions without the limits set out above, in systems with up to 4 indoor
stations art. .
(*) Interrupteur BUS POWER
Pour l’utilisation sans alimentation supplémentaire, mettre le BUS POWER sur ON (réglage d’usine).
Pour l’utilisation avec une alimentation supplémentaire, il convient de mettre le BUS POWER sur
OFF pour éviter de surcharger l’installation au cas où l’alimentation supplémentaire ne serait pas
disponible.
Remarques sur l’alimentation du dispositif
- Avec alimentation via bus ou auxiliaire
Après avoir été mis sous tension, le dispositif commencera à fonctionner au bout de 60 secondes.
Durant la phase de mise en marche, la led enveloppe, après être restée allumée 5 secondes,
commence à clignoter puis s’allume et s’éteint selon les intervalles suivants : allumée 0,2 secondes,
éteinte 0,8 secondes. Le dispositif est en service lorsque la led enveloppe
• clignote selon l’intervalle : allumée 0,8 secondes, éteinte 0,2 secondes. Le dispositif est prêt et en
attente d’être conguré ;
• est éteinte : le dispositif est conguré et il n’y a aucune notication non lue ;
• est allumée : le dispositif est conguré et certaines notications n’ont pas été lues.
En cas de redémarrage suite à une mise à jour, la phase de mise en marche peut s’avérer plus
longue.
- Avec alimentation via USB
Après avoir été mis sous tension, le dispositif commencera à fonctionner au bout de 40 secondes
: l’ordinateur reconnaît le port série (à travers lequel sera faite la conguration avec SaveProg)
et l’unité disque (servant à la mise à jour du dispositif). La led et l’écran restent éteints car ils ne
sont pas alimentés.
- Modalité économie d'énergie
Ce réglage est insigniant en cas d’utilisation d’une alimentation supplémentaire.
Sans alimentation supplémentaire, si la modalité économie d'énergie est validée, l’écran s’allume
uniquement si le système portier-vidéo est au repos (aucun autre dispositif avec écran allumé).
Dans le cas contraire, l’écran reste éteint et une tonalité informe l’utilisateur qu’il sera impossible
de l'allumer. En cas d’appel ou de conversation non prioritaire en cours (auto-allumage, appel
intercommunicant, appel sur mobile) ou s’il est allumé pour d’autres raisons (navigation dans
le menu réglages, consultation du registre des appels, etc.), l’écran s’éteindra instantanément à
l’arrivée d’un appel prioritaire destiné à n’importe quel dispositif de l’installation.
Il est possible de réaliser un système portier-vidéo avec une seule alimentation de système et
un maximum de 14 postes intérieurs art. sans alimentation supplémentaire et avec la modalité
économie d'énergie activée.
En désactivant la modalité économie d'énergie, il est possible d’allumer simultanément plusieurs
portiers-vidéo et d’utiliser les fonctions du dispositif sans les limitations préalablement décrites,
sur des installations comptant jusqu’à 4 postes intérieurs art. .
(*) BUS POWER Schalter
Bei Verwendung ohne Zusatznetzteil den BUS POWER Schalter auf ON stellen (Werkseinstellung).
Bei Verwendung mit Zusatznetzteil sollte der BUS POWER Schalter auf OFF gestellt werden, um
Überlastungen der Anlage im Fall eines nicht funktionsfähigen Zusatznetzteils zu vermeiden.
Anmerkungen zur Geräteversorgung
- Bei Bus- oder Hilfsversorgung
Nach der Versorgung ist das Gerät in etwa 60 Sekunden funktionsbereit. Nachdem die LED Umschlag
während des Starts 5 Sekunden lang erleuchtet war, beginnt sie zu pulsieren und blinkt daraufhin
mit der Frequenz 0,2 Sekunden ein, 0,8 Sekunden aus. Das Gerät ist funktionsbereit, wenn die LED
Umschlag
• mit der Frequenz 0,8 Sekunden ein, 0,2 Sekunden aus blinkt: das Gerät ist im Wartezustand auf die
Konguration bereit;
• erloschen ist: das Gerät ist konguriert und es liegen keine ungelesenen Benachrichtigungen vor;
• erleuchtetist: das Gerät ist konguriert und es liegen ungelesene Benachrichtigungen vor.
Der Neustart nach einer Aktualisierung dauert möglicherweise länger als die normale Startphase.
- Bei USB-Versorgung
Nach der Versorgung ist das Gerät in etwa 40 Sekunden funktionsbereit: Der PC erfasst den seriellen
Anschluss (über den die Konguration mittels SaveProg erfolgt) und das Laufwerk (über das die
Aktualisierung des Geräts erfolgt). LED und Bildschirm sind nicht versorgt und daher erloschen.
- Modus Energieeinsparung
Diese Einstellung ist bei Verwendung des Zusatznetzteils nicht von Belang.
Ohne Zusatznetzteil und bei aktiviertem Modus Energieeinsparung schaltet sich st der Bildschirm nur
im Ruhezustand der Videosprechanlage ein (kein anderes Gerät mit eingeschaltetem Bildschirm).
Andernfalls bleibt der Bildschirm ausgeschaltet, wobei der Benutzer mit einem akustischen Feedback
darauf hingewiesen wird, dass ein Einschalten nicht möglich ist. Bei ablaufenden, nicht prioritären
Anrufen oder Gesprächen (Selbsteinschaltung, Internrufe, Anrufe an Mobilgeräte) oder einer
Einschaltung aus anderem Grund (Browsen im Menü Einstellungen, Einsicht der Anruiste usw.) wird
der Bildschirm im Fall eines prioritären Anrufs an ein Gerät der Anlage sofort ausgeschaltet.
Es können Videosprechanlagen mit einem System-Netzteil und bis zu 14 Innenstellen Art. ohne
zusätzliches Netzteil und mit aktiviertem Modus Energieeinsparung realisiert werden.
Durch Deaktivieren des Modus Energieeinsparung können in Anlagen mit bis zu 4 Innenstellen
Art. mehrere Videohaustelefone gleichzeitig eingeschaltet und die Funktionen des Geräts ohne die
vorgenannten Einschränkungen genutzt werden.

17
K40517G.01
(*) Interruptor BUS POWER
Para el uso sin alimentador adicional, coloque el BUS POWER en ON (predeterminado de fábrica).
Para el uso con alimentador adicional, es preferible posicionar el BUS POWER en OFF, para evitar
sobrecargas en la instalación cuando no sea operativo este alimentador.
Notas acerca de la alimentación del dispositivo
- Con alimentación por Bus o auxiliar
Una vez alimentado, el dispositivo tarda unos 60 segundos en estar operativo. Durante la fase de
puesta en marcha, después de permanecer encendido jo durante 5 segundos, el LED empieza
a pulsar y luego parpadea: encendido durante 0,2 segundos, apagado durante 0,8 segundos. El
dispositivo está operativo cuando el LED
• parpadea estando encendido durante 0,8 segundos, apagado durante 0,2 segundos: el
dispositivo está listo y a la espera de conguración;
• está apagado jo: el dispositivo está congurado y no hay noticaciones sin leer;
• está encendido jo: el dispositivo está congurado y hay noticaciones sin leer.
En caso de reinicio después de una actualización, la fase de puesta en marcha puede tardar más
tiempo.
- Con alimentación por USB
Una vez alimentado, el dispositivo tarda unos 40 segundos en estar operativo: el PC detecta el
puerto serie (para realizar la conguración con SaveProg) y la unidad de disco (para realizar la
actualización del dispositivo). El LED y la pantalla permanecen apagados al no estar alimentados.
- Modo ahorro energético
Esta conguración es irrelevante en caso de uso con alimentador adicional.
Sin alimentador adicional, cuando está activado el modo ahorro energético, la pantalla se
enciende solo si la instalación de videoportero está en reposo (ningún otro dispositivo con
pantalla encendida). De lo contrario, la pantalla permanece apagada y una señal acústica informa
al usuario de la imposibilidad de encenderse. En caso de llamada o conversación no prioritaria
en curso (autoencendido, intercomunicante, llamada a móvil) o encendido por otros motivos
(navegación por el menú de ajustes, consulta del registro de llamadas, etc.), la pantalla se apaga
instantáneamente en caso de llamada prioritaria dirigida a cualquier dispositivo de la instalación.
Es posible realizar una instalación de videoportero con un alimentador del sistema y hasta 14
aparatos internos art. desprovistos de alimentador adicional y con el modo ahorro energético
activado.
Desactivando el modo ahorro energético, es posible encender simultáneamente varios
videoporteros y disfrutar de las funciones del dispositivo sin las limitaciones previamente descritas,
en instalaciones de hasta 4 aparatos internos art. .
(*) Interruptor BUS POWER
Para uma utilização sem alimentador suplementar, posicione o BUS POWER em ON (factory default).
Para uma utilização com alimentador suplementar, é preferível posicionar o BUS POWER em OFF, para
evitar uma sobrecarga da instalação no caso de o alimentador suplementar não estar operativo.
Notas sobre a alimentação do dispositivo
- Com alimentação a partir de bus ou auxiliar
Uma vez ligado à alimentação, o dispositivo demora cerca de 60 segundos a estar operativo. Durante a
fase de arranque, o LED do envelope, depois de se ter mantido aceso xo durante 5 segundos, começa
a pulsar e, nalmente, pisca com determinados tempos: aceso por 0,2 segundos, apagado por 0,8
segundos. O dispositivo está operativo quando o LED do envelope
• pisca com determinados tempos, aceso por 0,8 segundos, apagado por 0,2 segundos: o dispositivo
está pronto e à espera de conguração;
• está apagado xo: o dispositivo está congurado e não há noticações não lidas;
• está aceso xo: o dispositivo está congurado e há noticações não lidas.
Em caso de reinicialização após uma atualização, a fase de arranque pode exigir mais tempo.
- Com alimentação de USB
Uma vez ligado à alimentação, o dispositivo demora cerca de 40 segundos a estar operativo: o PC
deteta a porta série (através da qual faz a conguração com SaveProg) e a unidade disco (através da
qual faz a atualização do dispositivo). Os LEDs e o ecrã mantêm-se apagados enquanto não estão
alimentados.
- Modo de poupança de energia
Esta denição é irrelevante em caso de utilização com um alimentador suplementar.
Sem alimentador suplementar, quando o modo de poupança de energia está ativo, o ecrã só se acende
se o sistema do videoporteiro estiver em repouso (nenhum outro dispositivo com ecrã ligado). Caso
contrário, o ecrã mantém-se desligado e um feedback sonoro informa o utilizador da impossibilidade
de se ligar. Nos casos de chamada ou conversação não prioritárias em curso (autoacendimento,
intercomunicante, chamada para telemóvel) ou de acendimento por outros motivos (navegação no
menu de denições, consulta do registo de chamadas, etc.), o ecrã será instantaneamente desligado
em caso de chamada prioritária dirigida a um dispositivo qualquer do sistema.
É possível realizar um sistema de videoporteiro com um único alimentador de sistema e até 14 postos
internos art. desprovidos de alimentador suplementar e com o modo de poupança de energia ativo.
Desativando o modo de poupança de energia é possível ligar simultaneamente vários videoporteiros
e usufruir das funções do dispositivo sem as limitações anteriormente descritas, em sistemas com até
4 postos internos art. .
(*) Διακόπτης BUS POWER
Για χρήση χωρίς συμπληρωματικό τροφοδοτικό, τοποθετήστε τον διακόπτη BUS POWER στη θέση ON (εργοστασιακή
προεπιλογή).
Για χρήση με συμπληρωματικό τροφοδοτικό, συνιστάται να τοποθετήστε τον διακόπτη BUS POWER στη θέση OFF,
ώστε να αποφευχθεί η υπερφόρτωση της εγκατάστασης στην περίπτωση που δεν λειτουργεί το συμπληρωματικό
τροφοδοτικό.
Σημειώσεις για την τροφοδοσία του μηχανισμού
- Με τροφοδοσία από το bus ή βοηθητική τροφοδοσία
Μετά την τροφοδοσία, απαιτούνται περίπου 60 δευτερόλεπτα για να καταστεί λειτουργικός ο μηχανισμός. Κατά τη
φάση εκκίνησης, η λυχνία LED του φακέλου, αφού παραμείνει σταθερά αναμμένη για 5 δευτερόλεπτα, ξεκινά να
πάλλεται και τέλος αναβοσβήνει για τα εξής χρονικά διαστήματα: ανάβει για 0,2 δευτερόλεπτα και σβήνει για 0,8
δευτερόλεπτα. Ο μηχανισμός λειτουργεί όταν η λυχνία LED του φακέλου
• αναβοσβήνει για τα εξής χρονικά διαστήματα - ανάβει για 0,8 δευτερόλεπτα, σβήνει για 0,2 δευτερόλεπτα: ο
μηχανισμός είναι έτοιμος και σε αναμονή διαμόρφωσης,
• είναι σβηστή: ο μηχανισμός είναι διαμορφωμένος και δεν υπάρχουν ειδοποιήσεις που δεν έχουν αναγνωσθεί,
• ανάβει σταθερά: ο μηχανισμός είναι διαμορφωμένος και υπάρχουν ειδοποιήσεις που δεν έχουν αναγνωσθεί.
Στην περίπτωση επανεκκίνησης μετά από ενημέρωση, μπορεί να απαιτείται κάποιος χρόνος για την ολοκλήρωση της
φάσης επανεκκίνησης.
- Με τροφοδοσία από USB
Μετά την τροφοδοσία, απαιτούνται περίπου 40 δευτερόλεπτα για να καταστεί λειτουργικός ο μηχανισμός: ο Η/Υ
ανιχνεύει τη σειριακή θύρα (μέσω της οποίας γίνεται η διαμόρφωση με το SaveProg) και τη μονάδα δίσκου (μέσω
της οποίας γίνεται η ενημέρωση του μηχανισμού). Η λυχνία LED και η οθόνη παραμένουν απενεργοποιημένες καθώς
δεν τροφοδοτούνται.
- Λειτουργία εξοικονόμησης ενέργειας
Αυτή η ρύθμιση δεν είναι σχετική όταν χρησιμοποιείται συμπληρωματικό τροφοδοτικό.
Χωρίς συμπληρωματικό τροφοδοτικό, όταν η λειτουργία εξοικονόμησης ενέργειας είναι ενεργοποιημένη, η οθόνη
ανάβει μόνο εάν η εγκατάσταση θυροτηλεόρασης βρίσκεται σε κατάσταση αδράνειας (κανένας άλλος μηχανισμός με
οθόνη αναμμένη). Σε αντίθετη περίπτωση, η οθόνη παραμένει απενεργοποιημένη και ένας ηχητικός τόνος ενημερώνει
τον χρήστη όταν δεν μπορεί να ενεργοποιηθεί. Στην περίπτωση που υπάρχει σε εξέλιξη κλήση ή συνομιλία που δεν έχει
προτεραιότητα (αυτόματη ενεργοποίηση, κλήση ενδοεπικοινωνίας, κλήση προς φορητή συσκευή) ή ενεργοποίησης
για άλλους λόγους (πλοήγηση στο μενού ρυθμίσεων, άνοιγμα μητρώου κλήσεων κλπ.), η οθόνη θα απενεργοποιηθεί
στιγμιαία στην περίπτωση κλήσης με προτεραιότητα προς έναν οποιονδήποτε μηχανισμό της εγκατάστασης.
Μπορείτε να δημιουργήσετε μια εγκατάσταση θυροτηλεόρασης με ένα τροφοδοτικό συστήματος και έως 14
εσωτερικούς σταθμούς κωδ. χωρίς συμπληρωματικό τροφοδοτικό και με τη λειτουργία εξοικονόμησης ενέργειας
ενεργοποιημένη.
Εάν απενεργοποιηθεί η λειτουργία εξοικονόμησης ενέργειας, είναι δυνατή η ταυτόχρονα ενεργοποίηση πολλών
θυροτηλεοράσεων και η χρήση των λειτουργιών του μηχανισμού χωρίς τους περιορισμούς που περιγράφηκαν
παραπάνω, σε εγκαταστάσεις με έως 4 εσωτερικούς σταθμούς κωδ. .
BUS POWER (*)
) "" ON BUS POWER
.(
"" OFF BUS POWER
.
BUS -
. 60
5 LED
. 0.8 0.2 :
LED
: 0.2 0.8 •
: •
. : •
.
USB -
: 40
) (SaveProg )
. LED .(
-
.
.( )
.
( )
( )
.
14
.
4
.

18
K40517G.01
Morsetti Descrizione
1, 2 Bus Due Fili Plus
E+, E-
(*)
Ingresso alimentazione supplementare
(Alimentatore 6923)
FP
(*)
Ingresso "Chiamata Fuori Porta locale" (riferimento
al morsetto M).
IN
(*)
Ingresso "Funzione Allerta" (riferimento al
morsetto M).
M
(*)
Massa: Riferimento di massa per gli ingressi e le
uscite.
CH
(*)
Uscita "Ripetizione di chiamata" (rifermento al
morsetto M)
* Nota: la distanza massima dei collegamenti ai morsetti è di 10m.
• Morsettira removibile dalla staa per eventuali esigenze di cablaggio.
• Terminal block which can be removed from the bracket for possible wiring requirements.
• Bornier amovible de l'étrier pour toute exigence de câblage.
• Von der Halterung zwecks Verkabelung abnehmbare Klemmenleiste.
• Caja de bornes que se puede retirar del soporte para el cableado.
• Placa de terminais amovível do suporte para eventuais exigências de cablagem.
• Επαφή κλέμας αφαιρούμενη από τη βάση για πιθανές ανάγκες καλωδίωσης.
•.
Nota : le funzioni associate agli ingressi FP "Chiamata Fuori
Porta locale" e IN "Funzione Allerta" possono essere modicate
tramite programmazione. L'uscita CH "Ripetizione di chiamata"
è programmabile: Open Collector (default), o 12V 100mA. Per le
funzioni attivabili fare riferimento al manuale uso e congurazione e
al software di congurazione.
Terminals Description
1, 2 Due Fili Plus Bus
E+, E-
(*)
Additional power supply input (Power supply unit
6923)
FP
(*)
"Local Landing Call" input (reference to terminal M).
IN
(*)
"Alert Function” input (reference to terminal M).
M
(*)
Ground: Ground reference for inputs and outputs.
CH
(*)
"Repeat call" output (reference to terminal M)
* Note: the maximum connection distance to the terminals is 10 m.
Note : functions associated with the FP “Local Landing Call” and IN "Alert
Function” inputs can be modied via programming. The CH “Repeat call”
output can be programmed: Open Collector (default), or 12V 100mA. For
the functions which can be activated, please refer to the conguration
software use and conguration manual.
• Morsettiera di collegamento
• Connection terminal block
• Bornier de connexion
• Anschlussklemmenleiste
• Caja de bornes de conexión
• Placa de terminais de ligação
• Κλέμα σύνδεσης:
•
Table of contents
Other Elvox Intercom System manuals

Elvox
Elvox GIOTTO Series User manual

Elvox
Elvox Digibus 1284 Guide

Elvox
Elvox PETRARCA 6029 User manual

Elvox
Elvox K40515.E User manual

Elvox
Elvox K40900 User manual

Elvox
Elvox 6202/A User manual

Elvox
Elvox 62KF User manual

Elvox
Elvox 68TU/930 User manual

Elvox
Elvox 6604 User manual

Elvox
Elvox 6614 User manual

Elvox
Elvox 68IG/R Assembly instructions

Elvox
Elvox 3300 User manual

Elvox
Elvox Giotto 6329 Assembly instructions

Elvox
Elvox 6931 Assembly instructions

Elvox
Elvox 69RH Assembly instructions

Elvox
Elvox Giotto 6344 User manual

Elvox
Elvox 5652 User manual

Elvox
Elvox PETRARCA 6029 User manual

Elvox
Elvox 6931 User manual

Elvox
Elvox ART. 89F4/T User manual