PAVO Colorado User manual

1
A4 Colorado Laminator
Instruction Manual
PRODUCT DESCRIPTION
SPECIFICATION
Voltage: 220-240V/50Hz Current: 1.6 A
Ready time: 6 Min/80Mic Entry width: 235 mm
Thickness: 0.6 mm Pouch: Cold/80/~125 Mic
speed: 250mm/Min Rollers: 2
Size: 390 x 145 x 98 mm N.W.: 1.0 Kg
SAFETY NOTES
1. This laminator should be horizontally displayed on a flat surface with
good ventilation.
2. This laminator should only use power 220-240V/50Hz and should be
used indoors only.
3. This laminator is for home and office use only.
4. NEVER OPEN THIS LAMINATOR WHILE IN USE.
UTILITY
The laminator can both cold and hot pouches from name card size to A4 size.
It provides best lamination for hot pouches of 80Mic, 100Mic and 125Mic.
It preserves your photo, document and card, etc. in its original color against
aging from prolonged time.
OPERATION
POWER ON and OFF
Connect the plug to the main power, press the switch button to turn on the
machine. The Power LED would turn into Red. If you press switch button
to "Cold" position, the machine is under cold lamination status. If you press
switch to "Hot" position , the machine is under hot lamination status.
To turn off this laminator, press the switch button back to "Off" position,
power will be cut off and laminator is shut off.
COLD LAMINATION
Please make sure the machine is cool when you use cold laminating. Do not
use cold lamination if you just finish the job of hot lamination. When Ready
LED turns on in green, put the paper into your laminating pouch, and insert
Entry
LED
Switch Button
ABS Button

2
the pouch into laminator through Laminator front entry.
HOT LAMINATION
If you press the switch button to "Hot" position, you would have to wait for
about 6 minutes until the Green Ready LED turns on , and then put the
paper into pouch, and insert the pouch into laminator through Lamination
Entry.
Note: During lamination, the “Ready LED” may go out, as heat is
absorbed by the laminating pouch. This is normal. Do not need to stop
and wait for “Ready LED” to turn on light again. Please continue to
laminate your document or photo !
CLEAR THE JAMMED POUCH
This laminator is designed with a manual release device to clear the jammed
pouch. When a misfeed or jam occurs, press down "ABS " button and pull
out the jammed pouch..
MAINTENANCE AND WARNING
1. To clean or move around, make sure that this laminator is turned off.
2. Do not laminate dirty pouches, clean it before lamination.
3. Do not use this laminator in damp conditions.
4. Do not laminate anything that is more than 0.6mm thickness for best seal.
5. Do not laminate heat sensitive paper.
6. Do not insert open side of the laminating pouch into Lamination Entry, it
may lead to jamming or curling inside. Enter the pouch with the closed side
first.
WARRANTY
This product comes with two years limited warranty.

3
Plastifieuse Colorado A4
Manuel d'instructions
DESCRIPTION DU PRODUIT
SPÉCIFICATIONS
Tension : 220-240V/50Hz Courant : 1.6 A
Délai de
préparation:
6 Min/80Mic Largeur
d'entrée :
235 millimètres
Épaisseur : 0.6 millimètres Plastification : à froid/80/~125 Mic
Vitesse : 250mm/Min Rouleaux : 2
Dimensions : 390 x 145 x 98
millimètres
N.W. : 1.0 kilogramme
NOTES DE SÉCURITÉ
1. Cette plastifieuse devra être placée en position horizontale sur une surface
plate avec une bonne ventilation.
2. Cette plastifieuse doit être branchée à un courant électrique de
220-240V/50Hz et doit être utilisée uniquement à l'intérieur.
3. Cette plastifieuse est conçue uniquement pour la maison ou le bureau.
4. N'OUVREZ JAMAIS CETTE PLASTIFIEUSE LORSQU'ELLE EST EN
FONCTION.
UTILISATION
La plastifieuse peut plastifier à froid ou à chaud des documents allant du
format d'une carte de visite jusqu'à un format A4. Elle fournit la meilleure
plastification à chaud de 80Mic, de 100Mic et de 125Mic. Elle protège vos
photos, documents, cartes, etc., et en préserve la couleur d’origine contre le
vieillissement et l'usure du temps.
MANIPULATION
ACTIVER-DÉSACTIVER
Branchez la plastifieuse à une prise de courant, appuyez sur l'interrupteur
pour mettre en marche la machine. Le voyant LED deviendra rouge. Si vous
appuyez sur la position « Cold » (Froid) du commutateur, la machine est en
position plastification à froid. Si vous appuyez sur la position « Hot »
(Chaud), la machine est en position plastification à chaud.
Pour arrêter la plastifieuse, appuyez à nouveau sur « Off », le courant
électrique sera interrompu et la machine s'éteindra.
Entrée
LED
Bouton
commutateur
Bouton ABS

4
PLASTIFICATION À FROID
Assurez-vous que la machine est froide avant d'effectuer la plastification à
froid. N'employez pas la plastification à froid si vous venez juste d'effectuer
une plastification à chaud. Quand la LED verte s'allume, insérez le papier
dans la pochette à plastifier et glissez la pochette dans la plastifieuse à travers
son entrée frontale.
PLASTIFICATION À CHAUD
Appuyez sur la position « Hot » du commutateur, attendez environ 6 minutes
jusqu'à ce que le voyant LED vert s'allume, insérez ensuite le papier dans la
pochette et glissez la pochette dans la plastifieuse à travers l'entrée de celle-ci.
Note : Pendant la plastification, il se peut que le voyant « LED Ready »
s'éteigne, étant donné que la chaleur est absorbée par la pochette de
plastification. Cela est normal. Vous n'avez pas besoin d'interrompre
l'opération et attendre à ce que le voyant « LED Ready » s'allume à
nouveau. Continuez tranquillement à plastifier votre document ou
photo !
DÉGAGER LA POCHETTE BLOQUÉE
Cette plastifieuse est conçue avec un dispositif de déclencheur manuel pour
libérer la pochette bloquée. Lorsque la pochette s'enroule ou se bloque,
appuyez sur le bouton ABS et retirez la pochette bloquée...
ENTRETIEN ET AVERTISSEMENTS
1. Avant de nettoyer ou déplacer la plastifieuse, assurez-vous qu'elle est
éteinte.
2. N'utilisez pas de pochettes sales, nettoyez-les avant la plastification.
3. N'utilisez pas cette plastifieuse dans des locaux humides.
4. Pour un scellage parfait, ne plastifiez aucune feuille ayant une épaisseur de
plus de 0.6mm.
5. Ne plastifiez pas le papier thermosensible.
6. N'insérez pas le côté ouvert de la pochette à plastifier dans l'entrée de la
plastifieuse car elle pourrait se bloquer ou s'enrouler à l'intérieur de la
plastifieuse. Insérez la pochette du côté soudé.
GARANTIE
Ce produit a deux ans de garantie.

5
A4 Colorado Laminiergerät
Bedienungsanleitung
PRODUKTBESCHREIBUNG
SPEZIFIKATIONEN
Spannung: 220-240V/50Hz Stromstärke: 1.6 A
Anheizzeit: 6 Min/80Mic Zuführbreite: 235 mm
Papierdicke: 0.6 mm Taschen: Kalt/80/~125 Mic
Geschw.: 250mm/Min Rollen: 2
Maße: 390 x 145 x 98 mm Nettogew. 1.0 Kg
SICHERHEITSHINWEISE
5. Dieses Laminiergerät sollte waagerecht auf einer ebenen Unterlage mit
guter Luftzufuhr aufgestellt werden.
6. Das Laminiergerät muss mit Strom von 220-240V/50Hz betrieben werden
und ist nur für den Innengebrauch geeignet.
7. Dieses Laminiergerät ist nur für die private Verwendung oder Verwendung
im Büro vorgesehen.
8. ÖFFNEN SIE DAS GERÄT NIEMALS BEI LAUFENDEM BETRIEB.
VERWENDUNG
Das Laminiergerät kann sowohl Kalt- als auch Heiß-Laminiertaschen von
Visitenkartengröße bis A4 verarbeiten. Die beste Laminierfunktion erhält
man mit Heiß-Laminiertaschen von 80Mic, 100Mic and 125Mic. Es bewahrt
Ihr Foto, Ihre Dokumente, Karten usw. in den Originalfarben und schützt sie
vor Alterung durch längere Aufbewahrung.
BETRIEB
EIN- und AUSSCHALTEN
Stecken Sie den Stecker in die Steckdose und drücken Sie den Schalter, um
das Gerät einzuschalten. Die Betriebsanzeige-LED leuchtet rot. Wenn Sie den
Schalter in die Position "Cold" schieben, befindet sich das Gerät im
Kaltlaminiermodus. Wenn Sie den Schalter in die Position "Hot" schieben,
befindet sich das Gerät im Heißlaminiermodus.
Zum Abschalten des Laminiergerätes schieben Sie den Schalter wieder in die
Position "Off", der Strom wird unterbrochen und das Gerät ist ausgeschaltet.
KALTLAMINIEREN
Zuführg.
LED
Schalter
ABS Knopf

6
Achten Sie darauf, dass das Gerät nicht heiß ist, wenn Sie kalt laminieren
möchten. Laminieren Sie nicht kalt, wenn Sie gerade heiß laminiert haben.
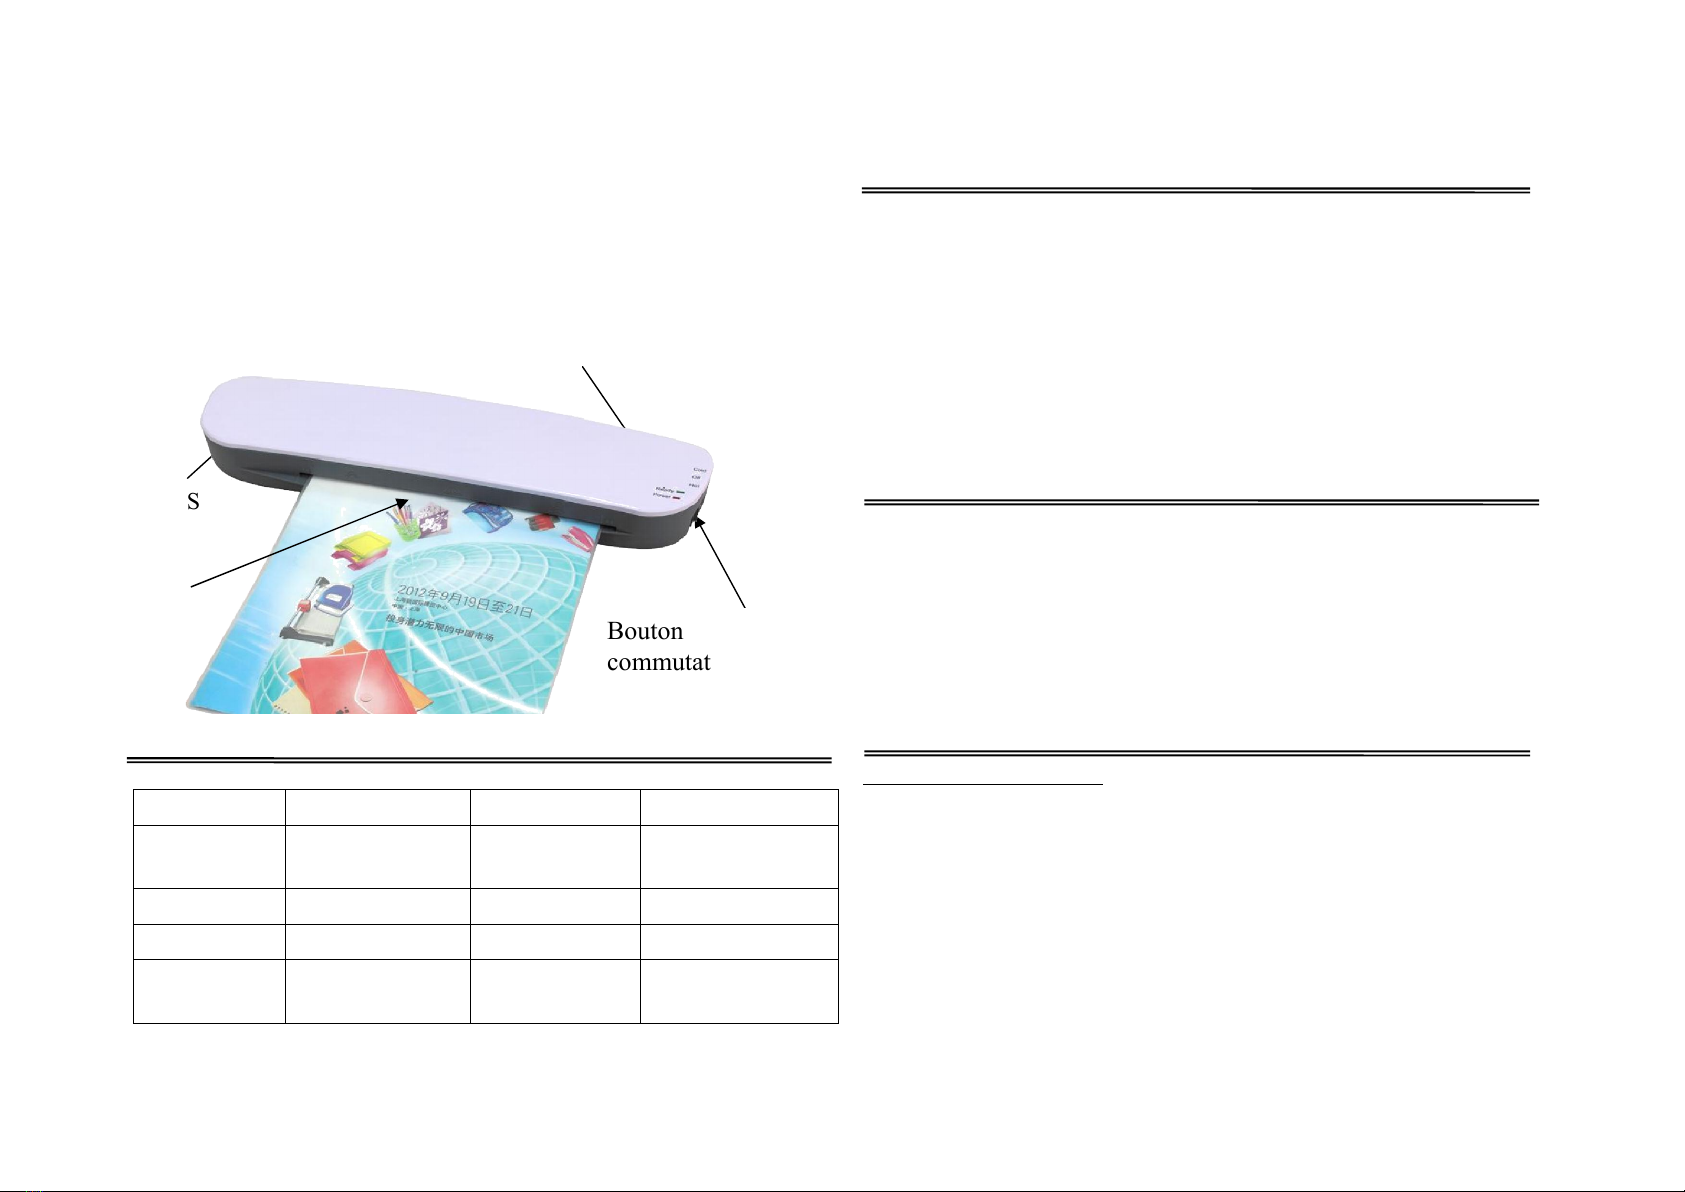
Wenn die Bereitschafts-LED grün leuchtet, tun Sie das Papier in die
Laminiertasche und führen Sie die Laminiertasche durch die vordere
Zuführung in das Laminiergerät ein.
HEISSLAMINIEREN
Wenn Sie den Schalter in die Position "Hot" bringen, müssen Sie etwa 6
Minuten warten, bis die grüne Bereitschaftsanzeige aufleuchtet. Tun Sie dann
das Papier in die Tasche und führen die Tasche durch die Zuführung in das
Laminiergerät ein.
Hinweis: Beim Laminieren kann es vorkommen, dass die grüne
Bereitschaftsanzeige ausgeht, weil die Hitze von der Laminiertasche
aufgenommen wurde. Das ist ganz normal. Sie brauchen nicht
anzuhalten und zu warten, bis das grüne Licht wieder aufleuchtet.
Fahren Sie einfach mit dem Laminieren Ihres Dokuments oder Fotos
fort !
EINGEKLEMMTE TASCHEN ENTFERNEN
Das Laminiergerät ist mit einer manuellen Freigabevorrichtung ausgestattet,
damit eingeklemmte Taschen entfernt werden können. Wenn eine Tasche
falsch eingeführt wurde oder sich verklemmt hat, drücken Sie den "ABS"
Knopf und ziehen Sie die eingeklemmte Tasche heraus.
PFLEGE UND HINWEISE
1. Vergewissern Sie sich vor Reinigung oder Transport des Gerätes, dass das
Laminiergerät ausgeschaltet ist.
7. Laminieren Sie niemals verschmutzte Laminiertaschen, säubern Sie sie vor
Benutzung.
8. Benutzen Sie das Laminiergerät nicht unter feuchten Bedingungen.
9. Laminieren Sie keine Gegenstände, die dicker sind als 0.6 mm, so erhalten
Sie die beste Versiegelung.
10. Laminieren Sie auf keinen Fall hitzeempfindliches Papier.
11. Führen Sie Laminiertaschen niemals mit der offenen Seite voran in die
Laminier-Zuführung ein, das kann im Gerät zu einem Stau oder zu Knittern
führen. Führen Sie die Laminiertasche mit der geschlossenen Seite zuerst in
das Gerät ein.
GARANTIE
Für dieses Produkt gilt eine auf 2 Jahre begrenzte Garantie.
Table of contents
Languages:
Other PAVO Laminator manuals
Popular Laminator manuals by other brands

Fellowes
Fellowes Voyager 125 instructions

Royal Sovereign
Royal Sovereign RSC-1651LS/LSH Service manual

UNITED OFFICE
UNITED OFFICE ULG 350 B1 Operating instructions and safety instructions

GBC
GBC GBC 2064WF-1 Installation and operating manual

Royal Sovereign
Royal Sovereign RSL-2701 owner's manual

UNITED OFFICE
UNITED OFFICE ULG 300 A1 operating instructions