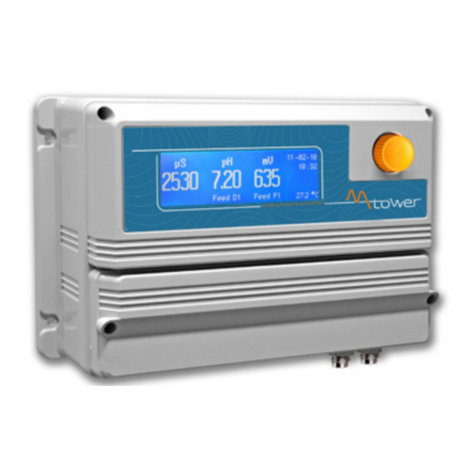
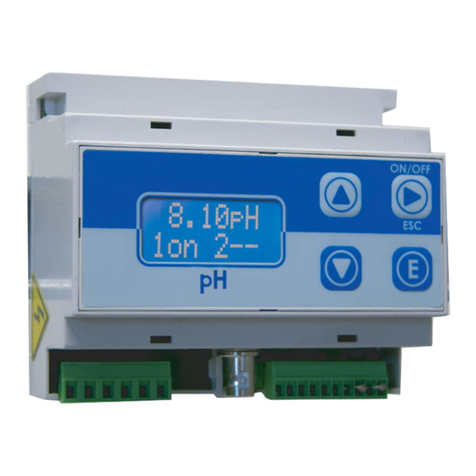
Emec JA Series User manual

1
OPERATING INSTRUCTIONS FOR
“JA SERIES” / “JA SERIES PRO” CONTROLLERS
This manual contains safety information that if ignored can
endanger life or result in serious injury. They are indicated
by this icon.
Keep the controller protected from sun and water.
Avoid water splashes.
Read Carefully ! ENGLISH Version
R19-07-19

2
Danger!
GENERAL SAFETY GUIDELINES
In emergencies the controller should be switched off immediately! Disconnect the power cable
from the power supply!
When installing always observe local regulations!
Manufacturer is not liable for any unauthorized use or misuse of this product that may cause injury,
damage to persons and / or materials.
Caution! Controller must be accessible at all times for both operating and servicing. Access must not be
obstructed in any way!
Feeder should be interlocked with a no-flow protection device to automatically shut-off the pumps
when there is no flow!
Pumps and accessories must be serviced and repaired by qualified and authorized personnel only!
Always discharge the liquid end before servicing the controller!
Empty and rinse the liquid end before work on a pump which has been used with hazardous or
unknown chemicals!
Always read chemical safety datasheet!
Always wear protective clothing when handling hazardous or unknown chemicals!
Controller must be operated / serviced by trained technicians only!
All connection operations must be performed while the controller is not connected to main supply!
Missed activation for Min/Max alarm and Maximum Dosing Alarm may cause hazardous overdosing!
NORME CE
EC RULES(STANDARD EC)
NORMAS DE LA CE
Direttiva Bassa Tensione
Low Voltage Directive
Directiva de baja tensión
Direttiva EMC Compatibilità Elettromagnetica
EMC electromagnetic compatibility directive
EMC directiva de compatibilidad electromagnética
2014/35/UE
2014/30/UE
⎬
⎬

3
Introduction
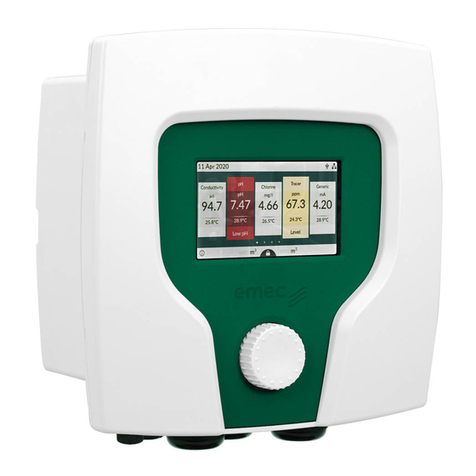
JA SERIES is a microprocessor based digital controller for conductivity** or pH or Redox or chlorine or temperature
(see controller’s label for bought model) with temperature reading, mA module and native modbus. On/Off, impulsive
proportional and PID are main working modes.Working ranges for Conductivity are from 0nS to 9999S with automatic
range and Measure / product** for best results. All information are provided through a large LCD display. Using
a revolutionary wheel control the controller can be easily programmed. JA SERIES is housed in a IP45 plastic box.
INPUTS:
- Stand-by
- Flow
- Conductivity probe
- Temperature probe
**Ohm - H3PO4- H2SO4- HNO3- HCl - NaOH - NaCl - TDS / PPM (CaCO3and NaCl)
Some functions are available for PRO model only (see page 25)
The wheel
JA SERIES has a wheel that must be used to control the controller. Wheel can be rotated in both directions to scroll
over the menus and / or pressed to confirm highlighted selection / value.
NOTE: Once changes are made press “OK” to save and exit from submenu. Press “ESC” to exit without saving.
Rotate wheel to scroll through menus or options
Press wheel to select highlighted option
OUTPUTS:
- 2 relay outputs free contact + 1 Alarm output
- 1 opto coupled pulses output
- 1 current output (mA)
SCROLL Click here
for previous menu and
saving* settings
*where specied
PRESS

4
Mainboard Connections JACD and JACD PRO series
Unplug controller from main power supply then perform connections by following the picture below.
DC Version Model:
1(-) - 2(+): 12 or 24VDC (see controller’s label)
AC Version Model:
L(Live) - N(Neutral): 85÷264VAC or 18÷36VAC 50/60 Hz (see controller’s label)
3(Common) - 4(N.O.): Setpoint 1 Output (free contact output max 2A)
5(Common) - 6(N.O.): Setpoint 2 Output (free contact output max 2A)
7(Common) - 8(N.O.): Alarm Output (free contact output max 2A)*
9(-) - 10(+): Standby contact*
11(-) - 12(+): Opto coupled output NPN PULSE.To use with “IS” , “MF” ,“PLUS” series pumps (max 50mA / 24VDC)*
13(GND) - 14(- Blue) - 15(Black) - 16(+ Brown): Proximity sensor mod.“SEPR” (dont’ remove jumper on blocks 13 and 14)
17(- RS485) - 18(+ RS485): RS485 (Modbus / Communication)*
19 (OUT Red) - 20 (IN Black) - 21(GND): Conductivity probe input
23(Green) - 24(Brown) - 25(White) - 26(Yellow): PT100 temperature probe (remove jumper / resistor when probe is installed)
27(+) - 28(-): mA Current Output (Max resistive load: 500Ohm)
Warning: Connections must be performed by qualified and trained personnel only
*Some functions aren’t available on standard models (see page 25)
L1 N2 3 4 5 6 7 8 9 10 11 12 13 14 15 16
17 18 19 20 21 22 23 24 25 26 27 28

5
9 10 11 12 13 14 15 16
17 18 19 20 21 22 23 24 25 26 27 28 29 30 31 32 33 34
L1 N2 3 4 5 6 7 8
Connections for JAPH / JARH / JACDIND / JACL / JASCL / JATEMP and PRO series
Unplug controller from main power supply then perform connections by following the picture below.
DC Version Model:
1(-) - 2(+): 12 or 24VDC (see controller’s label)
AC Version Model:
L(Live) - N(Neutral): 85÷264VAC or 18÷36VAC 50/60 Hz (see controller’s label)
3(Common) - 4(N.O.): Setpoint 1 Output (free contact output max 2A)
5(Common) - 6(N.O.): Setpoint 2 Output (free contact output max 2A)
7(Common) - 8(N.O.): Alarm Output (free contact output max 2A)*
9(-) - 10(+): Standby contact*
11(-) - 12(+): Opto coupled output NPN PULSE.To use with “IS” , “MF” ,“PLUS” series pumps (max 50mA / 24VDC)*
13(GND) - 14(- Blue) - 15(Black) - 16(+ Brown): Proximity sensor mod.“SEPR” (dont’ remove jumper on blocks 13 and 14)
17(-RS485) - 18(+RS485): RS485 (Modbus / Communication)*
20(Black - Blue) - 21(Grey or Green) - 22(Red): Inductivity probe input (JA CDIND models only)
23(-485 Green) - 24(+485 White) - 25(GND Black) - 26(+5V Red): SCL probe input (JA CL models only)
27(+) - 28(-): ECL6 probe input (JA CL models only)
29(Green) - 30(Pink) - 31(White) - 32(Yellow): PT100 temperature probe (remove jumper / resistor when probe is installed)
29/30(White) - 31/32(Black): temperature from inductivity probe
29(Green) - 30(Brown) - 31(White) - 32(Yellow): PT100 temp.probe (remove jumper / resistor when probe is installed)
33(+) - 34(-): mA Current Output (Max resistive load: 500Ohm)
Warning: Connections must be performed by qualified and trained personnel only
*Some functions aren’t available on standard models (see page 25)
Probe connector for
pH or ORP model only
ECDIND PT
ECDSIND PT
PH/RH/CL

6
Main Screen
When into normal operating mode, JA SERIES shows the following main screen:
TEMPERATURE (1)
READING (2)
OPTIONS (3)
Main screen zones:
(1) TEMPERATURE Temperature read by PT100 probe.
(2) READING Values read by the probe. “mS” - “uS” - “PPM/TDS”* are the measuring unit
for Conductivity probe. To change unit refer to “GENERAL OPTIONS” menu.
“mV” is the measuring unit for “JA RH” models.
“pH” is the measuring unit for “JA PH” models.
“mg/l” is the measuring unit for “JA CL” models.
According to selected probe, this field may appear different.
(3) OPTIONS (A) Quick Status Check summary (see page 7)
(B) Main menu (see page 9)
(C) Enable or Disable the controller (it still remains powered)
These fields are related to STANDBY / NO FLOW / ALARM condition.
During critical situations a warning / alarm message may appear. To
in-depth explanation completely rotate clockwise the wheel to review main
controller parameters and current outputs status.
*PPM / TDS unit is based on 1mS = 640 PPM of TDS ( CaCO3total dissolved solids)
*PPM / TDS unit is based on 1mS = 680 PPM of TDS (NaCl total dissolved solids)
Note: the word “PUMP” as shown into this manual refers to a “dosing device” connected to the controller!
NOTIFICATION AREA
LAN CONNECTION OK - ERMES CONNECTION OK
LAN CABLE DISCONNECTED
LAN CABLE CONNECTED - ERMES NOT AVAILABLE
Connection Status
CONNECTED TO USB PEN-DRIVE
ERMES OK
A B C
NOTIFICATION AREA
SETPOINTS DOSING ACTIVITY (% TIME ON)
ALTERNATE OUT1 - OUT2 - IS outputs

7
Quick status check
From main screen select to review main controller parameters and current outputs status.
Software Release
Local Time
Local Date
Setpoint Output 1 status*
Setpoint Output 2 status*
Pulse Output status (YES: ENABLED)
mA Output reading
LAN connection status (option)
WIFI connection status (option)
GSM Modem connection status (option)
*based on 100 seconds scale,
i.e.: 7% (7seconds ON, 93seconds off)

8
Password
At first start of the controller there is no password set. To set a new password with administrator privileges to enter
the main menu by clicking on the icon, ,then select “Settings”, press the dial and select “PASSWORD”. Press
the knob and insert a code of four numbers. Move on the icon and press the knob to save the settings. The new
administrator password (ADMIN) is now active.
To set a new passcode choose “GENERAL OPTIONS” from “Main Menu” , move on “PASSWORD”, click on wheel
and enter a four numbers code. Move on to save settings. The new passcode is activated.
Lost passcode ?
Please dont’ forget the passcode (if changed). In the unfortunate event, please call your local distributor for unlocking procedure. There is no way for you
to recover lost passcode.
For JA PH model shown
unit is pH
For JA RH model shown
unit is mV

9
“Main Menu” list
To grant access into “Main Menu” enter the passcode (as described in previous chapter). Once into “Main Menu”
rotate the wheel to scroll through all the options available.
Settings (see page 9)
Flow (see page 20)
General Options (see page 20)
Reset Controller (restore all parameters)
Out mA (see page 21)
Standby (see page 21)
Measure (see page 10)
\ SetPoint (see page 10)
Calibration (see page 14)
Compensation for JA CD model (see page 17)
PID Parameters (see page 13)
MODBUS (see page 19)

10
“Settings / Measure” (JA CD / CDIND series only)
According to connected probe the “K” factor can be selected between 1 - 10 - 001 - 01. “Automatic Range” let the controller
automatically set the most suitable scale according to reading range or press the wheel to choose between Ohm - H3PO4
- H2SO4 - HNO3 - HCl - NaOH - NaCl - TDS / PPM - 0-999.9nS - 0-999.9uS - 0-999mS (see page 22 for more info).
Move cursor on to save changes. Move to for previous menu without saving changes. For “JA CDIND” version the
“automatic range” item is replaced by the working scale selector (ppm TDS: 3000 mS - 300 mS - 30 mS).
Note: these changes must be set according to probe reading capacity. See probe’s datasheet to choose
correct values.
“Settings / Set-Point”
Before to enter setpoint parameters choose which output to configure between OUT 1 and OUT 2 (free contact output
max 2A) and OUT IS (NPN “CD PULSE”.To use with “IS” , “MF” , “PLUS” series dosing pumps max 50mA / 24VDC).
OUT 1 and OUT 2 use the same configuration settings and can ben set operate individually between 3 working
modes: “ON/ OFF” mode, “PROPORTIONAL” mode and “PID” mode.
OUT IS can be set to operate in P/M mode only. (available on “PRO” models only)
Version JA CD Version JA CDIND

11
“ON/OFF” mode (e.g. conductivity)
This working mode ca be set for OUT1 and OUT2 outputs.
ON/OFF mode
Set Conductivity value at 100uS ON and 90uS OFF. The difference between the two Conductivity values is called
HYSTERESIS.
Setpoint output will stay OFF until reading value will reach 100uS
Setpoint output will stay ON until reading value will decrease to 90uS
Conductivity pump will stay into its previous status into HYSTERESIS AREA
90 100
OFF
ON

12
“PROPORTIONAL” mode (e.g. conductivity)
This working mode ca be set for OUT1 and OUT2 outputs.
Proportional mode set the controller to operate using a calculated percentage based on a 1000 seconds scale between
two set values that enable or disable the Conductivity pump. To use this mode move cursor on “Working Mode”. Press
the wheel and select it.
PROPORTIONAL MODE between 10mS (0%) and 25mS (100%). [100 seconds scale]
This mode operates Conductivity pump for a value lower that 10mS with maximum dosing capacity and it will stop
Conductivity pump for a reading value higher than 25mS. Between these two vales (17,5mS) the pump will be
controlled into proportional mode (50seconds ON, 50seconds OFF).

13
“PID”mode (e.g. conductivity, available on “PRO” models only)
A proportional-integral-derivative controller (PID controller) is a control loop feedback mechanism (controller) widely used
in industrial control systems. A PID controller calculates an error value as the difference between a measured process
variable and a desired setpoint. The controller attempts to minimize the error by adjusting the process through use of
a manipulated variable. The PID controller algorithm involves three separate constant parameters, and is accordingly
sometimes called three-term control: the proportional, the integral and derivative values, denoted P, I, and D. Simply put,
these values can be interpreted in terms of time: P depends on the present error, I on the accumulation of past errors,
and D is a prediction of future errors, based on current rate of change.[1] The weighted sum of these three actions is
used to adjust the process via a control element such as the position of a control valve, a damper, or the power supplied
to a heating element.
Before enabling this mode congure the required parameters within “SETTINGS” -> “PID PARAMETERS” menu,
- Time INTEGRATIVE value (time needed to the controller to activate a procedure as answer to a plant’s change. E.G.: time
needed for pump activation when reached a set value. ) Default value: 60 seconds.
- Time DERIVATIVE value ( time needed to the controller to react to a plant’s status change. E.G.: if pH value in water
increase, the time integrative is the time needed to notify the change.) Default value: 3 seconds.
- MODE between + (dosed chemical is used to increase conductivity) or - (dosed chemical is used to decrease conductivity)
Move to for previous menu and saving changes. Within “SETPOINT” menu choose the related OUTPUT then move
wheel to select PID MODE. Parameters to set are:
- RANGE value. Range is the maximum PID value over or under which (depending on Mode+ or Mode-) the
controller will automatically switch into proportional mode
- SETPOINT which is the optimal value to achieve. Move to for previous menu and saving changes.

14
“CALIBRATION” (JA CD series)
Conductivity calibration procedure involves a “SLOPE” value that requires a buffer solution having a value near the
working range. Calibrate using plant’s temperature otherwise unattended results may occur. Verify probe selection into
“SETTINGS”, “Measure” before to start calibration procedure. Then choose “CALIBRATION” then “CONDUCTIVITY” to
begin calibration procedure.
SLOPE”, dip probe’s head into a buffer solution having value near to real-working value and wait until controller’s reading
is stable then press wheel, enter buffer solution’s value as second point calibration value move the cursor to “check” to
conrm the displayed value. To stop the calibration procedure, select “X”.
Temperature calibration. A professional thermometer is required to obtain a reliable calibration.
Within “CALIBRATION” menu choose “TEMPERATURE”.
Note: This procedure assumes that controller is correctly installed and congured, connected to a working PT100
probe. Calibrate using plant’s temperature otherwise unattended results may occur.
Using an external thermometer to read actual temperature and edit related eld “Cal. at”. Conrm by pressing wheel.
To revert both calibration to previous settings use “RESET CALIBRATION” menu.
To obtain reliable results the controller should be correctly installed, congured and connected to a working probe.

15
“CALIBRATION” (JA PH series)
Full pH calibration procedure involves two calibration points (Offset and Slope) and it requires two buffer
solutions. Default buffer solutions are pH 4.00 and pH 7.00. pH reading value can be also compensated from
“pH compensation” menu. Chose “Calibration” from main menu. Fast Calibration procedure involves one point
calibration (choose value closest to real field application).
In the following example instrument will calibrate pH using default buffer solutions values. Note: this procedure
assumes that instrument is correctly congured and a working pH probe connected. Otherwise unattended
results may occurr. When changing pH compensation option, calibration must be repeated.
Calib 1st Point. (Offset)
Once into “Calibration” menu move wheel on “Offset” then press wheel to enter into first point calibration
submenu. Prepare 7.00pH buffer solution and dip probe’s sensor on it.Wait until reading value is stable and accor-
ding to buffer solution value move wheel until it is the same on display (“Cal. at” field). Default value is 7.00pH.
To end procedure move cursor on “OK” and press wheel to proceed to next step. Note: buffer solution value may
change if environment temperature it’s different than 20°C. Read solution’s label for more information. Accor-
ding to this occurrence “pH Default” must be changed.
Calib 2nd Point. (Slope)
Move wheel on “Slope” then press wheel to enter into second point calibration submenu. Prepare 4.00pH buffer
solution and dip probe’s sensor on it. Wait until reading value is stable and according to buffer solution value
move wheel until it is the same on display (“Cal. at” field). Default value is 4.00pH.
To end procedure move cursor on “OK” and press wheel to proceed to “Save” request screen. Move wheel on
“YES” to save or “NO” to discard changes. Note: buffer solution value may change if environment temperature
it’s different than 20°C. Read solution’s label for more information. According to this occurrence “pH Default”
must be changed.

16
“CALIBRATION” (JA RH series)
ORP calibration procedure involves probe’s selection with one point (P1) calibration. From “Menu Calibration” choose
“ORP probe”. Choose between “FAST CALIBTRATION” (one buffer solution required) or “FULL CALIBRATION” (two
buffers solutions required for better calibration accuracy)
Note: This procedure assumes that instrument is correctly congured and a working ORP probe connected
and installed on system. Measurement must be performed using plant water. Otherwise unattended results
may occurr.
Calibration can be performed in two ways: the rst by alignment with a buffer solution, the second by reading the
residual ORP level of the pool with the DPD1, comparison with the attached graph followed by alignment of the pumps
group. The choice of method is exclusively at the user’s discretion. In both cases, to establish the set-point value, a
check using the DPD1 or other analysis system is necessary. The enclosed graphs provide a reference between the mV
value read by the pumps group and the quantity of residual ORP expressed in mg/litre, and are linked to the pH value.
1) Measure buffer solution temperature and verify that it is the same printed on solution’s label.
2) Remove protective cap from probe and wash probe’s tip into water. Then dry it by shaking the probe in air.
3) Set “Cal. at” value to match buffer solution value then put probe’s tip into buffer solution and wait until instrument
shows a stable reading value (mV eld).
4)Move cursor on “OK” and press wheel ton corm the new calibration value. If calibration process fails the instrment
will show “CALIBRATION FAILED”. Repeat procedure otherwise move on “ESC” and press wheel.

17
“COMPENSATION”
Conductivity measurements are temperature dependent. The degree to which temperature affects conductivity varies
from solution to solution and can be calculated using the following formula:
Gt = Gtcal {1 + a(T-Tcal)}
where: Gt = conductivity at any temperature T in °C, Gtcal = conductivity at calibration temperature Tcal in °C,
a = temperature coefficient of solution at Tcal in °C.
Substance at 25°C Concentration Alpha (a)
HCl 10 wt% 1.56
KCl 10 wt% 1.88
H2SO450 wt% 1.93
NaCl 10 wt% 2.14
Common alphas (a) are listed in the table above. To determine that (a) of other solutions, simply measure conductivity
at a range of temperatures and graph the change in conductivity versus the change in temperature. Divide the slope
of the graph by Gtcal to get a. Temperature compensation (Alpha) can be changed within 0.0% and 5.0%. It should
be set according to measured chemical properties.
If a temperature probe is installed choose “Enable” for “Automatic”. Otherwise select “Disable” and enter a
temperature value in “Temperature” field. If the controller is connected to a temperature probe, check the
“Automatic” field: temperature compensation is automatic. Otherwise choose to leave the field blank and enter a
value of average temperature in the system under which compensation must be made (field TEMPERATURE).
Options are:
ENABLE (tick to enable on the basis of the following parameters for the
temperature compensation)
ALPHA (see explanation above)
AUTOMATIC (tick to enable automatic temperature compensation based
on the reading provided by the PT100 sensor installed)
TEMPERATURE (manually enter a fixed value, if there is any installed
temperature probe)
Note: when “AUTOMATIC” is enabled the “TEMPERATURE” field is not available.

18
“CALIBRATION” (JA CL series)
Chlorine calibration procedure is based on installed chlorine probe and may involve one or two calibration points
depending on probes’ model From main menu choose “Calibration”. Installed probe will be automatically detected and
according to model a one or two points calibration will be enabled.
Note: This procedure assumes that the CONTROLLER is correctly installed and congured, connected to a working
probe. Calibrate using plant’s temperature otherwise unattended results might occur. If something wrong occurs
use RECOVERY CALIBRATION to restore to previous calibration.
Two points calibration method.
During this procedure probe must be dry and clean and not installed in plant. Use chlorine free water (or a carbon lter
system) and dip probe’s head into it, then ap on “First Point” (zero) to conrm it.
For Second point calibration use a plant’s sample water and analyze it using a DPD (photometer) system to obtain
value. Enter this value as second point calibration and conrm it.
One point calibration method (second point).
For Second point calibration use a plant’s sample water and analyze it using a DPD system (photometer) to obtain
value. Enter this value as second point calibration and conrm it.
“CALIBRATION” (JA TEMP series)
See page 14 (temperature calibration paragraph)
Note: This procedure assumes that controller is correctly installed and congured, connected to a working PT100
probe. Calibrate using plant’s temperature otherwise unattended results may occur.
Carbon Filter System Photometer

19
“MODBUS” (available on “PRO” models only)
Modbus is a serial communications protocol originally published by Modicon (now Schneider Electric) in 1979 for
use with its programmable logic controllers (PLCs). Simple and robust, it has since become a de facto standard
communication protocol, and it is now a commonly available means of connecting industrial electronic devices.
Set the communication speed according to the PLC system available. Set the ID assigning an UNIQUE address to
avoid conflicts.
Connect the PLC through blocks 17 and 18 and enter an ID number available, baudrate (communication
speed) and communication mode (i.e.: 8N1, data bit, parity check and stop bit).

20
“FLOW”
Flow contact (see “SEPR” blocks on page 4) can be enabled to stop a dosing procedure using a N.O. contact mode
(normally open) or N.C. contact mode (normally closed) when status on blocks changes. Rotate wheel to choose
between: “DISABLE”, “REVERSE” (N.O. contact) or “DIRECT” (N.C. contact). Furthermore “Flow contact” can
starts after a specified time when contact status changes. To set it move wheel on “Delay”, click it and rotate to
choose time (from 0 to 59 seconds). Confirm selection by clicking wheel.
Recovery: once the contact reverts to its previous status and after this specified amount of time (0 to 59 seconds)
the controller switches back to normal activities.
“GENERAL OPTIONS”
Several parameters can be set using this menu such as date, time, language, display contrast, main menu access
password, tau and delay.
FORMAT (units format i.e.: °C, EUROPE or °F, USA)
LOCAL DATE
LOCAL TIME
LANGUAGE (interface language)
CONTRAST (display contrast to increase readability)
PASSWORD (main access password)
TAU (change to increase / decrease readings stability)
DELAY (delay on startup)
HOLD* (when reading becomes unrealiable the
controller start a max 999 seconds countdown,
showing last reliable reading then it continues to
normally operate until it stops and shows *** that is
unattended reading). Set value to 0 to disable function.
*available on JACD & JACD PRO models only
This manual suits for next models
13
Table of contents
Other Emec Controllers manuals