EMOVE EM203 User manual

Bluetooth Adaptor
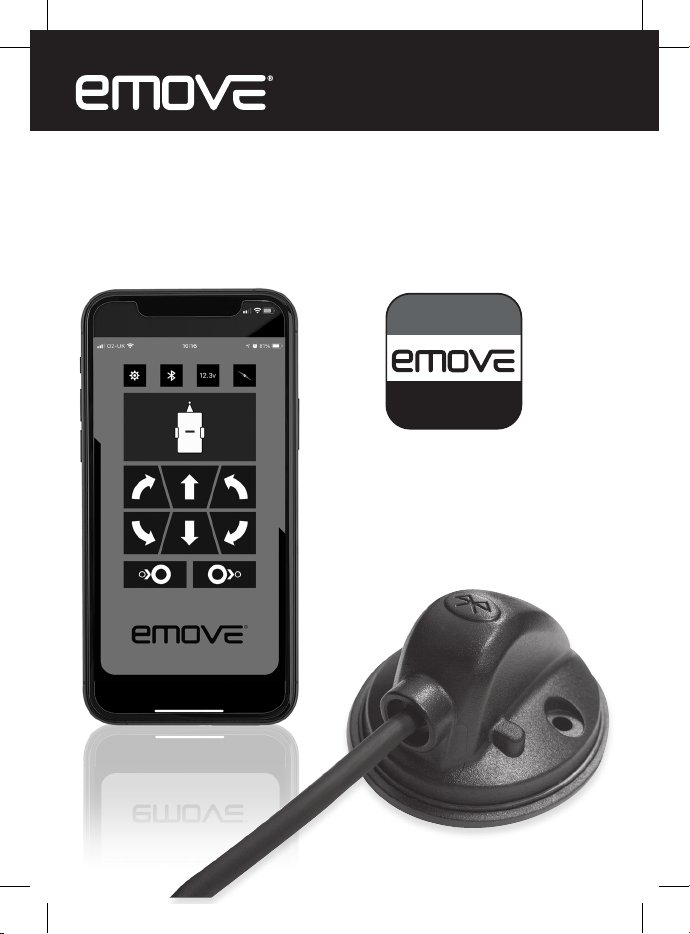
Control your EMOVE via our “My EMOVE” app

Intention For Use
Thank you for purchasing this EMOVE Bluetooth Adapter from Leisurewize. This Bluetooth
adaptor is designed to connect to the control box of your EMOVE caravan manoeuvring
system or the Finding Level mover so that you can control the mover from the EMOVE’s
dedicated smartphone app that is available on both iOS (version 7.0 and above) and
Android (version 4.3 and above).
Please note, this product is not suitable for expanding a 4 motor twin axle manoeuvring
system.
BEFORE INSTALLING THIS PRODUCT, WE HIGHLY RECOMMEND THAT YOU READ THROUGH ALL THE
INFORMATION IN THIS DOCUMENT. PLEASE KEEP THIS DOCUMENT FOR FUTURE REFERENCE.
Table of Contents
Intention For Use 3
Health & Safety Guidelines 3
Product Elements 4
Bluetooth Adaptor Installation Instructions 4
Syncing Your Handset to the EMOVE Motherboard 5
App Installation Instructions 6
Linking the Manoeuvring System to the App 6
Operating Instructions - EM203/EM303 - Manual Engage Motor Mover 7
Basic Manoeuvring 8
Operating Automatic Engagement 8
Receiving Incoming Calls 8
Compass 9
Operating Instructions - EM303A/EM305 - Automatic Engage Motor Movers 10
Basic Manoeuvring 11
Operating Automatic Engagement 11
Receiving Incoming Calls 11
Compass 12
Operating Instructions - EM306 - Finding Level 13
Basic Manoeuvring 14
Operating Automatic Engagement 14
Finding Level 14
Adjusting Each Corner Steady 16
Auto Adjust All Corner Steadies 16
Receiving Incoming Calls 16
Compass 17
Spirit Level 18

3
Health & Safety Guidelines
• Read this user manual carefully before installation and use.
• Failure to comply with these guidelines could result in serious injury or damage to
property.
• Make sure that the smartphone or tablet’s system software conforms to the minimum
requirements as specified in the Technical Specifications section of this document.
• Make sure that your smartphone or tablet’s system software is up-to-date.
• Make sure that your smartphone or tablet is without any damage.
• Damaged screens or units can have a big influence on the function of the remote
handset App. No warranty claim will be accepted and we cannot guarantee the function
of the system if the smartphone or tablet is damaged. We will not be liable for any
damage whatsoever caused as a result of using the remote handset App on a damaged
smartphone or tablet.
• Only use accessories that are supplied or recommended by the manufacturer.
• Stop operating the app/manoeuvring system immediately if you are in doubt about the
assembly or any procedures and consult one of our engineers (Please refer to contact
information on the last page of this manual).
• Practice operating the manoeuvring system in an open area before going on your
caravan holiday. This allows you to fully familiarise yourself with the remote handset App
/ handset / manoeuvring system.
• Before use, always check your smartphone or tablet for any damage.
• Always ensure that children and pets are kept a good distance away from the caravan
during operation.
• In the rare event of a malfunction, enable the handbrake immediately and turn off the
main isolation power switch.
• To maintain signal strength, always make sure that, during use, the distance between
the remote control and the caravan does not exceed 5 metres.
• Due to the nature of a remote signal, it may get obstructed by external terrain or
objects. So there may be small areas around the caravan where the quality of reception
reduces, hence the manoeuvring system may stop momentarily.
• Do not make any modifications on the system (mechanical or electronically). No
warranty claim will be accepted and we cannot guarantee the function of the system if
any modifications are made. We will not be liable for any damage whatsoever caused as
a result of incorrect installation, operation or modification.
Operating Instructions - AutoSteady 19
Adjusting Each Corner Steady 20
Auto Adjust All Corner Steadies 20
Receiving Incoming Calls 20
Compass 21
Settings Menu 22
Maintenance 23
Technical Support & Spare Parts 23
Technical Specifications 23

4
Product Elements
Bluetooth Adaptor Installation Instructions
IMPORTANT: TO INSTALL THIS BLUETOOTH ADAPTOR, PLEASE SEEK ASSISTANCE FROM A QUALIFIED
ENGINEER. THESE INSTRUCTIONS ARE FOR GENERAL GUIDANCE ONLY AS THE INSTALLATION PROCEDURE
MAY VARY DEPENDING ON CARAVAN TYPE.
WARNING: WORKING UNDER A VEHICLE WITHOUT THE APPROPRIATE SUPPORT IS EXTREMELY DANGEROUS.
Prior to installation, you need to ensure that the control box of your EMOVE has
been installed by a qualified engineer.
1. First, park up your caravan that has been fitted with your EMOVER on a
solid, level surface. Then use a lifting ramp to safely access the installed
control box.
2. Unpack all the components and check for the presence of all parts
(product elements).
3. With the supplied screws, the
Bluetooth adaptor should be
mounted on the outside of the
caravan to ensure your smartphone
can receive a Bluetooth signal right
around the caravan. Figure 1 shows
how the adaptor should be mounted
using the supplied screws.
Figure 1

5
Fig. 3A
Fig. 5A
Fig. 4A
Fig. 4B
Fig. 5B
Fig. 3B
4. With the Bluetooh adapter
mounted, carefully route the
cable along the underside of the
caravan floor via inside the trunking
(if possible) as this will protect
the cable from sharp edges and
dirt. Connect the cable into the
designated Bluetooth socket as
shown in Figure 2.
Syncing Your Handset to the EMOVE Motherboard
IMPORTANT: PRIOR TO LINKING THE BLUETOOTH ADAPTOR TO YOUR SMARTPHONE, YOU MUST FIRST LINK
THE CONTROL BOX TO THE SUPPLIED REMOTE CONTROL AS THIS WILL ENABLE THE APP TO REPLICATE
THE HANDSET’S CONTROLS. BY SKIPPING THIS KEY STEP, THE SMARTPHONE APP WILL NOT BE ABLE TO
CONTROL THE EMOVER.
Please follow the instructions below:
1. Turn on the remote control handset by sliding
the switch on the side of the handset
(Fig. 3A) to “On”. The green LED on the
remote control handset (Fig. 3-B) starts to
flash slowly.
2. Press the reset button (Fig. 4A) on the
control unit. All three LED lights on the
control unit (Fig. 4B) will flash slowly.
3. Press both the forward (Fig. 5-A) and reverse
(Fig. 5-B) buttons on the remote control
handset for about 3 seconds. The handset’s
buzzer will give a short beep to confirm that
the synchronisation is complete.
4. After successful synchronisation, the green
LED on the control unit and on the remote
control handset will illuminate continuously.
FOR QUAD SYSTEMS ONLY Repeat this proce-
dure with the second electronic control unit.
Turn the remote handset “Off” and then “On”
again so both control units will be activated.
Figure 2

6
App Installation Instructions
1. Download and install the free “My Emove” app by going to
either the Apple store or Google Play store (depending on
your device’s operating system) and search for the “My
EMOVE” app.
Linking the Manoeuvring System to the App
1. Switch on manuevring system via the battery power isolation switch.
2. Press the reset button on the control box. A beep will sound.
3. Prior to loading up the app on your smartphone, ensure your smartphone’s
Bluetooth has been enabled.
4. Open the app. On doing so for the first time,
you will be prompted to allow Bluetooth
connectivity on the app. Please allow for
Bluetooth connectivity (Figure 6).
5. Then, you will be taken to a screen
where it will ask you to search for a nearby
EMOVE Bluetooh Adaptor. Press Search
(Figure 7).
Figure 6
Figure 7

7
6. Once your EMOVE Bluetooth Adaptor has
been found, it will appear under the name
“BOLUTEK”.
7. Once you’ve paired with the Bluetooth device,
you will be taken to a screen where you can
select your EMOVE model (Figure 8).
8. On selecting your device, you will be taken to
the model’s control panel.
Please note, the above steps must be followed
when first using the product. After successful
synchronisation, you do not have to repeat the
above steps. Just turn on the battery power isolation
switch of the manoeuvring system, open the App
and turn on the Bluetooth option (if applicable).
The App will automatically enter the operating
screen without asking you to select the Bluetooth
connection and motor mover system again.
Figure 6
Figure 7
Figure 9
Figure 8
Operating Instructions
Figure 9 below shows the control
panel for EM203 & EM303.
A. Forwards button: both wheels
rotate in forwards direction.
B. Reverse button: both wheels rotate
in reverse direction.
C. Right forwards button: left wheel
rotates in forwards direction.
D. Right reverse button: left wheel
rotates in reverse direction.
E. Left forwards button: right wheel
rotates in forwards direction.
F. Left reverse button: right wheel
rotates in reverse direction.
G. Settings: goes to the setting menu.
H: Bluetooth status: when the
Bluetooth icon is displayed as
static, it indicates that the app is
connected to the adaptor. If the
icon is flashing, it indicates that it
is in the process of connecting.
I: Voltage reading: displays the
battery’s voltage reading.
J. Compass button: goes to the
compass.

8
Basic Manoeuvring
When manoeuvring straight forward or reverse (press button A or B), it is also
possible to adjust the direction by pressing button C or E (when driving forwards)
or button D or F (when driving in reverse).
In addition, the ‘Left forwards’ (E) and ‘Right reverse’ (D) buttons or ‘Right
forwards’ (C) and ‘Left reverse’ (F) buttons may be pressed at the same time to
turn the caravan around on its own axis without moving forward or backward (this
function will only work under the “single-axle function”).
When you switch direction within 2 seconds (i.e. from forward driving to reverse
driving and vice versa), a small delay of 1 second will occur to protect the
electronics and the motors.
Receiving Incoming Calls
While using the App, your smartphone will always remain available for incoming
calls and messages etc. Once the screen of your smartphone or tablet is used
by another App and you return to the My EMOVE App, please allow for a few
moments for the app to reconnect to the Bluetooth Adaptor.
While the app is reconnecting, you will notice that the Bluetooth Status icon is
flashing and the control panel buttons are greyed out (see Figure 10). You will
notice the screen being covered by the EMOVE logo as well (Figure 11). If you see
the EMOVE logo screen, simply swipe up to go back to the control panel.

9
Figure 10 Figure 11
Figure 12
Compass
The App includes a compass function
(Figure 12). Press the compass icon in
the up right corner of the screen and the
compass will appear on the screen. The
compass utilises your smartphone’s GPS

10
Operating Instructions - EM303A/EM305 - Automatic
Engage Motor Movers
Figure 13 below shows the control
panel for EM303A/EM305.
A. Forwards button: both wheels
rotate in forwards direction.
B. Reverse button: both wheels
rotate in reverse direction.
C. Right forwards button: left wheel
rotates in forwards direction.
D. Right reverse button: left wheel
rotates in reverse direction.
E. Left forwards button: right wheel
rotates in forwards direction.
F. Left reverse button: right wheel
rotates in reverse direction.
G. Automatic engage: engages the
motor powered rollers to the tyre.
H. Automatic disengaging button &
icon*: auto disengages the motor
powered rollers from the tyre.
I: Settings: goes to the setting
menu.
J: Bluetooth status: when the
Bluetooth icon is displayed as
static, it indicates that the app is
connected to the adaptor. If the
icon is flashing, it indicates that it
is in the process of connecting.
K: Voltage reading: displays the
battery’s voltage reading.
L. Compass button: goes to the
compass.
Figure 13

11
Basic Manoeuvring
When manoeuvring straight forward or reverse (press button A or B), it is also
possible to adjust the direction by pressing button C or E (when driving forwards)
or button D or F (when driving in reverse).
In addition, the ‘Left forwards’ (E) and ‘Right reverse’ (D) buttons or ‘Right
forwards’ (C) and ‘Left reverse’ (F) buttons may be pressed at the same time to
turn the caravan around on its own axis without moving forward or backward (this
function will only work under the “single-axle function”).
When you switch direction within 2 seconds (i.e. from forward driving to reverse
driving and vice versa), a small delay of 1 second will occur to protect the
electronics and the motors.
Operating Automatic Engagement
To activate the automatic engaging system of the motor powered rollers on the
tyre, press the G button for engaging and H button for disengaging. Please allow
3 seconds for manoeuvring to commence for either engage or disengage.
Engaging: During engage, the app’s display will show the roller engage icon. This
will appear on the display until the rollers are firmly pressed against the tyre.
Onced engaged, the system is ready to use.
Disengaging: During disengage, the app’s display will show the roller disengage
icon. This will appear on the display until the rollers have fully disengaged from
firmly pressed against the tyre.The H button will illuminate red until the rollers are
fully disengaged from the tyre. Onced disengaged, you will NOT be able to move
your caravan.
After finishing manovering, touch the “back key” (android users) twice or “home
button” (iOS users) once to exit.
IMPORTANT: The standard remote control handset which is supplied with your
manoeuvring system still can be used. However, only one remote control (either
standard remote or App remote control) can be used at a time.
Receiving Incoming Calls
While using the App, your smartphone will always remain available for incoming
calls and messages etc. Once the screen of your smartphone or tablet is used
by another App and you return to the My EMOVE App, please allow for a few
moments for the app to reconnect to the Bluetooth Adaptor.
While the app is reconnecting, you will notice that the Bluetooth Status icon is
flashing and the control panel buttons are greyed out (Figure 14). You will notice
the screen being covered by the EMOVE logo as well (Figure 15). If you see the
EMOVE logo screen, simply swipe up to go back to the control panel.

12
Figure 14 Figure 15
Figure 16
Compass
The App includes a compass function
(Figure 16). Press the compass icon in
the up right corner of the screen and the
compass will appear on the screen. The
compass utilises your smartphone’s GPS.

13
Operating Instructions - EM306 - Finding Level
Figure 17 below shows the main
control panel for EM306.
A. Forwards button: both wheels
rotate in forwards direction.
B. Reverse button: both wheels
rotate in reverse direction.
C. Right forwards button: left wheel
rotates in forwards direction.
D. Right reverse button: left wheel
rotates in reverse direction.
E. Left forwards button: right wheel
rotates in forwards direction.
F. Left reverse button: right wheel
rotates in reverse direction.
G. Automatic engage: auto engages
the motor powered rollers to the
tyre.
H. Automatic disengaging: auto
disengages the motor powered
rollers from the tyre.
I. Corner steadies/mover button:
switches between motor mover
control panel and corner steady
control panel.
J. Finding level: automatically levels
the caravan.
K. Settings: goes to the setting
menu.
L. Bluetooth status: when the
Bluetooth icon is displayed as
static, it indicates that the app is
connected to the adaptor. If the
icon is flashing, it indicates that it
is in the process of connecting.
M. Voltage reading: displays the
battery’s voltage reading.
N. Spirit level: This shows the spirit
level of your caravan. If the white
spot is in the middle, this means
that the caravan is completely
level.
O. Compass button: goes to the
compass.
Figure 17

14
Basic Manoeuvring
When manoeuvring straight forward or reverse (press button A or B), it is also
possible to adjust the direction by pressing button C or E (when driving forwards)
or button D or F (when driving in reverse).
In addition, the ‘Left forwards’ (E) and ‘Right reverse’ (D) buttons or ‘Right
forwards’ (C) and ‘Left reverse’ (F) buttons may be pressed at the same time to
turn the caravan around on its own axis without moving forward or backward (this
function will only work under the “single-axle function”).
When you switch direction within 2 seconds (i.e. from forward driving to reverse
driving and vice versa), a small delay of 1 second will occur to protect the
electronics and the motors.
Operating Automatic Engagement
To activate the automatic engaging system of the motor powered rollers on the
tyre, press the G button for engaging and H button for disengaging. Please allow
for 3 seconds for manoeuvring to commence either engage or disengage.
Engaging: During engage, the app’s display will show the roller engage icon. This
will appear on the display until the rollers are firmly pressed against the tyre.
Onced engaged, the system is ready to use.
Disengaging: During disengage, the app’s display will show the roller disengage
icon. This will appear on the display until the rollers have fully disengaged from
firmly pressed against the tyre.The H button will illuminate red until the rollers are
fully disengaged from the tyre. Onced disengaged, you will not be able to move
your caravan.
After finishing manovering, touch the “back key” (android users) twice or “home
button” (iOS users) once to exit.
IMPORTANT: The standard remote control handset which is supplied with your
manoeuvring system still can be used. However, only one remote control (either
standard remote or App remote control) can be used at a time.

15
Finding Level
On pressing the Finding Level button, it will automatically level your caravan. The
Finding Level utilises the app’s spirit level to help ensure your caravan is steady
and even.
Auto Corner Steady Functionality
Figure 18 below shows the corner steady control panel for EM306.
Figure 18
A. Upwards button: Sets the direction of
the corner steady (steadies) to go up
B. Downwards button: Sets the direction
of the corner steady (steadies) to go
down
C. Corner steadies/mover button:
switches between motor mover control
panel and corner steady control panel
D. Auto button: Auto adjusts the corner
steadies to go upwards/downwards
E. Front left corner steady button:
Adjusts only the front left corner
steady.
F. Back left corner steady button:
Adjusts only the back left corner
steady.
G. Front right corner steady button:
Adjusts only the front right corner
steady.
H. Back right corner steady button:
Adjusts only the back right corner
steady.
I. Settings: goes to the setting menu.
J. Bluetooth status: when the Bluetooth
icon is displayed as static, it indicates
that the app is connected to the
adaptor. If the icon is flashing, it
indicates that it is in the process of
connecting.
K. Voltage reading: displays the battery’s
voltage reading.
L. Spirit level: This shows the spirit level
of your caravan. If the white spot is
in the middle, this means that the
caravan is completely level.
M. Compass button: goes to the
compass.

16
Adjusting Each Corner Steady
To adjust a corner steady individually, first choose whether you want to adjust
the corner steady upwards or downwards. If you are adjusting the corner steady
upwards, press the Upwards button (A). To adjust the corner steady downwards,
press the Downwards button (B).
Then, select the corner steady you want to adjust (see below). This will enable
you to adjust the corner steady to move upwards/downwards depending on the
setting that you have chosen.
E. Front left corner steady button: Adjusts only the front left corner steady.
F. Back left corner steady button: Adjusts only the back left corner steady.
G. Front right corner steady button: Adjust only the front right corner steady.
H. Back right corner steady button: Adjusts only the back right corner steady.
Auto Adjust All Corner Steadies
To adjust all the corner steadies at the same time, first choose whether you
want to adjust the corner steady upwards or downwards. If you are adjusting the
corner steady upwards, press the Upwards button (A). To adjust the corner steady
downwards, press the Downwards button (B).
Then, press the Auto button (D). This will enable all the corner steadies to move
upwards/downwards, depending on the setting that you have chosen.
Receiving Incoming Calls
While using the App, your smartphone will always remain available for incoming
calls and messages etc. Once the screen of your smartphone or tablet is used
by another App and you return to the My EMOVE App, please allow for a few
moments for the app to reconnect to the Bluetooth Adaptor.
While the app is reconnecting, you will notice that the Bluetooth Status icon is
flashing and the control panel buttons are greyed out (see Figure 19). You will
notice the screen being covered by the EMOVE logo as well (Figure 20). If you see
the EMOVE logo screen, simply swipe up to go back to the control panel.

17
Figure 19 Figure 20
Figure 21
Compass
The App includes a compass function
(Figure 21). Press the compass icon in
the up right corner of the screen and the
compass will appear on the screen. The
compass utilises your smartphone’s GPS.

18
Spirit Level
The control panel for EM306 has a spirit
level that allows you to level your caravan
so that it is not slanting. To access the
spirit level, select the spirit level button (L),
on either the mover control panel or corner
steady control panel. This will take you to
the spirit level screen (Figure 22).
There you can adjust the corner steadies
so that it is level.
Figure 22

19
Figure 23
Operating Instruction - AutoSteady
Figure 23 below shows the
corner steady control panel for
AutoSteady.
A. Upwards button: Sets the
direction of the corner steady
(steadies) to go up.
B. Downwards button: Sets the
direction of the corner steady
(steadies) to go down.
C. Auto button: Auto adjusts the
corner steadies to go upwards/
downwards.
D. Front left corner steady button:
Adjusts only the front left corner
steady.
E. Back left corner steady button:
Adjusts only the back left corner
steady.
F. Front right corner steady button:
Adjust only the front right corner
steady.
G. Back right corner steady button:
Adjusts only the back right corner
steady.
H. Settings: goes to the setting
menu.
I. Bluetooth status: when the
Bluetooth icon is displayed as
static, it indicates that the app is
connected to the adaptor. If the
icon is flashing, it indicates that it
is in the process of connecting.
J. Voltage reading: displays the
battery’s voltage reading.
K. Compass button: goes to the
compass.

20
Adjusting Each Corner Steady
To adjust a corner steady individually, first choose whether you want to adjust
the corner steady upwards or downwards. If you are adjusting the corner steady
upwards, press the Upwards button (A). To adjust the corner steady downwards,
press the Downwards button (B).
Then, select the corner steady you want to adjust (see below). This will enable
you to adjust the corner steady to move upwards/downwards depending on the
setting that you have chosen.
D. Front left corner steady button: Adjusts only the front left corner steady.
E. Back left corner steady button: Adjusts only the back left corner steady.
F. Front right corner steady button: Adjust only the front right corner steady.
G. Back right corner steady button: Adjusts only the back right corner steady.
Auto Adjust All Corner Steadies
To adjust all the corner steadies at the same time, first choose whether you
want to adjust the corner steady upwards or downwards. If you are adjusting the
corner steady upwards, press the Upwards button (A). To adjust the corner steady
downwards, press the Downwards button (B).
Then, press the Auto button (D). This will enable all the corner steadies to move
upwards/downwards, depending on the setting that you have chosen.
Receiving Incoming Calls
While using the App, your smartphone will always remain available for incoming
calls and messages etc. Once the screen of your smartphone or tablet is used
by another App and you return to the My EMOVE App, please allow for a few
moments for the app to reconnect to the Bluetooth Adaptor.
While the app is reconnecting, you will notice that the Bluetooth Status icon is
flashing and the control panel buttons are greyed out (see Figure 24). You will
notice the screen being covered by the EMOVE logo as well (Figure 25). If you see
the EMOVE logo screen, simply swipe up to go back to the control panel.
This manual suits for next models
4
Table of contents
Other EMOVE Automobile Accessories manuals
Popular Automobile Accessories manuals by other brands

LaserLine
LaserLine 921T user manual

Whispbar
Whispbar K340W Fitting Instructions for Basic Carrier

APS
APS iBoard IB-R159 manual

INDRA
INDRA Smart Series installation guide

ICON Vehicle Dynamics
ICON Vehicle Dynamics 17-UP FSD PRO Series installation instructions

Front Runner
Front Runner TRCA010 Operation manual