Emperor Aquatics 02818 User manual
Instructions for Emperor Aquatics, Inc.’s 18, 25 & 50
Watt Advanced UV Sterilizers (for Savio’s Skimmers)
Thank you for purchasing our 18, 25 & 50 Watt Advanced UV Sterilizer. Please read all instructions carefully before attempting
to install this UV Sterilizer. If at any time you have questions regarding parts or installation, please feel free to contact our
Customer Service Department at 610-970-0440 x0.
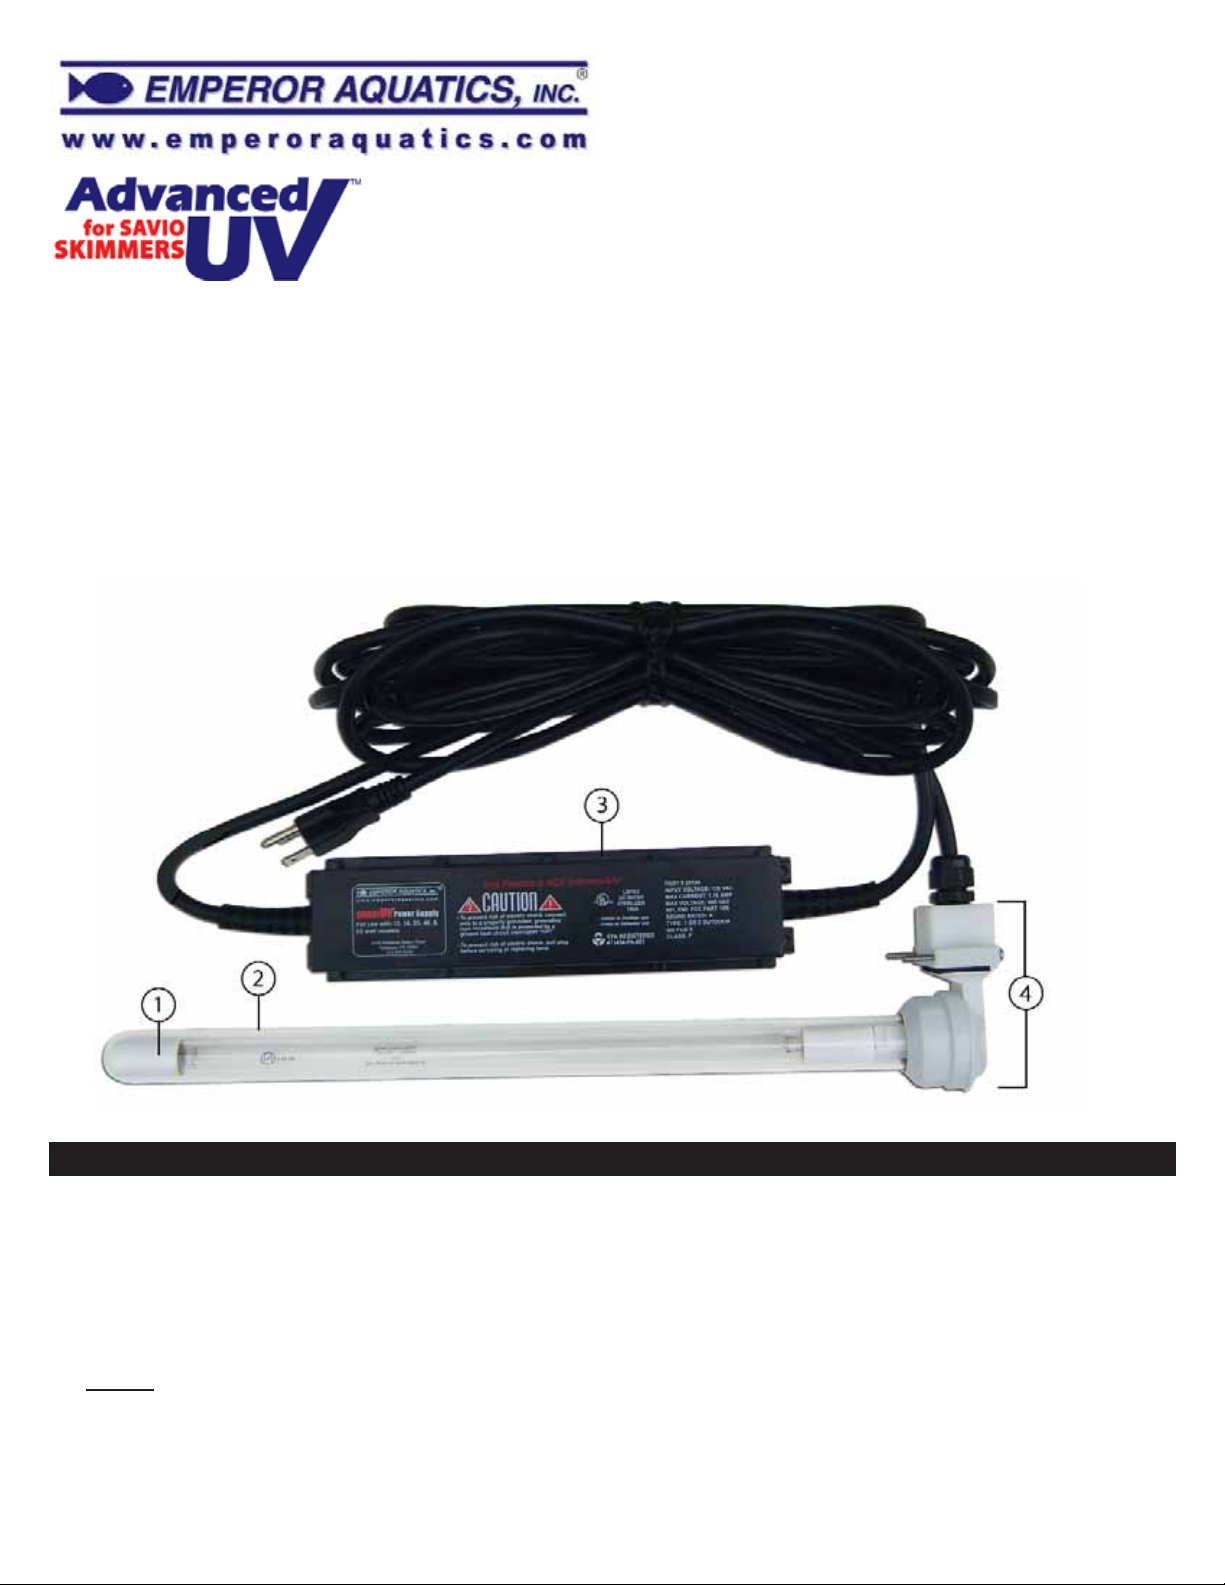
18, 25, 50 Watt Advanced UV Sterilizer - What is included?
1. UV Lamp
2. Quartz Sleeve
*** Before Installing, Inspect for damage ***
3. Power Supply (Sealed Power Supply w/ Lamp Connector)
4. Connection Assembly w/ Screws
02934-INS-ADVAN
Rev. A
1.0 Important Safety Instructions for Advanced UV Sterilizers
WARNING: To guard against injury, basic safety precautions should be observed, including the following. Water and electricity
can be a dangerous combination. Help us ensure your safety PLEASE READ AND FOLLOW THESE INSTRUCTIONS.
WARNING: FAILURE TO FOLLOW THESE INSTRUCTIONS CORRECTLY COULD RESULT IN A VOID OF WARRANTY OR
EVEN UNSAFE CONDITIONS.
1.1 Always unplug the unit from its power source before opening the skimmer’s lid. UV light can be very dangerous, to
avoid injury don’t handle or look at the UV lamp while it’s operating. Direct exposure to UV rays can cause health risks
and skin tissue damage.
1

1.2 DANGER: Special care should be taken to avoid the possibility of receiving an electric shock, due to water being employed
in the use of this pond equipment. For each of the following situations, do not attempt repairs yourself. Call EMPEROR
AQUATICS, INC. for services or discard the appliance.
1.2.1 If the unit falls into the water, DO NOT REACH FOR IT! First unplug it and then retrieve it. If internal electrical
components of the unit get wet, unplug it immediately.
1.2.2 If the unit shows signs of water leakage inside the quartz sleeve, immediately unplug it from the power source.
1.3 Do not operate this unit if is has a damaged cord or plug, if it is malfunctioning, or if it has been dropped or damaged in any
manner.
1.4 Close supervision is necessary when any appliance is used by or near children.
1.5 Always unplug the unit from an outlet when not in use, before servicing, and cleaning or removing parts. Never yank the cord
to pull the plug from the outlet. Grasp the plug and pull to disconnect.
1.6 Do not use the Emperor Aquatics, Inc. Advanced UV Sterilizer on any applications other than its intended use. The use of
attachments not recommended or sold by Emperor Aquatics, Inc. may cause unsafe conditions.
1.7 Do not allow the unit to be entirely submerged. Follow water level guidelines as seen on page #5.
1.8 WARNING: Do not operate the Advanced UV Sterilizer when the water level inside the skimmer filter is below the
recommended point (as indicated on page #5). Operating the unit in dry conditions will result in damage to the unit
and possible un safe conditions. Damage cause in this way will void the warranty.
1.9 Do not allow the power supply module to be submerged in water. Do not place the power supply in the pond
or in an area where rain water may collect.
1.10 The electrical requirements for this Advanced UV Sterilizer are 120VAC 60 Hz. This unit must be plugged into a well
grounded (GFI) electrical outlet. To comply with the National Electrical Code (NFPA 70) and to provide additional protection
from risk of electrical shock, this unit should only be connected to a receptacle that is protected by a ground fault circuit inter-
rupter (GFI). Do not attempt to cut the ground plug off or change the cord to a two-wire plug. Altering the power assembly will
void the manufacturer's warranty.
1.11 Use only three-wire extension cords that have 3-prong grounding-type plugs and 3-pole cord connectors that accept
the plug from this unit.
2.0 Advanced UV Sterilizer Features & Specifications
• UL listed for indoor and outdoor use
• Long lasting UV lamps (13 Month continuous useful UV Lamp Life)
• Protective Quartz Sleeve (thermally protects the UV Lamp; ensures optimum UV performance)
• Watertight Design (resists failure due to water damage, isolates the skimmer water from the UV’s electrical hardware)
• Remote Power Supply (moves it away from water inside the skimmer box and the pond)
Model No.
02818
02826
02850
Maximum
Pond Size
1,500 Gal.
2,340 Gal.
4,800 Gal.
No. Lamps/
Watt
1/18
1/25
1/50
Maximum Water
Flow Rate
500 GPH
780 GPH
1,600 GPH
Dim.
(Inches)
18.5” x 4”
23.25” x 4”
23.25” x 4”
Advanced UV Sterilizer Specifications
2
Using a low-pressure mercury vapor germicidal
lamp. Input watts are supplied to the UV lamp
creating an electrical arc with the mercury inside.
This reaction creates UV-C light. The UV-C light
between 250nm and 280nm (the germicidal action
spectrum) when directly exposed to living microor-
ganisms such as bacteria and Protozoa is very
effective at altering their DNA, disabling them from
reproducing or even destroying them.
Microorganisms vary in type and size. Identifying
the targeted microorganism, (Algae, Bacteria
etc...) and matching its type and size to its estab-
lished UV exposure rate, are prerequisites for
eliminating that particular microorganism.
Successful UV sterilization requires the UV-C
(UV radiation @ 250-280nm) light to penetrate the microorganism’s cell wall/cell membrane and destroy its nuclear material as
discussed and shown in diagram above.
Successful UV sterilization in a water application requires the targeted waterborne microorganism to be in direct contact with the
UV-C light (produced by the UV lamp) for a specific amount of time [UV exposure rate]. Established UV exposure rates must be
applied to achieve successful UV sterilization.
3.0 Introduction to UV Sterilization
UV-C Radiation used for disinfection is most
effective at a wavelength of 264 nanometers (nm).
The Spectrum of Light
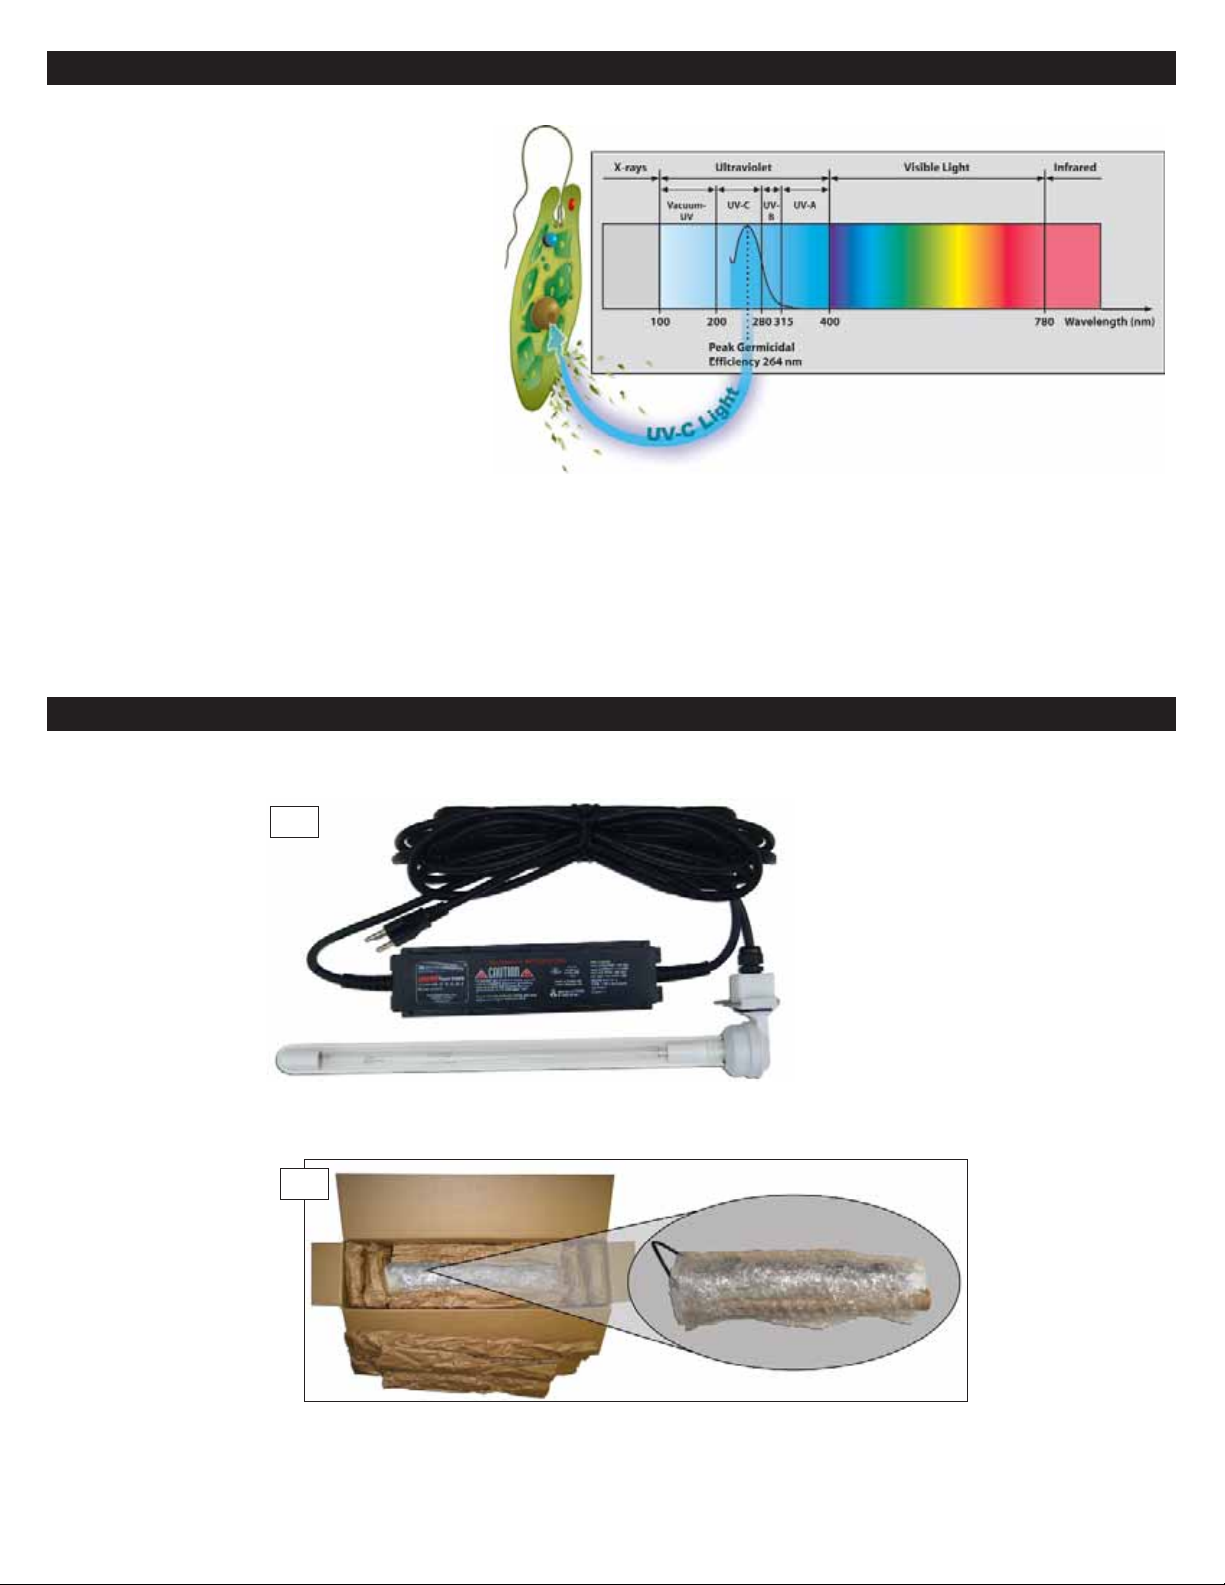
4.0 Inspection
4.1 The 18, 25, & 50 Watt Advanced UV Sterilizer is shipped from our factory as shown here in 4A:
Please inspect these items for possible shipping damage before use. Thoroughly inspect the quartz sleeve and uv lamp
for damage of any kind as they are made of glass and are easily broken.
4.2 The Advanced UV Sterilizer is shipped fully assembled and packed as shown here in Photo 4B.
3
4B
4A
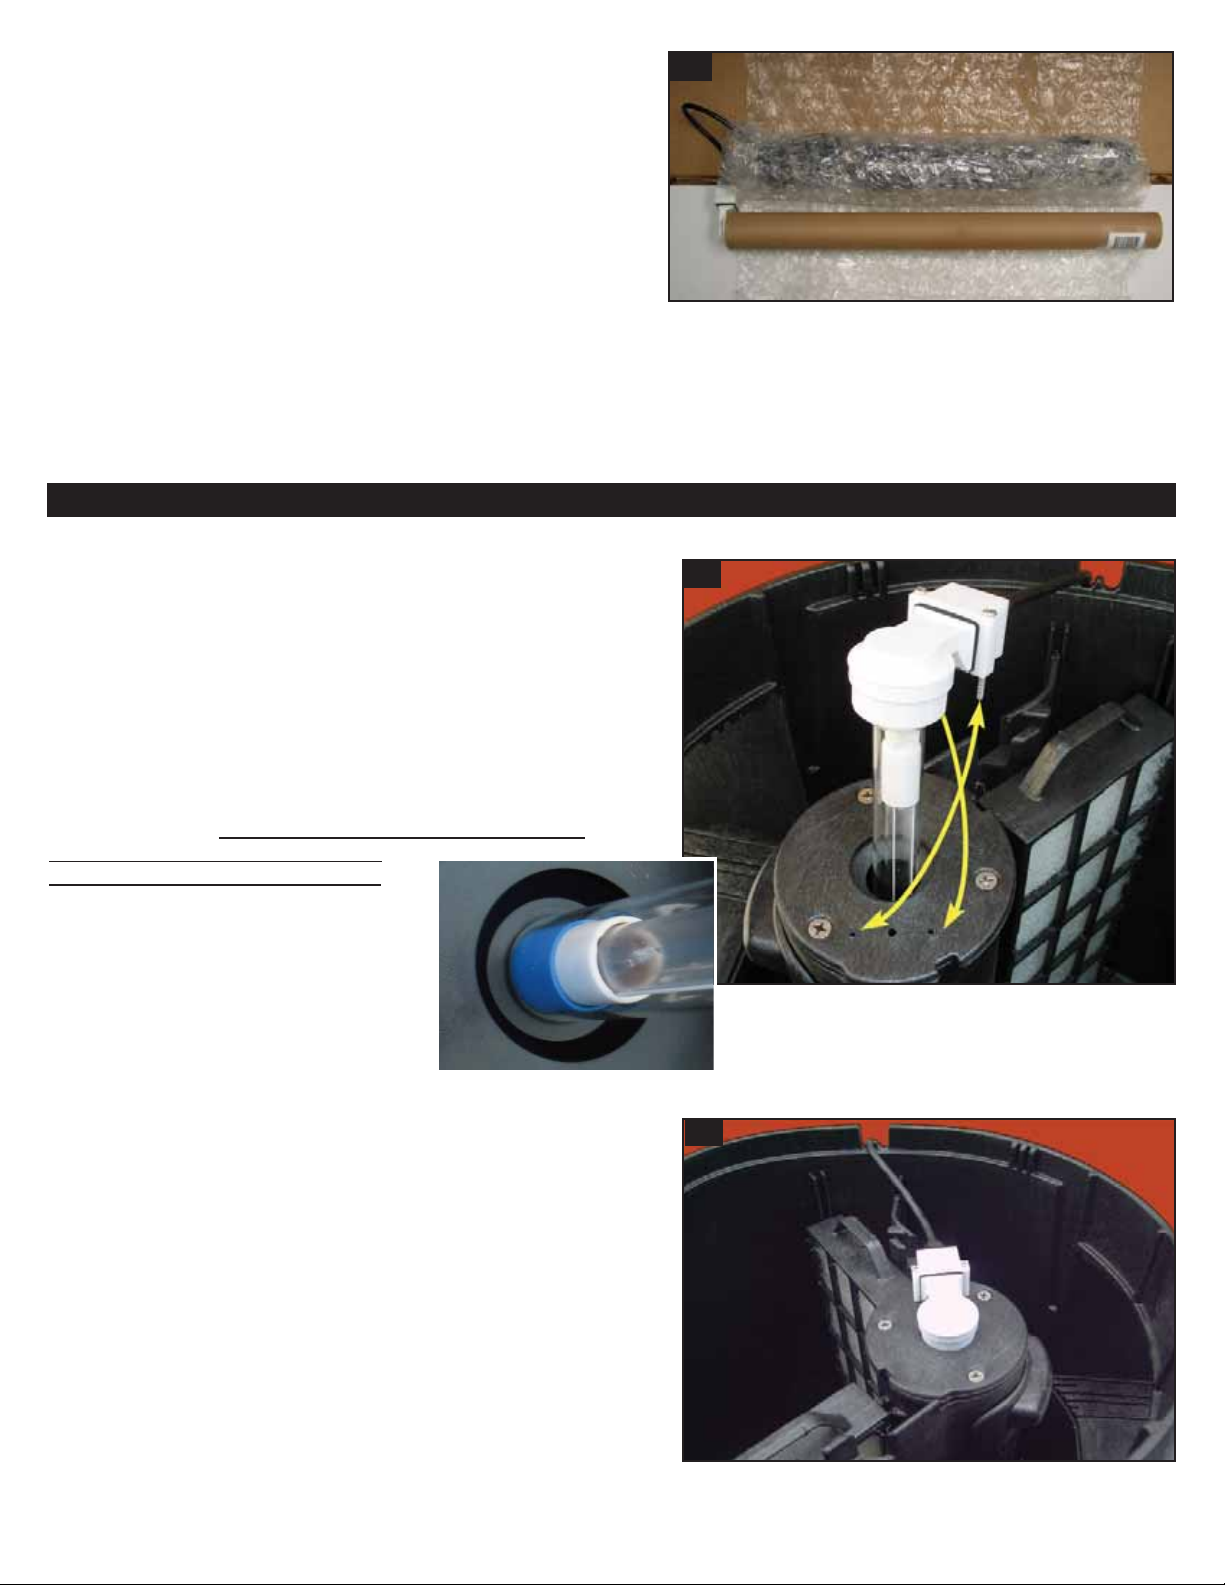
4.3 Your Advanced UV will be wrapped as one cocoon of bubble
wrap. First, carefully remove the outer layer of bubble wrap. You
should now have two protected sections connected by the power
cord as shown in Photo 4C to the right. Second, carefully remove
the bubble wrap from the Advanced UV Sterilizer’s power supply.
Gently slide the protective tube from the Advanced UV’s Quartz
Sleeve for removal. Lastly, remove the rubber bands from the
power supply cord and the piece of tape holding the screws in
place (located on the connection assembly). With the exception of
the two mounting screws your Advanced UV Sterilizer should not
have any loose parts. If your Advanced UV does not look like the
one in Photo 4A, or if you noticed any broken parts please contact
Emperor Aquatics, Inc. at 610-970-0440 x0 for further assistance.
4.4 Your Advanced UV Sterilizer is now ready for installation into
your Savio Skimmer.
4C
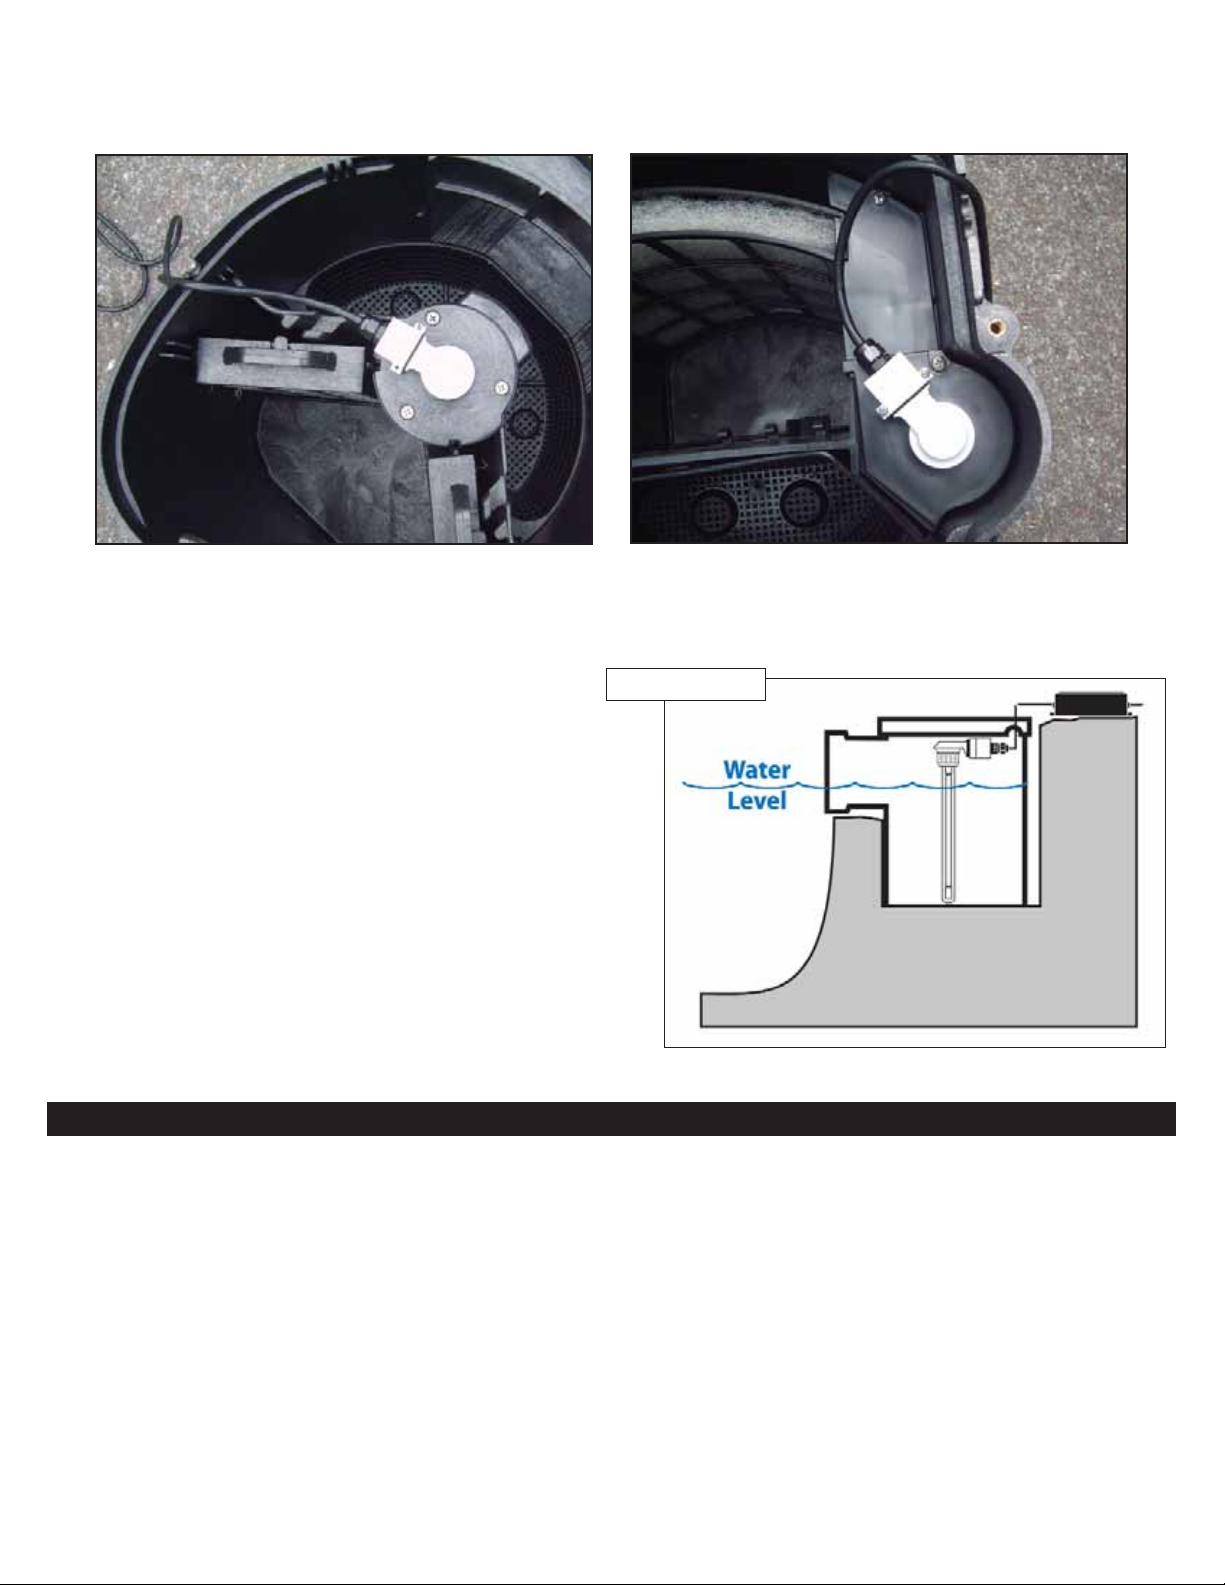
5.1A Slide the quartz sleeve end of the unit gently into the UV
chamber of the filter (shown in Photo 5A). Line up the two
screws of the white connection assembly with the holes on
the filter. Ignore the center hole.
5A
5.2 Secure the Advanced UV Sterilizer by tightening down the
two screws (shown in Photo 5B).
5B
4
5.0 Installation
5.1B 2008 and Newer Savio Skimmers require the UV Plate
hole to be opened up from a 7/8” diameter to 1”. Use a 1” hole
saw bit to accomplish this. Center the 1” hole saw over the
existing hole, then carefully drill through the plastic unit com-
pletely. Make sure the freshly cut surface is smooth and clean
before proceeding. Note: Using a quartz sleeve maintains the
critical operating temperature required
by the lamp for optimum UV-C output.
5.3 Drape the power cord over and out of the filter as shown below. Make sure the cord is resting within one of the
knotches on the filter rim to ensure the cord will not interfere with the filter lid.
WARNING: Do not operate the Advanced UV Sterilizer when the water level inside the skimmer filter is below the recom-
mended point (as indicated on Diagram 5-1). Operating the unit in dry conditions will result in damage to the unit and
possible un safe conditions. Damage cause in this way will void the warranty.
5.4 Under no circumstances should the power supply be
submerged under water (inside or outside the filter).
5.5 Place lid securely on the filter.
5.6 After the recommended water level is obtained, you may
plug in your Advanced UV Sterilizer to start operation.
5.7 You are now ready to operate the Advanced UV Sterilizer.
18 Watt Advanced UV 25 & 50 Watt Advanced UV
5
6.0 Servicing the 18, 25, & 50 Watt Advanced UV Sterilizer
6.1 QUARTZ SLEEVE CLEANING:
(WARNING: Unplug the Advanced UV from the electrical source before removing the lid of the Savio skimmer or you risk
possible injury due to ultraviolet light exposure).
Once the Advanced UV is unplugged, remove the Savio Skimmer’s lid. Unscrew the UV’s mounting screws and gently remove
the unit from the skimmer box. Remove the soft solid waste deposits on the quartz sleeve with a mild dish washing detergent
then rinse thoroughly. For harder deposits on the quartz sleeve remove with vinegar or muriatic acid. WARNING: Extra care
must be used when handling chemicals including acids of any kind.
Quartz sleeve cleaning frequency is determined by the condition of the water being treated. Supplying solids-laden water to the
UV decreases UV transmissibility through the water and weakens overall UV performance. This also makes the quartz sleeve
dirty quicker; therefore, requiring more frequent cleanings. When finished, reinstall the Advanced UV by following these steps in
reverse.
Diagram 5-1
This manual suits for next models
2
Table of contents
Other Emperor Aquatics Laboratory Equipment manuals

Popular Laboratory Equipment manuals by other brands


Belden
Belden HIRSCHMANN RPI-P1-4PoE installation manual

Koehler
Koehler K1223 Series Operation and instruction manual

Globe Scientific
Globe Scientific GCM-12 quick start guide

Getinge
Getinge 86 SERIES Technical manual

CORNING
CORNING Everon 6000 user manual

Biocomp
Biocomp GRADIENT MASTER 108 operating manual


