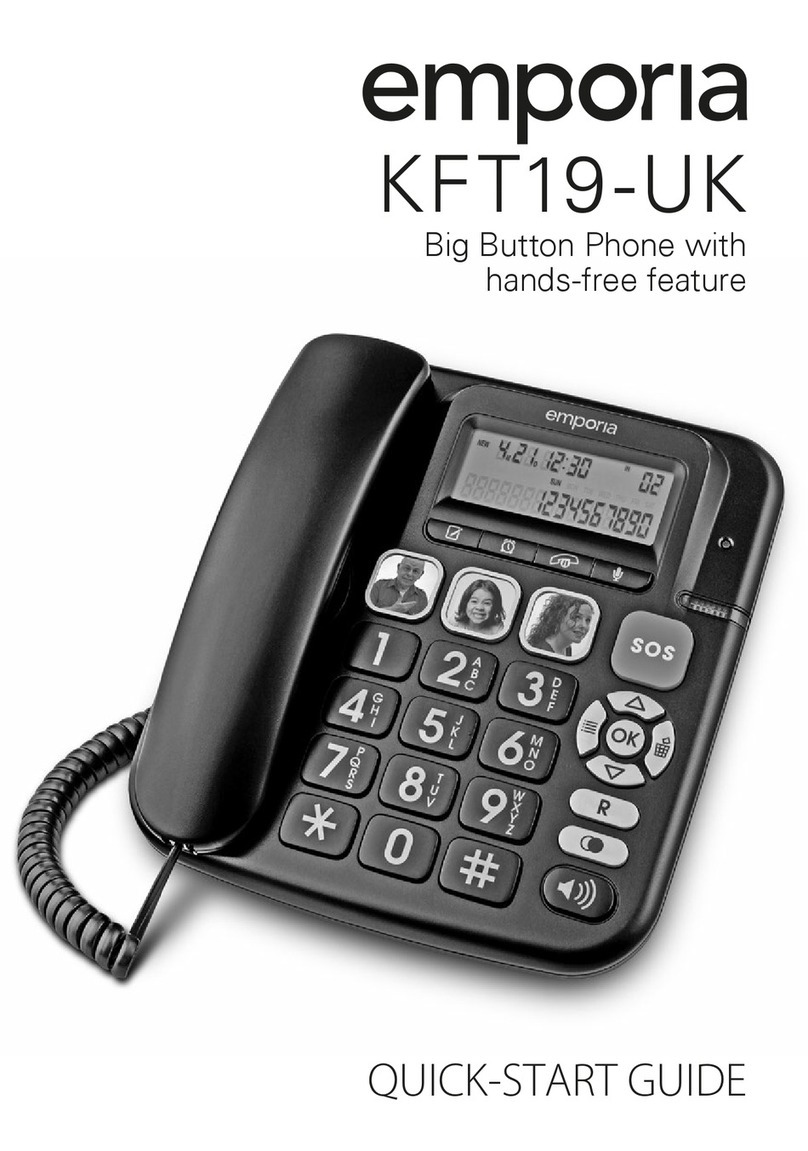
EMPORIA KFT19-SOS User manual

QUICK-START GUIDE
KFT19·SOS
Big-button phone with
emergency-bracelet

02
Thank you for purchasing an emporia Big Button
KFT19-SOS telephone.
This user guide provides you with information that
you need to set up and start using your phone.
Before you make your first call, please follow
the simple instructions in »Getting started« on
page 06.
What's in the Box
·KFT19-SOS-UKtelephone
·Receiver cord
·Phone line cable
·4 pc. AA batteries
·Emergency button with bracelet and lanyard ttings
·Quick-Start Guide
Keep the packing materials in a safe place in case you need to
transport the unit. Keep the receipt, it is your guarantee.
WELCOME

03
Your phone at a glance ..................................................................................04
Getting started ..................................................................................................06
Good to know .....................................................................................................08
·Using the menu ......................................................................................................08
·Entering text............................................................................................................08
Using the phone................................................................................................09
·Incoming calls .........................................................................................................09
·Make a call ...............................................................................................................10
·Outgoing call list ....................................................................................................10
·Incoming call list.....................................................................................................10
Emergency call function ............................................................................... 11
·The emergency bracelet....................................................................................... 11
Phone book .........................................................................................................16
·Creating a contact record.....................................................................................16
·Dialling a number from the phonebook.......................................................... 17
Settings (Menu) .................................................................................................18
·LCD contrast ............................................................................................................18
·Enter time/date.......................................................................................................18
·Store number .......................................................................................................... 19
·LCD language.......................................................................................................... 19
·Voice – spoken functionality ............................................................................... 19
·Set flash time........................................................................................................... 19
·Manage pendants ..................................................................................................20
·Local area code.......................................................................................................20
Appendix...............................................................................................................22
·Guarantee ................................................................................................................22
·Declaration of network conformity....................................................................25
·Declaration of conformity (DoC).........................................................................25
CONTENTS

0
W
X
Y
Z
9
T
U
V
8
P
Q
R
S
7
M
N
O
6
J
K
L
5
G
H
I
4
D
E
F
3
A
B
C
2
1
R
SOS
OK
MENU
01
02
03
14
04
04 YOUR PHONE AT A GLANCE
01 Receiver hook switch
(line interruption)
02 BOOST-key
This button allows you to instantly increase
the volume of the receiver. Theaudio-boost
function will be disabled automatically
when the call ends.
03 Speaker
04 MENU-key
MENU
Use this key to open the menu.
05 ARROWkeys
Use this key to…
·… to scroll in lists and menus.
·… to open the Phone book or
the Caller ID (CLIP) list (incoming calls).
06 DELETEkey
Use this key to clear/delete individual
digitsthat have been entered or to delete a entry in alist.
07 OK-key
OK
Use this key to conrm a menu item or an entry.
08 Incoming Call LED indicator
The red LED will ash to indicate incoming calls.
09 SOS-key
SOS
This SOS button is a one-touchmemorykey that you can allocate to a
nominated family member, carer or neighbour so that you can easily
contact them through the SOS key.
You can nd more and detailed information in chapter »Emergency
call function« on page11 of this manual

0
W
X
Y
Z
9
T
U
V
8
P
Q
R
S
7
M
N
O
6
J
K
L
5
G
H
I
4
D
E
F
3
A
B
C
21
R
SOS
OK
MENU
14
09
05 06 07
08
10
11
12
13
05YOUR PHONE AT A GLANCE
10 PHONEBOOK-key
Use this key to…
·… to switch between the Caller ID (CLIP) list
and Phone book.
·… to exit/end the menu.
11 FLASH-key
If you dial a number and the line is busy,
pressthe FLASHkey and the REDIALkey
toredial the number.
12 REDIALkey
Outgoing call list – You can use this key to dial
your most recently dialled number again.
It also allows you to insert a dialling pause
when inputting a number.
13 HANDS-FREEkey
With this key you can accept a call in handsfree
mode, start a call in handsfree mode or switch
the handsfree mode on or o during a call.
14 NUMBERkeys

DC 9V/300mA
6
5
4
2
1
06 GETTING STARTED
Positioning the phone
·You need to position your phone within 2 metres
of a phone socket so the cable can reach.
·Do not place this product on an unstable surface.
The phone could drop on the oor, which could
cause serious damage to it.
Set the ringer volume
Slide the switch 1to loud, medium, or
quiet as needed.
Adjust the handset volume
Move the slider 2as needed. Upwards
to increase and downwards to decrease
thevolume.
Connecting the receiver cord
Insert one end of the receiver cord into its
port ( ) 3 on the left-hand side of the phone
and the other end into the receiver.
Connecting the telephone line
·Insert the transparent plug into the line port ( ) 4
on the bottom ofthe phone.
·Plug the other end of the telephone line cord into
the wall socket.
Inserting the batteries
Open the battery compartment 5and insert the included batteries
(4 × AA). Pleasepay attention to the polarity. Once the batteries are
in, putthe battery compartment cover back on. The time should now
bedisplayed on thescreen.

DC 9V/300mA
5 3
07GETTING STARTED
Connect the power supply
Insert the plug into the port 6on the back of
thedevice and the other end into a 240V power
socket.
Setting the display language
You can change the display language if the phone
has been set to alanguage you don't understand.
·When the corded phone is not in use,
press the MENU-key
MENU
, to open the menu.
LCD CONTRAST will be displayed.
·Press the ARROWkey (UP) three times to
select. LCD LANGUAGE will be displayed.
·Conrm with the OK-key
OK
.
The available languages will be listed.
·Use the ARROWkeys to select your
desired language.
·Finish with a nal conrmation by pressing
theOK-key
OK
.
·Exit the menu by pressing the PHONEBOOK-key .
Setting the date and time
If your service provider has activated caller ID, the time and date will
be automatically updated on the phone by the network as soon as
you receive a call.
Screen backlight
The backlight will illuminate when you receive an incoming call,
dialout or press any key. It will go o when the phone is not in use

08
Using the menu
·When the phone is not in use, press the MENU-key
MENU
to open
themenu.
·Use the ARROWkeys to scroll from one function to the next.
The current function will be shown on the display.
·Press the OK-key
OK
to select the displayed function.
Thecorresponding option will open.
Entering text
Enter text using the keypad. Each key has several characters assigned
to it, which can be selected by pressing the respective key several
times. The table below shows you which number to press for each
letter and special character. This will be helpful when storing a name
in the phone book.
> Writing tips:
·Enter letters and characters by pressing the corresponding key.
Press the corresponding key briey several times in succession to
getto the desired character.
·When a character has been selected, the cursor will move to the
nextposition after a short pause.
·You can use the ARROWkeys to move the cursor around
thetext if you want to amend the text you've entered.
·Press the DELETEkeyto deletethe character to the left of
thecursor.
01
2
ABC
3
DEF
4
GHI
5
JKL
6
MNO
7
PQRS
8
TUV
9
WXYZ
1 × blank 1 A D G J M P T W
2 × 0 . B E H K N Q U X
3 × – , C F I L O R V Y
4 × + : 2 3 4 5 6 S 8 Z
5 × = ; 7 9
6 × - !
GOOD TO KNOW

09
Incoming calls
> Accepting a call
·When you receive a call, the phone will ring and the red Incoming-
Call LED indicator will ash. Simply pick the receiver up to answer
the call.
·Or press the HANDS-FREEkey if you wish to answer in hands-
free mode.
> Ending a call
Simply put the receiver back on to the cradle or press
the Receiver hook switch (or press the HANDS-FREEkey if you
are are using the phone in hands-free mode).
During a call
> Audio-Boost-Function
The audio-boost function will raise the volume of the receiver to
amplify the volume of the voice/sound (handset only). The audio-
boost function will be disabled automatically when the call ends.
Press the BOOST-key to turn the audio-boost function on or o.
> Hands-free mode
In hands-free mode, you can talk to someone on the phone without
having to hold the receiver. In addition, other people in the room can
follow your conversation thanks to the loudspeaker.
·To answer and end a call in hands-free mode,
simply press the HANDS-FREEkey .
·To turn hands-free mode on during a call, press the HANDS-
FREEkey and place the receiver back in the cradle.
·To turn hands-free mode o during a call, lift the receiver and
pressthe HANDS-FREEkey .
USING THE PHONE

10
Make a call
·Pick up the receiver and wait until you hear the dial tone.
·Enter the phone number.
OR
·If you want to use hands-free mode, press theHANDS-FREEkey .
Wait until you hear the dial tone.
·Enter the phone number.
Outgoing call list
The most recently dialled phone numbers are listed and displayed
chronologically in the Outgoing call list. If the list is full, each new
entry will replace the oldest.
·Use the REDIALkey to open the Outgoing call list.
·Use the ARROWkeys to select the desired entry.
Press and release the OK-key
OK
to start the call.
·Use the DELETEkey to delete a entry.
Press and hold it for 3 seconds the to delete all entries of the list.
Incoming call list
The most recently received phone numbers are listed and
displayed chronologicaly in the Caller ID (CLIP) list (incoming calls).
If the list is full, each new entry will replace the oldest.
·To enter Caller ID list, ensure the CLIP-Symbol is displayed right of
thedate. (Use the PHONEBOOK-key to switch between
the Caller ID list [Incoming call list] and [Phone book].)
Use the ARROWkeys to open the Caller ID list.
·Use the ARROWkeys to select the desired entry.
Press and release the OK-key
OK
to start the call.
·Use the DELETEkey to delete a entry.
Press and hold it for 3 seconds the to delete all entries of the list.
USING THE PHONE

1
35
3
34
4
2
11
Your phone is equipped with an emergency
call function which can be programmed
to automatically call up-to 30 contacts
from the phonebook in rotation and
up-to 30 times.
The recipient of the emergency call will
hear a voice message which states that
»This is an emergency call, to accept this
call press 1«.
> There are two ways to make a call for help
quickly in an emergency:
·Press and hold the SOS-key
SOS
on the emergency bracelet.
·Press the SOS-key
SOS
on the phone.
The emergency bracelet
01 SOS-key
SOS
·Press and hold to start a
emergencycall.
·Press and hold for 2seconds for
accepting a call.
·Press and hold again for 2seconds
toend a call.
02 LED
Flash to indicate a press on
the SOS-key.
03 Battery cover screws
04 Eyelets for bracelet
05 Eyelet for lanyard
EMERGENCY CALL FUNCTION

12 EMERGENCY CALL FUNCTION
Your emergency button can be worn
as a bracelet or around your neck
using the pendant strap included.
The pendant can be used to answer
an incoming call remotely rather
than rushing to the phone or trigger
an emergency call.
To answer an incoming call, whilst the phone is ringing, press
the button on emergency remote Button for 2 seconds and your
telephone will answer in hands free mode where you will be able to
speak to the caller. When you reach the telephone, you can continue
in hands-free mode or lift the receiver to talk. You can also end the
call by pressing the remote emergency button for 2 seconds,
To activate and emergency call Press and hold the button for
2seconds. Please see the following sections that explain the
emergency call set-up and call process.
There is an LED light on the remote Button. If this does not illuminate
please replace the battery. We recommend that you replace the
battery in the remote Button every 12 months.
You can register up to ve emergency bracelets on your phone.
You can read how to manage these transmitters in Chapter »Manage
pendants« on page20.

Typ: A23+ –
silicon-layer
cover
13EMERGENCY CALL FUNCTION
Changing the alarm Button battery
We recommend that you replace the alarm Button battery every
12months and check that its function is working at regular intervals (at
least every 4 weeks). If the LED light does not illuminate or it cannot be
used for ‘answer’ functionality, replace the battery as soon as possible.
We recommend that you use a service partner or suitable qualied
technician to replace the battery in order for the remote emergency
Button to retain its water resistance ability and functionality.
·Using a small Phillips screwdriver,
remove the three screws.
You do not need to remove the wrist
strap or pendant to replace thebattery.
Place your remote Button with the
button facing down on a soft dry surface.
·Lift carefully the top section of
thebutton and remove the casing and
the silicon-layer.
·Replace the battery (type: A23, 12V).
Payattention to the polarity (the spring
is the negative end of thebattery).
·Ensure that the silicon-layer is correctly placed inside the top section
and replace it over the lower section– being careful to ensure that the
gaps are all closed correctly. Thereis only 1way that the silicon layer
can t correctly and theeyelets should be clear from silicon section.
·Before replacing the screws we recommend that you press the
button for less than 1second to test the LED illuminates and that
thenew battery is located correctly.
·Now carefully turn over the emergency Button to have the button
facing down and replace the 3Philips cross head screws securely.
Donot over tighten.

14 EMERGENCY CALL FUNCTION
Emergency call cycle
When the emergency cycle is started, the following happens:
·The phone will sound the alarm for 5seconds and automatically
dials the rst emergency number. The phone alarm will stop and
thefollowing voice message will be played:
»This is an emergency call, to accept this call press 1.«
·If the recipient of the call does not conrm the call by pressing
the1 key, thecall will be dropped and the second person from
youremergencylist will be called.
·If it is not possible to get through to the second contact,
the third will be called, and so on.
·Up to 30emergency contacts can be added to the emergency list
and can be called in the order saved. This call list will be repeated up
to 30times for all assigned emergency contacts unless it is answered
and conrmed by one of the recipients.
When the call is answered and conrmed by the recipient, the
telephone will be placed in to hands-free mode and you will be able
to hear and speak with the recipient of the emergency call.
We recommend that you have at least 5 emergency contacts assigned to
the emergency list.
Warning tone
A warning tone will start sounding immediately on your telephone
to conrm the emergency function is activated. The warning tone
stops after 5 seconds and you will hear the voice announcement
repeatedly say »This is an emergency call, to accept this call
press 1«.

15EMERGENCY CALL FUNCTION
How do I stop an accidental emergency call?
If you press and hold the SOS-key
SOS
by mistake and activate
theemergency call procedure press the orange HANDS-FREEkey
or press and hold the DELETEkey on the telephone.
The call will stop immediately.
Who do I call in an emergency?
·Inform the people you are setting as emergency contacts and
discusswith them what they should do in an emergency.
·If you want to add a help organisation or an ocial institution
such as a rescue service, it is imperative that you check with
thoseorganisations that they can accept your call before doing so.
Please do NOT set your phone to call the Emergency services 999 /112.
What does the emergency call recipient have to do?
·An automatic announcement will be played constantly for any
recipient. The message will say: »This is an emergency call, to accept
this call press 1.«
·Your emergency contact now has to press the 1 key (one) on their
keypad within 60 seconds to conrm the call. When the call is accepted
by the recipient, they will be able to speak to and hear the caller.
·If the call is not conrmed, the call will move on to your next assigned
emergency contact. This ensures that your call does not go through
to an answerphone or a voicemail.
Setting the emergency call list
To set-up the emergency function, you will need to add names and
numbers to the phonebook and select which of these contacts you
would like to receive and emergency call. Please discuss this with
them before adding them.
Find more information about creating a contact in chapter:
»Creating a contact record« on page16

16
The phone book store up to 30 numbers and the names connected
to them. Contact records can contain numbers of up to 22digits and
names of up to 16characters.
Creating a contact record
·When the phone is not in use, press the MENU-key
MENU
to open
themenu. LCD CONTRAST will be displayed.
·Use the ARROWkeys to select STORE NUMBER
·Conrm with the OK-key
OK
.
The cursor will be displayed. Enter the number.
·Conrm with the OK-key
OK
.
The cursor will ash in the bottom row.
Enter the name (seepage08).
·Conrm with the OK-key
OK
.
EMERGENCY OFF will be displayed.
Here you have the option to dene this entry as an emergency contact.
Use the ARROWkeys to switch between OFF and ON.
·Conrm your decision with the OK-key
OK
.
·If you choose EMERGENCY ON, now -01- POSITION will be displayed.
·Use the ARROWkeys to specify the order
in the emergency cycle.
·Finaly conrmation by pressing the OK-key
OK
.
SAVED! will be displayed.
PHONE BOOK

17
Dialling a number from the phone book
·To enter the Phone book, ensure the -Symbol is displayed right of
thedate. (Use the PHONEBOOK-key to switch between
[Phone book] and the Caller ID list [incoming calls].)
·Use the ARROWkeys to open the Phone book.
·Use the ARROWkeys to select the desired entry.
·Press and release the OK-key
OK
to start the call.
Edit an entry from the phone book
·Use the ARROWkeys to open the Phone book.
·Use the ARROWkeys to select the desired entry.
·Press and hold the MENU-key
MENU
.
EDIT? will be displayed.
·Conrm with the OK-key
OK
.
The number will be displayed, the rst digit ashes.
Use theARROWkeys to move the cursor around.
·Conrm your changes with the OK-key
OK
.
The name will be displayed, the rst character ashes.
·Conrm your changes with the OK-key
OK
.
EMERGENCY OFF/ON will be displayed.
·Use the ARROWkeys to change the emergency setting.
·Finaly conrmation by pressing the OK-key
OK
.
SAVED! will be displayed.
Delete an entry from the phone book
·Use the ARROWkeys to open the Phone book.
·Use the ARROWkeys to select the desired entry.
·Use the DELETEkey to delete a entry.
Press and hold it for 3 seconds the to delete all entries of the list.
PHONE BOOK

18 SETTINGS (MENU)
Your phone comes with a number of settings that you can change
topersonalise the way the phone works.
·When the phone is not in use, press the MENU-key
MENU
to open
themenu. LCD CONTRAST will be displayed.
·Use the ARROWkeys to scroll from one function to the next.
The current function will be shown on the display.
·Use the PHONEBOOK-key to exit the menu.
LCD contrast
The default is: 4; 1 (low) up to 5 (high) selectable
Enter time/date
If your service provider has activated caller ID, the time and date will
be automatically updated on the phone by the network as soon as
you receive a call.
·Select ENTER TIME/DATE in menu.
·Conrm with the OK-key
OK
.
ENTER TIME will be displayed, the hour digit ashes.
·Use the ARROWkeys to change the value.
·Conrm with the OK-key
OK
, the minute ashes.
·Use the ARROWkeys to change the value.
·Conrm with the OK-key
OK
.
ENTER DATE will be displayed, the month ashes.
·Use the ARROWkeys to change the value.
·Conrm with the OK-key
OK
, the day ashes.
·Use the ARROWkeys to change the value.
·Finaly conrmation by pressing the OK-key
OK
.
·Exit the menu by pressing the PHONEBOOK-key .

19SETTINGS (MENU)
Store number
(seepage16)
LCD language
·You can select the language to be displayed on the display:
English, Francais, Italiano, Deutsch, Espanol, Nederlands, Polski,
Svenska, Dansk, Suomi, Portugues
·To change the display language if the phone has been set to
alanguage you don't understand, see the instruktion »Setting the
display language« on page07.
Voice – spoken functionality
Your phone can be set to read out the following elements to make it
easy to use if you are partially sighted:
·Menu Options
·Incoming Telephone Numbers (using Caller-ID)
·Emergency Announcement
·Dial pad numbers
Languages available are as listed under LCD Language above.
Please note: changing the LCD language does not change
theVoicelanguage in the screen reader.
Voice can be turned o as the nal option in the language list.
Set flash time
Adjusting the ash time is only used for a PBX phone system.
Thedefault setting is 100 ms which is correct for home telephones.

20 SETTINGS (MENU)
Manage pendants
> Pair new pendant
·Select PAIR NEW PENDANT in menu.
·Conrm with the OK-key
OK
. PAIRING will be displayed.
·Conrm with the OK-key
OK
to start pairing mode.
PAIRING… will be displayed and will ash.
You have 2 minutes to pair you new pendant.
·Press and hold the SOS-key
SOS
on the emergency bracelet.
·As soon as the bracelet is successfully registered,
DONE will be displayed.
> Disconnect a pendant
·Select PAIR NEW PENDANT in menu.
·Conrm with the OK-key
OK
. PAIRING will be displayed.
·Use the ARROWkeys to select DELETE DEVICE.
·Conrm with the OK-key
OK
.
·As soon as the bracelet is successfully deregistered,
DONE will be displayed.
All previously paired bracelet are disconnected.
Local area code
After you have set the local area code, the device automatically lters
the area code if the incoming number matches the rst number with
the local area code. If the area code has only 4 digits, the last digit can
be left as a –.
Table of contents
Other EMPORIA Telephone manuals


