9019URF QG 德
3100506040 v1.0
9019URF-Tastatur mit Maus & Dualmodus Joystick-Maus
Kurzeinleitung
Hardwareinstallation
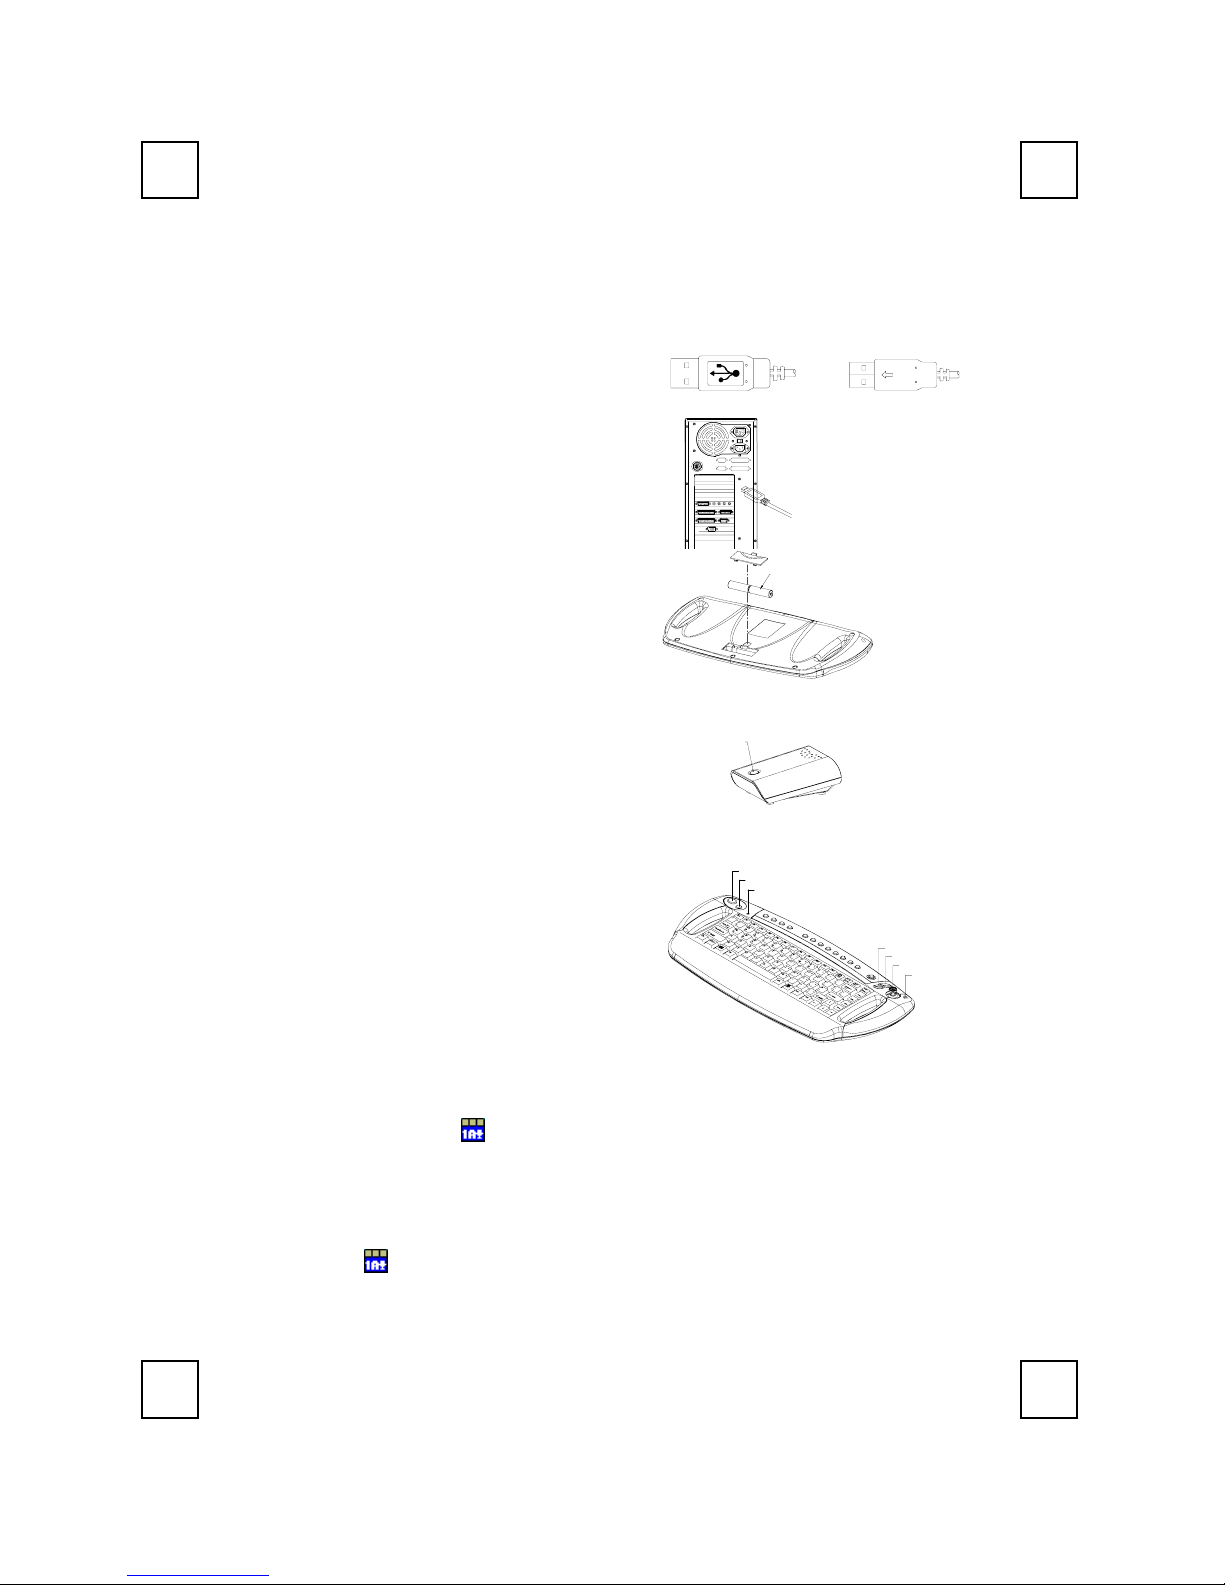
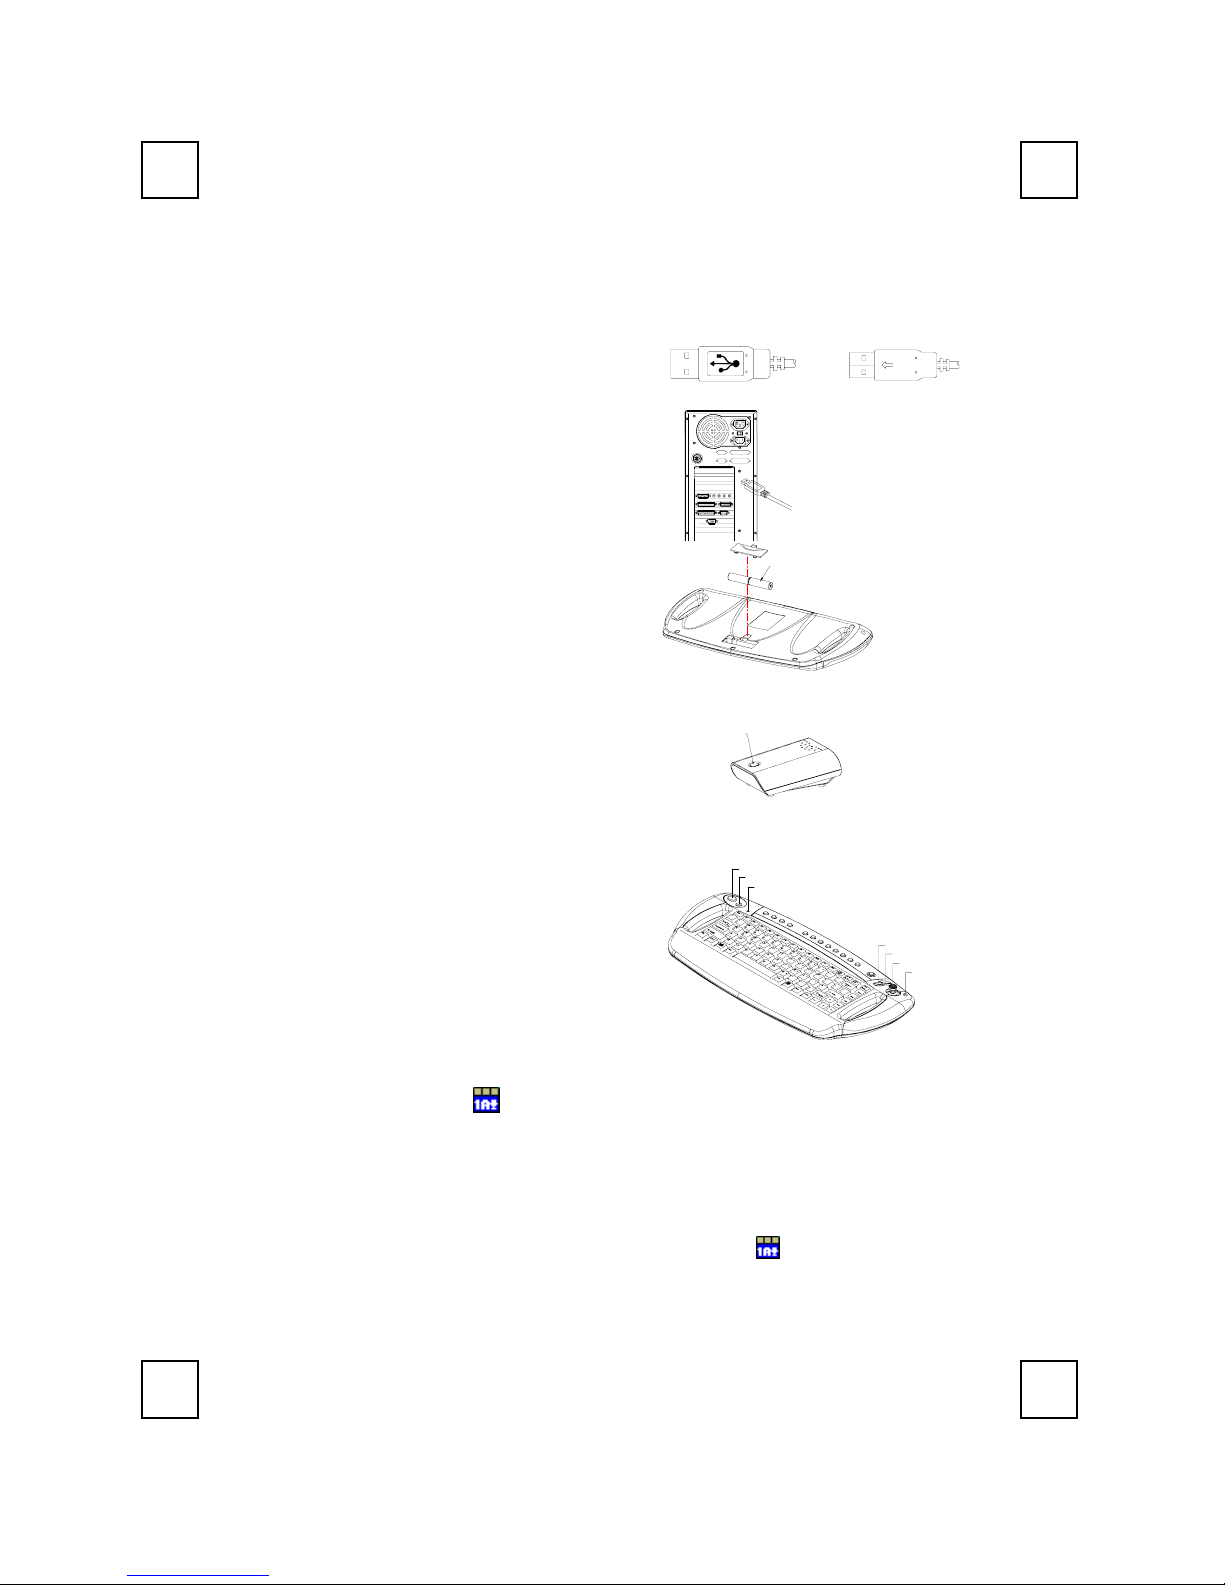
Front View of USB Connector Back View of USB Connector
1. Verbinden Sie den Empfänger mit Ihrem PC,
indem Sie den Empfängerstecker in den PC
einstecken.
2. Vergewissern Sie sich bei Ihrer Tastatur, dass
die Batterien an der Rückseite richtig installiert
sind. (Beachten Sie die Markierung für die
Polarität der Batterien im Batteriefach)
110V
(+)
(-) 1.5V 2pcs
ID-Einstellung
Die ID-Erkennungsfunktion verhindert die
Interferenzen durch die anderen RF-Mäuse in der
selben Umgebung. Die ID muss neu eingestellt
werden, nachdem die Batterien ausgewechselt
wurden oder wenn die Tastatur nicht richtig
funktioniert. Der ID-Knopf jedes
Gerätes wird mit dem Wort "CONNECT"
gekennzeichnet
Die LED unter der ID Taste des Empfängers
zeigt den Verbindungsstatus
1. Ihr PC muss eingeschaltet sein, um die
ID-Einstellung zu ändern.
2. Drücken Sie einmal den ID-Knopf auf der
oberen Teil des Empfängers.
3. Drücken Sie einmal die ID-Taste vorne an der
oberen linken Ecke der Tastatur.
Achtung: Der ganze Prozess sollte innerhalb 1
Minute vervollständigt werden.
ID Button(LED)
Mouse Right Button
ID Button
Scroll Down
Sticker
Mouse Middle Button
Scroll Up
Mouse Left Button
Softwareinstallation
Um die Funktion der speziellen Taste der Tastatur ausnutzen zu können, müssen Sie den
Tastaturtreiber, der sich auf der Treiber-CD in der Box befindet, installieren.
1. Stecken Sie die Treiber-CD in das Diskettenlaufwerk.
2. Rufen Sie das Programm SetupKey.exe.
3. Befolgen Sie den Anweisungen auf dem Bildschirm, um die Installation zu vervollständigen.
Das Treibersymbol wird auf der Windows-Taskleiste angezeigt, wenn alle Setupprozesse
vervollständigt wurden. Das Betriebssystem muss nicht neu gestartet werden.
In den USB-Anschluss
einstecken
Rückseite der
9019URF-Tastatu
ID-Taste am Empfänger
(mit einer LED unter der
ID-Taste
Frontseite der 9019URF-Tastatur