Eneltec ENFL-10W-01RGB User manual

RGB COB LED Flood Lights
www.eneltec-led.com
CE APPROVED
LED DRIVER

www.eneltec-led.com
Dimensions
A
B
c
Data
A B C
ENFL-10W-01RGB 115 100 85
ENFL-20W-01RGB 180 140 135
ENFL-30W-01RGB 225 185 160
ENFL-50W-01RGB 285 360 183
ENFL-70W-01RGB 285 360 183
ENFL-100W-01RGB 290 360 183
Model No.
Product Dimension (mm)
Model No. ENFL-10W-01RGB ENFL-20W-01RGB ENFL-30W-01RGB ENFL-50W-01RGB
Input Voltage
PF >0.5
Power (W) 10 20 30 50
Lumen (lm) 1000 2000 3000 5000
CRI
Beam Angle
Color
IP Grade
LED
LED Driver
Packing
Dimension
(mm)
20PCS
560×260×230
12PCS
495×390×250
8PCS
480×415×305
4PCS
500×315×335
Net Weight/
Gross Weight
(Kg)
20PCS
9.5/10.5
12PCS
11.4/12.5
8PCS
13.2/14.5
4PCS
10.9/12.0
IP65
EPILEDS 35mil×1PC
CE Driver
>0.9
85-265VAC, 50-60Hz
>8 0
RGB
120°
www.eneltec-led.com
User Instruction:
1. Rated operational voltage: AC85~265V 50/60HZ. The input voltage should be stable to
avoid large fluctuation. It should be no more than rated operational voltage.
2. Ambient temperature for storage: -40℃~+60℃
Aambient temperature for working: -20℃~+50℃
The best ambient temperature for working: -0℃~+30℃
3. There are glass fittings for the light. Please handle with care. To avoid the glass from
being broken, heavy loading is forbidden.
Installation Instruction:
It is suggested that the LED flood lights should be
installed by professionals following the instructions.
Otherwise, the following consequences may result.
1. The light given out by the flood light cannot be fully
displayed. The beam angle is inappropriate.
2. The light cannot work normally
3. The danger of electric shock.
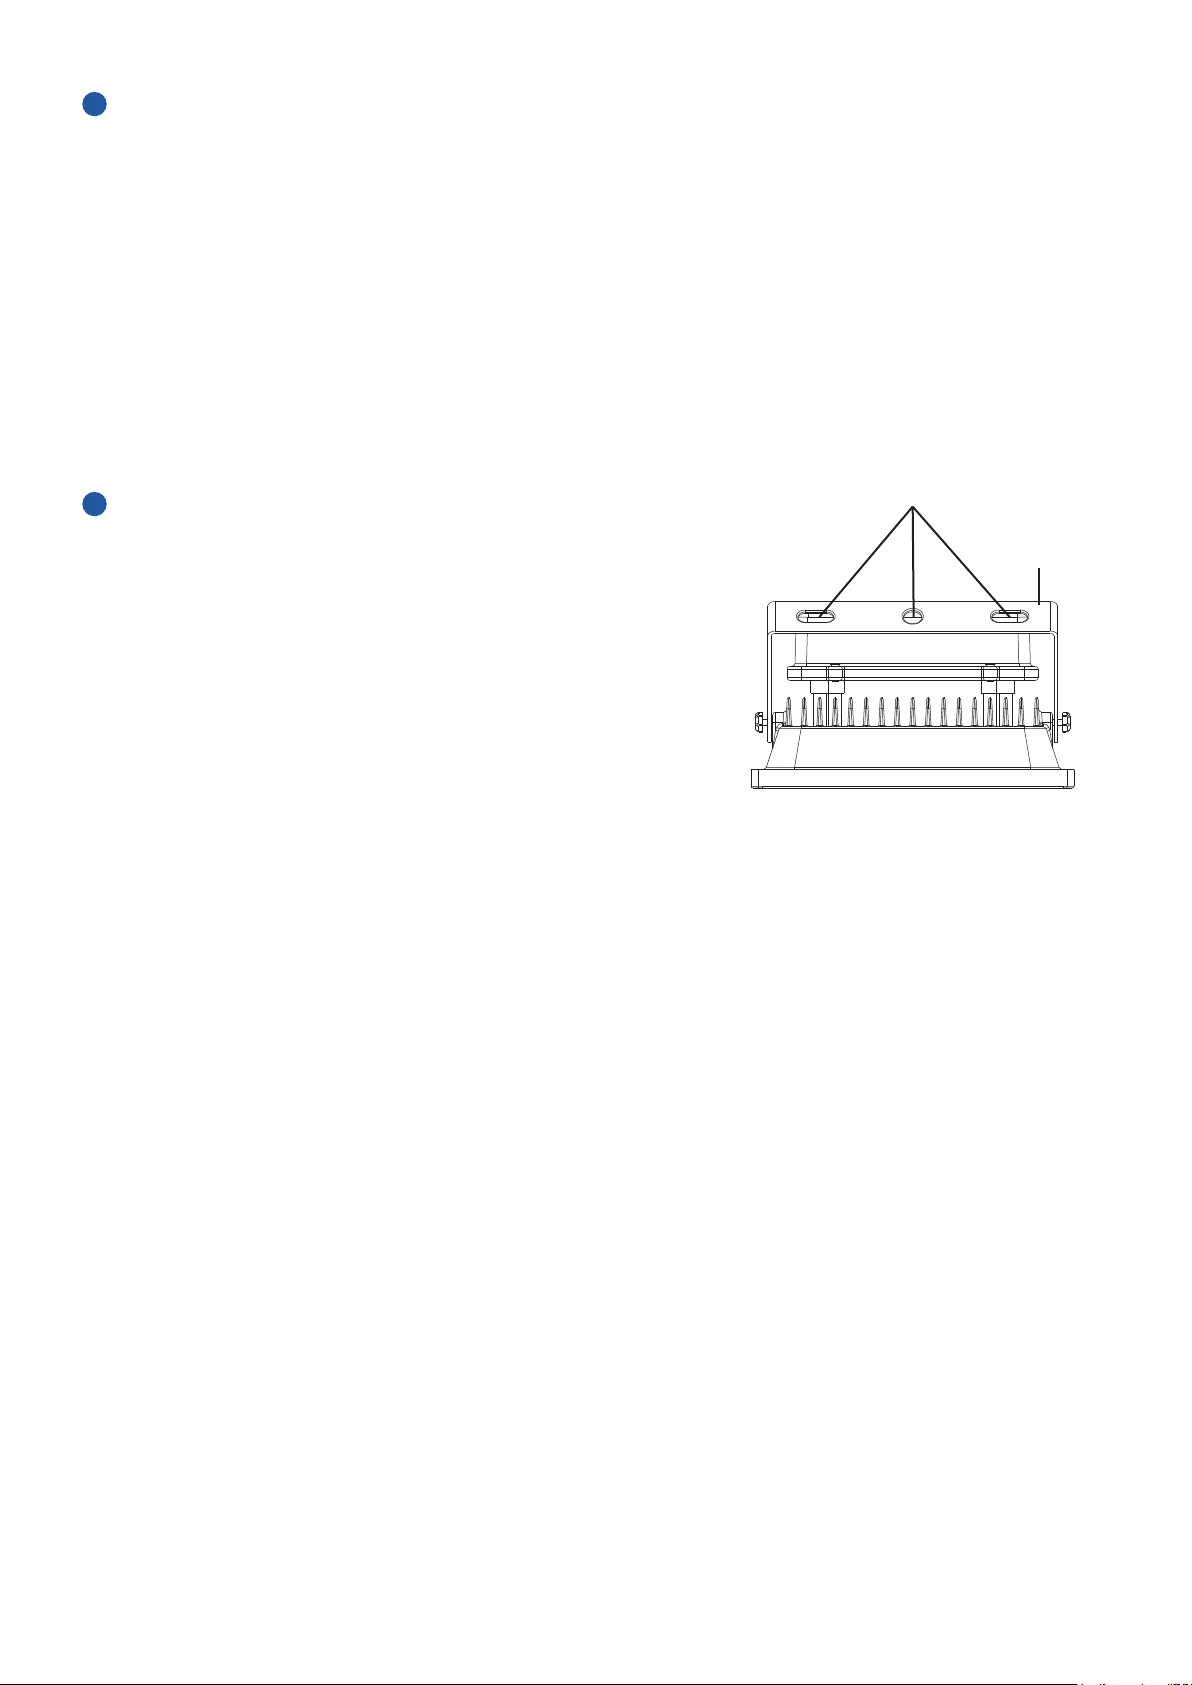
Installation Holes
Bracket
Step 1: Inspect installation position
First check whether the support or screws of the installation position can bear the weight of
1.5 times more than the body weight of the light. If not, please do not install.
Step 2: Fix the light
If the support for installation is steel, aluminum or iron bracket, please drill three holes in the
metal support. The location of the holes is the same as what is on the bracket.
Please align the holes on both the bracket of the light and the metal bracket. Then lock them
with screws. If the place for installation is cement or concrete on flat surface, please drill
holes with jackhammer on the corresponding position of the mounting surface. Then fix
the light with setscrews of more than Φ10MM.
1. Pass the screw through
the bracket 2. Lock the screw 3. Install completed

www.eneltec-led.com
Remote Control Instruction:
1[ON]/[OFF]
Buttons to switch the unit on or o.
2 Brightness control.
3 Colour selection buttons.
Use the
[W] button for white light,
[R], [G] or [B] button for the basic colours red, green and blue,
the coloured buttons to directly select a mixed colour.
4[FLASH]
Automatic change of all colours.
5[STROBE]
No function.
6[FADE]
Fast automatic change of all colours with blending eect.
7[SMOOTH]
Slow automatic change of all colours with blending eect.
Inserting the battery into the
remote control
The IR sensor for the remote control signals is rmly connected to the device with a
separate cable. Set up the receiver in such a way that there are no interfering objects
between remote and receiver.
Establish all connections as long as the unit is switched o. Use the shortest possible
high-quality cables for all connections.
Press the lock of the battery holder to the centre of the housing and pull out the battery
holder like a drawer. Insert the battery. The battery is correct if the positive pole points
to the housing base of the remote control. Slide the battery holder back into the remote
until it clicks into place.
When shipping, the battery is already installed in the remote and protected against
discharge by a transparent plastic foil. Remove the plastic foil prior to rst use.
This manual suits for next models
5


