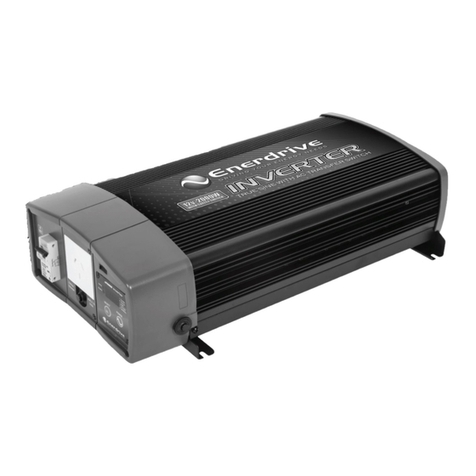
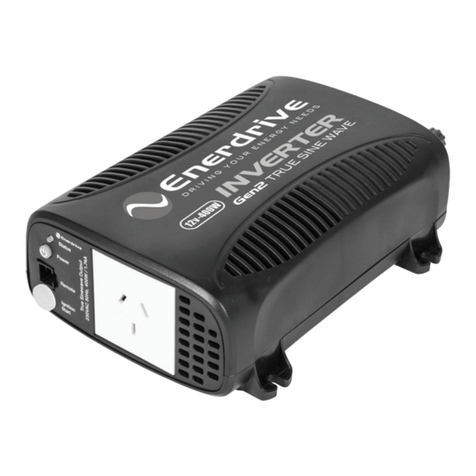
Enerdrive EPOWER 400W/12V User manual

User Manual
EPOWER 400W/12V INVERTER
EPOWER 500W/24V INVERTER
400W
500W
TRUE SINE WAVE INVERTERS
ePOWER Inverter 400W/500W User Manual Rev 2.0

Enerdrive ePOWER 400W - 500W Owners Manual Rev: 2.0
Page 2
For safe and optimum performance, the Enerdrive ePOWER Inverter must be used properly. Carefully read
and follow all instructions and guidelines in this manual and give special attention to the CAUTION and
WARNING statements.
PLEASE KEEP THIS MANUAL FOR FUTURE REFERENCE
Disclaimer
While every precaution has been taken to ensure the accuracy of the contents of this guide, Enerdrive
assumes no responsibility for errors or omissions. Note as well that specications and product functionality
may change without notice.
Important
Please be sure to read and save the entire manual before using your Enerdrive ePOWER Inverter. Misuse
may result in damage to the unit and/or cause harm or serious injury. Read manual in its entirety before
using the unit and save manual for future reference.
Product Numbers
ePOWER True Sine Wave Series
• Model: ePOWER 400w/12v - Enerdrive Part: EN1104S
• Model: ePOWER 500w/24v - Enerdrive Part: EN1105S-24
Document Part Number
ePOWER Inverter 400W/500W User Manual Rev 2.0
Service Contact Information
ENERDRIVE PTY LTD
Unit 11, 1029 Manly Road Tingalpa, Queensland, Australia 4173
Ph: 1300 851 535 Fax: 07 3390 6911
Email: sales@enerdrive.com.au
www.enerdrive.com.au

Page 3
Table of Contents
1. INTRODUCTION 4
2. PRODUCT DESCRIPTION 5
3. INSTALLATION 5
4. UNIT OPERATION 8
5. TROUBLESHOOTING 9
6. SPECIFICATIONS 10
7. WARRANTY 11

Enerdrive ePOWER 400W - 500W Owners Manual Rev: 2.0
Page 4
1. INTRODUCTION
Thank you for purchasing the Enerdrive ePOWER Inverter. With our state of the art, easy to use design,
this product will oer you reliable service for providing AC power and 5V USB power for your home, boat,
caravan, 4WD or commercial vehicle. The Enerdrive ePOWER Inverter can run many AC powered appliances
when you need AC power anywhere. The 5V USB power can charge many USB powered devices. This
manual will explain how to use this unit safely and eectively. Please read and follow these instructions
and precautions carefully.
IMPORTANT SAFETY INFORMATION
This section contains important safety information for the Enerdrive ePOWER Inverter. Each time, before
using the Enerdrive ePOWER Inverter, READ ALL instructions and cautionary markings on or provided with
the inverter, and all appropriate sections of this guide. The Enerdrive ePOWER Inverter contains no user
serviceable parts. See Warranty section for how to handle product issues.
WARNING: FIRE AND/OR CHEMICAL BURN HAZARD
• Do not cover or obstruct any air vent openings and/or install in a zero-clearance compartment.
WARNING: FAILURE TO FOLLOW THESE INSTRUCTIONS CAN RESULT IN DEATH OR SERIOUS INJURY
• When working with electrical equipment or lead acid batteries, have someone nearby in case of an
emergency.
• Study and follow all the battery manufacturer’s specic precautions when installing, using and servicing
the battery connected to the inverter.
• Wear eye protection and gloves.
• Avoid touching your eyes while using this unit.
• Keep fresh water and soap on hand in the event battery acid comes in contact with eyes. If this occurs,
cleanse right away with soap and water for a minimum of 15 minutes and seek medical attention.
• Batteries produce explosive gases. DO NOT smoke or have an open spark or re near the system.
• Keep unit away from moist or damp areas.
• Avoid dropping any metal tool or object on the battery. Doing so could create a spark or short circuit
which goes through the battery or another electrical tool that may create an explosion.
WARNING: Shock Hazard. Keep away from children!
• Avoid moisture. Never expose unit to snow, water, etc.
• Unit provides 230 VAC, treat the AC output socket the same as regular wall AC sockets at home.
WARNING: Explosion hazard!
• DO NOT use the Enerdrive ePOWER Inverter in the vicinity of ammable fumes or gases (such as gas
bottles or large engines).
• AVOID covering the ventilation openings. Always operate unit in an open area.
• Prolonged contact to high heat or freezing temperatures will decrease the working life of the unit.

Page 5
LIMITATIONS OF USE
Do not use in connection with life support systems or other medical equipment or devices.
2. PRODUCT DESCRIPTION
The Enerdrive ePOWER Inverter package includes the items list below.
• ePOWER Inverter base unit
• Owner’s manual
• DC Input cable accessories
3. INSTALLATION
WARNING: Enerdrive recommends that all wiring be done by a certied technician or electrician to ensure
adherence to the applicable electrical safety wiring regulations and installation codes. Failure to follow
these instructions can damage the unit and could also result in personal injury or loss of life.
CAUTION: Before beginning your Enerdrive ePOWER Inverter installation, please consider the following:
• The Enerdrive ePOWER Inverter base unit should be used or stored in an indoor area away from direct
sunlight, heat, moisture or conductive contaminants.
• When placing the unit, allow a minimum of 75mm of space around the unit for optimal ventilation.
Understanding the unit features
Image below shows unit features:
Power Indicator
USB Port AC Outlet
On / O Switch
- Negative DC Terminal
Fan Opening
+ Positive DC Terminal
Fault Indicator

Enerdrive ePOWER 400W - 500W Owners Manual Rev: 2.0
Page 6
Material Prepare for Installation
Typical Wiring block diagram of the Enerdrive ePOWER Inverter:
Battery Bank:
• The use of deep cycle battery is highly recommended for power inverter application
• For battery size, you need to identify how long you wish to operate the load(s). Enerdrive does
recommend that you purchase as much battery capacity as possible. See more on “Estimated Run time
and Load” in Section 4.
• Please use 12V Battery Bank system for 12V DC Input Inverter (EN1104S). Use 24V Battery Bank system for
24V DC Input Inverter (EN1105S-24). Using 12V DC Input Inverter on 24V Battery System will damage
the inverter and may catch re.
Fuse or Circuit Breaker:
• DC-rated fuse or DC-rated circuit breaker connected along the DC positive line is required.
• Select a fuse or circuit breaker with 60A/16V minimum rating for the 12V DC Input Inverter(s) and 35A/
30V minimum rating for the 24V DC Input Inverter(s).
• Based on the size of the battery bank chosen on the 12V or 24V Battery Bank system above, determine
the overall short circuit current rating of the battery bank from the battery manufacturer. The fuse or
circuit breaker chosen has to be able to withstand the short circuit current that may be generated by the
battery bank.
Disconnect Switch:
• Select a Disconnect Switch with the same or higher rating of the selected fuse or circuit breaker from
the above.
• The Disconnect Switch is used to disconnect the DC power between the power inverter and the battery
bank during service, maintenance or trouble shooting.
DC Input Cable:
• Use of low resistance wire is required for all the DC connections between the inverter and the battery
bank.
• Use minimum 10mm2 cable with a maximum length of 1.5m for 12VDC inverter and 6mm2 cable with a
maximum length of 1.5m for 24v inverter systems.
-
- Negative
+
+ Positive
12V Battery Bank EN1104S
24V Battery Bank EN1105S-24
Fuse or
Circuit
Breaker
Disconnect
Switch
AC Loads
USB
Loads
NOTE: Using 12V DC Input Inverter on 24V Battery System will damage
the inverter and may catch re.

Page 7
Installing the Enerdrive ePOWER Inverter System
WARNING: Electrical Shock Hazard
The unit ‘On/O’ switch does not disconnect the DC power from the battery. Use the DC Disconnect
Switch or disconnect the DC input cables connection to disconnect the DC power from the battery before
working on any circuits connected to the unit. Failure to follow these instructions can result in death or
serious injury.
CAUTION: Reverse the DC Input terminal will damage the unit and cannot be repaired. Damage caused by
reverse polarity connection is not covered by the warranty.
ePOWER Inverter Installation:
• Choose an appropriate mounting location.
• For indoor use, the orientation of the unit can be mounted in any direction except with the DC Input
panel facing downwards.
• For RV installation, the unit has to be mounted horizontally.
• Use mounting template below to mark the positions of the mounting screws.
• Drill the 4 mounting holes and place the inverter in position and fasten the inverter to the mounting
surface.
ePOWER Inverter DC Input Connection:
CAUTION: Reversing the DC Input terminal will damage the unit and cannot be repaired. Damage
caused by reverse polarity connection is not covered by the warranty.
• Connect one end of the negative DC input cable to the ePOWER Inverter DC negative terminal. Connect
the other end of the negative DC input cable to the battery negative terminal.
• Make sure the Disconnect Switch is in the OFF position.
• Connect one end of the positive DC input cable to the ePOWER Inverter DC positive terminal. Connect
the other end of the positive DC input cable to one of the terminal of the Disconnect Switch.
• Connect a DC input cable between the other terminal of the Disconnect Switch and one side of the
terminal of the fuse holder.
• Connect a DC input cable between the other terminal of the fuse holder and the battery positive terminal.
• Install the selected fuse to the fuse holder.
• Turn Disconnect Switch to ON position.
148 mm
165 mm
175 mm
200 mm

Enerdrive ePOWER 400W - 500W Owners Manual Rev: 2.0
Page 8
• Attach the red ring-type connector to the positive (+) DC terminal (red) on the power inverter and
connect the black ring type connector to the negative (-) DC terminal (black) on the Power inverter.
• Tighten the nut on each DC terminal.
• Insert the light plug of this cable to the fused 12V lighter plug socket.
• Unit is ready for use.
Connect unit with optional accessories using the Battery clips cable:
CAUTION: Please be sure all the connections are tight before the use of the unit.
• Attach the red ring-type connector to the positive (+) DC terminal (red) on the power inverter and
connect the black ring type connector to the negative (-) DC terminal (black) on the Power inverter.
• Attach the negative (black) clip to the negative (-) battery terminal.
• Attach the positive (red) clip to the fuse or circuitry breaker of the 12V battery bank as indicated on
‘Typical Wiring block diagram of the Power Inverter’ on page 5.
• Unit is ready for use.
Testing the Power Inverter:
• Turn unit on by using the On/O button on the unit. The ‘Power’ light turns on indicating the Enerdrive
Power Inverter is ON. AC output is now available.
• Plug in a small AC load like a 25W table lamp or small appliance to the AC socket to verify AC is available.
• The unit is successfully installed and functioning properly.
4. UNIT OPERATION
WARNING: RISK OF EQUIPMENT DAMAGE
• Do not plug surge-protected power bars into the unit’s AC outlets. The surge protected components
on the surge-protected power bar may not like the modied sine wave output generate by the inverter.
• Do not connect an AC power source like utility power or generator to the unit AC outlets.
• Turn ON and OFF the unit
• Toggle the On/O switch to ‘ON’ position to turn unit ON.
• ‘Power’ indicator will turn green.
• AC Output is available at the AC output socket and 5V USB port.
• Toggle the On/O switch to ‘O’ position to turn unit o. ‘Power’ indicator will turn o.
Understanding the LED indicators
• Power indicator: Indicator turn on indicate unit is ON.
• Fault indicator: Indicator turns on indicate fault was detected. Unit has shutdown. To reset the unit,
remove the fault condition and reset unit by using the toggle switch and turn unit o and on again.
Understanding the fan operation
The fan on the unit will automatically turns on when it sense the internal temperature of the unit reach to
its preset level.

Page 9
5. TROUBLESHOOTING
To trouble shoot the unit, please note the error code display on the main unit and review the “Understanding
the Error Codes” in section 4.
Load Consumption Estimate Run time
Cordless Phone 5W 150 hrs
Clock/Radio 8W 100 hrs
Table Lamp 40W / 60W 27 hrs/ 18 hrs
Freezer (249 Litre) 80W 15 hrs
20” LCD TV 100W 11. 5 hr s
Flooded Light 500W 1hr
Sump Pump (1/2 hp) 350W Not applicable (surge too high)
Problem Symptom Solution
No AC output and ‘Power’
indicator is o.
The unit is o Turn unit ON using the toggle
switch
No power to inverter Check fuse or the Disconnect
switch (if installed) is either
blown or turn OFF
No AC output. ‘Fault’ indicator
is ON
Unit detect fault and has
shutdown
Verify the error condition and
make correction and reset unit
AC Load on Power Inverter
Although the Power Inverter can provide high surge power up to two times the rated output power, some
appliances may still trigger on the inverter protection system. A higher power inverter is required for those
appliances.
Estimate Run time on Load
The following run times are an estimate based on using a 12V-120AH battery bank for 12V systems and
24V-60A battery bank for 24V systems. Actual run time may vary.

Enerdrive ePOWER 400W - 500W Owners Manual Rev: 2.0
Page 10
6. SPECIFICATIONS
Note: Specications are subject to change without notices.
Specications
Inverter EN1104S EN1105S-24
AC Output Power 400 Watt 500 Watt
AC Output Current 1.74A 2.17A
AC Output Voltage 230Vac 50Hz
AC Output Waveform True Sinewave (<3% THD)
DC Input Voltage 12.5 VDC 25.0 VDC
No Load Current N/A
No Load Current (Power Save OFF) < 0.8 A <0.5 A
No Load Current (Power Save ON) < 0.1 A
DC Operating Range 10.5 – 15.75VDC 21.0 – 31.0 VDC
Under Voltage Alarm 11.0 VDC 22.4 VDC
UV Shutdown 10.5 VDC 21.0 VDC
UV Recovery 12.0 VDC 23.6 VDC
OV Shutdown 15.75 VDC 31.0 VDC
AC Output Socket AU
DC Output
USB Output (5V) 2.1A
Safety and Environmental
Agency Markings CE
Operating Temp. 0º to 40º
Storage Temp. -20º to 60º
Relative Humidity 5 - 90% non-condensing
Operating Altitude Up to 2000m above sea level
Weights and Dimensions
Weights 1.73 kg
Dimensions (LxWxH) 312 x 175 x 87mm

Page 11
7. WARRANTY
Two Year Limited Warranty
Our goods come with guarantees that cannot be excluded under the Australian Consumer Law. You are
entitled to a replacement or refund for a major failure and for compensation for any other reasonably
foreseeable loss or damage. You are also entitled to have the goods repaired or replaced if the goods fail
to be of acceptable quality and the failure does not amount to a major failure.
The limited warranty program is the only one that applies to this unit, and it sets forth all the responsibilities
of Enerdrive. There is no other warranty, other than those described herein. Any implied warranty of
merchantability of tness for a particular purpose on this unit is limited in duration to the duration of this
warranty.
This unit is warranted, to the original purchaser only, to be free of defects in materials and workmanship
for two years from the date of purchase without additional charge. The warranty does not extend to
subsequent purchasers or users other than OEM applications.
This unit is not intended for commercial use. This warranty does not apply to damage to units from misuse
or incorrect installation/connection. Misuse includes wiring or connecting to improper polarity power
sources.
RETURN/REPAIR POLICY:
If you are experiencing any problems with your unit, please contact our customer service department at
support@enerdrive.com.au or Phone 1300 851 535 before returning product to retail store. After speaking
to a customer service representative, if products are deemed non-working or malfunctioning, the product
may be returned to the purchasing store within 30 days of original purchase. Any defective unit that is
returned to Enerdrive within 30 days of the date of purchase will be replaced free of charge.
If such a unit is returned more than 30 days but less than two years from the purchase date, Enerdrive
will repair the unit or, at its option, replace it, free of charge. If the unit is repaired, new or reconditioned
replacement parts may be used, at manufacturer’s option. A unit may be replaced with a new or
reconditioned unit of the same or comparable design. The repaired or replaced unit will then be warranted
under these terms for the remainder of the warranty period. The customer is responsible for the shipping
charges on all returned items back to Enerdrive.
LIMITATIONS:
This warranty does not cover accessories, such as adapters and batteries, damage or defects result from
normal wear and tear (including chips, scratches, abrasions, discoloration or fading due to usage or
exposure to sunlight), accidents, damage during shipping to our service facility, alterations, unauthorized
use or repair, neglect, misuse, abuse, failure to follow instructions for care and maintenance, re and ood.
If your problem is not covered by this warranty, call our Support Team at support@enerdrive.com.au or
phone 1300 851 535 for general information if applicable.

Unit 11, 1029 Manly Road Tingalpa, Queensland, Australia 4173
Ph: 1300 851 535 Fax: 07 3390 6911
Email: sales@enerdrive.com.au
www.enerdrive.com.au
This manual suits for next models
3
Table of contents
Other Enerdrive Inverter manuals

Enerdrive
Enerdrive ePRO Combi Series User manual

Enerdrive
Enerdrive EPC 2000-12 User manual

Enerdrive
Enerdrive ePOWER 300W: ePOWER 500W User manual

Enerdrive
Enerdrive Gen2 TRUE SINE WAVE User manual

Enerdrive
Enerdrive DOMETIC EN1120S-X User manual

Enerdrive
Enerdrive ePRO Combi User manual

Enerdrive
Enerdrive ePRO User manual

Enerdrive
Enerdrive EN1120X User manual

Enerdrive
Enerdrive ePOWER User manual