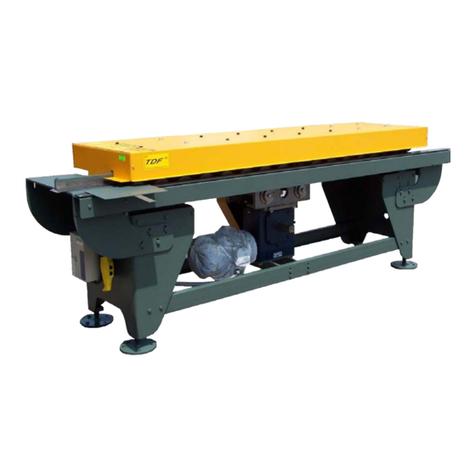
Engel 800 Series Instruction manual

ENGEL 800 SERIES
ROLLFORMER
INSTALLATION, OPERATION &
MAINTENANCE MANUAL
Manual-MN031407
March 2007

© Copyright by Engel Industries
All Rights Reserved
The information in this document has been reviewed and is believed to be completely accurate. However, no
responsibility is assumed for inaccuracies. Furthermore, ENGEL INDUSTRIES reserves the right to make
changes to any products herein, at any time, to improve reliability, function, or design. ENGEL INDUSTRIES
does not assume any liabilities arising out of the application or any use of any product described herein,
neither does it convey any license under its patent rights nor the rights of others.
TRADEMARK NOTICES
Engel Industries is a registered trademark. All other brand and product names are trademarks or registered
trademarks of their respective companies.

March 14, 2007 i
TABLE OF CONTENTS
TABLE OF CONTENTS
SAFETY SECTION
LOCKOUT GUIDE
ASSEMBLY DRAWINGS (Back of Manual)
ELECTRICAL SCHEMATICS (Back of Manual) Section/Page
1. INTRODUCTION........................................................................................................................1-1
A. INSTALLATION ................................................................................................................................. 1-2
(1) Unpacking The Machine ..............................................................................................1-2
B. SAFETY............................................................................................................................................. 1-2
(1) Safety Precautions (Before Starting The Machine)......................................................1-2
(2) Safety Precautions (While Operating The Machine)....................................................1-3
2. SYSTEM OVERVIEW................................................................................................................2-1
A. ROLLFORMER.................................................................................................................................. 2-1
(1) Entrance Guides..........................................................................................................2-1
(2) Triplex Outboard Feed Guide Option...........................................................................2-2
(3) Factory Roll Gap Settings............................................................................................2-3
(a) Resetting Roll Gap & Tension...................................................................... 2-3
(4) Roll Gap Chart.............................................................................................................2-4
(5) Slitter Attachment (Option)...........................................................................................2-5
3. SYSTEM CONTROLS...............................................................................................................3-1
(1) ROLLFORMER START/STOP SWITCH .....................................................................3-1
4. MAINTENANCE.........................................................................................................................4-1
A. TORQUE VALUES FOR GENERAL ASSEMBLY............................................................................. 4-1
B. SERVICING....................................................................................................................................... 4-4
(1) Lubricant Recommendations / Specifications..............................................................4-4
(2) Lubrication, General Requirements .............................................................................4-4
(3) Lubrication Schedule ...................................................................................................4-4
C. TOOLING REPLACEMENT............................................................................................................... 4-6
D. PREVENTIVE MAINTENANCE......................................................................................................... 4-7
(1) Daily Maintenance .......................................................................................................4-7
(2) Monthly Maintenance...................................................................................................4-7
E. ASSEMBLY DRAWINGS & ELECTRICAL SCHEMATICS............................................................... 4-9
F. ORDERING PARTS .......................................................................................................................... 4-9
G. RETURNS.......................................................................................................................................... 4-9
(1) Returning Parts For Repair..........................................................................................4-9
(2) Warranty Returns.........................................................................................................4-9
(a) Warranty Claim Approved.......................................................................... 4-10
(b) Warranty Claim Disapproved..................................................................... 4-11
(3) Returning Unused Parts For Credit............................................................................4-11

ii March 14, 2007
H. ASSEMBLY & ELECTRICAL DRAWINGS.......................................................................................4-21
LIST OF TABLES
Table 4-1. Metric Bolt And Cap Screw Torque Values..........................................................4-2
Table 4-2. Unified Inch Bolt And Cap Screw Torque Values.................................................4-3
Table 4-3. Recommended Lubrication Products...................................................................4-4
Table 4-4. Lubrication Schedule............................................................................................4-5
Table 4-5. System Lubrication Points....................................................................................4-5
Table 4-6. Inspection Schedules...........................................................................................4-7
LIST OF FIGURES
Figure 1-1 Engel 800 Series Rollformer................................................................................1-1
Figure 2-1 Rollformer Assembly............................................................................................2-1
Figure 2-2 Typical Entrance Guides (HB-825S Shown)........................................................2-2
Figure 2-3 Triplex Entrance Feed Guide...............................................................................2-2
Figure 2-4 Roll Gap Adjustment Components.......................................................................2-3
Figure 2-5 Roll Gap Locations...............................................................................................2-4
Figure 2-6 Slitter Attachment.................................................................................................2-5
Figure 3-1 Start/Stop Switch .................................................................................................3-1
Figure 4-1 Hydraulic Symbols Used On Assembly Drawings .............................................4-17
Figure 4-2 Electrical Symbols Used On Assembly Drawings (Sheet 1 of 2).......................4-18

SAFETY - 1
SAFETY SUMMARY
INTRODUCTION
Safety is everyone’s business. Whether you are an equipment operator, a maintenance
person, a supervisor, or business owner, you are directly responsible for the day-to-day safe
operation of your Engel equipment. It is your responsibility to maintain and operate this
equipment in strict compliance with all applicable laws, safety regulations, and the
manufacturer’s recommended procedures.
PROMOTING SAFETY
Institute a company safety program. The formation of an organized safety program is
strongly recommended. This safety program should include the formation of a safety
committee to review and update company safety policies on a regular basis. Establish a firm
policy on safety regulations in the work place. Publish these objectives, spelling out each
employee’s responsibilities. Make certain that each employee knows what is expected of
them.
SAFETY PROGRAM
The following steps are suggestions that a company developing, or expanding, a
comprehensive safety program should consider:
1. Engel Industries carefully design safeguards into their products in order to minimize
hazards. However, the manner in which equipment is incorporated into a manufacturing
process may inadvertently create a hazard or otherwise defeat built-in safeguards.
Closely examine the operation of your company’s processing equipment. Take notice of
potential hazards. Install guards or take other appropriate action to eliminate hazard
risks.
2. Make certain equipment operators and maintenance personnel are properly trained.
3. Setup a program of daily, weekly, and monthly machinery inspection. Make a check list.
Keep a historical record of all maintenance work, repairs, and adjustments.
4. Frequently evaluate safety guards and devices during actual production runs. Correct
any unsafe practice or situation immediately.
5. Establish safe, convenient material handling systems. If conveyor equipment is installed
in your facility, it should conform to recommendations published in the ‘American National
Standard, Conveyors and Related Equipment, Safety Standards for ANSI/ASME B20.1’
which are available from the American National Standards Institute (ANSI).
6. Provide personal protective equipment, such as safety glasses with side shields, safety
helmets, tongs, gloves, hand pads, spats, and protective sleeves, as required to suit the
operation.
7. Organize a company safety committee. Schedule periodic meetings on a regular basis to
review and update all safety policies.
8. Establish a firm policy on safety regulations in the work place. Publish these objectives,
spelling out each employees responsibilities. Make certain that each employee knows
what is expected of them.
9. Investigate all accidents and close calls. Take immediate action to prevent a recurrence
of the incident. Keep records of the investigation and the corrective measures taken.

SAFETY - 2
10. Post a list of names, addresses, and phone numbers of physicians and others who are to
be called in emergency situations.
CUSTOMER'S RESPONSIBILITIES
There are certain hazards associated with the operation of any equipment or system of
machinery that are impractical, if not impossible, for equipment suppliers to safeguard. The
user must address these hazards and be responsible for providing guards or barriers for
establishing appropriate work procedures and for training personnel in the safe operation of
that equipment.
With respect to coil and strip processing equipment, the following hazards should be noted:
•Open pits and depressions or raised areas in the floor.
•Space between machines, where strip edges and ends are exposed during feed-up,
run, and tail-out conditions. This includes carry-over tables and both roller and belt
conveyors.
•Nip and pinch points of machinery, coils, and strip which may be exposed in feed-up,
run, and tail-out.
•Areas surrounding coil handling devices where coils are in motion.
•Areas surrounding payoff reels and recoilers, where clock-springing strip ends
present a hazard during banding, un-banding, feed-up and tail-out conditions.
•Sheet and pack handling devices (including conveyors) where the motion, as well as
shifting of sheets or packs, may present a hazard.
•The area surrounding sheet stacking devices, which must be approached for setup,
but which should be clear of personnel during operation because of moving
machinery or material.
•Areas associated with high temperatures, high pressure fluids (hydraulic, air, or
water) and electrical devices and connections.
•The vicinity of machinery which moves into or out of the line.
REFERENCE SOURCES
Questions concerning specific hazards or safeguarding of equipment may be addressed to
the equipment manufacturer. For additional information, refer to the sources listed here:
American National Standards Institute (ANSI)
ANSI B11.18, ”Machinery and Machine Systems for the Processing of Coiled Strip,
Sheet and Plate - Safety Requirements for Construction, Care and Use.” ANSI
B11.4, “Shears: Safety Requirements for Construction, Care and Use.” ANSI
B11.14, ”Coil-Slitting Machines/Systems Safety Requirements for Construction, Care
and Use.” ANSI B11.18, ”Machinery and Machine Systems for the Processing of
Coiled Strip, Sheet and Plate - Safety Requirements for Construction, Care and Use.”
National Fire Protection Association (NFPA)
NFPA 79, “Electrical Standards for Industrial Machinery.”
European Union
“Directives on Safety of Machinery” and “CE Marking”

SAFETY - 3
WARNING LABELS
Warning and safety related informational labels are placed on the Engel Industries Industries’
equipment at strategic points. It is important that these labels not be removed, covered,
hidden, or defaced. The purpose of these labels is to alert personnel to potential personal
injury hazards or other direct or indirect safety concerns.
DANGER indicates an imminently hazardous situation which, if not
avoided, will result in death or serious injury.
WARNING indicates a potentially hazardous situation which, if not
avoided, could result in minor or serious injury.
CAUTION indicates a potentially hazardous situation which, if not
avoided, may result in minor or moderate injury.
NOTICE indicates a company policy that relates directly or indirectly
to the safety of personnel or protection of property.
It is important that the meaning of a safety sign be clearly understood by those who may come in
contact with the hazard. To increase the understanding of a safety sign’s components, the ANSI
Z535 committee encourages safety sign manufacturers and owners of facilities to publish and exhibit
the following (above) information on safety posters, safety bulletins or the like. Doing so will assist in
the objective of achieving a national uniform system for the recognition of potential personal injury
hazards and accident prevention.” - ANSI Z535.2, Annex A1
WARNING MESSAGES IN THIS MANUAL
Throughout this manual various DANGER, WARNING, CAUTION, and safety
related NOTICE appear. The intent is to alert operator and maintenance personnel to
potential hazards. In addition, important operation and maintenance details are emphasized
with the NOTE heading.
SAFETY FIRST

SAFETY - 4
The equipment in this line was designed and manufactured for a specific task. DO NOT use
the equipment for any other function or to process material that is beyond the equipment’s
design specifications. Modifications or additions to this equipment line should not be made
without first consulting Engel Industries Industries. Replacement and maintenance parts
should be equal to original equipment. Use of other parts may result in unsafe operating
conditions. If there is a question as to the suitability of a part, Engel Industries should be
consulted.
In general, every piece of equipment must be treated as dangerous. While operating or
maintaining this equipment, each person must be aware of their own safety as well as the
safety of all others around the line.
Material Coils
Coils present numerous hazards. They may shift, roll or fall without warning. Some
coils may spring open without warning. Sharp edges of the strip in the coil are
hazardous. Stay clear of coils as they are being moved. Use extreme caution any
time a coil is approached or handled.
Metal Strips
The metal strip may have sharp or ragged edges. The strip is under tension and is
subject to abrupt tension changes. This can result in strip breakage with the ends
flying without warning. Stay clear of the strip whenever possible. When it is
necessary to approach or handle the strip, use extreme caution. Use protective
devices such as tongs, gloves, eye protection, and wrist guards as required for
safety. The strip presents many pinch hazards with the machinery. Stay clear of
these. Never step on or over strip in the line.
Machinery
Never reach into any piece of machinery which is operating or which is capable of
operation. Loose clothing or jewelry should be kept clear of machinery at all times.
When working on one piece of equipment, be aware of hazards of surrounding
equipment. Any item inserted into a machine may be thrown or may cause a
dangerous malfunction or breakage.
Safe Guards
No equipment should be operated unless the safe guards or devices supplied with
the product are securely in place and properly adjusted.

SAFETY - 5
ENGEL has conducted hazard evaluation and risk analysis studies for their products. Safe
guards installed on the equipment are there for a reason. BEFORE EQUIPMENT IS PLACED
INTO SERVICE, ALL SAFE GUARDS OR DEVICES MUST BE IN PLACE AND PROPERLY
ADJUSTED.
Maintenance
Before performing any maintenance on a piece of equipment, insure that all power is
locked off in accordance with your company’s lockout/tagout policy. Be sure that all
movable members (such as rolls, arms, tables, etc.) are securely blocked from
inadvertent motion which might be hazardous. Treat all electrical lines as being live
and all piping as being under high pressure. Insure that all items are properly
reassembled before placing them into operation. Before equipment is returned to
service, ALL safe guards or devices MUST BE in place and properly adjusted.
NOTICE
Before doing any WELDING ON EQUIPMENT, the following precautions must
be taken to insure against damage:
1) All power is removed from system.
2) The weld ground is connected to the closest possible location on the unit
where the welding is being performed.
3) All encoders, sense eyes, and controls should be electronically
disconnected if at all possible to avoid possible damage.
Operation
This equipment is capable of speeds, tensions, and adjustments which may be
hazardous for some of the materials within the line specification. For example, thin,
narrow strip may be subjected to tensions sufficient to cause breakage. Never
attempt to process any material unless the safe adjustments for that particular are
known and can be implemented.
Traffic Around Equipment
Care should be taken at all times in moving around the equipment, whether on foot or
in a vehicle. Changes in floor elevation, machine bases and debris around the
equipment are trip hazards. Take care that personnel are not trapped between
vehicles and equipment.
Do not attempt to walk or climb on any machine while in operation. Failure to observe this
warning may result in death or serious injury.
HAZARD REMINDER
Use the following HAZARD REMINDER sheet to reinforce awareness of the hazards
associated with coil processing lines. This reminder can be a useful supplement to your
company’s safety program. ENGEL suggests the following steps:
1. SHOW each individual the HAZARD REMINDER sheet and explain each category of
hazard.

SAFETY - 6
2. POINT OUT EXAMPLES of each type of hazard on the actual equipment the individual
operates or works around.
3. EXPLAIN HOW TO AVOID HAZARDS in the individuals work environment.
4. GIVE a copy of the HAZARD REMINDER sheet to each individual.
Safety is everyone’s business!

THINK SAFETY FIRST
NIP POINT
WHEN ONE OBJECT ROTATES NEAR ANOTHER, IT CAN PULL YOU
IN and CRUSH YOU
PINCH POINT
WHEN ONE OBJECT MOVES CLOSER TO ANOTHER, IT CAN CUT or PINCH
YOU.
MOVING EQUIPMENT and COILS
CAN KNOCK YOU OFF BALANCE or CRUSH YOU
STRIP EDGES and ENDS
CAN CUT or STRIKE YOU.
ELECTRICAL and FLUID SYSTEMS
CAN SHOCK and BURN YOU and CAN EXPLODE.
CLIMBING ON MACHINES
CAN MAKE YOU FALL - MAYBE INTO ONE OF THE HAZARDS ABOVE.


LOCKOUT GUIDE - 1
LOCKOUT GUIDE
1. LOCKOUT GUIDE
A. INTRODUCTION
An essential element of a comprehensive safety program includes the development and use of
a written hazardous energy lockout procedure. The lockout procedure establishes the
minimum requirements for the lockout of hazardous energy sources using an energy-isolating
device whenever maintenance or service is performed on the processing line. The goal of this
section is to outline a sample procedure that can be used as a guide when developing your
own written procedures for complying with the requirements of O.S.H.A. 29 CFR 1910.147.
B. SCOPE
This procedure applies to all work on the processing line other than normal operational tasks.
“Normal operational tasks” are tasks that:
•Do not require the employee to place any part of his body in a danger zone or point of
operation.
•Do not require safety guards or safety devices to be removed or defeated.
•Do not expose the employee to hazards associated with the unexpected energization,
start-up, or release of stored energy.
This procedure shall be used to ensure that the machine is stopped and isolated from all
potentially hazardous energy sources and that these energy sources are locked out before
employees perform any servicing or maintenance when the unexpected energization, start-up
of the machine, or the release of stored energy could cause injury.
This procedure does not apply to minor tool changes and adjustments and other minor
servicing activities that take place during normal production operations.
C. DEFINITIONS
(1) Affected Employee
Any employee who is performing service or maintenance on equipment or whose job
requires the individual to work in an area in which servicing or maintenance is being
performed.
(2) Authorized Employee
A person who locks or tags out machines or equipment in order to perform service or
maintenance on that machine or equipment. An affected employee becomes an
authorized employee when that employee’s duties include performing service or
maintenance covered under this section.
(3) Energy-Isolating Device
An apparatus that isolates hazardous energy. The apparatus must be capable of
accepting a lock and tag when equipment is being repaired or maintained.

LOCKOUT GUIDE - 2
(4) Lockout
The placement of a lockout device on an energy-isolating device, in accordance with an
established procedure, ensuring that the energy isolating device and the equipment being
controlled cannot be operated until the lockout device is removed.
(5) Tagout
The placement of a tagout device on an energy isolating device, in accordance with an
established procedure, to indicate that the energy isolating device and the equipment
being controlled may not be operated until the tagout device is removed.
CAUTION
Use of a tag in place of a lock does not adequately guard against accidental operation.
(6) Servicing and/or maintenance
Workplace activities such as constructing, installing, setting up, adjusting, inspecting,
modifying and maintaining and/or servicing machines or equipment. These activities
include lubrication, cleaning or unjamming of machines or equipment and making
adjustments or tool changes where the employee may be exposed to the unexpected
energization or start-up of the equipment or the release of hazardous energy.
D. RESPONSIBILITIES
Department managers shall ensure compliance with the lockout/tagout procedure, provide
training, and provide required materials as needed for compliance.
(1) Department Supervisors shall:
•Develop lockout procedures for all equipment and keep documentation of the
methods on file.
•Provide specific lockout method training to employees before allowing authorized
employees to perform service or maintenance work.
•Assure that lockout procedures are audited on a regular basis and corrective actions
taken and documented when necessary.
(2) Maintenance Manager shall:
•Maintain a supply of locks, multiple lockout devices, plug locks, breaker locks, and
any other devices needed to lock out machines or equipment.
•Maintain a supply of informational lockout warning tags.
•Notify the appropriate manager or department when energy isolation instructions or
instructional signs need to be made or changed.
•Audit maintenance employee use of lockout procedures periodically, take corrective
actions as required, and document all corrective actions taken.
(3) Manufacturing Engineers shall:
•Assure that new equipment, rebuilt equipment, and equipment being renovated or
upgraded has energy-isolating devices that are capable of being locked out before
being installed or put back into service.
•Maintain a list of all plant equipment.

LOCKOUT GUIDE - 3
•Contact Safety Manager for review of new equipment prior to releasing the equipment
to production.
(4) Affected employees shall:
•Notify one of the following departments for an authorized employee lockout
whenever servicing or maintenance is needed:
Maintenance
Die Setters
Press Operators
Engineers and Technicians
•Never interfere with equipment that is locked out, remove a lock, or attempt to
operate locked out equipment.
(5) Safety Manager shall:
•Develop and upgrade this policy as needed.
•Audit the lockout program at least annually.
•Assist in training.
E. PROCEDURES
(1) Lock System
•Locks to be used for lockout will be red, key operated padlocks and will be supplied to
authorized employees using the current tool policy.
•One lock and one key will be issued to each authorized employee, unless an
individual requires more than one lock on a regular basis.
•Each lock will be identified by the employee name and clock number engraved on the
lock. Locks may not be loaned to other employees.
•Department locks used for group lockout or when extra locks are needed for a specific
situation will be numbered by department and kept in the department office or an area
lock bank. When locks from the bank are in use, tags will be left in the bank indicating
date, where used, authorized employee name and id number.
•Locks may be used for lockout only. Red locks may not be used on lockers or tool
boxes at any time.
•Only one key will be issued per lock. All duplicates will be destroyed, and no master
keys will be kept.
(2) Sequence of Lockout
•Notify all affected employees that servicing or maintenance is required and that the
machine or equipment must be shut down and locked out.
•Refer to the written lockout procedure for the equipment to determine the types and
magnitude of the energy sources involved, understand the hazards of that energy, and
the methods of control.

LOCKOUT GUIDE - 4
•Shut the machine down using normal operating means (stop button). Operate (shut
off, close, block, etc.) all of the energy-isolating devices. Lock out the energy-isolating
devices with the assigned red padlock(s). Mechanical power presses will have the
lockout procedures posted in a binder in each department supervisor’s office, listed by
asset number. Other equipment having multiple energy sources will have the lockout
procedure posted on the equipment.
NOTICE
If more than one person is working on a machine, each individual must attach his own lock to the
energy-isolating device.
•Verify, by operating the normal starting means or using test equipment, that the
lockout has accomplished zero mechanical state. Return controls to off.
(3) Restoring Equipment to Normal Operation
•Remove tools, install guards, and notify affected employees, ensuring that they
understand and are in the clear.
•Verify that the operating controls are in the off or neutral position.
•Remove lockout devices and reenergize the machine.
•Notify affected employees that the machine is ready for use.
(4) Special Situations
Group Lockout is used when more than one employee must work on a machine at the same
time. One of the following must be used:
•Each employee shall place his lock on the energy isolating device(s).
•A multiple lock device (hasp) may be used if the energy-isolating device cannot
accept multiple locks.
•When multiple locks cannot be used, lockout can be accomplished by:
9An authorized employee may lockout (including all necessary steps) energy-
isolating device(s) using identified departmental locks.
9The key to the identified departmental locks will then be placed into an identified
lock box.
9All personnel associated with the lockout will then secure the identified lock box
with their personal locks.
9As each individual completes his task, he will remove his lock from the lock
9When all locks have been removed from the lock box, the authorized employee
who made the original lockout may remove the locks from the energy isolating
devices, following all steps in restoring a machine to service.
Shift Changes must maintain continuity of lockout and the safety of incoming employees using
the following procedure.
•The lock(s) of the authorized employee(s) of the first crew will be replaced with
identified departmental locks.
•The departmental lock keys will then be given to the supervisor, who will supply them
to the incoming crew.

LOCKOUT GUIDE - 5
•The incoming crew will then verify lockout using all procedures before replacing the
departmental locks with their own or using lock box procedures.
Contractors working in the company plant must have lockout procedures that meet or exceed
the standard.
•Prior to beginning work, each contractor must supply the company with the written
lockout procedures to be used.
•The contractor’s procedure will be reviewed by the Safety Manager and the
contractor will be approved or rejected.
•If approved, the contractor’s procedure and the company procedure will be reviewed
in a joint meeting so that each party is aware of the other’s procedure.
•Under no circumstances will the company provide a contractor with locks or
advice on lockout procedures, other than assistance with identifying energy sources
and energy isolating devices.
Lock removal by other than the owner of the lock may only be done if all of the following
conditions are met.
•The supervisor must verify that the authorized employee who placed the lock is not in
the facility.
•The supervisor must make a reasonable effort to contact the employee to verify the
condition/situation with the equipment and to inform the employee that his lock is
going to be removed.
•The supervisor must insure that the person knows his lock has been removed prior to
resuming work in the facility.
•The supervisor completes the Safety Lock Removal Incident form. This form must be
reviewed with the appropriate department manager and the Safety Manager.
F. TRAINING
The following sample outline may be used as a guide when developing a lockout/tagout
training program for your company’s employees.
(1) Authorized Employees must be trained in the following:
•Recognition of applicable hazardous energy sources.
•The type and magnitude of the energy available in the workplace.
•The methods and means necessary for energy isolation and control.
(2) Affected Employees must be trained in the following:
•The purpose and use of the energy control procedure.
•The prohibition and dangers of related to attempts to start or reenergize machines
that are locked out.
(3) Retraining
Retraining will be provided for authorized and affected employees whenever one of the
following occurs. The retraining should reestablish employee proficiency or introduce new
methods and procedures as needed.

LOCKOUT GUIDE - 6
•There is a change in their job assignments.
•There is a change in equipment, machines, or processes that present a new
hazard.
•There is a change in energy control procedures.
•Periodic inspection reveals or there is reason to believe that there are deviations
from this policy caused by inadequate knowledge of the procedure.
NOTICE
Deviations from this policy due to negligence on the part of the employee must be dealt with by the
established corrective action policy.
(4) Training
•Training must be certified, including the date and time of training and each
Records will be filed by the Safety Manager.
•Training will follow the Lockout Program Training Outline.
G. TRAINING OUTLINE
(1) Why lockout?
1. To prevent injury from the accidental start-up or release of energy while performing
maintenance or testing.
2. To comply with O.S.H.A. 1910.147.
3. It is the RIGHT thing to do.
(2) What are sources of energy?
•Thermal
•Pneumatic (air)
•Gravity
•Hydraulic
•Electrical
•Mechanical
(3) Sequence for lockout:
1. Notify all affected employees.
2. Shut down equipment by normal methods.
3. Operate controls/dissipate energy (return controls!)
4. Lockout energy isolation devices
5. Verify lockout.
(4) Lock system:
1. Locks are RED key operated locks.
2. ONE lock, ONE key issued to authorized employees (additional locks, individually
keyed may be required for some authorized employees).
3. EACH lock (with one key) will be identified by employee name and clock number.

LOCKOUT GUIDE - 7
4. Department locks will be numbered and identified by department and kept in:
•The department office in a lock bank.
•In the area on a lock bank.
•In a cabinet.
5. Locks will be purchased by departments (by Managers ONLY).
6. Lock replacement policy - use existing tool policy.
7. Locks must be in the care of the personnel to whom they are assigned whenever on
duty.
8. Identification tags will be placed in the lock bank when locks are in use indicating:
•Date.
•Equipment where used.
•Authorized employee name.
•Authorized employee ID number.
(5) The lock:
1. Must be readily identifiable as a lockout lock.
2. Can be used for lockout ONLY.
3. Can have only ONE key for each lock.
4. Can NOT have a “master key”.
5. Must be individually identified.
6. Personal lockout locks CANNOT be lent or borrowed.
7. MUST be used.
(6) When is lockout not required?
Lockout is not required for minor tool changes and adjustments and other minor servicing
activities which take place during normal production operations.
This is ONLY applicable if they are ROUTINE, REPETITIVE and INTEGRAL to the use of
the equipment for production, provided that the work is performed using alternative
measures which provide effective protection.
(7) When do we lockout?
1. A machine or line which is OPERABLE FOR PRODUCTION can be SERVICED,
ADJUSTED, and/or TESTED without lockout if:
•The person is NOT required to place any part of his/her body in jeopardy
and
•The person is NOT working where a safety guard is removed or a safety device is
defeated.
and

LOCKOUT GUIDE - 8
•The person is not exposed to unexpected energization, start-up or release of
stored energy.
2. When servicing, testing, and maintaining equipment in which:
•The unexpected energization of machines or equipment COULD CAUSE INJURY OR
DEATH.
or
•The unexpected start-up of machines or equipment COULD CAUSE INJURY OR
DEATH.
or
•The release of stored energy COULD CAUSE INJURY OR DEATH.
(8) What about contractors?
Each contractor working on projects in the plant must have lockout procedures that meet
or exceed the standard.
Prior to beginning work, the responsible representative of the contractor and will meet with
the company contact to review the lockout procedures of the contractor and the company.
The company contact or project coordinator shall review the contractor’s lockout
procedure with any company personnel who will be involved with the project.
(9) Unfamiliar with lockout?
When a service or technical group must inspect or perform work on an unfamiliar
operational unit, an operations or maintenance supervisor familiar with the unit shall be on
site and will actively participate in the lockout. The operations or maintenance supervisor
duties include the verification of zero mechanical state and active participation in the
lockout removal procedure.
(10)How do I know where to put my lock(s) for lockout?
1. Refer to the Equipment Lockout Survey (developed by the Safety Committee or Safety
Manager) which identifies lockout points for each machine.
2. If not sure, contact knowledgeable operations or maintenance supervisor who will
actively participate in the lockout, including verification of zero mechanical state and
active participation in lockout removal procedure.
3. VERIFY LOCKOUT BEFORE BEGINNING WORK.
(11)Verify lockout - how?
•Testers
•Operate Controls
(12)Group lockout
1.Each person shall place their lock(s) on the appropriate energy isolating device(s).
2.A multiple lock device (hasp) may be used, if the energy isolating device cannot
accept multiple locks.
3.When multiple locks are not used, lockout can be accomplished by:
•An authorized person may lockout (including all necessary steps) energy
isolation device(s) using an identified departmental lock(s).
Table of contents
Other Engel Industrial Equipment manuals