The authorized certication authorities
in the countries certify the production
relevant to indicate standards.
CE DECLARATION OF CONFORMITY
This product complies with the
requirements of the following instructions:
Low Voltage Directive (LVD): 2006/95/EC
Labelling Directive CE: 93/68/EEC. The
instructions above indicate that ENSA
Infrared heaters comply with the following
standards:
ΕΝ60335-2-30:2003 + A1:2004 + A2:2007
EN60335-1:2002 + A1:2004 + A11:04 +
A12:06 + A2:06
EN50366:2003 + A1:2006
Declaration of correspondence to
standards:
GOST Р 52161.2.30-2007
GOST Р 51317.3.2-2006(g. 6.7)
GOST Р 51317.3.3-2008
GOST Р 50460-92
CISPR 14-1
DSTU IEC 60335-1:2004
DSTU IEC 60335-2-30:2004
GOST 14254
Serial production according:
TU U 29.7-36531392-001:2010
Attention! Packing materials are
recyclable!
Packing and package materials should
be disposed of in accordance with the
recycling rules of related materials. Before
discard, please, sort the waste. At the end
of the heater life, it must be disposed of in
accordance with the rules and regulations
acting in the territory where the disposal is
planned. To familiarize with the rules, codes
and methods of disposing of different
materials, contact you nearest recycling
center.
The warranty period for the heater is 24 months. The warranty
period may be extended subject to purchase an extended
warranty and/or extended service. For more information,
contact with the point of sale.
In case of any malfunction or defect caused by the
manufacturer, the manufacturer or the person authorized
by him is obligated to recticate the faults. In this case,
contact to the seller or to the point of sale. In case of defect
detection after the install by the installation company caused
by the installation company, the liability for defects lies down
the installation organization. In this case contact to the
representative of the installation company. The manufacturer
and the persons authorized by him is not responsible for
a product, which was liable to inuence by third persons.
The manufacturer has the right to improve the product, it
characteristics, technology, properties, functionality without
any additional notice for the consumer and obligations to
update / improve previously issued / purchased.
Warranty is not provided if / when:
The quality warranty card and a marking sticker with the serial
number are damaged/absent.
Inappropriate use, device overwork, incorrect installation and
operation.
Mechanic damage of the product (cleavages, cracking,
dimples), inuence of abrasive agents and materials, chemical
agents, vapors, excessive temperatures, local heating (in
consequence of which the device is out of order)
Repair, installations, change of characteristics by no
authorized persons and organizations.
Natural disasters and phenomena: res, oods, windstorms and
other force mayor.
Incorrect power connection, as well as caused by this faults
of the system.
Damages and defects caused by ingress of insects, pets and
other foreign objects and organisms.
Attempts to open/modication/improve/tear down/complete
the set.
Violation of storage and transportation conditions applicable
for this type of products (hitting, tipping, excessive moisture
and aggressive environment, extreme temperatures and
critical high and low temperatures)
There are the parts of the normal wear and tear, which are
subject to such wear and have a service life of less than the
service life of the heater (xing handles, support, metalware,
power cable)
The warranty does not apply to:
Periodic service and cleaning
Alignment with other equipment, adaptation, updating.
Conditions of guarantee maintenance:
The warranty covers manufacturing and design defects
preventing the operation of the device.
The warranty service includes the repairs or replacement of
defective parts by the manufacturer, by a person authorized
by the manufacturer or an organization authorized by the
manufacturer.
Warranty repair must be carried out within a period not
more than 45 (forty-ve) days from the date of registration
of the defect by the manufacturer, a person authorized
by the manufacturer or an organization authorized by the
manufacturer. In case of departure from the schedule dates to
resolve the problem, the parties may conclude an additional
agreement to extend the term of repair.
Other terms and conditions are subject to «Consume
Protection Law».
The manufacturer is only liable for the produced product
and shall carry warranty obligations that apply only to
manufactured products. The manufacturer is not liable for
damages caused by the product.
Certications and Standarts
Utilization rules
Warranty conditions
Trouble How to troubleshoot?
The heater does not heat up
Make sure that the plug are inserted
into the outlet and the outlet carries
voltage
The heater does not heat up enough
The heating is dependent on the line
voltage and may be higher or lower
than the normal value. Please, con-
tact to a specialist for measuring the
voltage in your residential distribution
The heater does not heat a room
It is necessary to verify the insulation
of the walls, weather-stripping of all
windows and doors. Ventilating the
room do not leave the window open
for a long time.
Other troubles Contact to the organization autho-
rized by the manufacturer.
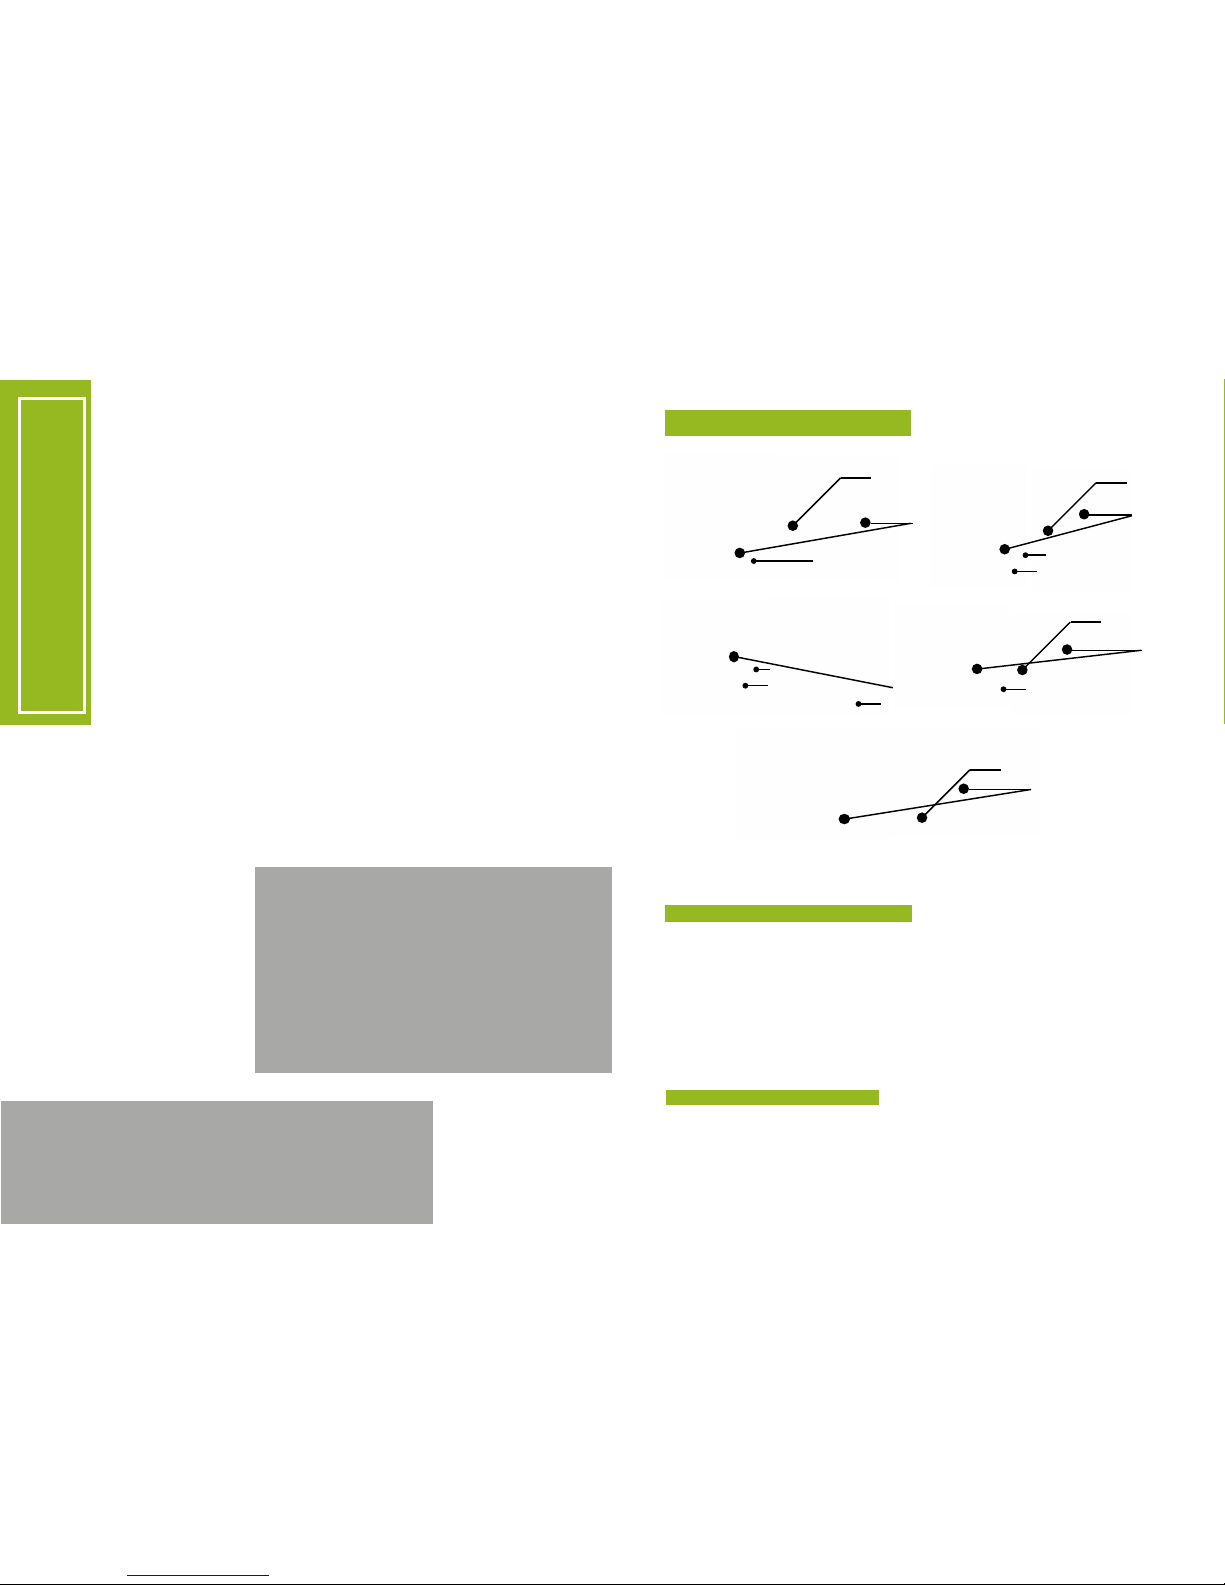
Мounting distance
Р500 / Р500Т / Р500Е / C500 (wall)
Р750 / Р750Т / Р750Е / C750 (wall)
P750G
P900 / P900G / P900E
Characteristics
•Before cleaning and maintenance turn
off the device from the network and make
sure, the device has cooled down to room
temperature.
•Do not use for cleaning abrasive cleaners
and devices.
•To clean surfaces use a soft damp cloth.
•Remove dust with a vacuum cleaner with
a soft nozzle or a special brush.
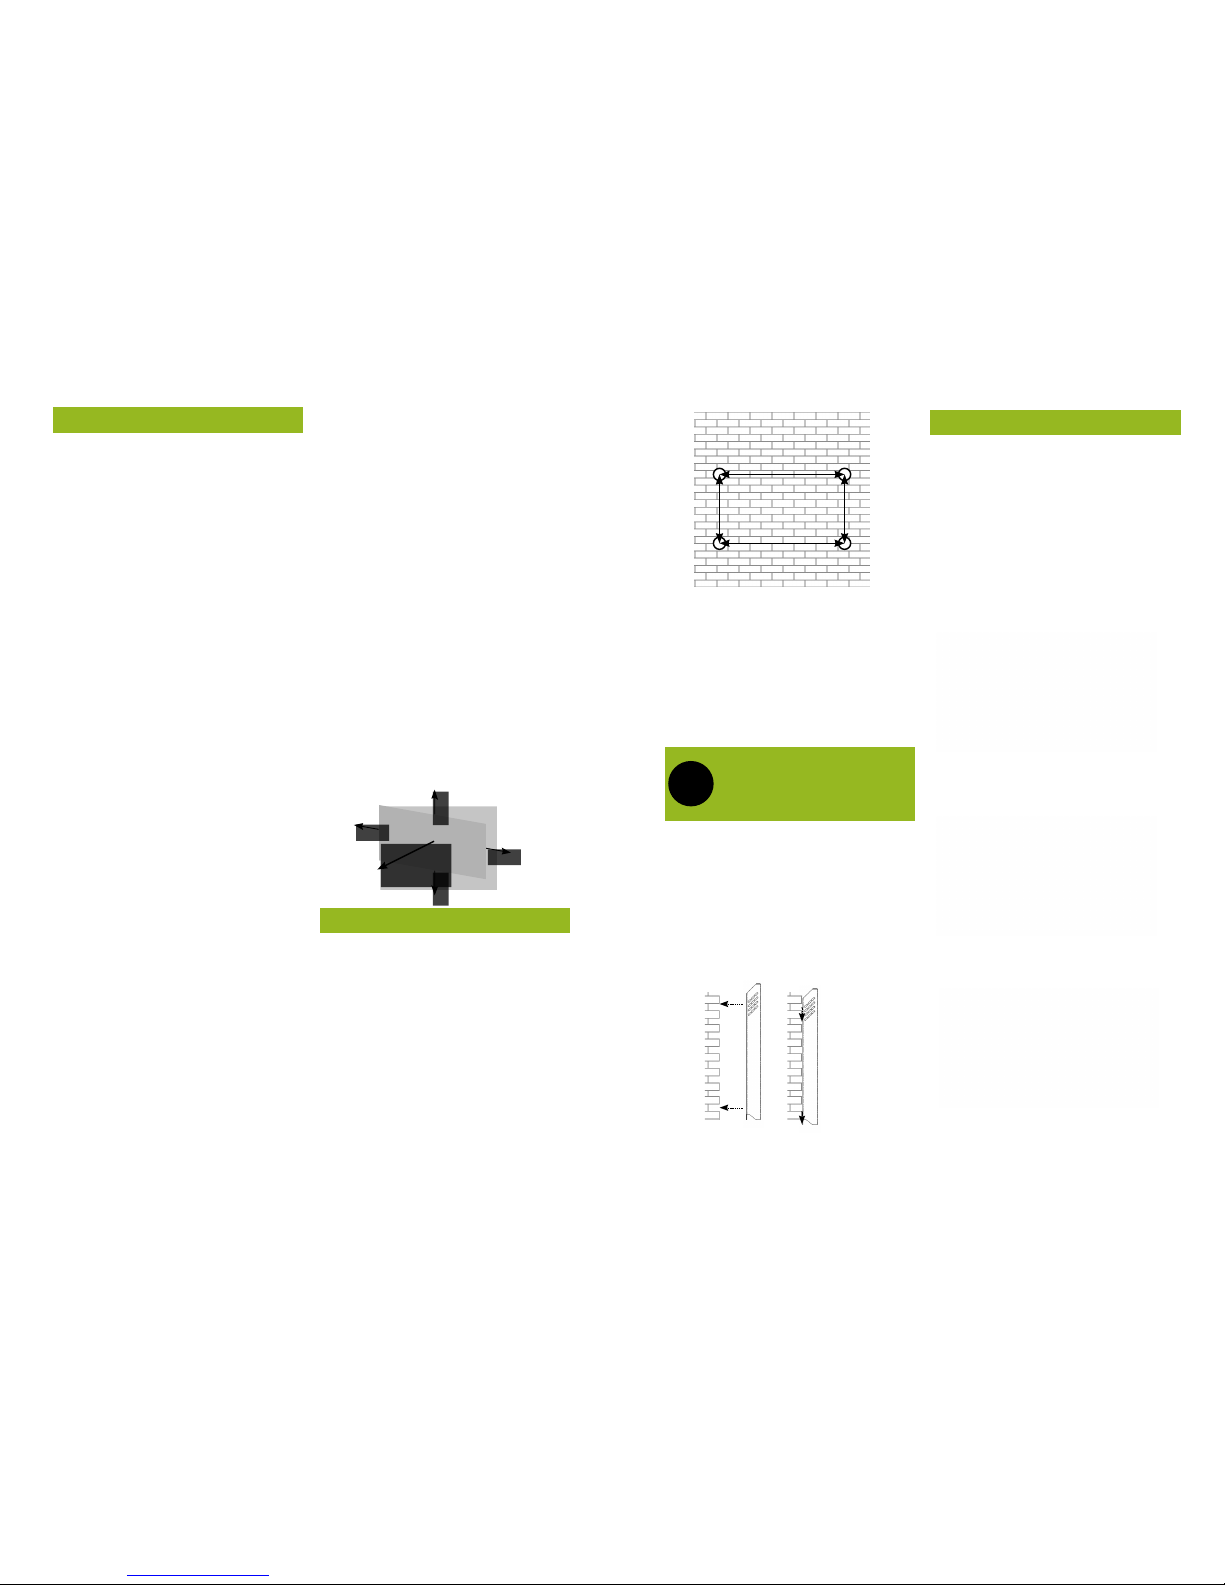
•Do not connect the device when the
device is plugged in.
•Do not perform the connection without
having an appropriate and do not trust the
connection do not have an appropriate
qualications.
•When connected, check the cable
connections by the color (must conform to
Rules for Electrical installations)
•Do not allows that the cable N or L touch
the contact G
•To connect one heater do not use cable
with a diameter less 0.75mm.
If it is necessary, to integrate the heaters
in one group or to connect to an external
controller, use an electrical diagram of
connection.
Trouble-shooting
Maintenance
Technical Characteristics
P500 P500T P750 P750T P900G P500Е P750Е C500 C750
Tension, V 220 (230) 220 (230) 220 (230) 220 (230) 220 (230) 220 (230) 220 (230) 220 (230) 220 (230)
Frecuency, Hertz 50 50 50 50 50 50 50 50 50
Cap acity, W 500 (550) 500 (550) 750 (800) 750 (800) 950 (1000) 500 (550) 750 (800) 500 (550) 750 (800)
Dimension(HхWхTh),mm 500х750х50 500х750х50 500х1000х50 500х1000х50 600x1200x35 500х750х50 500х1000х50 586х750х51 586х1000х51
Weight, kg 8 8 10 10 14 8 10 12 14
Thermoregulator External needed Add-in
thermostat External needed Add-in
thermostat External needed Add-in
thermostat
Add-in
thermostat
Add-in
thermostat
Add-in
thermostat
Heating ar ea, m2up to 10 up to 10 up to 15 up to 15 up to 18 up to 10 up to 15 up to 10 up to 15
Surfac e
temperature, Co85 (95) 85 (95) 85 (95) 85 (95) 85 (95) 85 (95) 85 (95) 85 (95) 85 (95)
Installation Wall Wall Wall Wall Wall
Ceiling Wall Wall Wall
Ceiling
Wall
Ceiling
Frame Steel Steel Steel Steel Steel Steel Steel Steel Steel
Color RAL9016Gloss RAL9016Gloss RAL9016Gloss RAL9016Gloss RAL9016Moir RAL9016Gloss RAL9016Gloss RAL9016Gloss RAL9016Gloss
Warranty, years 2 2 2 2 2 2 2 2 2
Lifetime, years 30 30 30 30 30 30 30 30 30