Enttec Pixelator Instruction manual

Quick Start Manual
50657 (PIXELATOR)
for more information visit:
enttec.com/pixelator
US Patent Patenting 1
PIXELATOR
( P N 7 0 0 6 0 )
Box Contents
•Pixelator (pn:70060)
•Straight connect Ethernet lead (pn:79102)
•IEC power cord (country dependent plug)
•User manual (pn: 50657)
Physical Features
•24 Pixel Link ( RJ-45) ports (data output only)
•Gigabit Ethernet Connection
•LCD display to provide status information on
system and data flow
Software Features
•Pixel Protocol is configurable for each Pixel Link
port (WS2812B WS2811 or APA-104)
•Pixel Grouping is configurable for each Pixel Link
port (up-to 340)
•Pixel Ordering is configurable for each Pixel Link
port (RGB and RGBW modes)
•Each Pixel Link can be assigned upto 2 Ethernet
Universes. (allows 340 indivudal leds to be
assigned from each port in RGB modes)
•
•All configurations are made through web browser.
•Graphical User Interface for creating and editing
ports is flow-chart oriented and documents data
flow as you configure it.
•Clock module to sync multiple universes output
•Supports following DMX over Ethernet protocols:
◦ESP
◦Art-Net
◦StreamingACN (sACN)
◦KiNet
•DMX Generator and Stream snapshot (web) .
Safety
•Do not expose the unit to rain or moisture, doing
this will void the warranty
•Do not remove the cover, there are no serviceable
parts inside
•Since the Pixelator is designed to run 24/7, the fan
will always remain on, however it can be disabled if
needed.
Basic Setup
ENTTEC Pixelator is a standard Art-Net node. Because of
this, you can use the device with applications, consoles,

Quick Start Manual
50657 (PIXELATOR)
for more information visit:
enttec.com/pixelator
US Patent Patenting 2
desks, or controllers that are compatible with Art-Net to
distribute Art-Net data via Ethernet network.
With the default profile, each Pixel Link port is mapped
to it's respective Art-Net Universe, allowing you to
directly plug-in your Pixelator without the need for
configuration.
Pixel Tape needs to be connected to the Pixel Link port
using a PLink Injector (sold separately). The injector
takes external DC power and has appropriate terminals
to connect the tape.
Getting Started
To begin your installation please follow these steps.
1. Unpack the unit from the box. Inspect the
Pixelator for any damage that might have
occurred in shipping, and verify that it looks to
be in good condition before plugging it in to
power.
2. The Pixelator occupies a single unit (1U) in a 19
inch rack. You may attach it to the rack either at
this time or later after configuring it, if desired.
3. Attach a power cord with mains voltage to the IEC
input on the back.
4. Using an Ethernet Cat5, Cat5E or Cat6 cable,
connect the Pixelator to an Ethernet Network.
When the unit turns on, you will be able to see its initial
IP address on the LCD panel which looks like w.x.y.z,
where each letter is a number between 0 and 255. Note that
IP address down for later use.
5. The LCD displays the IP address of the unit at all
times (except when it's booting), but if not possible
to check the LCD, NMU App (available for Windows
& Mac) can be used to detect the Pixelator on your
network. NMU can be downloaded here :
www.enttec.com/nmu
Profiles
Profiles are essential to the operational philosophy of the
Pixelator. With a profile selected, the device knows how to
utilize the many resources it can make use of to perform
lighting control tasks.
Each Profile contains configuration information for some or
all of the following:
Pixel Link (PLink)
These are the physical PIXEL Link ports (1-24)
Ethernet Streams
These are the DMX over Ethernet universes. (Art-Net, ESP,
KiNET, ACN)
Routing Diagram
The routing diagram is the visual representation of
the Profile itself and it tells the Pixelator how frames are
moved or routed inside the routing engine, as well as what
to do with multiple sources of data that need to be merged,
when that option is engages. Other special operations can
be part of a diagram as well, such as Channel Shifter, Output
Switch, etc.
Factory Profiles
The Pixelator has a set of factory profiles, to start you off.
You're likely to see 2 or more of the following:
•Artnet24->Pixel24: This profile will take 24 Art-Net
universes and convert them to 24 Pixel-Link signal on
ports 1 to 24.
•Artnet48->Pixel24: This profile will take 48 Art-Net
universes and convert them to 24 Pixel-Link signal on
ports 1 to 24. (Each Port will be mapped to 2 Art-Net
Universes consecutively)
These profiles are just an example of what can be done with
the Pixelator, you can modify the factory profiles to
accommodate your specific need, or create your own profile
from scratch.
If you don't see any of the above, please contact
support@enttec.com and we can send them to you. After
that, you're on your own to make and edit profiles to suit
your application!
You may select between existing profiles via the menu, but
to edit them and make new ones, you'll need to access the
Pixelator's web page. Read more about each of these ways

Quick Start Manual
50657 (PIXELATOR)
for more information visit:
enttec.com/pixelator
US Patent Patenting 3
to interact with the Pixelator in the following sections of
the manual.
Changing from one profile to another can be done in a
web browser window, via RS232 command, or with the
touch of a few buttons on the front panel (LCD menu).
LCD Menu
The LCD Menu is navigated through the four panel
buttons on the front of the unit.
The Menu button acts as the “Back” button, which
takes you to the previous Menu/screen.
The Enter button goes into the selected option on the
screen, and activating the option.
The Top & Bottom button are used to navigate/scroll
through the options on any screen. The currently
selected option is highlighted with a white background
on the screen.
Main Menu
Pixelator - ART24-PIXEL24
IP: 192.168.10.200
Packets: 1040/ S
press a key to enter
Line1: displays the System Name and currently Selected
Profile.
Line2: displays either the current IP address / DHCP
Failed / disconnected, highlighting the current status of
the network interface. The IP address is where the web
interface can be accessed.
Line3: displays the number of packets currently passing
through the Pixelator. This number of packets per
second, can be used as an indicator of the activity of DMX
on your network.
Pressing any of the panel buttons/keys will activate the
next screen on the LCD Menu.
Selection Menu
1-load profile
2-Setup
3-Status
4-Restart
1-Load Profile
Lists all available profiles on the Pixelator, list can be
scrolled using up & down keys. Scrolling indicator is visible
when the list allows scrolling.
Pressing Enter at the selected profile will activate the
profile (some profiles might need a license to activate)
2-Setup
1-Change IP
2-Factory Reset
Setup screen allows changing the IP address of the unit via
“Change IP” or doing Factory Reset.
Change IP
This screen further gives two options DHCP or Static IP.
When Static IP is selected, the screen allows you to change
the IP address using the top and bottom button to scroll the
digits and the menu & enter buttons to select the segment.
Once you are on the last segment of the IPaddress, pressing
the Enter button, will activate the IP address. It will take a
few seconds for the change to go through, please wait 30
seconds, before attempting to try again.
Change IP Address
IP: 192.168.001.003
Factory Reset
Activating Factory Reset, leads to a simple prompt
confirming your action. Once confirmed, the Factory Reset
will take a few seconds to run. It will end up deleting all your
user created profiles, as well as any saved settings. Please
use this only when needed, or as directed by ENTTEC
support team.
F-Reset in progress
please wait …

Quick Start Manual
50657 (PIXELATOR)
for more information visit:
enttec.com/pixelator
US Patent Patenting 4
3-Status
Status Screen, allows the following two options:
1-System
2-Network
Both the Status screens are read-only and provide
information about the system and Networking.
These require no user-input and serve as a way of
checking the performance of the unit.
4-Restart
Restart Screen, when activated, prompts for the user
to confirm the selection.
1-YES
2-NO
Once confirmed, Pixelator will stop the output engine
and restart the system. While rebooting the LCD
screen will change between a couple of screens, and
the LCD Main Menu will only be visible, once the
system is fully ready. (usually takes a minute)
System Restarting
Please wait …
Web Interface
The Pixelator is configured, controlled and programmed
through a web browser interface running on a computer
system located on the same Local Area Network. Any
modern web browser, such as Chrome, Firefox, Internet
Explorer, Safari or Opera, running under any operating
system, including Windows XP or Vista, Mac OS X or Linux
can be used.
Type the IP address (shown on the LCD Menu) into your web
browser to access the Pixelator Web Interface.
Throughout the Web Interface, helpful hints are displayed
when a user hovers the mouse over the “Help” icon?
Web: Profiles
From this screen you can manage your profiles.
As you will notice in the "Remarks" column, the factory
default profiles are read only. If you wish to modify one of
them, you will first need to copy the profile to some other
name. Once the profile has been copied you can modify it
to fit your particular needs.
Clicking on the Profile name will launch the profile in the
profile-editor window.
Web: Profile Editor
Create a new profile or edit an existing one using the
profile-editor. Opens up in a new page in your web browser.
Select a module on the left and the right panel will provide
help about that panel. Connect a module to another using
wires from one point to another.
The direction of the wire (arrow) is important, the arrow
signifies output, and reflects the flow of data.

Quick Start Manual
50657 (PIXELATOR)
for more information visit:
enttec.com/pixelator
US Patent Patenting 5
Web: Profile Modules
Each profile is made up of two or more connected
Modules or Actions. The relationship between them
forms the layout of the data flow within the profile.
The following modules are available:
The PLink 1U module represents one of the physical
ports on the rear of this unit, and maps to 1 Universe.
•Protocol: select the led protocol that the pixel
tape conforms to.
•Ordering: RGB or RGBW mapping that the pixel
tape conforms to. RGB modes use 3 DMX slot per
LED pixel, and RGBW modes use 4 DMX slots.
•Grouping: it allows one DMX pixel to drive
multiple physical LED pixels
•Start-Ch: DMX Start Channel for the 1st pixel can
be changed as needed.
Limitation: Same PLink port# cannot be re-used within
the same profile.
The PLink 2U module represents one of the physical ports
on the rear of this unit, and maps to 2 Universe.
•Each PLink 2U module has 2 input nodes that can be
connected to two Ethernet streams. Top one (U1) is
mapped to the First universe and Bottom one (U2)
is mapped to the Second universe relative to the
pixel-tape.
•Protocol: select the led protocol that the pixel tape
conforms to.
•Ordering: RGB or RGBW mapping that the pixel tape
conforms to.
Limitation: Same PLink port# cannot be re-used within the
same profile
Art-Net Stream: "Send IP address": is the destination
address used when the stream is sending data only.
ESP Stream: ENTTEC Show protocol DMX over Ethernet
stream (ESP).
IP address is the destination address used when the
stream is sending data only.
Kinet Stream: For example: You can connect Kinet Stream
to an Art-Net Stream to convert and output as Art-Net.
(Kinet stream is supported as input only).

Quick Start Manual
50657 (PIXELATOR)
for more information visit:
enttec.com/pixelator
US Patent Patenting 6
Streaming ACN: "IP address" is the destination
address used when the stream is sending data only
(default is disabled = 0.0.0.0)
DMX Generator: Define your own custom DMX
Channel values and assign the selected ones.
Snapshot feature can be used to capture values from
an input stream. All modifications can be done using
the DMX Grid Page.
Clock: Allows you to synchronize ALL Pixel Link output
only when the connected Input Stream is received.
•Auto-repeat allows user to repeat the output
once every "number of seconds" regardless of
Synced Stream
•Default behavior [Auto-repeat = Never]: Will only
refresh Pixe Link when Synced Stream is received
The Clock module can be used to make sure the output
is always synced to the “latest universe” - especially if
the source adds a delay to each universe.
Firmware Update
You can update the firmware on the Pixelator, via the
web browser. Get the new firmware files (they are
available on website: www.enttec.com/Pixelator).
Download them to your desktop and then follow
instructions in the Pixelator's web browser page,
under the Settings section.
Note: While the firmware is being updated, please do
not power off the unit, please wait until the web-page
is processing. (up-to 5 minutes).If the web-page does
not refresh automatically, please open the home page
on the browser manually, and verify that the update
has succeeded.
NMU
NMU (Node Management Utility) is a free Windows and
Mac application that is used to manage compatible
ENTTEC DMX over Ethernet nodes. NMU will not directly
allow you to configure the Pixelator itself, but it can help
you find your unit's IP address and then open a browser
window to access Pixelator. Follow these steps:
1. Download NMU from www.enttec.com/nmu
2. Ensure that your Pixelator is hooked up physically
by Ethernet cable to the same physical network as
the computer on which you will run the NMU.
3. Press the Discovery button.
4. Once found, select Pixelator and use the IP address
to access the web interface via your web browser.
Connector pin out
Pixel Link pinout (RJ-45):
Pin1: Data +
Pin2: Data -
Pin7: Ground
RS232:
Pin 2: TX
Pin 3: RX
Pin 5: Ground
PLink System
•Each PLink port can drive up to 340 RGB individual
pixels (2 DMX universes) - PLink 2U module must be
used in Pixelator Profile
•PLink Injector sold separately (73546 / 73544)
•1 PLink Injector needs to be used per PLink port on
the Pixelator

Quick Start Manual
50657 (PIXELATOR)
for more information visit:
enttec.com/pixelator
US Patent Patenting 7
•External DC power supply
•Data extensions up to 300 meters over Cat6 cable
•Supports RGB pixel strips based on WS2811,
WS2812, WS2812B and APA-104 LEDs.
•Small, light and easy to hide design
•High power screw terminal connectors
•Easy wiring using straight Cat5/Cat6 standard
connections
Due to continuous improvements and innovation of all
ENTTEC products, specifications and features are subject
to change without notice.
Pixelator Specifications
Due to continuous improvements and innovations of all
ENTTEC products, specifications and features are subject
to change without notice.
Item
Value
Input Voltage
90-260V AC
Input Frequency
50/60Hz
Power Consump-
tion
20W
Heat dissipation
65BTU/ Hour
Weight
1.8kg / 39.6lbs
Shipped Weight
2.6kg / 5.78lbs
Length
463.1mm / 18.25”
Width
111mm / 5”
Height
43.6mm / 1.72”
Op Environment
0-50 Celsius
Connectors
24 * Plink Output Ports (RJ-45)
1 * Ethernet Connector
1 * RS232 Connector
2* USB Host Connectors (un-used)
Certification
CE, FCC certified
Ordering Information
The Pixelator and related products can be ordered from
our website or through your ENTTEC dealer using the
following part numbers.
Part Number
Description
70060
Pixelator
70704
Stream Auditor Liscence
73546
Plink Injector 5V
73544
Plink Injector 12-24V
73545
Plink Injector
73920
CVC3
Registration
Please register your ENTTEC product to get latest software
updates and to validate your warranty. To register, please
visit enttec.com/register
License
The Wireit Library is distributed under the MIT License
Distributed under the MIT License : Copyright (c) 2007-2010, Eric
Abouaf <eric.abouaf at gmail> Permission is hereby granted, free
of charge, to any person obtaining a copy of this software and
associated documentation files (the "Software"), to deal in the
Software without restriction, including without limitation the
rights to use, copy, modify, merge, publish, distribute, sublicense,
and/or sell copies of the Software, and topermit persons to whom
the Software is furnished to do so, subject to the following
conditions: The above copyright notice and this permission notice
shall be included in all copies or substantial portions of the
Software.
THE SOFTWARE IS PROVIDED "AS IS", WITHOUT WARRANTY OF ANY
KIND,EXPRESS OR IMPLIED, INCLUDING BUT NOT LIMITED TO THE
WARRANTIES OF MERCHANTABILITY, FITNESS FOR A PARTICULAR
PURPOSE AND NONINFRINGEMENT. IN NO EVENT SHALL THE
AUTHORS OR COPYRIGHT HOLDERS BE LIABLE FOR ANY CLAIM,
DAMAGES OR OTHER LIABILITY, WHETHER IN AN ACTION OF
CONTRACT, TORT OR OTHERWISE, ARISING FROM, OUT OF OR IN
CONNECTION WITH THE SOFTWARE OR THE USE OR OTHER
DEALINGS IN THE SOFTWARE.
Other manuals for Pixelator
3
This manual suits for next models
1
Table of contents
Other Enttec Media Converter manuals
Enttec
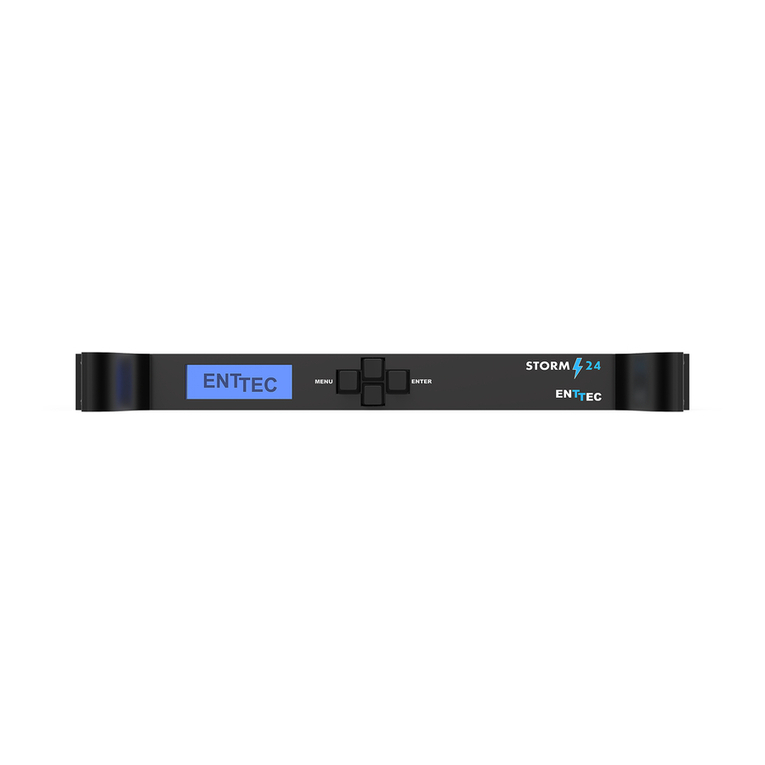
Enttec Storm24 User manual
Enttec
Enttec RDS8 Instruction manual
Enttec
Enttec Storm 8 User manual

Enttec
Enttec RDS4 Instruction manual

Enttec
Enttec STORM10 User manual
Enttec
Enttec Pixelator User manual
Enttec
Enttec Storm 8 User manual
Enttec
Enttec Pixelator User manual
Enttec
Enttec PIXELATOR MINI User manual
