Eon Energy Fit Starter Pack User manual

Your ‘how to’ guide to getting energy fit
THIS LOOKS
SIMPLE ENOUGH.
SO WHAT ARE
WE WAITING
FOR?
Energy Manager Booklet Customer_Layout 1 27/05/2010 14:55 Page 3

We know that lots of people really want to reduce the
amount they spend on energy in their home, but aren’t
always sure what steps to take.
That's why we've launched our energy fit programme. It's
designed to give realistic, energy saving tools and ideas
that have been tried and tested by you - our customers!
You’ve taken your first step towards getting energy fit with
an Energy Fit Starter Pack. Your easy to install energy
monitor, and Energy Fit software, will enable you to start
seeing the energy you’re using, and make positive changes
to help save you money.
2
Welcome!
You’ve taken your first step to get energy fit
Energy Manager Booklet Customer_Layout 1 27/05/2010 14:55 Page 4

3
true?
If you’re a little sceptical about whether ‘watching your
energy’ really does reduce your bills, just ask our Watt
Watchers.
We challenged a number of families to see how much they
could save in three months and the results were incredible.
You can read about what worked for them on page 27 and
in our Energy Fit software.
Too good to be
less energy?
We sell energy. The more people use, the more money we
make, surely? It stands to reason. Except, for an energy
company with an eye on more than short term profit, it
doesn't.
Our ideal would be to have more customers, all using less
energy. It would be better for you, because you'd have
lower bills. It'd be better for us, because lower bills
generally means happier customers who want to stay with
us. And it'd be better for everyone, because we all need to
reduce carbon emissions.
But why would we want you to use
Energy Manager Booklet Customer_Layout 1 27/05/2010 14:55 Page 5

What’s inside? 6
Safety first 8
Getting connected 9
Your monitor 13
Making the most of your monitor 18
How much you could save 27
Your questions answered 28
started
Getting
4
Energy Manager Booklet Customer_Layout 1 27/05/2010 14:55 Page 6

This is your Energy Fit Starter Pack,
containing your E.ON energy monitor, a
software CD to help you get the most
from your monitor, and all the help you
need to get started.
On its own, it won't cut your bills but it
will show you how much electricity
you're using and when you're using it.
It will also give you an indication of
what's costing you the most and where
you can make the biggest savings!
kick off
To OOOH, THAT WASN'T
DIFFICULT TO
INSTALL AT ALL!
5
Energy Manager Booklet Customer_Layout 1 27/05/2010 14:55 Page 7

6
Your monitor’s power cable - to make
it work.
Your transmitter - it sends readings from
your meter to your monitor to tell you how
much electricity you're using.
what’s inside
Take a look
1
2
Your sensor jaw - you need to clip this to one
of the cables coming out of your meter. We’ll
show you how easy it is over the next few
pages.
3
Energy Manager Booklet Customer_Layout 1 27/05/2010 14:55 Page 8

7
Your energy monitor - it will tell you how
much electricity you’re using at any time.
Your data cable, to connect your energy
monitor to your computer.
Your 'Energy Fit software' which will enable
you to make the most of your monitor.
4
5
6
Energy Manager Booklet Customer_Layout 1 27/05/2010 14:55 Page 9
8
Safety first
We want you to use your energy monitor safely, so please take a moment to read
these notes before starting.
Although you won’t need to carry out any electrical wiring to install the monitor, it will
be used in and around the electricity supply to your home so you need to take care.
Before installing your monitor, please check that your electricity meter and cables are
in good condition. Hazards to look out for are:
• deterioration, such as loose wires
• exposed copper wiring
• burn marks or holes in the cable insulation
• excess heat or crackling noises
• damage to the meter.
If you notice any of these, don’t install your monitor - speak to one of our team by
calling 0800 092 9106 and selecting option 1, or consult a qualified electrician
immediately for further advice.
!
Energy Manager Booklet Customer_Layout 1 27/05/2010 14:55 Page 10

9
connected
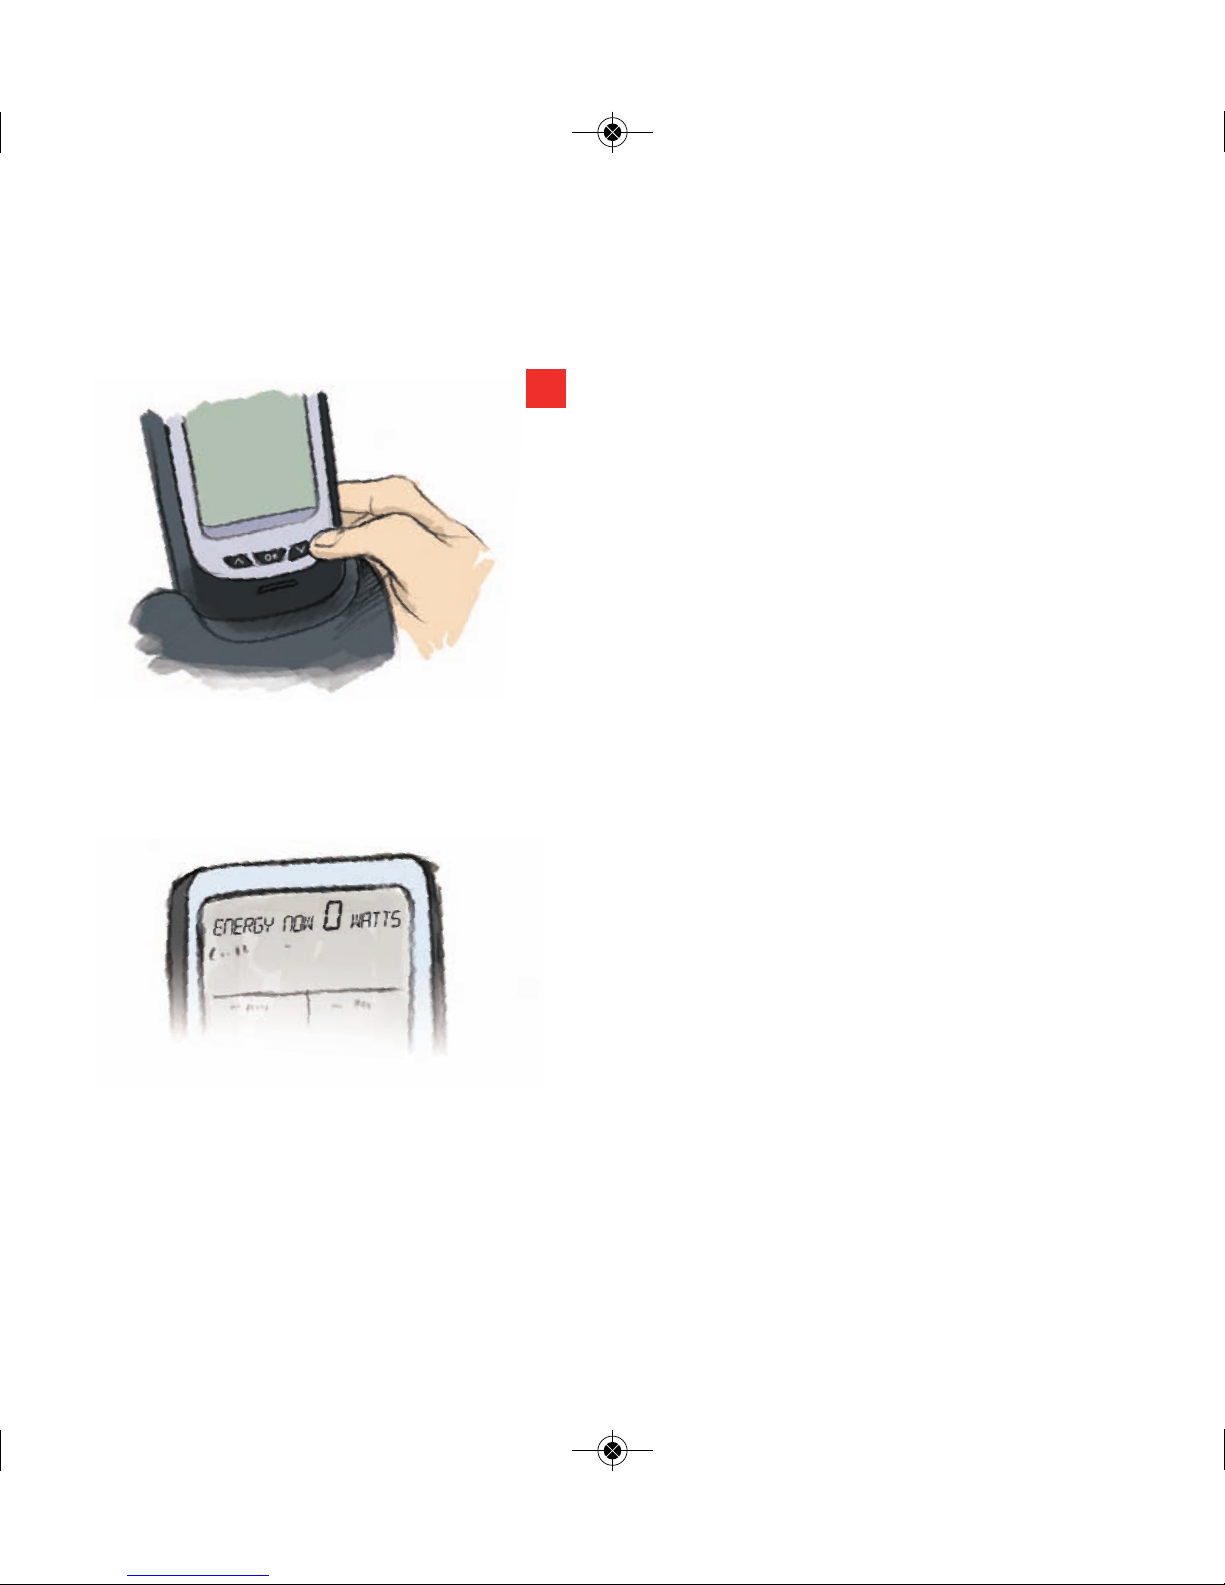
Plug your monitor in to a convenient wall
socket at home - you'll see 'dashes' on
the display which means it's turned on.
Getting
is easy when you follow these 4 simple steps:
1
You'll need your monitor and
transmitter to hand.
Energy Manager Booklet Customer_Layout 1 27/05/2010 14:55 Page 11

10
Remove the clear plastic battery tab from the
underside of your black transmitter - you'll see
there's a small button.
Using a ball point pen, push and hold the button
for 9 seconds.
When you release the button, you'll see a red
light on the transmitter flashing rapidly - this
means it's ready to 'tune' itself with your
monitor.
If it doesn't, try again.
2
Energy Manager Booklet Customer_Layout 1 27/05/2010 14:55 Page 12
11
Now, press and hold the 'down' arrow button on
your monitor for six seconds - the light on your
transmitter should still be flashing.
When you release the button, you'll see a tuning
signal on the top right of your monitor's display
indicating it's tuning itself to your transmitter.
When your monitor and transmitter are tuning,
the display will show ‘240’ (indicating domestic
voltage). Once this is finished, your monitor's
display will clear and then '0 watts' will appear.
This usually takes a few seconds.
3
Energy Manager Booklet Customer_Layout 1 27/05/2010 14:55 Page 13
12
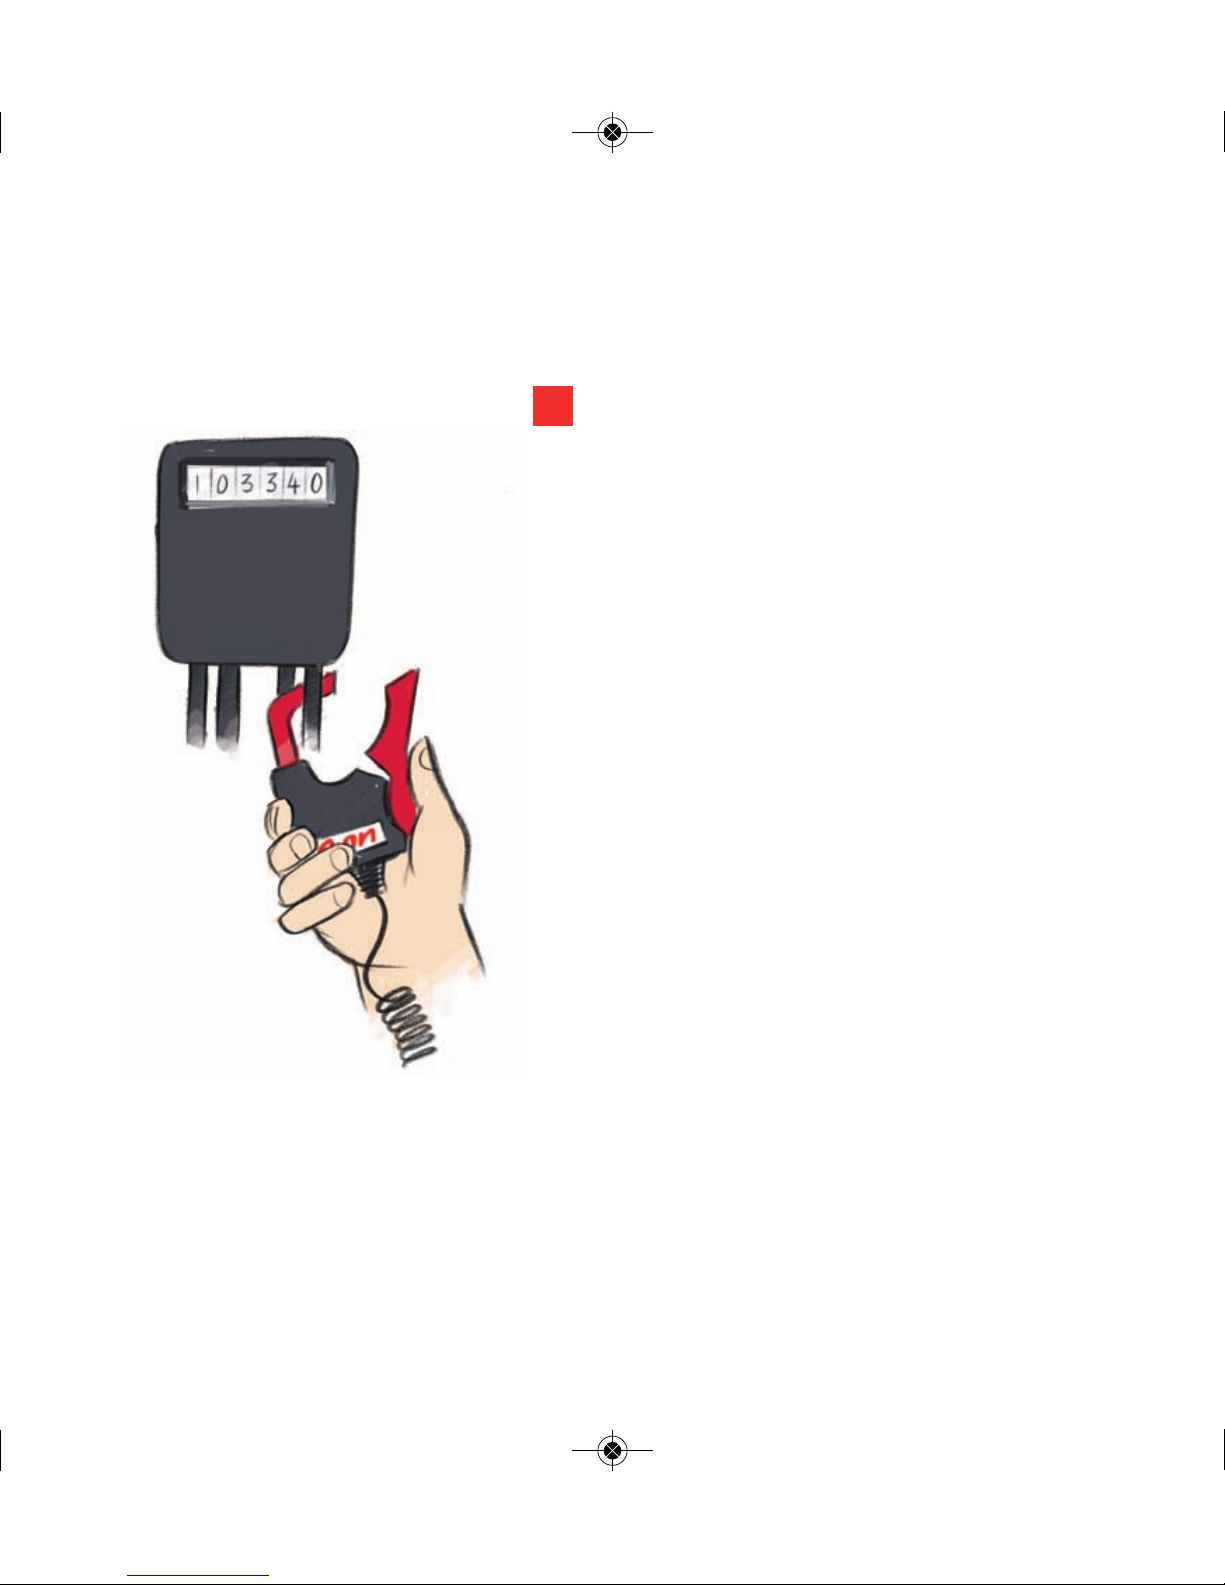
Now, plug your sensor jaw in to the underside of
your transmitter and take them both to your
electricity meter.
You need to identify the cable that connects
your electricity meter to your fuse box - this is
called your 'live' cable. It's usually thick black or
grey, and may have a red marker on it to clearly
differentiate it from the others.
Clip your sensor jaw around your live cable,
being careful not to pull or bend the cable.
Your sensor jaw should fit effortlessly around
the cable and end up loose, so it doesn't pinch.
If you accidentally attach the jaw to the wrong
cable, don’t worry - you won’t damage anything.
Just unclip it, and try again.
Now stand your transmitter in a dry place where
it won't get knocked over and damaged. It's
supplied with a Velcro sticky pad on the reverse
so you can ‘stick’ it on a wall. For the best signal,
make sure the transmitter’s aerial is in an
upright position.
4
Energy Manager Booklet Customer_Layout 1 27/05/2010 14:55 Page 14

13
monitor
Your
Your monitor's display should immediately show you how
much electricity you’re using. Give it a quick test by
turning off an appliance such as your kettle. Your monitor
will take just a couple of seconds to change.
Setting the clock
Press and hold the ‘OK’ button in the middle of
the monitor for three seconds. When you let go,
the screen will clear and the ‘hours’ display will
flash. Use the ‘up arrow’ and ‘down arrow’ to
choose the correct hour using the 24-hour clock.
Press the ‘OK’ button again and the ‘minutes’
display will flash. Use the ‘up arrow’ and ‘down
arrow’ again to set the correct minutes.
Press the ‘OK’ button and the time will be saved
and the screen will return to normal.
1
2
3
Energy Manager Booklet Customer_Layout 1 27/05/2010 14:55 Page 15

14
Your monitor has been programmed with a default price so to get the most out of it, we
recommend you change it to match what your current unit rate is. The information you see
on how much money you could be spending at any given time will be much more accurate.
Finding out your unit rate
Look at your E.ON contract if you're a new customer, or your latest E.ON bill to find out how
much you're paying for electricity in pence per kilowatt hour (p/kWh).
It will show you your 'First unit rate' (formerly known as your 'Primary unit rate') and your
'Next unit rate' (formerly known as your 'Secondary unit rate'). It may also show you you
have a 'Night rate' as well.
You'll need to write down your 'Next unit rate' and if you have one, your 'Night rate' as this is
what your monitor will need.
Setting your unit rate
Follow the simple steps below to change the default price to your 'Next unit rate', and if you
have a 'Night rate', also follow steps 1 - 4 on Page 15:
On the monitor, hold the ‘up arrow’ for three seconds and release. You'll then be
prompted to select your currency. Using the arrows, choose £/p, and then press 'OK'.
The default price will start flashing (the monitor will show 'high' flashing). Using the
arrow buttons scroll through until you get to your 'Next unit rate’ and press 'OK', then
complete this by pressing 'OK' again.
1
2
Adding your electricity price
Energy Manager Booklet Customer_Layout 1 27/05/2010 14:55 Page 16

15
If you have a 'Night rate'
Having a 'Night rate' means you pay a different amount for the electricity you use during the
night, compared to what you use during the day (eg an Economy 7 customer). You can
programme your energy monitor to take this into account following the simple steps below.
Again, on the monitor, press and hold the ‘up arrow’ and ‘down arrow’ together for
three seconds and release.
You'll be prompted to set your 'low' unit rate, this would be your 'Night rate' given on
your bill (remember, you’ve already just set your ‘high unit rate’). Using the ‘up arrow’
and ‘down arrow', scroll through until you get to your 'Night rate', and then press ‘OK’.
You'll then be prompted to set which hours this rate applies to - this is your Economy 7
hours (usually between midnight and 7am). Using the arrow buttons, first set the time
your Economy 7 rate starts, then press 'OK'. Then you'll be prompted to set when your
Economy 7 hours end.
Some customers have Economy 7 hours which are split across two time periods (eg
11pm to 2am, and then 3am to 7am). Your monitor can only support one time frame so
we suggest you set when your Economy 7 hours for when they are first due to start,
and when they finally end to give you the best possible indication of how much your
electricity use is costing you. Using the example given, this would be 11pm start and
7am finish. Again, using the arrow buttons, set the time and then press ‘OK’.
Your screen will now return to normal.
1
2
3
4
Energy Manager Booklet Customer_Layout 1 27/05/2010 14:55 Page 17
16
1
This indicates that the sensor jaw supplied in your Starter
Pack is installed. For most homes, this will be one.
The ‘Up/Down’ display shows you how much money you
spend or save when you turn an appliance on or off. It also
shows you the equivalent increase or decrease in the
amount of electricity used in watts or kilowatts. This will
give you an idea of how much each appliance costs to run.
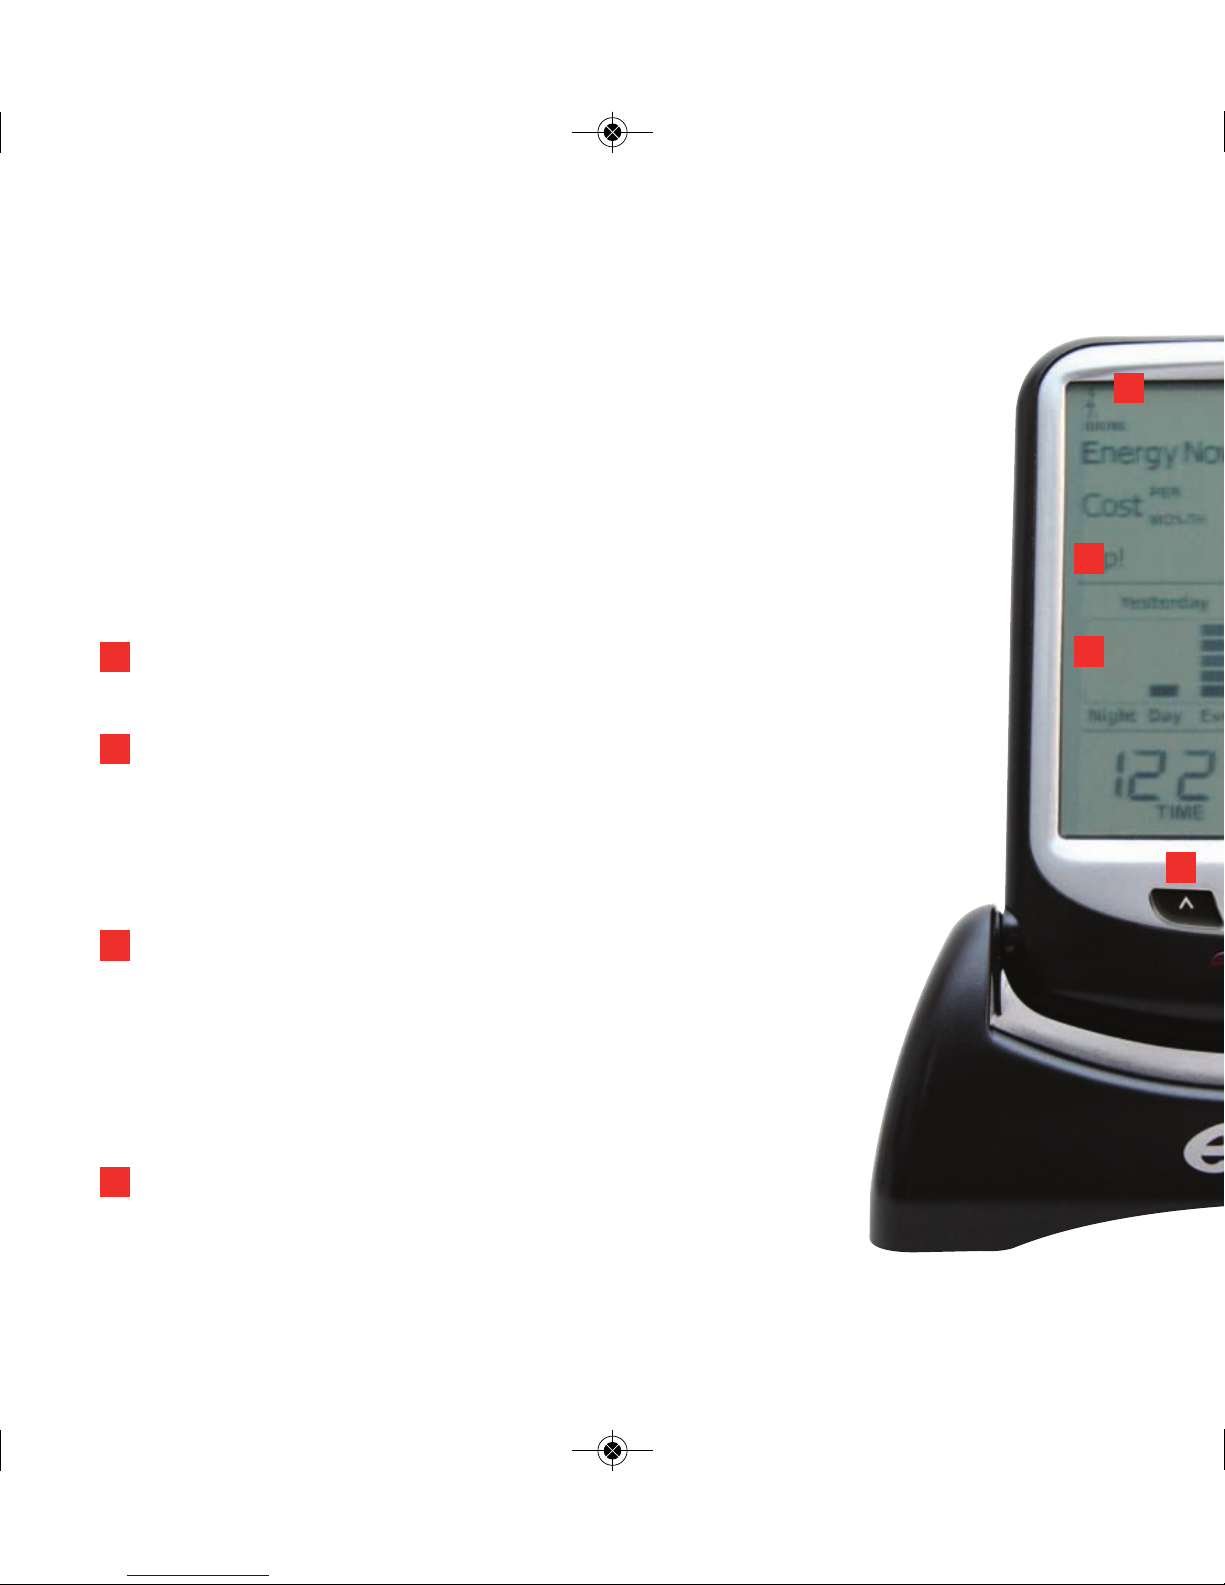
The graph shows you how much electricity you used
yesterday. It breaks your usage down into three periods -
7am to 3pm the previous day, 3pm to 11pm the previous
evening and 11pm to 7am the previous night. You can
therefore see, at a glance, when you have used the most
and least electricity.
These buttons enable you to set the monitor and
download data once your software is installed - we refer
to them as 'arrow up', 'OK' and 'arrow down' throughout
this guide.
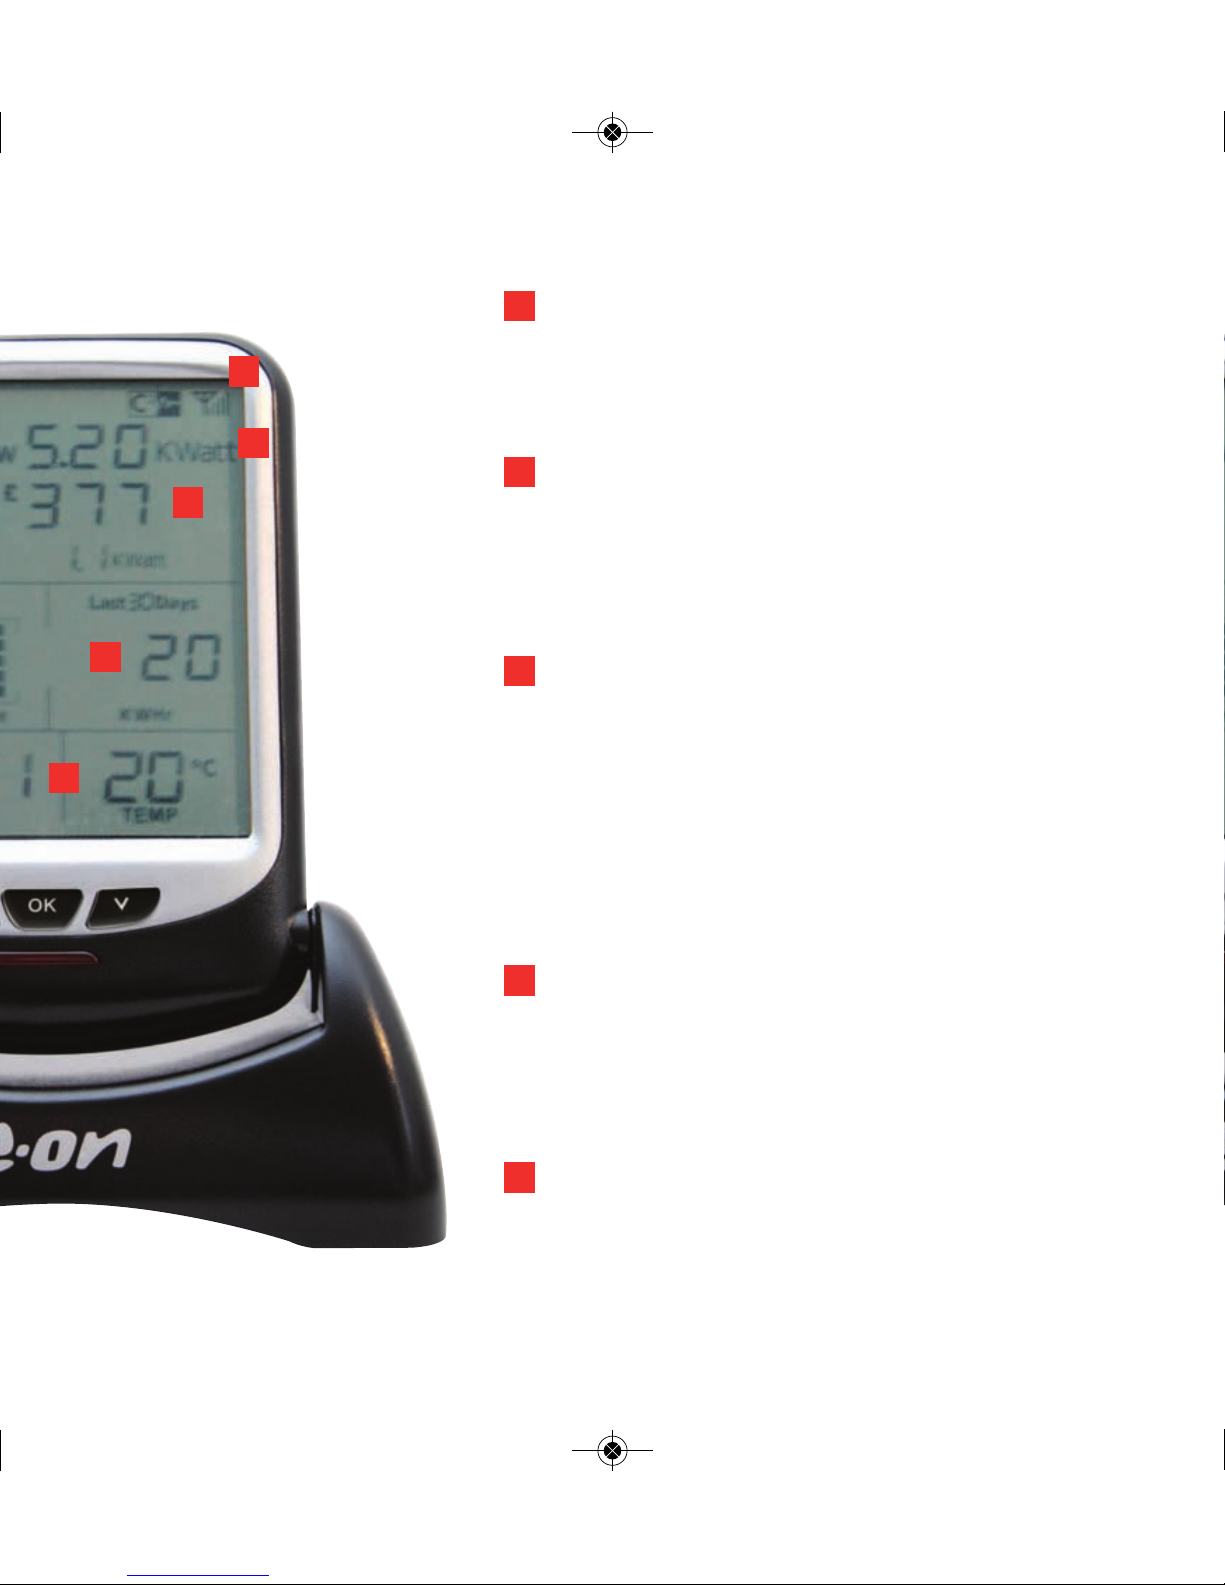
When your monitor is up and running, the screen will look like this
image. To help you understand how to use your monitor effectively,
take a moment to study the screen and the explanations below.
1
2
3
4
3
2
4
your monitor
Understanding
Energy Manager Booklet Customer_Layout 1 27/05/2010 14:55 Page 18
17
This has a range of 30 metres and can transmit
through walls, so even if your meter is somewhere
awkward or outside, the monitor will still be able to
pick up the signal.
The ‘Energy Now’ display shows you how much
electricity you’re using right now in either Watts or
Kilowatts. Test it out by switching an appliance,
such as your kettle, on and off and watch the figure
change.
The ‘Cost Per Day/Month’ display shows how much
you’re forecast to spend on electricity over these
periods of time. You'll also see this change as you
turn appliances on and off as it shows how much
your electricity will now cost if you continue to use
this amount. Remember, 5% VAT is added to your
electricity bill which the monitor doesn't take in to
account.
This shows how much electricity you’ve used in
kWh. The display scrolls every ten seconds between
the amount used in the last day, the last 7 days and
the last 30 days. You can scroll through manually by
pressing the ‘OK’ button.
This shows you the time once it’s been set and the
temperature, which are displayed all the time when
your monitor is turned on.
5
6
5
7
6
7
8
8
9
9
4
Energy Manager Booklet Customer_Layout 1 27/05/2010 14:55 Page 19

18
your monitor
Making the most of
Welcome to your Energy Fit software - you'll find the CD you need to
install this software attached to the back of this booklet.
Your software enables you to understand more about how and when you
use electricity at home.
It works by downloading data from your monitor. It then shows you this
data in a variety of graphs so you can choose to see what you've used
during the last day, week, month, or quarter. The software also includes
hints and tips on ways you can save energy with its '100 ways to save'
section.
Home Download Energy usage
Energy Manager Booklet Customer_Layout 1 27/05/2010 14:55 Page 20

19
Installing your software
100 Ways FAQs Settings
Before you begin
• You'll need to have MS Windows 7, MS Windows XP or MS Windows Vista to be able to run
the software, and your PC or laptop will need a CD drive for the installation.
• If you have a Mac, virtually all new models are able to run this software (they need an
Intel processor running Mac OS X v10.4.6 or higher), as long as they have a Windows
application installed - either Windows XP or Windows Vista additional software.
Simply insert the software CD which should launch the software installation wizard. Follow
the installation wizard and when it's completed, launch the software from the Programmes
menu. To launch the software for the first time after you've installed it, click on Start > All
Programs > Energy Fit.
You'll find six sections in your Energy Fit software which guide you through the set up,
downloading your data, viewing your energy use, tips on how to save energy around the
home, your questions answered and how to update your personal settings.
Energy Manager Booklet Customer_Layout 1 27/05/2010 14:55 Page 21

20
How to link your monitor to your PC
Step 1
Connect your energy monitor to your PC or laptop with
the data cable provided. One end of the cable fits in the
underside of the monitor and the other end fits into a
USB port on your computer. Your energy monitor will
need to be plugged into a power supply. You then need
to click 'Next' as prompted by the software.
Step 2
Your software is provided with a default electricity price
already set. We recommend you change it to match
what your current unit rate is by clicking on
'Customised Set Up' and following the steps on Page 21.
If you’re happy to use an average electricity price then
click on 'Express Set Up’.
Step 3
Your monitor is now connected. All your settings have
been set to default values. Click ‘Finish’ to complete.
Once you’ve installed the software, follow these easy steps to get connected.
Energy Manager Booklet Customer_Layout 1 27/05/2010 14:55 Page 22
Table of contents


