manuals.online logo
Brands
  1. Home
  2. •
  3. Brands
  4. •
  5. Epever
  6. •
  7. Controllers
  8. •
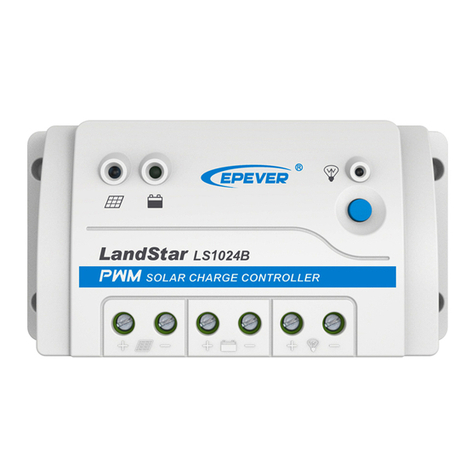
  9. Epever LS1024BPD User manual

Epever LS1024BPD User manual

BEIJING EPSOLAR TECHNOLOGY CO., LTD. Tel:+86-10-82894112 / 82894962 Website:www.epsolarpv.com/www.epever.com
1 2
LS BPD series Solar Charge Controller
1. Safety Information
Read all of the instructions in the manual before installation.
DO NOT disassemble or attempt to repair the controller.
Install external fuse or breaker as required.
Do disconnect the solar module and fuse/ breakers near to battery before installing or
moving the controller.
Power connections must remain tight to avoid excessive heating from a loose
connection.
Only charge batteries that comply with the parameters of controller.
Battery connection may be wired to one battery or a bank of batteries.
Risk of electric shock, the PV and load can produce high voltages when the controller is
working.
2. Overview
Thank you for selecting the LS BPD series solar charge controller. The LS-BPD controller
is a waterproof PWM charge controller that adopts the most advanced digital technique.
The multiple load control modes enable it can be widely used on solar home system, field
monitoring, traffic signal, solar street light, solar garden lamp, etc.
It’s an easy operation and cost efficient controller featured as: 
3-Stage intelligent PWM charging:Bulk, Boost/Equalize, Float
Support 3 charging options: Sealed, Gel, and Flooded.
Programmable LVD and main parameters via digital tube and button
Multiple load control modes
Extensive Electronic protection
Battery temperature compensation function.
IP67 waterproof degree
3. Product Features
①
Mounting hole Φ5
⑥
PV negative wire
②
Charging status LED indicator
⑦
Battery negative wire
③
Battery status LED indicator
⑧
Load negative wire
④
Temperature Sensor *
⑨
Digital tube
⑤
PV、Battery and Load positive wire
⑩
Button
*If the temperature sensor short-circuited or damaged, the controller will be
charging or discharging at the internal temperature of device.
4. Wiring
(1) Connect components to the charge controller in the sequence as shown above and pay
much attention to the “+” and “-”. Please don’t insert the fuse or turn on the breaker during
the installation. When disconnecting the system, the order will be reserved.
(2) After power on the controller, check the battery LED indicator on the controller, it will be
on solid green. Otherwise please refer to chapter 8. Always connect the battery first, in
order to allow the controller to recognize the system voltage.
(3) The battery fuse should be installed as close to battery as possible. The suggested
distance is within 150mm.
5. LED Indicators
Indicator
Color
Status
Instruction
Green
On Solid
PV connection normal but
low voltage(irradiance) from
PV, no charging
Green
Slowly Flashing(1Hz)
In charging
Green
Fast Flashing(4Hz)
PV reverse polarity
Green
OFF
No PV voltage(night time) or
PV connection problem
Green
On Solid
Normal
Green
Slowly Flashing(1Hz)
Full
Green
Fast Flashing(4Hz)
Over voltage
Orange
On Solid
Under voltage
Red
On Solid
Over discharged
Red
Fast Flashing(4Hz)
Battery Overheating
Red
On Solid
Load ON
Red
OFF
Load OFF
Charging (green) and battery indicator (orange)
flashing simultaneously
Controller overheating
6. Setting Operation
Button function
The controller parameters can be set via the button:
Mode
Note
Load ON/OFF
When the load mode is Manual mode, press the button can turn
on/off the load.
Clear error
Press the button
Browse Mode
Press the button and hold on 5s then the digital tube will be on.
Press the button to roll the item in circle.
Parameter set
Mode
Press the button to roll the item in the browse mode and hold on 5s
to enter edit parameters with the LED2 flashing. Modify the value by
pressing the button. Save the data and return to the menu until the
LED2 stop flash.
Digital Tube Display
The reference of LED for parameter and setting value is shown in the table
LED1
Item
LED2
Value
Default
Range
Battery type
1:Sealed
2:Gel
3:Flooded
Low voltage disconnect
voltage①
②
10.6V-12.0V Unit
value=0.1V(x2/24V)
Load set
0:Light ON/OFF
1:Light ON +Timer
2:Manual Mode
3:Output mode
4:Test mode
Light ON/OFF threshold
voltage③
②
1-17V(x2/24V)
Light ON+Time mode1:Time1
②
0-14H,Unit value= 1H
Light ON+Time mode2:Time2
②
0-14H,Unit value= 1H
①Low Voltage Reconnect Voltage =Low Voltage Disconnect Voltage+0.5V/12V(x2/24V).
②Radix point of LED segment display indicate the value added “10”, for example 0.=10, 4. =14.
③For day/night detection, load will be automatically turned on/off when PV voltage is
below/above threshold voltage.
LED Code
Code
Detail
Over discharged
If fault and working state on left appear,
corresponding code will be displayed.
Several states occur at the same time,
these code will be displayed circularly
(interval 1s). Only one state occurs, the
code flashes per 1s. You can enter
setting mode and set parameters despite
the error shows
Under voltage
Load over load①
Load short circuit
The radix point of LED1 lighting up
indicates that load is ON.
Oppositely, load is OFF.
Load state (radix point) will conceal
during fault displaying and parameter
setting
①When load current reaches1.02-1.05 times 1.05-1.25 times, 1.25-1.35 times and
1.35-1.5 times more than nominal value, controller will automatically close loads in 50s,
Button
LED1
LED2
Figure 1 Product Feature
Figure 2 Connection diagram
Radix point
④
①
⑤
⑥
⑦
⑧
⑨
⑩
②
③
BEIJING EPSOLAR TECHNOLOGY CO., LTD. Tel:+86-10-82894112 / 82894962 Website:www.epsolarpv.com/www.epever.com
3 4
30s,10s and 2s respectively.
NOTE: Just only the Load over load and the Load short circuit can be cleared by
pressing the button.
Load control setting
(1) Manual Mode
(2) Light ON/OFF (Default)
(3) Light ON +Timer
(4)Output mode
The load will be on for 24 hours. The button is disabled.
(5)Test mode
The same as light ON/OFF mode but no 10 minutes delay. The test mode is only used to
test load switch. It can return to the previous mode after controller restart.
NOTE: In the mode of Light ON/OFF and Light ON + Timer, the Load is turned on
after 10minutes delay.
7. Protection
PV Short Circuit
If the PV array short circuit, the controller will stop charging, clear it to resume normal
operation.
PV Reverse Polarity
Fully protection against PV reverse polarity, correct the wire connection to resume
normal operation.
Battery Reverse Polarity
Fully protection against battery reverse polarity, correct the wire connection to resume
normal operation.
Battery Over Voltage
When the battery voltage reaches to the set point of Over Voltage Disconnect Voltage,
the controller will stop charging the battery to protect the battery from being over
charged to break down.
Battery Over Discharge
When the battery voltage reaches to the set point of Low Voltage Disconnect Voltage,
the controller will stop discharging the battery to protect the battery from being over
discharged.
Battery Overheating
The controller detect the environment temperature through the external temperature
sensor. If the environment temperature exceeds 65 ºC, the controller will automatically
start the overheating protection to stop working, and recover below 50 ºC.
Load Overload
Load will be switched off when 1.05 times rated current overload happens. Controller will
automatically attempt to reconnect load for 5 times. If overload protection still exist after
controller’s 5 times attempts, user have to reduce load appliance, then press the button
or repower the controller or wait for one night-day cycle (night time>3 hours).
Load Short Circuit
Load will be switched off when load short circuit (≥4 times rated current) happens.
Controller will automatically attempt to reconnect load for 5 times. If short circuit
protection still exist after controller’s 5 times attempts, user have to clear short
circuit ,then press the button or disconnect and restart the controller or wait for one
night-day cycle (night time>3 hours).
Controller Overheating
If the Internal temperature of the controller exceeds 85 ºC, the controller will
automatically start the overheating protection, and recover below 75 ºC.
High Voltage Transients
The controller is protected against small high voltage transients. In lightning prone
areas, additional external suppression is recommended.
8. Troubleshooting
Faults
Possible reasons
Troubleshooting
LED Charging
indicator turn off
during daytime when
sunshine falls on PV
modules properly
PV
array disconnection
Confirm that PV and battery wire
connections are correct and tight
No LED indicator
Battery voltage maybe
less than 8V
Measure battery voltage with the
multi-meter. Min.8V can start up the
controller
Battery LED indicator
Battery voltage higher
Check if battery voltage is higher
green fast Flashing
than over voltage
disconnect
voltage(OVD)
than OVD, and disconnect the PV
Battery LED indicator
red and display “”
Battery
over discharged
When the battery voltage is restored
to or above LVR point (low voltage
reconnect voltage), the load will
recover
Battery LED indicator
red flashing
Battery Overheating
The controller will automatically turn
the system off. But while the
temperature decline to be below 50
ºC, the controller will resume.
Charging(green) and
battery indicator
(orange)flashing
simultaneously
Controller overheating
Please try to decline the
environment’s temperature, or the
power of PV or the power of the load
Load terminals no
output and display
“”or “”
Over load or Short
circuit
Please reduce the number of
electric equipments or check
carefully loads connection.
NOTE: If want to clear errors promptly, please restart the controller and disconnect
the PV array firstly, then load and battery; and reconnect system according to
"Chapter4".
9. Technical Specifications
Item
LS1024BPD
LS2024BPD
Nominal system voltage
12/24VDC Auto
Battery input voltage range
8~32V
Battery type
Sealed (Default) / Gel / Flooded
Max. PV open circuit voltage
50V
Rated current
10A
20A
Self-consumption
9.4mA/12V;12.2mA/24V
Charge Circuit Voltage Drop
≤0.3V
Discharge Circuit Voltage Drop
≤0.2V
Temperature compensation
coefficient
-3mV/℃/2V
Working environment
temperature
-35℃~+55℃
Enclosure
IP67
Grounding
Common Positive
Overall dimension
108.5x64x25.6mm
108.5x83x25.6mm
Mounting dimension
100.5mm
100.5mm
Mounting hole size
Φ5
Power cable
2.5mm2
4.0mm2
Net weight
0.33kg
0.41kg
Battery Voltage Control Parameters
Below parameters are in 12V system at 25 ºC, please double the values in 24V system
Battery Type
Sealed
Gel
Flooded
Over Voltage Disconnect Voltage
16.0V
16.0V
16.0V
Charging Limit Voltage
15.0V
15.0V
15.0V
Over Voltage Reconnect Voltage
15.0V
15.0V
15.0V
Equalize Charging Voltage
14.6V
——
14.8V
Boost Charging Voltage
14.4V
14.2V
14.6V
Float Charging Voltage
13.8V
13.8V
13.8V
Boost Reconnect Charging Voltage
13.2V
13.2V
13.2V
Low Voltage Reconnect Voltage
11.6V
11.6V
11.6V
Under Voltage Warning Reconnect
Voltage
12.2V
12.2V
12.2V
Under Voltage Warning Voltage
12.0V
12.0V
12.0V
Low Voltage Disconnect Voltage
11.1V
11.1V
11.1V
Discharging Limit Voltage
10.6V
10.6V
10.6V
Equalize Duration
120 min.
——
120 min.
Boost Duration
120 min.
120 min.
120 min.
10. Disclaimer
Damage from improper use or use in an unsuitable environment.
PV or load current, voltage or power exceeding the rated value of controller.
User disassembly or attempted repair the controller without permission.
The controller is damaged due to natural elements such as lighting.
The controller is damaged during transportation and shipment.
Any changes without prior notice! Version number:V2.1
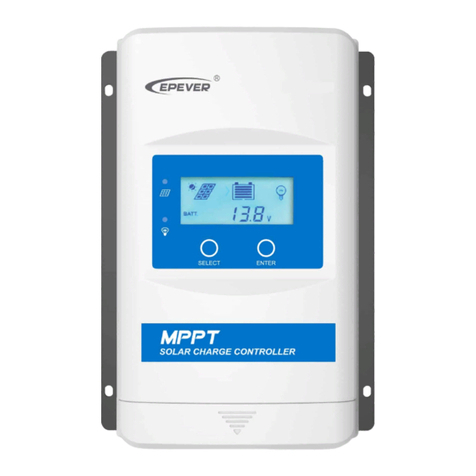
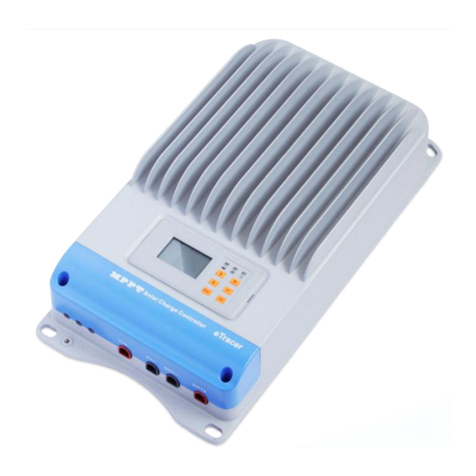
This manual suits for next models

2

Other Epever Controllers manuals

Epever XTRA Series User manual

Epever

Epever XTRA Series User manual

Epever ET4415BND User manual

Epever

Epever ET4415BND User manual

Epever Tracer AN series User manual

Epever

Epever Tracer AN series User manual

Epever iTracer-ND Series User manual

Epever

Epever iTracer-ND Series User manual

Epever Tracer1206A User manual

Epever

Epever Tracer1206A User manual

Epever Tracer-AN Series User manual

Epever

Epever Tracer-AN Series User manual

Epever Tracer1206AN User manual

Epever

Epever Tracer1206AN User manual

Epever Tracer-BN Series MPPT User manual

Epever

Epever Tracer-BN Series MPPT User manual

Epever XTRA N Series User manual

Epever

Epever XTRA N Series User manual

Epever LandStar EU series User manual

Epever

Epever LandStar EU series User manual

Epever LandStar GPLI Series User manual

Epever

Epever LandStar GPLI Series User manual

Epever LS-E Series User manual

Epever

Epever LS-E Series User manual

Epever Tracer2206AN User manual

Epever

Epever Tracer2206AN User manual

Epever Tracer6210AN User manual

Epever

Epever Tracer6210AN User manual

Epever Tracer BPL Series User manual

Epever

Epever Tracer BPL Series User manual

Epever EPIPDB-COM-10 User manual

Epever

Epever EPIPDB-COM-10 User manual

Epever LS-B Series User manual

Epever

Epever LS-B Series User manual

Epever Epsolar eBox-WIFI-01 User manual
Epever

Epever Epsolar eBox-WIFI-01 User manual

Epever XTRA1206N User manual

Epever

Epever XTRA1206N User manual

Epever Tracer BPL Series User manual

Epever

Epever Tracer BPL Series User manual

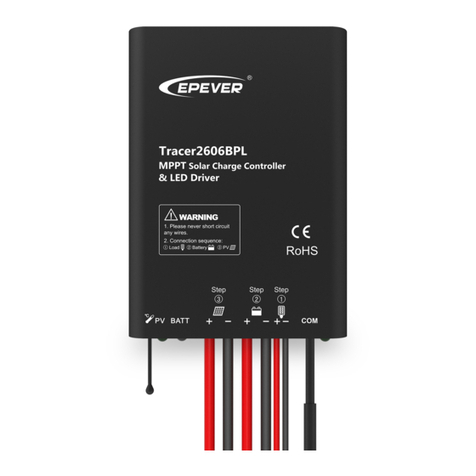
Epever Tracer2606BPL User manual

Epever

Epever Tracer2606BPL User manual

Epever SolarV AN Series User manual

Epever

Epever SolarV AN Series User manual

Epever LandStar LPLI Series User manual

Epever

Epever LandStar LPLI Series User manual

Epever MPPT User manual

Epever

Epever MPPT User manual

Popular Controllers manuals by other brands

motortronics VCM series quick start guide

motortronics

motortronics VCM series quick start guide

Topmodel XPower XREG80HV user manual

Topmodel

Topmodel XPower XREG80HV user manual

Revolution Micro TouchMi owner's manual

Revolution Micro

Revolution Micro TouchMi owner's manual

APS TS400 Installation & user manual

APS

APS TS400 Installation & user manual

HighPoint SSD7103 installation guide

HighPoint

HighPoint SSD7103 installation guide

GRAPHTEC OPS676 user manual

GRAPHTEC

GRAPHTEC OPS676 user manual

Jordan Valve I & M Mark 4150 Series Installation & maintenance instructions

Jordan Valve

Jordan Valve I & M Mark 4150 Series Installation & maintenance instructions

AMX NetLinx NI-2000 Dimension Guide

AMX

AMX NetLinx NI-2000 Dimension Guide

Curtis 1268-5403 Pre-installation instructions

Curtis

Curtis 1268-5403 Pre-installation instructions

Hansen PXVC-PT manual

Hansen

Hansen PXVC-PT manual

LEGRAND Wattstopper LMRC-611MCC quick start guide

LEGRAND

LEGRAND Wattstopper LMRC-611MCC quick start guide

JBL LED SOLAR CONTROL WIFI quick guide

JBL

JBL LED SOLAR CONTROL WIFI quick guide

Lutron Electronics Energi Savr Node QS QSNE-4S10-D Programming guide

Lutron Electronics

Lutron Electronics Energi Savr Node QS QSNE-4S10-D Programming guide

Computer Automation Technology CAT-300 manual

Computer Automation Technology

Computer Automation Technology CAT-300 manual

GCE MEDIEVAC+ Instructions for use

GCE

GCE MEDIEVAC+ Instructions for use

Evender SR-1009 Series manual

Evender

Evender SR-1009 Series manual

Linear Technology DC1817B Demo Manual

Linear Technology

Linear Technology DC1817B Demo Manual

Regulus RC 25 quick start guide

Regulus

Regulus RC 25 quick start guide

manuals.online logo
manuals.online logoBrands
  • About & Mission
  • Contact us
  • Privacy Policy
  • Terms and Conditions

Copyright 2025 Manuals.Online. All Rights Reserved.