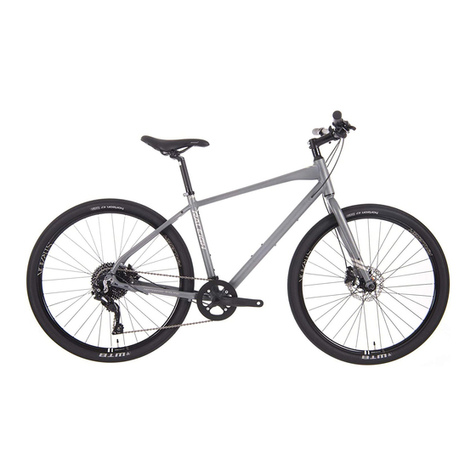
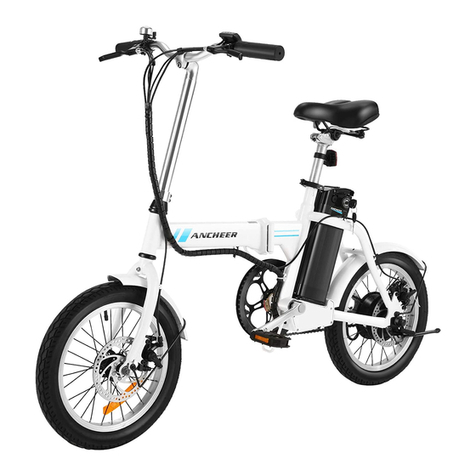
eProdigy Bikes Logan User manual

ASSEMBLY MANUAL
Logan
eProdigy™

TABLE OF
CONTENTS
Introduction
1
General Warning
4
The Total Package
5
Owner’s Identication
6
Recommended Tools
7
Assembly
8
Handlebar Installation
Front Fender Installation
Front Wheel Installation
Pedals Installation
Pump Tires
About the Battery
16
General Overview
Maintenance
Storage
Charging and Handling
Inserting and Removing Battery
Charging Procedure
Checking State-of-Charge

Thank you for choosing eProdigy Bikes. It is our mission to provide you with the latest in electric propulsion
technology, and inspire the joy of riding worldwide one cyclist at a time. Your Logan is designed with some of
the most innovative industry thinking to provide you with the safest, most ecient and thrilling experience.
Should there be any time you are unsure about the maintenance or service process please contact your dealer
for immediate assistance. We hope you enjoy your new electrical assist bicycle, as much as we love to ride ours.
IMPORTANT: This document is meant to be used in conjunction with the eProdigy User Manual. Please read
this Logan Assembly Manual together with the User Manual carefully to protect yourself, your bike and to
ensure you safely enjoy the full performance of the product.
Note: It is strongly recommended to have your bicycle examined by a professional mechanic prior to riding.
eProdigy Technical Support can be reached by email at support@eProdigyBikes.com or by phone at 1-888-
928-9328 ext. 2
Hello

GENERAL
WARNING
This manual contains numerous “cautions” and“warnings”, please pay attention to these as they directly impact
either the proper use of the bicycle, avoiding potentially hazardous situations, or general safety. The WARNING
labels must be paid special regard to, failure to do so may result in serious injury or death.
t5IFDPNCJOBUJPOPGUIFTBGFUZBMFSUTZNCPMBOEUIFXPSEWARNING indicates a potentially hazardous
situation which, if not avoided, could result in serious injury or death.
t5IFDPNCJOBUJPOPGUIFTBGFUZBMFSUTZNCPMBOEUIFXPSECAUTION indicates a potentially hazardous
situation which, if not avoided, may result in minor or moderate injury, or is an alert against unsafe practices.
t5IFXPSECAUTION used without the safety alert symbol indicates a situation which, if not avoided, could
result in serious damage to the bicycle or rendering your warranty void.
t%POPUBEEBNPUPSUPUIFQSPEVDU
t%POPUUPXUIFQSPEVDU
t%POPUNPEJGZUIFQSPEVDU
t3FQMBDFXPSOPSCSPLFOQBSUTJNNFEJBUFMZ
t*GBOZUIJOHEPFTOPUPQFSBUFQSPQFSMZEJTDPOUJOVFVTF
04
GENERAL WARNING
www.eProdigyBikes.com

Check that your eProdigy package is correct, complete,
and undamaged.
Your eProdigy package should contain the following:
THE TOTAL
PACKAGE
eProdigy bicycle frame
with a Coaxial Bottom Bracket Motor™ installed
Rear wheel
%PXOUVCFCBUUFSZNPVOU
with 2 keys installed
)BOEMFCBSTXJUI,5-$%DPOUSPMQBOFM
display, throttle, shifter, and grips installed
05 THE TOTAL PACKAGE www.eProdigyBikes.com
Front wheel
Seat post with saddle installed
Pedals
Quick release for the front wheel
Front + Rear fender Note
Battery & charger is shipped separately for safety purposes
1
2
4
5
6
7
8
9
2
4
5
6
9
8
9
1
7

Each eProdigy bicycle frame, motor and battery has a
unique serial number. The Bike Frame Serial Number
Motor Serial Number and the Battery Serial
Number can be seen as shown here.
Write these numbers below to keep it for future
reference. If the bicycle is stolen, these serial numbers
may help in retrieving the lost bike.
Frame Serial Number
Motor Serial Number
Battery Serial Number
Purchase Date
Model Name
Dealer
Note
This information is only available on your products.
It is not available from eProdigy
OWNER’S
*%&/5*'*$"5*0/
06 08/&34*%&/5*'*$"5*0/ www.eProdigyBikes.com
1
2
1
2
xxxxxxxxxxxx
eBike Li-Ion battery
xxxxxxxxxxxxx
II IIIIIII I IIIIIIIIIIII IIIII

1 NNNNNNBOENN"MMFOLFZT
2Phillips screw driver
Crescent wrench and/or 10mm wrench
415mm pedal wrench
5Bicycle grease
3&$0..&/%&%
TOOLS
Note
Do not dispose the carton or packaging until the assembly of the
bicycle is complete. This can prevent accidentally discarding parts
of the bicycle.
07 3&$0..&/%&%500-4 www.eProdigyBikes.com
WARNING
Keep small parts away from children during
assembly
1
2
4
5
Our very own eProdigy technical team recommends
the following tools to assemble the Logan eBike

1
08 )"/%-&#"3*/45"--"5*0/ www.eProdigyBikes.com
)"/%-&#"3
INSTALLATION
Use the 4mm Allen key to
remove the handlebar mount
Center the handlebar to the stem and ensure the
handlebar’s direction is aligned with the front fork
1
2
Use a Phillips screwdriver and 4mm Allen key
Evenly tighten the mount screws with the
4mm Allen key
Note
You may need to loosen
the KT-LCD3 control panel
Display to move it out of
the way when installing
the handlebar
a
a

09 )"/%-&#"3*/45"--"5*0/ www.eProdigyBikes.com
Make sure the handle bar is centered
and the KT-LCD3 control panel is
secure
Top View
b
b
Note

10 '30/5'&/%&3*/45"--"5*0/ www.eProdigyBikes.com
'30/5'&/%&3
INSTALLATION
Use a 3mm Allen key, 5mm Allen key, and a 10mm/ Crescent wrench
Place the fender in the fork.
Secure the fender mount
in the highest position on
the mounting tab
Front fender attaching hardware
has been pre-assembled onto the
fork. Loosely holding the light in place
Remove the nut
from the fork
crown
4
Tighten the bolt and
nut with a 5mm Allen
key and a 10mm
wrench
5
6
Note
At this point you can
adjust the position
of the light to the
desired angle
c
cBack View

Remove the pre-assembled
bolt and washer
11 '30/5'&/%&3*/45"--"5*0/ www.eProdigyBikes.com
Note
It’s always a good idea to check
over all nuts and bolts on the bike
to ensure they are secure
Align the fender stays
with the fork mounting
holes
7
8
d
d
Re-insert each bolt and
washer into the fork
mounting holes and tighten
securely using a 4 mm Allen
key
e
e
e
9
10

12 FRONT WHEEL INSTALLATION www.eProdigyBikes.com
FRONT WHEEL
INSTALLATION
Place the wheel
between the front fork
Make sure the rotor is centered
between brake pads; rotating
without friction
10
11`
f
g
Note
consult your dealer for replacement
brake pads as needed
f
g

Install the quick release
skewer through the
front wheel
Note
Make sure quick release lever is
on the opposite of the drive side
13 FRONT WHEEL INSTALLATION www.eProdigyBikes.com
open
position
closed
position
12
14
e
Note
make sure there is a
spring on either side of
the rotor, the big taper
facing the outside of
the wheel
In the lever open position,
twist the end cap on till snug.
Then close the quick release lever
to the closed position
e

14 1&%"-4*/45"--"5*0/ www.eProdigyBikes.com
1&%"-4
INSTALLATION
Apply grease onto the
pedal threads
Use 15mm pedal wrench, bicycle grease
* Each pedal is marked with a R or L to help make sure you are
installing the correct side
R
14
On the drive side
tighten pedal clockwise
On the left side,
tighten pedal counter-
clockwise
L
R
R
15
16

15 PUMP UP TIRES www.eProdigyBikes.com
PUMP UP
TIRES
Use a tire pump or a regulated air hose
Apply grease evenly on
the seat post before
the bike’s rst ride
Maintenance:
t'SFRVFOUMZDIFDLUIFUJSFJOøBUJPO
pressure because all tires lose air
slowly
over time. For extended storage,
keep the weight of the bicycle o
the tires.
t%POPUVTFVOSFHVMBUFEBJS
IPTFTUPJOøBUFUIFJOOFSUVCFT
An unregulated hose can suddenly
PWFSJOøBUFCJDZDMFUJSFTBOEDBVTF
them to burst.
Pump your tires to the optimal tire
pressure; up to 50 PSI
17
18

ABOUT THE
BATTERY
General Overview
The eProdigy Logan is proudly powered by Lithium Ion
$FMMTQSPEVDFECZ%S#BUUFSZ¥BMFBEFSJOQSPEVDJOH
innovative, sustainable power technologies. Li-Ion
batteries do not have a memory eect, which means
the battery’s maximum energy capacity is not aected
if it is repeatedly recharged after only being partially
discharged. Complete drainage is not required before
charging. This characteristics and their ability to hold a
charge for long periods while maintaining a high
energy density making them ideal for driving portable
equipment. Through it’s life cycle, as with all batteries,
the Li-Ion cell will deteriorate from 100% capacity at
full charge to approximately 80% over 800 cycles.
Battery Maintenance
Very little maintenance is required, however there are
some key steps to ensure the optimal performance of
your battery and the longest life span possible (approx.
2 years or 800 charge cycles).
WARNING
eProdigy will not be held liable for battery
breakdown caused by improper care or misuse
including, but not limited to opening the battery case.
Battery damage due to user mishandling or neglect
voids all warranty and product liability claims.
Storage
The battery should be stored in temperatures between
10˚C (50˚F)~ 25˚C (77˚F) and never colder than -10˚C
'PSPWFS$'&YQPTJOHZPVSCBUUFSZUP
extreme temperature uctuations or humidity will
severely reduce battery life and potentially cause
corrosion.
Charging and Handling Your Battery
We recommend charging your battery with an eProdigy
charger at room temperature after every ride, ideally
when the battery is at less then 50% charge. If it has
been exposed to cold temperatures, wait until it warms
to about 20˚C before charging.
16 ABOUT THE BATTERY www.eProdigyBikes.com

17 ABOUT THE BATTERY www.eProdigyBikes.com
Mounting and Removing the Battery Pack
The battery is an important and costly component of
an eBike. It is designed to be locked into position with
a key to prevent theft. Always make sure that all
settings are switched obefore removing the battery.
Routinely wipe dry and clean the battery connectors
on the battery mount.
Inserting Down-Tube Battery
align the battery with track on the docking station
insert the battery pack into the down-tube mount
you will hear a “click” when the battery lock is secure
eBike Li-Ion battery
eBike Li-Ion battery
“click”
2
Removing Down-Tube Battery
UVSOPòUIF.PUPSCZTIVUUJOHPòUIF,5-$%
display (no image shown)
insert the key and turn clockwise, gently pull the
handle outwards to lift the battery from the dock
1
2
eBike Li-Ion battery
2b
eBike ll-ion battery
2a
CAUTION
Do not force the battery onto the battery dock.
This can damage the battery connector.
2
1
1
The battery pack can be heavy, so be careful not to drop
it
Note

18 ABOUT THE BATTERY www.eProdigyBikes.com
connect the charger to the battery, ensure
connections are secure
insert the charger cable into an AC outlet
if the power plug is inserted without the battery
DPOOFDUFEUPUIFDIBSHFSUIF-&%XJMMMJHIUVQHSFFO
UPTJHOJGZJUT45"/%#:TUBUVT
2
1
1
Charging Procedure
UPTJHOJGZJUT$)"3(*/(TUBUVTUIF-&%XJMMMJHIUVQSFE
UPTJHOJGZJUT'6--:$)"3(&%TUBUVTUIF-&%XJMMMJHIU
up green
4
5
4
WARNING
Do not leave a charging battery overnight or
unattended, to avoid overheating. It usually only
takes 4-6 hours to fully charge a completely drained
battery.
Checking the Battery state-of-charge
2
1press down on till you hear a “click”
CBUUFSZTUBUFPGDIBSHF-&%XJMMJMMVNJOBUF
1
Located on the body of the battery is State-of-Charge
-&%JOEJDBUPS
100-75% charge
75-50% charge
50-25% charge
<25% charge
Note
when the battery is fully charged, the voltage reading should be
approximately 40 volts

version 2015. 05.05
Table of contents

