11494-6
4.ASSEMBLYSTEPS
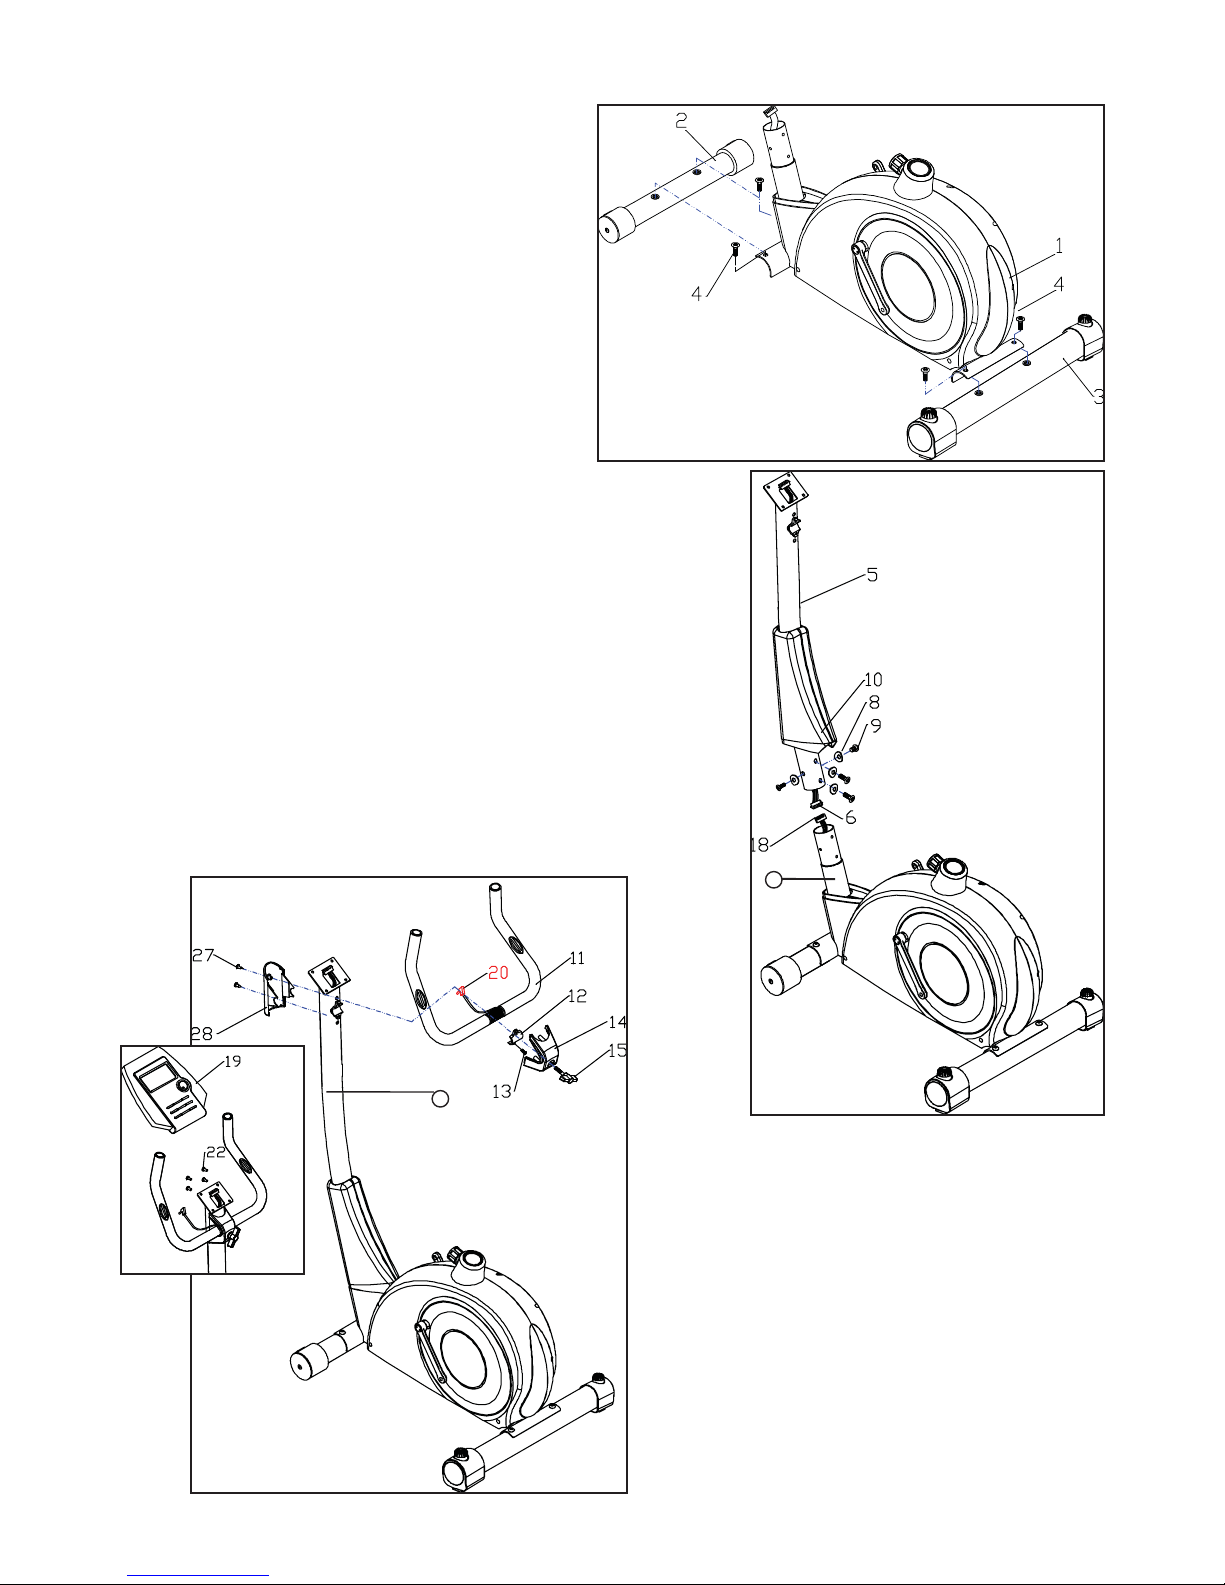
STEP01
• Attach the Front Stabilizers (2) and the Rear Stabilizer
(3) to the Main frame (1), then fasten with 4
Carriage Bolts (4).
STEP02
• Be sure the Front Post Cover (10) is on the Front Post (5).
• Connect the Middle ComputerWire (6),by pulling the computer
wire through the Front Post (5) by using the string attached on the
front post.
• Connect the Lower ComputerWire (18) with Middle Computer
Wire (6).
• Insert the Front Post (5) into the Main frame (1), attaching with 4
Bolts (9) and ArchWashers (8).
CAUTION:
Ensure that cables are not damaged
during assembly or when tightening screws.
STEP03
• Put the Handlebar (11) onto the bracket of Front Post
(5),then use Bracket (12) and fasten with
Bolt M8 x 20mm (13).
• Put the Rear Bracket Cover (14) onto the
Handlebar(11) and fasten withT Shape Knob (15).
• Put the Front Bracket Cover (28) on the other side and
fasten with screw M4 x 20mm (27).
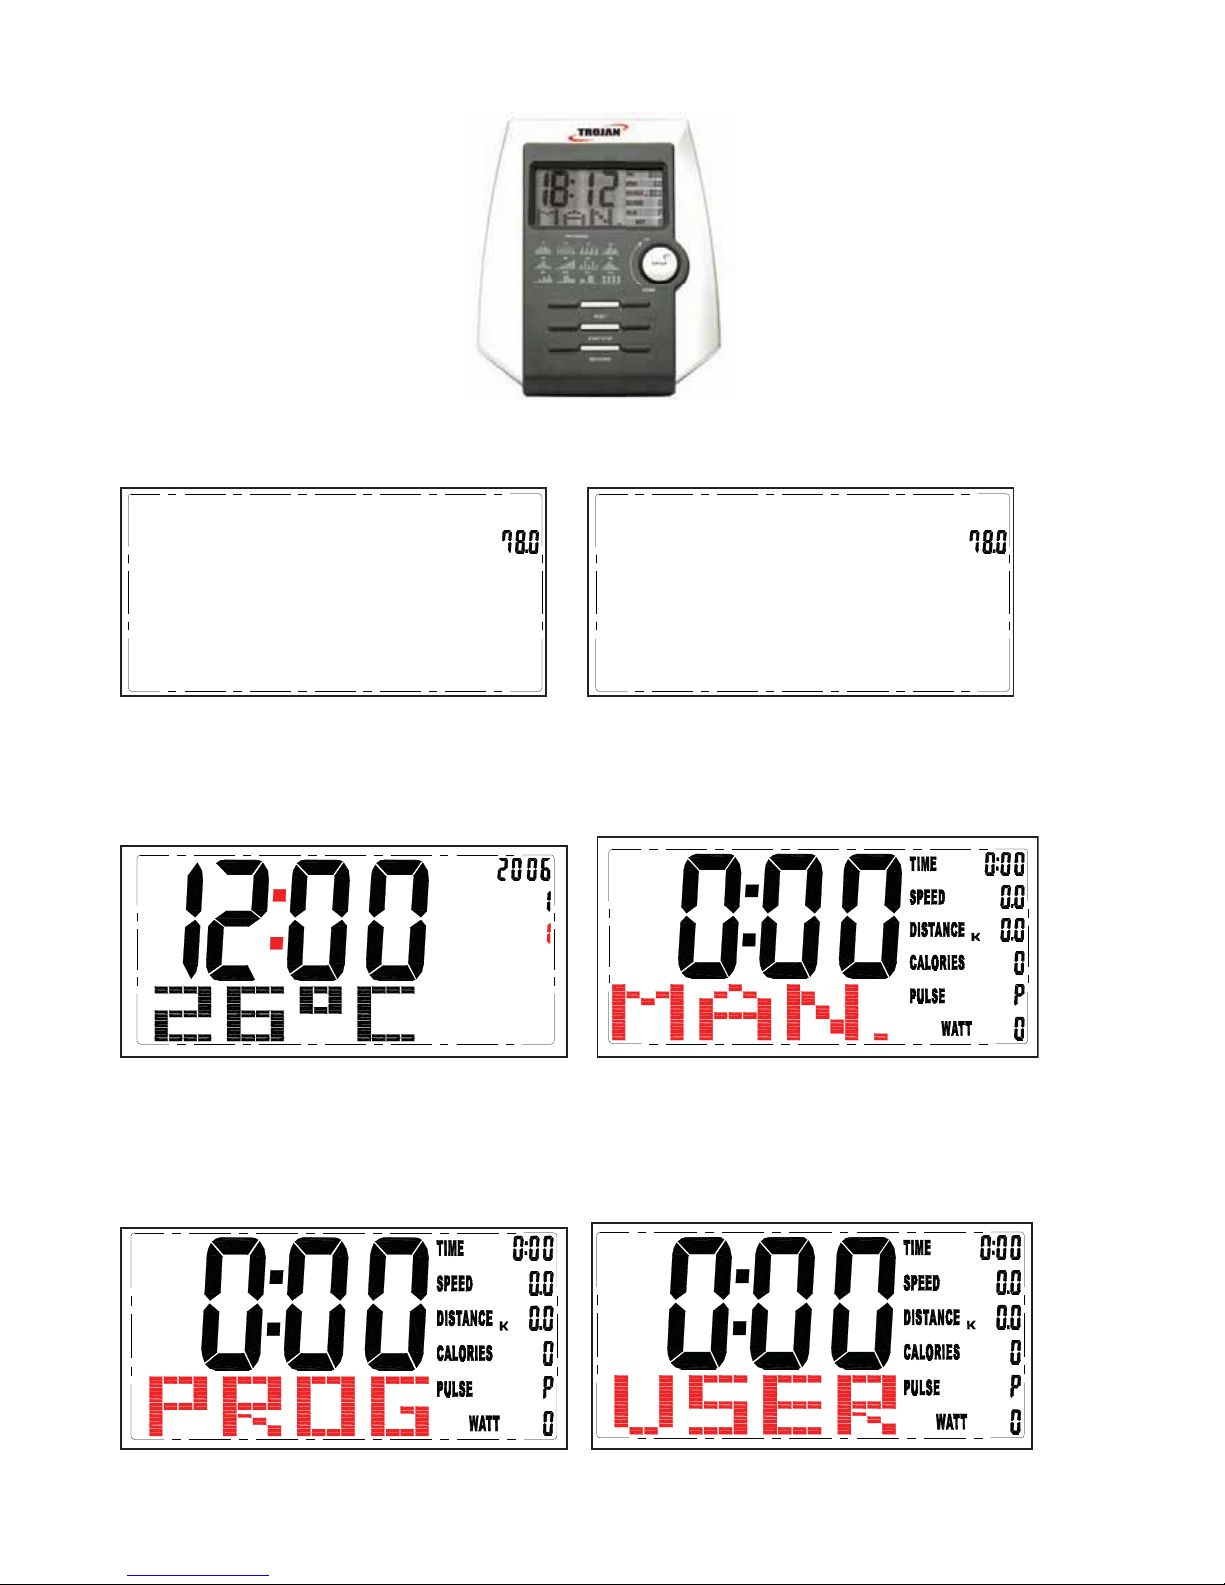
• Slide the Computer (19) onto the computer holder of
Front Post (5) tighten with screws (22).
CAUTION:
Ensure that cables are not damaged during assembly or
when tightening screws.
5
1