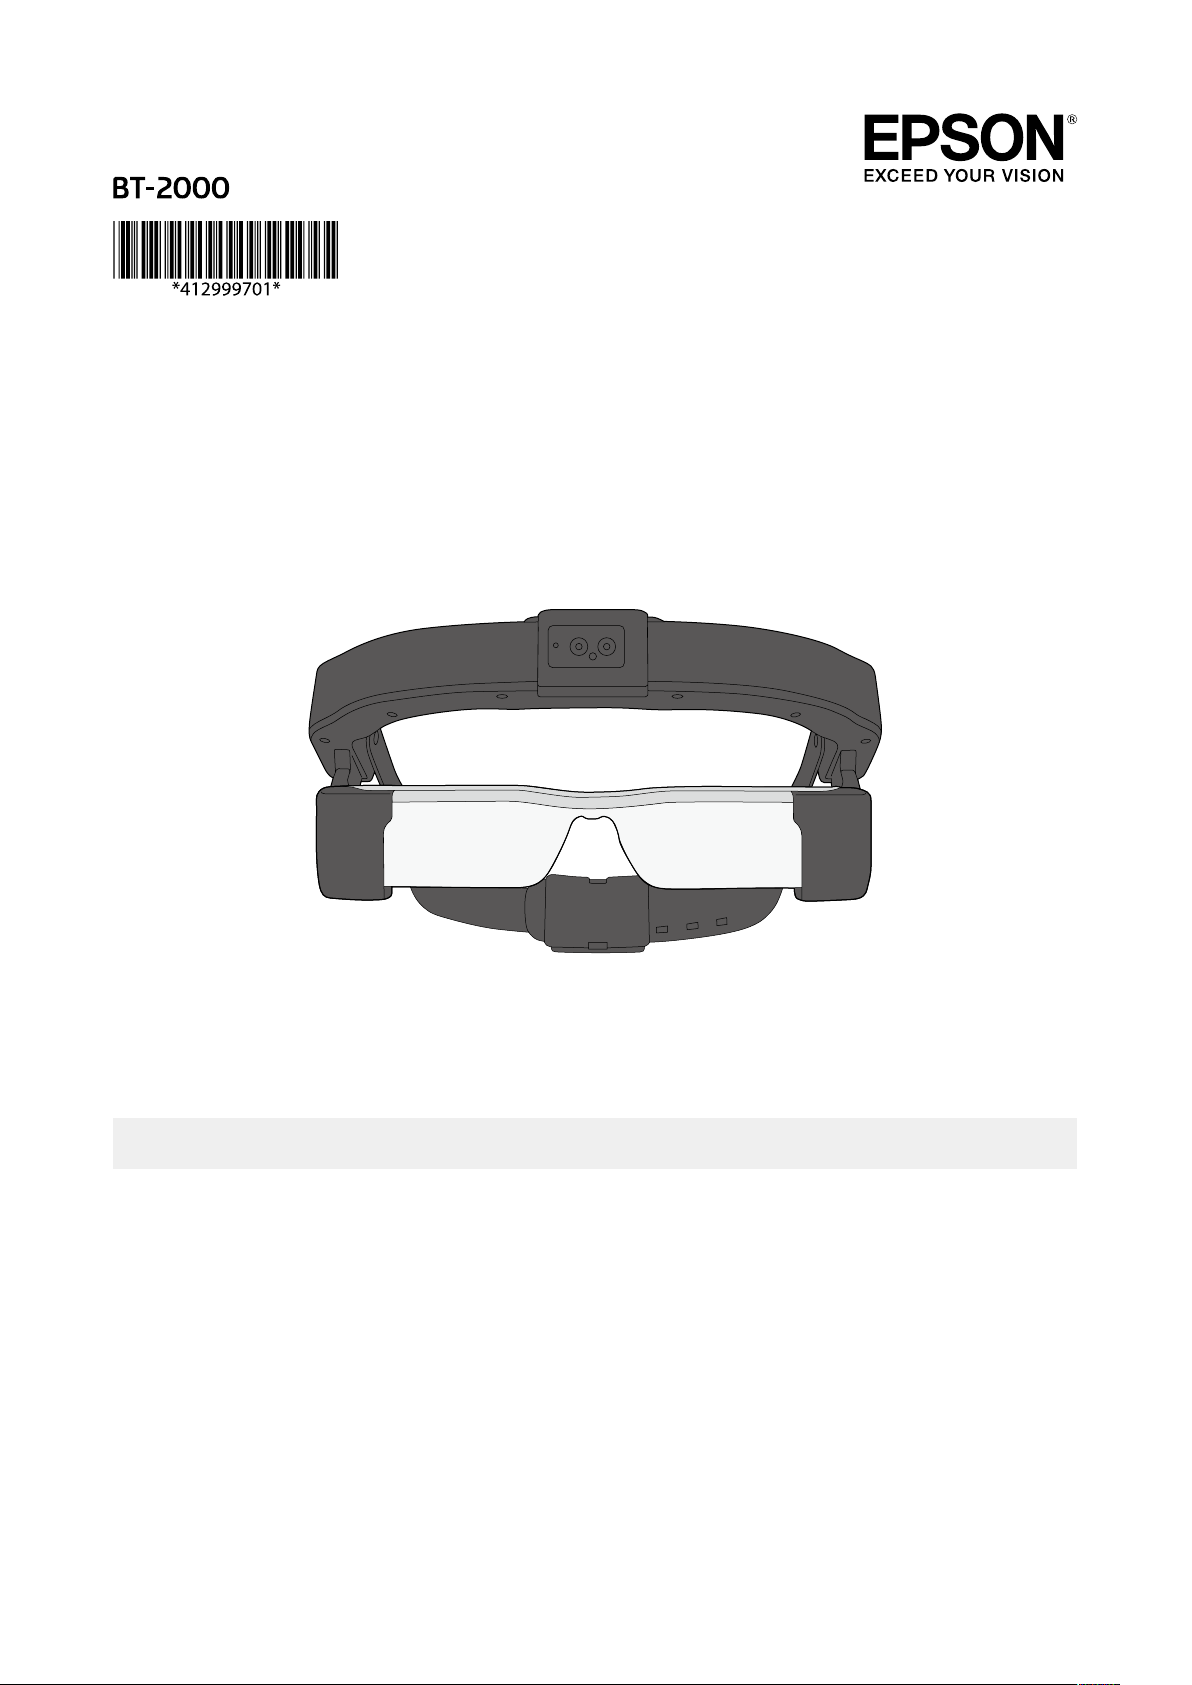
Epson BT-2000 User manual

User's Guide
Viewing Images Using the Headset ..........12
Maintenance ...........................................................12
Troubleshooting ....................................................13
Specifications ..........................................................14
Intellectual Property Rights ............................15
General Notes .........................................................15
Contact List ..............................................................18
Contents
Smart Headset
MOVERIO Pro
Included Items .......................................................2
Optional Items ........................................................2
Safety Instructions................................................3
Part Names and Functions ..............................6
Getting Ready .........................................................8
Turning On and Off .............................................10
Wearing the Product ..........................................10
Copyright© 2015 Seiko Epson Corporation. All rights reserved.

2
Included Items
Optional Items
Headset
Wear the headset to view images.
➡“Wearing the Headset” p. 11
Controller (with controller hold-
er)
Operates the product.
Battery packs (x2)
Powers the product.
➡“Charging the Battery” p. 8
AC adapter/AC cable
Charges the product. The AC cable
connector shape differs depending on
where you bought the product.
➡“Charging the Battery” p. 8
Shade
Shades the product from too much
exterior light.
➡“Installing the Shade/Protective
Shield/Lens Holder” p. 9
Protective shield
Protects the product's lens from foreign
objects.
➡“Installing the Shade/Protective
Shield/Lens Holder” p. 9
Inner pads (A/B/C)
Attach inside the headset to adjust the
headset to fit your head. The inner pad
B is attached to the headset at the time
of purchase.
➡“Replacing the Inner Pad” p. 9
Lens holder
Install lenses and attach them to the
headset. This allows users who wear
glasses to remove their glasses before
wearing the headset.
➡“Installing the Shade/Protective
Shield/Lens Holder” p. 9
Armband
Allows you to wear the controller on
your arm.
➡“Wearing the Controller” p. 10
Mono earphones with mic
Outputs audio from the product, and
inputs audio to the product.
Hexagon wrench and screws (x2)
Attaches the lens holder, shade, and
protective shield.
Hard carrying case
BO-HC2000
Use this case when carrying or storing
the product.
Quad battery charger
BO-QC2000
Allows you to charge four battery
packs simultaneously. The battery
packs are not included.
Battery packs* (x2)
BO-BP2000
Shade*/Protective shield*
BO-SD2000
Inner pads (A/B/C)*/Lens hold-
ers* (x2)
BO-IP2000
Controller holder*/Armband*
BO-PW2000
* Included with the product at time of purchase.

3
Safety Instructions
For your safety, read the attached documents carefully to use the product correctly.
After you have read the documents, save them for later reference.
Safety symbols
Warning
This symbol indicates information that, if ig-
nored, could possibly result in serious personal
injury or even death due to incorrect handling.
Caution
This symbol indicates information that, if ig-
nored, could possibly result in personal injury or
physical damage due to incorrect handling.
Warning Usage environment and condi-
tion precautions
Only use this product at the stated power-supply voltage.
Only use the supplied AC cable and AC adapter. Using other power
supply devices could result in heat, fire, explosion, malfunction, or liquid
leakage.
Take the following precautions when handling the plug. Failure to com-
ply with these precautions could result in fire or electric shock.
• Do not plug the AC adapter into an outlet being used by many other
devices.
• Do not insert the plug into a dusty outlet.
• Insert the plug firmly into the outlet.
• Do not hold the plug with wet hands.
• Do not pull the power cable when disconnecting the plug.
Do not use the supplied power cable if it is damaged. Doing so could
result in fire or electric shock.
• Do not modify the supplied power cable.
• Do not place heavy objects on top of the supplied power cable.
• Do not bend, twist, or pull the power cable with excessive force.
• Keep the power cable away from hot electrical appliances.
For your safety, unplug the product when it is not being used. The
insulation may deteriorate, which may result in electric shock, fire, or
malfunction.
Do not touch the plug during a thunderstorm. Doing so could result in
fire or electric shock.
Do not leave this product in locations subject to temperatures beyond
the specified operating range, such as cars with the windows closed,
in direct sunlight, or in front of air-conditioning or heater outlets. Also,
avoid locations subject to sudden changes in temperature. Doing so
may result in deformation due to heat, fire, malfunction, failure, or dam-
age.
Do not use the product in locations where it may get wet or is subject
to high levels of humidity such as in a bath or shower. Doing so could
result in fire or electric shock.
Do not place this product in locations subject to smoke, steam, high
humidity, or dust such as kitchen counters or near humidifiers. Doing so
may result in fire, electric shock, or deterioration in image quality.
Do not cover this product with a cloth or similar material during use.
Doing so may change the shape of the case through heat, or fire.
Do not expose the camera lens to direct sunlight for a long time. Doing
so may result in fire or explosion due to condensed beams of light from
the lens.
Warning Product usage precautions
Do not start using this product at a high volume. Doing so may
result in hearing impairment. Lower the volume before turning
off the product, and gradually increase the volume after turning
on the product. To prevent possible hearing damage, do not
listen at high volume for prolonged periods of time.
Do not allow any conductive foreign objects to touch the charging con-
nector, external device connector, or earphone microphone socket, and
do not put any conductive foreign objects into the connection ports.
Doing so may cause a short circuit and result in fire or electric shock.
Do not allow solvents such as alcohol, benzene, or thinner to touch the
product. Also, do not clean this product with a wet cloth or solvents.
Doing so may warp or crack the product housing and may result in
electric shock, malfunction, or fire.
The product housing should only be opened by qualified service per-
sonnel unless you are explicitly instructed to do so in the User’s Guide.
Also, do not disassemble or remodel the product (including consum-
able items). Many of the parts inside the product carry a high voltage
and could cause fire, electric shock, accident, or poisoning.
Do not subject the lens of the product to strong shocks or knock it
against hard objects. If the lens is damaged, it could splinter and cause
serious injuries to the eyes and face.
Do not throw the product into a fire and do not heat the product. Do
not place objects with naked flames, such as candles, on this product.
Doing so may result in heat, fire, or explosion.
Warning Viewing image precautions
Do not wear this product while driving a car, riding a motor bike or bi-
cycle, cooking, or performing any other dangerous tasks. Doing so may
result in accident or injury.
Do not use this product in unstable locations such as stairs or at altitude.
Also, do not use the product while walking in dangerous locations such
as near machinery or equipment that might get caught on the cables,
where there is a lot of traffic, or where it is dark. Doing so may result in
accident or injury.
When walking while viewing images on the product, be aware of your
surroundings. If you are too focused on the image, it could result in ac-
General information symbols
Caution Indicates procedures which may result in damage
or injury if sufficient care is not taken.
Note Indicates additional information and points which
may be useful to know regarding a topic.
[ ] Indicates controller keys and icons and menu items
displayed on the screen.
➡Indicates a reference to related topics.

4
Safety Instructions
cidents, falling down, and colliding with other people. Slide up the lens
whenever possible so as not to impede your vision.
When viewing in dark locations, it is difficult to see your surroundings
due to the brightness of the image. Be aware of your surroundings.
When using this product in small locations, be aware of your surround-
ings.
When wearing this product, do not look directly at the sun or other light
sources even if you are using the shade. This could cause serious injury
to your eyes or loss of eyesight.
Make sure the cable does not catch on anything in the surrounding area
while wearing the product. Also, make sure the cable does not wind
around your neck. Doing so may result in accident or injury.
Make sure the cable does not get damaged. Otherwise, it may result in
fire or electric shock.
• Do not damage the cable.
• Do not place heavy objects on top of the cable.
• Do not bend, twist, or pull the cable with excessive force.
• Keep the power cable away from hot electrical appliances.
Warning Product abnormality precautions
In the following situations, turn off this product immediately, unplug
the power plug, and contact your local dealer or the Epson service call
center. Continuing to use under these conditions may result in fire or
electric shock. Do not try to repair this product yourself.
• If you see smoke, or notice any strange odors or noises.
• If any water, beverages, or foreign objects get into the product.
• If the product was dropped or the case was damaged.
Warning Wireless function precautions
When taking this product into areas in which the use of electromag-
netic waves is prohibited, such as in an aircraft or in hospitals, follow the
instructions in the area and turn off this product or disable the Blue-
tooth or wireless LAN function. Do not use the Bluetooth or wireless
LAN function near automatically controlled devices such as automatic
doors or fire alarms. If the product has an auto power on function, dis-
able it before turning off the product. The electromagnetic waves may
cause electromagnetic interference with medical equipment or cause
the equipment to malfunction.
Note the following points when using the Bluetooth or wireless LAN
function in medical institutions.
• Do not bring this product into operating rooms, Intensive Care Units
(ICUs), or Cardiac Care Units (CCUs).
• When on wards, turn off this product or stop the electromagnetic
waves.
• Even when not on wards, turn off this product or stop the electro-
magnetic waves if there is any electronic medical equipment in the
area.
• Follow any rules stipulated by medical institutions that prohibit the
use of devices emitting electromagnetic waves, or that prohibit
entry to certain areas with such devices.
• If the product has an auto power on function, disable it before turn-
ing off the product.
If you have an implanted pacemaker or implanted defibrillator, make
sure you keep a distance of at least 22 cm between this product and
the implanted device when using the Bluetooth or the wireless LAN
function. The electromagnetic waves may influence the operation of
implanted pacemakers or implanted defibrillators. Turn off this product
or stop the electromagnetic waves if you are in a location where some-
one near you may have a pacemaker, such as a crowded train.
Caution Usage environment and condi-
tion precautions
Do not place the product in locations subjected to vibrations or shocks.
While viewing images using the product, make sure you confirm the
safety of your surroundings and do not leave any fragile items in your
immediate vicinity. The images you are viewing may cause you to move
your body involuntarily, resulting in damage to nearby items or personal
injury.
Do not place this product near high-voltage lines or magnetized items.
Doing so may result in breakdown, malfunction, or failure.
When performing maintenance, make sure you turn off the product, un-
plug the power plug and the power connector and disconnect all wires.
Otherwise, it may result in electric shock.
Stop charging the battery if the charging does not end in the stated
period of time. Continuing the charge may result in liquid leakage, heat,
explosion, or fire.
If the batteries are not handled correctly, the battery could explode or
leak which could cause a fire, injury, and corrode the product. Take the
following precautions to make sure you use this product safely.
• Do not use different types of batteries at the same time, and do not
use a mixture of old and new batteries.
• Do not use any batteries other than those specified in the User's
Guide.
• If the battery leaks, wipe up the leaked liquid with a cloth and
replace it with a new battery (if any leaked liquid gets on your hands,
wash in water immediately).
• Immediately remove batteries when it is time to replace them.
• Remove the batteries if you will not be using the product for a while.
• Do not heat the batteries or throw them into fire or water.
Caution Product usage precautions
Do not over tighten the head band while wearing the product. Doing
so may result in injury or rash due to the pressure.
Stop using this product if the skin that touches the product (head, face,
and so on) feels itchy when wearing the product, or any unusual rashes
occur, and consult your local dermatologist.
If you sweat while using the product, wipe the sweat from your head,
face, and the product. Continuing to use under these conditions may
result in itching or a rash.
Hold the controller securely or place it on a stable surface and make
sure the cables are not pulled with undue force. Dropping the headset
due to the weight of the controller may result in injury or malfunction.
Dispose of this product in accordance with your local laws and regula-
tions.

Safety Instructions
5
Caution Viewing image precautions
Always take periodic breaks when viewing images using this product.
Long periods of viewing images may result in eye fatigue. If you feel
fatigued or uncomfortable even after taking a break, stop viewing im-
mediately.
Do not drop this product or treat it with unnecessary force. Also, if the
product breaks due to an impact such as a fall, stop using the product.
Continuing to use this product may result in injury due to glass frag-
ments.
Do not place your finger between the moving parts of this product,
such as the hinges. Doing so may result in injury.
Make sure you are wearing this product correctly. Incorrect usage could
make you feel nauseous.
This product should only be used for the purposes stated in the manu-
als. Using it for anything else may result in injury.
If a problem or malfunction occurs, stop using this product immediately.
Continuing to use this product may result in injury or could make you
feel nauseous.
Stop using this product if your skin feels unusual when wearing this
product and consult your local dermatologist. Sometimes allergies may
occur due to the coating or material of the product.
How a 3D image is perceived varies depending on the individual. Stop
using the 3D function if you feel strange or cannot see in 3D. Continu-
ing to view the 3D images could make you feel nauseous.
Children (especially under elementary school age) should not use this
product as their eyesight is still developing.
Do not use this product if you are sensitive to light, or feel nauseous.
Doing so may aggravate your pre-existing conditions.
Do not use this product if you have prior eye conditions. Doing so may
aggravate the symptoms such as strabismus, amblyopia, or anisometro-
pia.
Caution Product abnormality precautions
Data such as video or images stored on the product may be lost or
damaged when the product malfunctions, is repaired, or undergoes
other services. Epson shall not be responsible for the loss of any data,
damage to data, or loss of profits that occurs at such a time.
You can recycle used lithium-ion batteries. When the product's
internal battery reaches the end of its service life, contact a
service center for information on recycling.
Dust-proofing and Water-proofing
When the product's battery cover and port covers are installed correctly,
the product is dust-proof and water-proof compliant with IP54 standard
based on JISC0920 (IEC60529:2001) confirmed by tests from a third
party.
The dust-proof and water-proof features do not guarantee that the
product will operate under all conditions or protect against malfunc-
tions. The warranty is invalid if malfunctions are determined to have
occurred due to incorrect handling of the product by the user.
Dust-proofing level compliant with IP5X
• This prevents dust from getting inside the product.
• Even if a small amount of dust does enter the product, it can still be
operated normally.
Water-proofing level compliant with IPX4
If the product is subjected to water at a normal temperature from a
faucet at a rate of 10 L/min for over five minutes, water does not enter
the product and it can be operated normally.
Caution Dust-proofing and water-proof-
ing precautions
When using the product, remove all connected cables, and close the
battery cover, AC adapter port cover and micro USB port cover securely.
When you open these covers for battery replacement or other purpos-
es, open it in location away from water or dust and do not handle with
wet hands. If tiny pieces of trash such as hairs or sand become inserted
between the ports, this may allow water or dust to enter the product.
When the power cable or the microUSB cable are connected to the
product, the dust-proof and water-proof performance is not maintained.
Do not drop or damage the product. This could cause the dust-proof
and water-proof performance to degrade.
Do not peel off or damage the rubber packing on the back of each
cover. Do not allow trash to stick to the rubber packing. This could cause
the dust-proof and water-proof performance to degrade.
Do not allow other liquids (such as organic solvents, soapy water, hot
spring water, and seawater) to splash onto the product, and do not
place it in water intentionally.
Do not leave the product in locations subject to humidity such as bath-
rooms.
Do not use the product in heavy rain.
If rain or water splash onto the product, wipe it with a dry cloth as soon
as possible.

6
Part Names and Functions
Headset
A
Camera
Captures images and movies. Remove the protective film before
using the camera. You can adjust the direction of the camera
vertically.
B
Camera indicator
Flashes while the camera is operating.
C
Light sensor
Senses the brightness of your surroundings and automatically
adjusts the brightness of the screen.
D
Head pad
Fits against your forehead when wearing the headset. The head
pad is equipped with a built-in sensor to detect the position
and direction of the product.
E
Lens
Displays images. When you are not viewing images, you can
slide up the lens to the head pad.
➡“Viewing Images Using the Headset” p. 12
F
Lens justier
You can adjust the position of the lens vertically. Make sure the
lens is level when adjusting.
G
Head band
Secures the headset on to your head. You can adjust the length
to fit the size of your head (head circumference: 560 to 640
mm).
H
Cable securer
Secures cables when wearing the headset.
I
Screw holes to secure the shade/protective shield/
lens holder
Install the shade/protective shield using the exterior screw
holes. Install the lens holder using the interior screw holes.
➡“Installing the Shade/Protective Shield/Lens Holder” p. 9
J
Inner pad (B)
If the headset feels tight, replace this with inner pad A or C. The
headset feels loose if you attach a smaller inner pad.
➡“Replacing the Inner Pad” p. 9

7
Controller
The illustrations show the controller when it has been removed from the controller holder.
A
micro USB port*
You can connect a commercially available USB cable to connect
to a computer.
B
Reset button*
If the product stops working, press this button to force the
product to turn off.
C
microSD card slot*
You can insert a commercially available microSD card.
G
Cross-key
Highlights items and moves the cursor when making settings or
operating an application.
H
[ ] Key lock
Disables controller operations (Key lock mode) to prevent ac-
cidental operations.
➡“Disabling controller operations (Key lock)” p. 10
I
Battery cover*
Remove when replacing the battery.
J
Key lock indicator
Lit blue when the key lock is on.
K
Power indicator
You can check the status of the product according to the color
and lit status of the indicator.
Indicator Status Product Status
Light blue Operating
Flashing light blue (one second intervals) Starting up / Shutting down
Flashing light blue (once every three
seconds) Charging
Blue Sleep mode
Flashing red Battery running low/Startup error
Flashing red three times Insufficient battery to start up
Flashing red and blue alternately Battery replacement mode
L
Earphone socket
Connects the supplied mono earphones with mic.
M
AC adapter port
Connects the AC adapter to charge the product.
➡“Charging the Battery” p. 8
D
[ ] Power button
Turns the product on or off.
➡“Turning On and O” p. 10
E
ABXY keys
The key functions vary depending on the application being
used. The following shows the default settings.
Key Function
A (Blue) key Displays the previous screen.
B (Red) key Displays the Home screen.
X (Green) key Displays available menus for the current screen.
Y (Yellow) key Switches the operation performed when you press the
cross-key between adjusting the volume, adjusting the
brightness, and switching between 2D/3D mode.
F
[ ] Enter key
Selects or confirms the item when making settings or operating
an application.
* You cannot use the feature when the controller is in the controller holder.

8
Getting Ready
Charging the Battery
Make sure you charge the product when using it for the first time.
Initial charging takes approximately three hours.
Caution
Make sure you install two batteries when using the product.
Replacing with Optional Batteries
This section explains how to replace a battery with a fully charged
battery. You need to purchase optional batteries and a battery char-
ger for replacement.
You can replace the batteries without turning off the product.
Caution
• Do not remove two batteries at the same time when the product
is on. Stored data and settings may be lost.
• If the product is not used for an extended period of time, the
backup battery which maintains the date and time settings may
run out, and the date and time may be reset to their default set-
tings.
➡“Date and time settings are reset” p. 13
Note
The product guides you through replacing the batteries in Battery
replacement mode. Press the [ ] power button and the [ ] key
lock button at the same time, and then replace the batteries by fol-
lowing the instructions displayed in the headset.
A
Remove the battery cover.
E
Plug in the AC cable.
The power indicator flashes light blue. Charging is complete
when the power indicator stops flashing and changes to lit
light blue. Disconnect the AC adapter and the AC cable.
Note
When charging is complete with two batteries installed, you can use
the product for approximately four hours. Battery life may vary depend-
ing on the environmental usage conditions and the applications being
used.
The battery indicator for the battery that is running low flashes
red.
B
Remove one battery.
While pressing the battery catch, lift out the battery.
B
Install two batteries.
Align the charging connectors on the battery with those on
the product, and then press the battery down until you hear it
click into place.
A
Remove the battery cover.
C
Attach the battery cover.
D
Connect the controller, AC adapter, and AC cable.
Note
When the product is off, the battery indicator does not oper-
ate.

9
Replacing the Inner Pad
The inner pad B is attached to the headset at the time of purchase.
If the headset feels tight, replace this with inner pad A or C. The
headset feels loose if you attach a smaller inner pad.
A
Grip the center of the inner pad and carefully pull it
to remove.
B
Align the groove at the bottom of the replacement
inner pad with the tabs on the headset.
Press the groove at the top and the tabs on the left and right
of the inner pad into the headset to install.
Installing the Shade/Protective Shield/Lens Holder
Install the shade/protective shield/lens holder using the hexagon wrench and screws supplied with the product.
Install the shade or protective shield to the outside of the head-
set, and secure it in place using screw hole (A). You cannot install
the shade and protective shield at the same time.
Before installing the lens holder on the headset, visit your local opti-
cians and have them install lenses in the lens holder. After lenses
have been installed, install the holder to the inside of the headset,
and secure it in place using screw hole (B).
(The customer is responsible for the cost of the lenses. Depending
on the opticians, they may not be able to perform this procedure.)
Lens holder supported lenses
Lens (W x H) 50 x 24 mm
Nose pads 20 mm
Frame PD 70 mm
Curve 4
Note
You may not be able to view images when using special lenses such
as colored lenses, mirrored lenses, and polarized lenses.
C
Install the charged battery.
Align the charging connectors on the battery with those on
the product, and then press the battery down until you hear it
click into place.
The battery indicator lights green for a while before turning
off.
If the battery indicator for the other battery flashes red, repeat
the procedure to replace this battery. When both battery indi-
cators turn off, battery replacement is complete.
D
Attach the battery cover.
Note
If the battery indicator flashes red and green alternately, there is
an error with the battery. Turn off the product, wait for a while, and
then turn it back on.

10
Turning On and O
Note
Before turning on the product, check that the battery is charged.
➡“Charging the Battery” p. 8
Note
• To turn off the product, hold down the [ ] power button for more
than one second, and then select [OK] in the message displayed in
the headset.
• If operations freeze, you can force the product to shutdown by using
one of the following methods.
• Hold down the [ ] power button for more than eight seconds.
• Use something thin to press the reset button for at least two
seconds.
Turning on
Press the [ ] power button until the power indicator is lit light
blue.
The power indicator flashes light blue when starting up. Startup is
complete when the power indicator changes from flashing to lit
light blue.
Turning off the screen while the product is on (Sleep
mode)
When you press the [ ] power button briefly, the power indica-
tor turns blue, and the product enters sleep mode. Press the [ ]
power button briefly again to wake the product from sleep mode.
Disabling controller operations (Key lock)
When you hold down the [ ] key lock button, the key lock indi-
cator is lit blue, and the key lock turns on. Press the [ ] key lock
button again to release the key lock.
Caution
Do not force the product to shutdown unless operations freeze. Stored
data and settings may be lost.
Wearing the Product
Wearing the Controller
This section explains how to wear the controller on your arm using
the armband.
Note
• You can also wear the controller on your waist using a commercially
available belt (up to 50 mm thick) instead of the armband.
• Before wearing the controller and headset, put on the supplied
mono earphones with mic. Connect it to the earphone socket on
the controller, and wear them as shown in the following illustration.
A
Thread the armband through the controller holder,
and create a loop that will t roughly to the size of
your arm.
B
Unclip the tabs on the sides of the controller holder.
C
Wind the cable around the controller holder and
secure it in place with the tabs.
Make sure the cable does not catch on anything in the sur-
rounding area.
D
Place the controller holder on your arm and secure
it with the armband.
Note
You can also thread the armband through vertically.

11
Wearing the Headset
Wear the headset so that you can view your surroundings when you
slide up the lens. When not viewing images, make sure you slide up
the lens for your own safety.
Note
• You can wear the headset over glasses that are up to 143 mm wide.
• Before you wear the product, check that the power indicator on the
product is light blue (turned on).
➡“Turning On and O” p. 10
A
Move the lens as far away from the head pad as pos-
sible.
Note
When wearing the headset over a cap, remove the cap and fit it
into the headset.
• The headset may not be able to accommodate caps with a
large brim. Also, caps with a large brim may be caught by the
camera. We recommend wearing caps with a brim less than 40
mm in width.
• Match the size of the cap with your head in advance.
• Place the head pad on the brim of the cap.
• Adjust the length of the head band according to the size of the
cap.
C
Tighten the head band and secure the head pad.
Put on the headset from the top.
Hold the head pad to adjust the position so that you can view
images on the lens while the head pad is away from the lens.
Note
When wearing the headset with a cap, make sure there is no gap
between the brim of the cap and the head pad.
D
If you cannot view a part or any of the image, adjust
the lens justier on either side of the lens.
Make sure the head pad does not slip out of position while
adjusting.
If you still cannot view images even after adjusting the lens
justifier, start again from step 1.
E
Check that you can slide up the lens to view your
surroundings.
If the images impede your visibility when sliding up the lens,
or if you cannot slide up the lens, start again from step 1.
B
Run the cable through the cable securer of the
headset.
Caution
Do not use too much force when adjusting the position of the
headset.
Note
• If the headset feels tight, replace this with inner pad A or C. The
headset feels loose if you attach a smaller inner pad.
➡“Replacing the Inner Pad” p. 9
• When removing the headset, hold the head pad in one hand
while loosening the headband to prevent the product from being
dropped.

12
Viewing Images Using the Headset
When you turn on the product, you can view images through the
lens approximately 4 m away from you.
Note
How an image is perceived varies depending on the individual.
Maintenance
Cleaning the Headset
• If you can see marks in the image or if the image is hazy, check that
there is no dust, fingerprints, and other dirt on the lens. If the lenses
are dirty, wipe them carefully with a soft cloth.
Caution
When wiping the lenses, do not use lens cleaning liquids or organic
solvents.
• If the camera is dirty, wipe it carefully with a soft cloth.
• If the inner pad is dirty, dampen a cloth in warm water, wring it out
thoroughly, and then wipe the inner pad carefully.
Re-tightening Screws
After using the product for an extended period, the screws securing
the lens may become loose.
Re-tighten the screws periodically using the hexagon wrench sup-
plied.
4m
Storing and Transporting the Headset
• When storing the product, place it in the box it came in, or on the
optional hard carry case.
• If you are not going to use the product for a while, remove the bat-
teries before storing the product.
• When placing the headset, make sure it is placed horizontally so that
it does not touch against hard objects. If the headset is placed with
the lens facing down and the lens touches hard objects, the lens
could be damaged.
• When carrying the headset, make sure you grip both sides of the
headset firmly so that it is not dropped.
Cleaning the Charging Connectors
If either of the connectors on the controller or the batttery’s con-
nectors are dirty or if there are foreign objects stuck to them, you
may not be able to charge correctly. Disconnect the AC adapter
and the AC cable, and wipe off any dirt with a dry cloth or a cotton
swab. We recommend cleaning the charging connectors regularly
(once every three months).
Caution
• Do not damage the charging connectors with your finger or a hard
object.
• Do not expose the charging connectors to water. When cleaning the
charging connectors, use a dry cloth or a cotton swab.

13
Troubleshooting
If you think a malfunction has occurred, check the following.
Cannot use the controller
• You cannot perform controller operations when the key lock indica-
tor is lit (Key lock enabled). Press the [ ] key lock button to release
key lock.
➡“Disabling controller operations (Key lock)” p. 10
• When the power indicator is blue (during Sleep mode), press the
[ ] power button briefly.
➡“Turning o the screen while the product is on (Sleep mode)” p. 10
Cannot connect to the network
• Check that the wireless LAN (Wi-Fi) environment can be accessed
from where you are using the product.
• Check that the product's network settings are correct. Contact your
network administrator for more details.
Date and time settings are reset
The product is equipped with a backup battery to maintain date
and time settings even if the main battery runs out.
If the product has not been used for an extended period of time,
the backup battery may run out, and the date and time may be
reset to their default settings.
• Charge the product with the battery installed. It takes about five
days to fully charge the backup battery. You can use the product
while the backup battery is charging.
➡“Charging the Battery” p. 8
• When the backup battery has been charged, turn on the product,
select [Settings] - [SYSTEM] - [Date & time], and then set the date and
time.
The product does not turn on
• Check that the batteries are installed in the controller correctly.
• Check that the batteries are fully charged.
• If the product cannot turn on due to insufficient power, the power
indicator flashes red three times.
• Press the [ ] power button until the power indicator is lit light
blue. When the power indicator flashes light blue, the product is
starting up. Startup is complete when the power indicator changes
from flashing to lit light blue.
➡“Turning On and O” p. 10
• When charging cannot be performed or operations are unrespon-
sive, force the product to turn off, and then turn the product back
on.
• If the controller gets too hot due to prolonged use or the usage
environment, the product may turn off for safety reasons. Also, if the
controller gets too hot while charging, the charging could stop tem-
porarily. Wait for the temperature to fall, and then turn the product
back on.
Cannot see images
When images are not displayed when the power indicator is light
blue, the images may be muted (the product temporarily hides the
image).
Tap the right-hand side of the product twice lightly to release the
mute function.
If you accidentally activate the mute knock function, you can set it
to Off.
Cannot hear audio
To listen to audio from the product, use the mono earphones with
mic supplied.

14
Specications
Model Number BT-2000
Material Polysilicon TFT active matrix
LCD panel size 0.42" wide panel (16:9)
LCD panel pixel count Horizontal 960 x vertical 540 dots
Angle of view Approximately 23 degrees (diagonally)
Virtual screen size 64" support (virtual viewing distance 4 m)
Color reproduction 24 bit color (approximately 16,770,000 colors)
Platform Android TM 4.0.4
Supported movie formats MP4 (MPEG4+AAC), MPEG2 (H.264+AAC)
Supported still image formats JPEG, PNG, BMP, GIF
Supported audio formats WAV, MP3, AAC
Supported 3D Side-by-side format
Internal memory Main memory 1 GB
User memory 8 GB
External memory microSD (2 GB maximum)
microSDHC (32 GB maximum)
Connector ports micro-USB, 4 pin mini jack (earphones with microphone complying with the CTIA standard)*1,
microSD card slot
Operating temperature 0 to 40°C, humidity 20 to 80% (no condensation)
Charging temperature 5 to 35°C, humidity 20 to 80% (no condensation)
Storage temperature -10 to 60°C, humidity 10 to 90% (no condensation)
Power voltage Controller 11VDC 1.64A (when AC adapter connected)
AC adapter Model Number AST1116Z1-1
Manufacturer PHIHONG TECHNOLOGY CO., LTD.
Electrical rating 100 to 240 VAC 50 to 60 Hz 0.4 A
Power consumption When operating at full capacity 4000 mW, when in sleep mode 80 mW, when off 5 mW
Battery Type Lithium-ion batteries 1240 mAh (x2)
Lithium content Less than 1.5 g
Amount of watt hour rating Less than 20 Wh
Frequency band IEEE 802.11 b/g/n/a
Frequency range 2.4 GHz band 1 to 13 ch, 5 GHz band 36 to 140 ch
Modulation OFDM, DS-SS
Potential interference range 10 m
Battery life Approx. 4 hours (When operating at full capacity)
Reliability Life span 10,000 h (When brightness is set to the default, and used continuously in an environment of 25°C.
The life span means the point at which the product enters the wear out failure period. Product
performance may then degrade, such as a decline in screen luminance of 50% from the initial
stages.)
Mean-Time Between Failure (MTBF) 180,000 hours (Failure means a random failure during the random failure period.)
Exterior dimensions
(W x D x H)
Headset 205 x 136 x 100 mm (without the head band)
Controller 70 x 157 x 35.3 mm (without protruding section)
Mass Headset 290g (without cables)
Controller 265 g (without batteries, 1 battery is approx. 50 g)
Camera Resolutions 5 million pixels
Image resolutions Still images 2596 x 1948 dots
Movies 1920 x 1080 dots
Depth sensing 640 x 480 dots (depth sensing distance 30 to 100 cm)
Earphones with mic Earphone impedance 16Ω±15%
Earphone output Max. voltage 150 mV or less
Voltage with broadband characteristics 75 mV or more
Mic Capacitor microphone
Sensors GPS/geomagnetic sensor/IMU (accelerometer/gyroscopic sensor)/illumination sensor
Bluetooth 3.0 HSP/A2DP/HID/OPP/SPP/AVRCP
Bluetooth 4.0 LE *2 PXP/FMP
*1 :Restrictions in operation may occur when using an adapter plug.
*2 :You can only connect to a beacon with devices specified by Epson.

15
Intellectual Property Rights
Trademarks microSDHC Logo is a trademark of SD-3C, LLC.
Wi-Fi® and Wi-Fi Direct™ are the trademarks or registered trademarks of the Wi-Fi Alliance.
Other product names used herein are also for identification purposes only and may be trademarks of their respective owners. Epson disclaims any and all
rights in those marks.
OPEN SOURCE SOFT-
WARE LICENSE
As well as software owned by Epson, this product also uses open source software.
The following provides information on the open source software used in this product.
1. This product includes open source software programs according to the license terms of each program.
The open source software programs are without warranty; however, any malfunctions (including malfunctions caused by the open source software
programs) that occur in this product do not influence the warranty conditions provided for this product.
2. We provide the source code of some open source software programs. If you desire to receive the source code above, please see the "http://www.epson.
com" and contact the customer support of your region. We provide the source code until five (5) years after the discontinuation of this product. You shall
comply with the license terms of each open source software program.
3. The open source software programs are WITHOUT ANY WARRANTY; without even the implied warranty of MERCHANTABILITY AND FITNESS FOR A PAR-
TICULAR PURPOSE. See the license agreements of each open source software program for more details, which are described in the product.
4. The license terms of each open source software program are described in Home screen > Settings > About device > Legal information > Open source
licenses of the product.
General Notes
Notes Regarding Wire-
less LAN
Do not use the Wireless LAN function in France unless you are indoors.
If you purchase this product outside of North America and Taiwan, please note that this product emits wireless LAN electromagnetic waves on channels
1 to 13. Therefore, do not use the wireless LAN function in North America and Taiwan where wireless LAN channels are limited to 1 to 11 by the Wireless
Telegraphy Act.
Follow local laws and regulations when using in other regions.
Wireless Telegraphy Act
Regulations
The following acts are prohibited by the Wireless Telegraphy Act.
• Modifying and disassembling (including the antenna)
• Removing the label of conformance
• Using the 5 GHz bandwidth LAN when outdoors
Restriction of Use This product is manufactured based on the specifications of the country of sale. When using this product outside the country of sale, contact your nearest
support center.
When this product is used for applications requiring high reliability/safety of function and precision, such as transportation devices related to aviation, rail,
marine, automotive; disaster prevention devices; various safety devices, you should use this product only after giving consideration to including fail- safes
and redundancies into your design to maintain safety and total system reliability.
Because this product was not intended for use in applications requiring extremely high reliability/safety such as aerospace equipment, main communica-
tion equipment, nuclear power control equipment, or medical equipment related to direct medical care, please make your own judgment on this product's
suitability after a full evaluation.
Notes on Frequency This product operates in the same frequency bandwidth as industrial devices such as microwave ovens, scientific, and medical devices and mobile object
identification (RF-ID) systems (licensed premises radio stations, amateur, and unlicensed specified low-power radio stations (hereafter "other radio sta-
tions")) used in factory production lines.
1. Before using this device, make sure there are no "other radio stations" being used in the vicinity.
2. If this device causes RF interference between the device and "other radio stations", promptly move to a different location, stop using the device, and
contact your local dealer to ask for advice on preventing interference (for example setting up partitions).
3. In addition, when harmful radio wave interference occurs between the device and "other radio stations", contact your local dealer.
Authentication informa-
tion

16
General Notes
FCC Compliance State-
ment
This equipment has been tested and found to comply with the limits for a Class A digital device, pursuant to part 15 of the FCC Rules. These limits are
designed to provide reasonable protection against harmful interference when the equipment is operated in a commercial environment. This equipment
generates, uses, and can radiate radio frequency energy and, if not installed and used in accordance with the instruction manual, may cause harmful
interference to radio communications. Operation of this equipment in a residential area is likely to cause harmful interference in which case users will be
required to correct the interference at their own expense.
WARNING
The connection of a non-shielded equipment interface cable to this equipment will invalidate the FCC Certification or Declaration of this device and may
cause interference levels which exceed the limits established by the FCC for this equipment. It is the responsibility of the user to obtain and use a shielded
equipment interface cable with this device. If this equipment has more than one interface connector, do not leave cables connected to unused interfaces.
Changes or modifications not expressly approved by the manufacturer could void the user’s authority to operate the equipment.
FCC/Industry Canada (IC)
Notices
FCC Notices
This device complies with Part 15 of the FCC Rules. Operation is subject to the following two conditions: (1) this device may not cause harmful interference,
and (2) this device must accept any interference received, including interference that may cause undesired operation.
This equipment complies with FCC radiation exposure limits set forth for an uncontrolled environment. End-users must follow the specific operating in-
structions for satisfying RF exposure compliance. This transmitter must not be co-located or operating in conjunction with any other antenna or transmitter.
Caution:
You are cautioned that changes or modifications not expressly approved by the party responsible for compliance could void your authority to operate the
equipment.
Industry Canada (IC) Notices
CAN ICES-3 (A)/NMB-3(A)
This Class A digital apparatus complies with Canadian ICES-003.
Cet appareil numèrique de la classe A est conforme à la norme NMB-003 du Canada.
This equipment complies with RF radiation exposure limits set forth for an uncontrolled environment. End-users must follow the specific operating instruc-
tions for satisfying RF exposure compliance. This transmitter must not be co-located or operating in conjunction with any other antenna or transmitter.
SAR Notices This device with the WLAN device has been tested to SAR and complies to FCC and IC exposure requirements for portable devices. SAR testing has been
done at distance of 0 cm from the body.
Cet appareil avec l’appareil W-LAN a été testé aux SAR et est conforme aux exigences des FCC et IC exposition pour les appareils portables. Le test SAR a été
fait à distance de 0 cm du corps.
Indication of the manufacturer and the importer in accordance with requirements of directive 2011/65/EU (RoHS)
Manufacturer: SEIKO EPSON CORPORATION
Address: 3-5, Owa 3-chome, Suwa-shi, Nagano-ken 392-8502 Japan
Telephone: 81-266-52-3131
http://www.epson.com/
Importer: EPSON EUROPE B.V.
Address: Atlas Arena, Asia Building, Hoogoorddreef 5,1101 BA Amsterdam Zuidoost The Netherlands
Telephone: 31-20-314-5000
http://www.epson.com/europe.html

General Notes
17
CE
DECLARATION of CON-
FORMITY
In France, WLAN usage is only permitted indoors.
The purpose of the WLAN function is to connect to a 2.4 GHz access point.

18
This address list is current as of December 2013.
A more up-to-date contact address can be obtained from the corresponding website listed here. If you do not find what you need on any of
these pages, please visit the main Epson home page at www.epson.com.
EUROPE, MIDDLE EAST & AFRICA
ALBANIA
ITD Sh.p.k.
http://www.itd-al.com
AUSTRIA
Epson Deutschland GmbH
http://www.epson.at
BELGIUM
Epson Europe B.V.
Branch oce Belgium
http://www.epson.be
BOSNIA AND HERZEGOVINA
NET d.o.o. Computer Engineering
http://www.net.com.ba
BULGARIA
Epson Service Center Bulgaria
http://www.kolbis.com
CROATIA
MR servis d.o.o.
http://www.mrservis.hr
CYPRUS
Mechatronic Ltd.
http://www.mechatronic.com.cy
CZECH REPUBLIC
Epson Europe B.V.
Branch Oce Czech Republic
http://www.epson.cz
DENMARK
Epson Denmark
http://www.epson.dk
ESTONIA
Epson Service Center Estonia
http://www.epson.ee
FINLAND
Epson Finland
http://www.epson.
FRANCE & DOM-TOM TERRITORY
Epson France S.A.
http://www.epson.fr
GERMANY
Epson Deutschland GmbH
http://www.epson.de
GREECE
Oktabit S.A.
http://www.oktabitgr.com
HUNGARY
Epson Europe B.V.
Branch Oce Hungary
http://www.epson.hu
IRELAND
Epson (UK) Ltd.
http://www.epson.ie
ISRAEL
Epson Israel
http://www.epson.co.il
ITALY
Epson Italia s.p.a.
http://www.epson.it
KAZAKHSTAN
Epson Kazakhstan Rep. Oce
http://www.epson.kz
LATVIA
Epson Service Center Latvia
http://www.epson.lv
LITHUANIA
Epson Service Center Lithuania
http://www.epson.lt
LUXEMBURG
Epson Europe B.V.
Branch oce Belgium
http://www.epson.be
MACEDONIA
Digit Computer Engineering
http://www.digit.com.mk
NETHERLANDS
Epson Europe B.V.
Benelux sales oce
http://www.epson.nl
NORWAY
Epson Norway
http://www.epson.no
POLAND
Epson Europe B.V.
Branch Oce Poland
http://www.epson.pl
PORTUGAL
Epson Ibérica S.A.U.
Branch Oce Portugal
http://www.epson.pt
ROMANIA
Epson Europe B.V.
Branch Oce Romania
http://www.epson.ro
RUSSIA
Epson CIS
http://www.epson.ru
UKRAINE
Epson Kiev Rep. Oce
http://www.epson.ua
SERBIA
AVG d.o.o. Beograd
http://www.a-v-g.rs
SLOVAKIA
Epson Europe B.V.
Branch Oce Czech Republic
http://www.epson.sk
SLOVENIA
Birotehna d.o.o.
http://www.birotehna.si
SPAIN
Epson Ibérica, S.A.U.
http://www.epson.es
SWEDEN
Epson Sweden
http://www.epson.se
SWITZERLAND
Epson Deutschland GmbH Branch
oce Switzerland
http://www.epson.ch
TURKEY
Tecpro Bilgi Teknolojileri Tic. ve San.
Ltd. Sti.
http://www.tecpro.com.tr
UK
Epson (UK) Ltd.
http://www.epson.co.uk
AFRICA
http://www.epson.co.za
or
http://www.epson.fr
SOUTH AFRICA
Epson South Africa
http://www.epson.co.za
MIDDLE EAST
Epson (Middle East)
http://www.epson.ae
Contact List

19
NORTH, CENTRAL AMERICA & CARIBBEAN ISLANDS
CANADA
Epson Canada, Ltd.
http://www.epson.ca
COSTA RICA
Epson Costa Rica, S.A.
http://www.epson.co.cr
MEXICO
Epson Mexico, S.A. de C.V.
http://www.epson.com.mx
ECUADOR
Epson Ecuador
http://www.epson.com.ec
U. S. A.
Epson America, Inc.
http://www.epson.com
SOUTH AMERICA
ARGENTINA
Epson Argentina S.R.L.
http://www.epson.com.ar
BRAZIL
Epson do Brasil
http://www.epson.com.br
CHILE
Epson Chile S.A.
http://www.epson.cl
COLOMBIA
Epson Colombia Ltd.
http://www.epson.com.co
PERU
Epson Peru S.A.
http://www.epson.com.pe
VENEZUELA
Epson Venezuela S.A.
http://www.epson.com.ve
ASIA & OCEANIA
AUSTRALIA
Epson Australia Pty. Ltd.
http://www.epson.com.au
CHINA
Epson (China) Co., Ltd.
http://www.epson.com.cn
HONG KONG
Epson Hong Kong Ltd.
http://www.epson.com.hk
INDIA
Epson India Pvt., Ltd.
http://www.epson.co.in
INDONESIA
PT. Epson Indonesia
http://www.epson.co.id
JAPAN
Seiko Epson Co.
Toyoshina Plant
http://www.epson.jp
KOREA
Epson Korea Co., Ltd.
http://www.epson.co.kr
MALAYSIA
Epson Malaysia Sdn. Bhd.
http://www.epson.com.my
NEW ZEALAND
Epson New Zealand
http://www.epson.co.nz
PHILIPPINES
Epson Philippines Co.
http://www.epson.com.ph
SINGAPORE
Epson Singapore Pte. Ltd.
http://www.epson.com.sg
TAIWAN
Epson Taiwan
http://www.epson.com.tw
THAILAND
Epson (Thailand) Co.,Ltd.
http://www.epson.co.th
Table of contents
Other Epson Headset manuals