ERA TOUCHKEY User manual
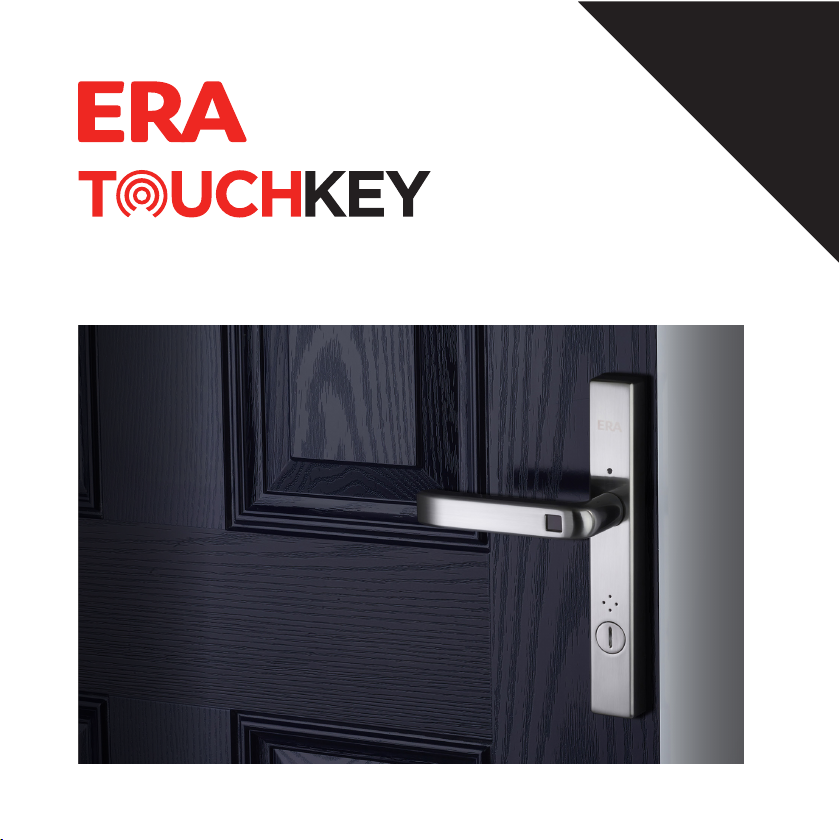
Smarter Handle
USER GUIDE
FOR THE
HOMEOWNER

Here if you need us
Your ERA product is designed to be up and running in
minutes, but if you do need help there are lots of handy
videos and information available on our website.
Or contact us for further assistance or support.
Visit www.eratouchkey.com
or call us 0345 646 1487
Welcome to ERA Smart Home,
a complete ecosystem for home security.
Visit eratouchkey.com to find out how to combine
TouchKey with the ERA Smart Home series of home
security devices. Including a smart alarm system, video
doorbell, and indoor and outdoor cameras.

Contents
Inserting the batteries in your new TouchKey
Factory re-set the device (required for a new lock or new owner)
Create account and add TouchKey
Add TouchKey to an existing ERA Smart Home account
Adding a fingerprint
Unlocking the fingerprint sensor (if required)
Unlocking TouchKey using the Smart Home App
Auto unlock TouchKey with Geolocation via Bluetooth
Setting up voice control
Account access and user permissions
Adding a Guest/Family User
First login and change of password for Guest/ Family User
To decommission a device
Deleting an ERA account
Understanding your TouchKey
Warranty Information
1
2
3
4
5-6
7
8
9
10
11
12
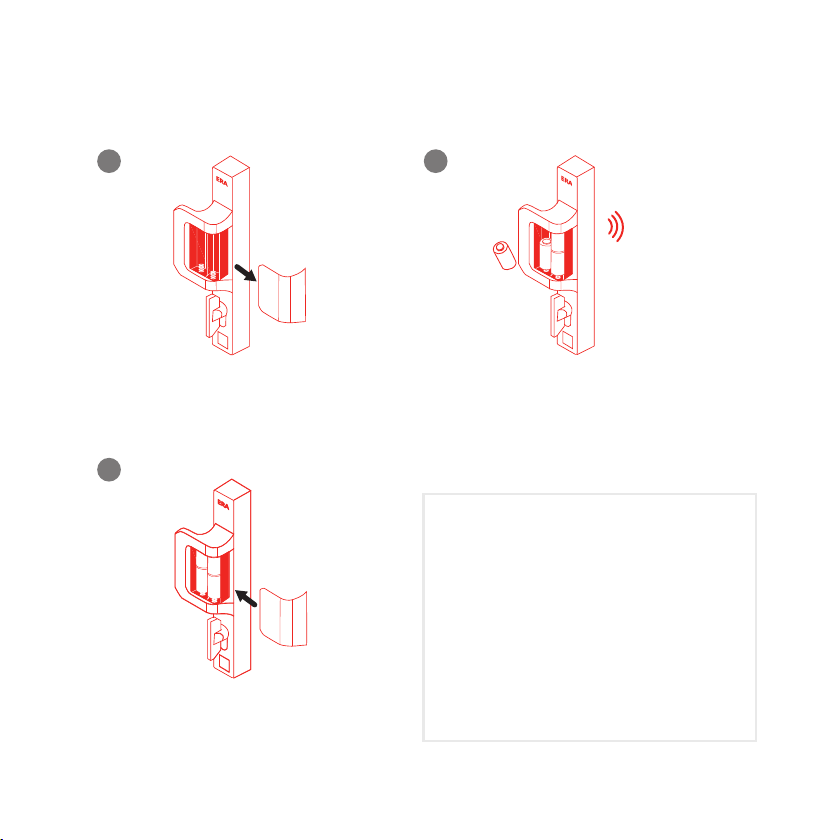
Replace battery cover.
Remove battery cover by sliding
it away from the hinges.
Insert 4 x NEW Panasonic CR123
batteries and the lock will “beep” once.*
*Depending on the orientation of your
door, you may have a left or right
handle installed. The orientation of the
batteries within the battery
compartment will differ for each.
Please ensure you check that the
battery is fitted the correct way (see
diagram within compartment).
Inserting Batteries
1. 2.
3.
1

Factory Re-set the device
Required for a new lock or a new owner
An LED light on the external handle
will start flashing BLUE after reboot, to
confirm the product has been reset.
There is a small pinhole reset
button on the side of the internal
handle, just above the handle grip.
Using a pin or the point of a
paperclip, place into the hole
and press for at least 5 seconds.
Release pin, you will hear a “beep”
and your TouchKey will reboot.
4.
Inserting the batteries in your new TouchKey
Factory re-set the device (required for a new lock or new owner)
Create account and add TouchKey
Add TouchKey to an existing ERA Smart Home account
Adding a fingerprint
Unlocking the fingerprint sensor (if required)
Unlocking TouchKey using the Smart Home App
Auto unlock TouchKey with Geolocation via Bluetooth
Setting up voice control
Account access and user permissions
Adding a Guest/Family User
First login and change of password for Guest/ Family User
To decommission a device
Deleting an ERA account
Understanding your TouchKey
Warranty Information
1. 2.
3.
5
2

ERA-c8077j04i8
Add TouchKey
Please enter the device id.
TouchKey Name
Add
Setup Compete
Lorem ipsum dolor sit Lorem ipsum
dolor sit amet, consectetuer adipiscing
Ok
Download the ERA
Smart Home App (iOS
or Android). Turn on
your Bluetooth.
Create account and add TouchKey
You will see a notification
that your account has
been created and
TouchKey has been
successfully added.
Open the App and create
an account by completing
required details.
A verification code will be
sent to your registered
e-mail account.
Enter the code into the
App when prompted.
On the next screen
click on “ERA TouchKey”.
Stand within 2m of the
TouchKey and ensure the
power is on. The LED will
go RED. Press "Next".
Select your TouchKey
device in the “Select
Product” page.
You will receive a
“Bluetooth Pairing Request”,
click “Pair” to initiate.
Once connected, enter a
name for your TouchKey
device, and press Add.
This will now add your
TouchKey to your account.
1. 2. 3.
4. 5. 6.
7. 8. 9.
XXXX
Select Product
ERA TouchKey
ERA-c8077j04i8
Connect to your TuchKey
Select your TouchKey
TouchKey Setup
ERA-c8077j04i8
Connect to your TuchKey
Select your TouchKey
Bluetooth Pairing Request
Lorem ipsum dolor sit Lorem ipsum
dolor sit amet, consectetuer adipiscing
elit, sed diam nonummy nibh euismod
Lorem ipsum dolor sit amet,
Cancel Pair
ERA-c8077j04i8
Add TouchKey
Please enter the device id.
TouchKey Name
Add
34
Follow steps 7 -9 from the
previous page.
Adding TouchKey to an existing
ERA Smart Home account
Turn on Bluetooth in
your phone settings.
1. 2. 3.
4. 5. 6.
Open the ERA Smart
Home App (iOS or
Android).
Select TouchKey from the
menu. Press "Add".
Insert the batteries into
your TouchKey.
Select your TouchKey, on
the "Connect to your
TouchKey" page.
Select Product
ERA TouchKey
ERA-c8077j04i8
Connect to your TuchKey
Select your TouchKey
34

Adding a fingerprint
Open the ERA Smart
Home App
(iOS or Android).
Select TouchKey. Open TouchKey settings
Select "Fingerprints".Click the “+” to add
a fingerprint and name
your new fingerprint.
Ta p "Start" and follow the
on screen instructions.*
TouchKey will "beep" and a GREEN LED light on the
external handle will flash. Using your chosen
fingerprint (finger/thumb), place this over the black
sensor on the front of the external handle.
The GREEN LED on the
external handle will stay
illuminated for 2-3
seconds while the App
takes an image.
The fingerprint icon will
update once successful
1. 2. 3.
4. 5. 6.
7. 8.
Select Product
ERA TouchKey
Settings
TouchKey Name
Fingerprints
Auto Unlock
Audio Settings
Delay Interval
Settings
TouchKey Name
Fingerprints
Auto Unlock
Audio Settings
Delay Interval
Add Fingerprints
To add fingerprint just tap on
the start button and follow
the instructions
Start
56

Adding a fingerprint
continued
Follow the on screen App
instructions as you move
through the 3 fingerprint
screens.
Once completed, your
fingerprint should have
been successfully added
to the TouchKey.
If you experience any
issues adding a fingerprint
the App will return to the
start, where you can
repeat the process.
Once the fingerprint is
added into the TouchKey
it will be listed in the
fingerprints section.
To name, edit or remove a
fingerprint click the 3 small
dots to the right of the
relevant fingerprint (useful
for multiple households).
Test a fingerprint works by
closing the App and placing
the stored fingerprint on
the TouchKey device.
To add additional
fingerprints and users
repeat the above steps.
9. 10. 11.
12. 13. 14.
15. 16.
*The process will time out after 90 seconds
Please watch the video
for further information
on fingerprint setup.
Fingerprints
John’s Access
ADMIN
Jane’s Access
ADMIN
Fingerprints
John’s Access
ADMIN
Jane’s Access
ADMIN
To enhance any enrolled
fingerprint, click on the
three dots next to an
already enrolled fingerprint.
From the sub menu, select
"Enhanced Fingerprint
Setup" and follow the on
screen instructions.
56

Unlocking the fingerprint sensor
If there are 12 consecutive failed fingerprint attempts by a user or users, to open
the door, then the fingerprint sensor will be disabled.
Once disabled, the fingerprint sensor on the handle will remain unresponsive to
touch until unlocked.
To unlock it, you need to verify (with two-factor authentication) that an authorised
user is trying to unlock the door.
Standing near the door, open the Smart Home app and go the to
TouchKey dashboard.
You will see a message in the TouchKey dashboard that the fingerprint
sensor is disabled.
When prompted, press and hold a registered fingerprint on the app
screen for a few seconds.
The app screen will switch from red to green as the fingerprint is verified
and finally to the TouchKey screen, once authorised.
The fingerprint sensor is now unlocked and ready to use.
1.
2.
3.
4.
5.
7
Other manuals for TOUCHKEY
3
Table of contents
Other ERA Lock manuals


