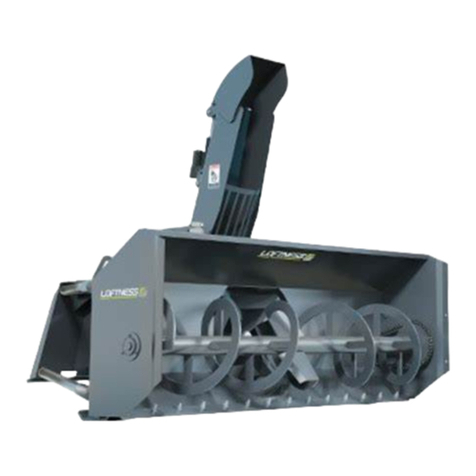
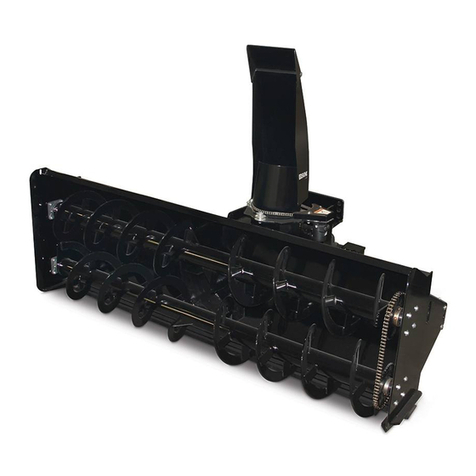
Erskine Attachments 1080FM User manual

1
Models 1080FM-960FM
Front Mounted Qwik-A-Tach
Snow Blowers
Operator’s Manual
Set-Up Assembly and
Parts Information
D
Do
o
n
no
ot
t
u
us
se
e
o
or
r
o
op
pe
er
ra
at
te
e
t
th
hi
is
s
m
ma
ac
ch
hi
in
ne
e
u
un
nt
ti
il
l
t
th
hi
is
s
manual has been read and understood.
Read the Operation & Maintenance Manual entirely. When you see this
symbol, the subsequent instructions and warnings are serious –follow
without exception. Your life and the lives of others depend on it!

2
IMPORTANT
If this machine is used by an employee or is loaned or
rented to others, make certain that the operator(s) prior
to operating:
Is instructed in safe and proper use.
Reviews and understands the operation and
maintenance manual(s) pertaining to the machine.
Remember, the operator is responsible for the safe
operation and maintenance of the machine. Most
accidents can be prevented. Good safety practices not
only protect you, but also the people around you.
NOTE: Erskine Attachments LLC reserves the right to make
improvements in design or changes in specifications at any time
without notice and without incurring any obligations to install them on
units previously sold.

3
TABLE OF CONTENTS
REFERENCE INFORMATION
Write the correct information for YOUR Snow Blower in the spaces below. Always use
these numbers when referring to your Snow Blower.
Snow Blower Serial Number…………..
YOUR ATTACHMENTS DEALER
ADDRESS:
PHONE:
CONTACT:
FOREWORD
4
SAFETY
5
SERIAL NUMBER/DECAL LOCATION
6-7
MOUNTING THE SNOWBLOWER
8-12
OPERATING THE SNOWBLOWER
13-14
ROUTINE MAINTENANCE
15-22
SET UP ASSEMBLY OF THE SNOWBLOWER
23-39
PARTS INFORMATION
40-53
GENERAL SPECIFICATIONS
54
WARRANTY
55

4
FOREWORD
To The Owner/Operator:
DO NOT use or operate this machine until this manual has been read and
understood. If you require additional information, contact your Dealer or Erskine
Attachments LLC.
Operation and Maintenance Manuals are written to
give the owner/operator instructions on the safe
operation and maintenance of the product. For your
safety and the safety of other persons, you must
not operate, service, inspect or otherwise handle
this equipment before you have reviewed and
understood the Operation and Maintenance
Manual(s) pertaining to the Erskine™ Front
Mounted Snow Blower and the Prime Mover
(tractor).
Throughout this manual reference may be made to
the left hand (LH) or right hand (RH) side. These
terms are used as viewed from the operator’s seat
facing front.
In order to get the optimum performance and
efficiency that has been designed into the
Erskine™ Front Mounted Snow Blower, read this
manual thoroughly before setting-up, operating, or
performing maintenance procedures on the
machine.
It is the responsibility of the user to read the
operator’s manual and comply with the safety
instructions, operating instructions and
maintenance guidelines set forth in this manual.
The user is responsible for inspecting the machine
daily, and for having parts repaired or replaced
when continued use of the machine would cause
damage, excessive wear to other parts or make the
machine unsafe for continued operation.
The signal words CAUTION, WARNING, or
DANGER are used to indicate degree of hazards
and to warn against unsafe practices that may
cause personal injury and are used with
appropriate safety instructions. These signal words
are not to be ignored; your safety is involved.
CAUTION: denotes a general
reminder of good safety practices or
directs attention to unsafe practices.
WARNING: denotes a hazard
intermediate between DANGER and
CAUTION.
DANGER: denotes the most serious
hazard.
The word NOTE is used to convey information that
is out of context with the manual text; special
information such as specifications, techniques,
reference information, and other information of a
supplementary nature.
The word IMPORTANT, is used in the text when
immediate damage will occur to the machine due to
improper technique or operation. IMPORTANT will
apply to the same information specified by NOTE,
only of an immediate and urgent nature.
Erskine Attachments LLC cannot anticipate every
possible circumstance that might involve potential
hazard. The safety messages found in this manual
and on the machine are therefore not all inclusive.
If an operating procedure, tool device, maintenance
or work method not specifically recommended is
used; you must satisfy yourself that it is safe for you
and others. You must also ensure that the machine
will not be damaged or made unsafe by the
procedures you choose.

5
SAFETY
Whenever you see this symbol, it means Attention!
Become Alert! Your Safety is involved.
Failure to obey warnings or instructions can cause
personal injury or death.
Operating instructions must be given to everyone before operating this machine and at least once a year
thereafter in accordance with OSHA regulations.
General Safety Instructions
Read the operators manual for the Prime Mover
(tractor) to become totally familiar with the
controls and instruments. Know how to stop all
equipment operation in case of emergency.
Avoid the possibility of personal injury and/or
machine damage. NEVER exceed the maximum
recommended input power or speed
specifications for the Erskine™ Front Mounted
Snow Blower.
Check and be sure all operating controls are in
neutral before starting the engine.
Disengage PTO drive, lower the Erskine™ Front
Mount Snow Blower to rest flat on the skid shoes,
stop engine, set park brake, and wait for all
motion to stop before leaving the operators seat
for any reason.
WARNING: Before adjusting, or
servicing the unit, stop the engine
and relieve all hydraulic pressure by
opening the control valve.
Keep all shields, guards, and covers in place.
Stay clear of the Erskine™ Snow Blower when
unit is in operation.
NEVER make adjustments, lubricate, or perform
any service on the machine while it is in
operation.
Keep people at least 10 feet (3m) away from
machine when machine is in operation.
NEVER operate near embankments or terrain
that is so steep that rollover could occur.
NEVER allow children or untrained persons to
operate.
DO NOT permit riders on equipment.
Use adequate safety warning lights and devices
as required by local regulations.
Obey all local laws and regulations regarding
machine operation on public property.
The machine is designed for snow removal only.
NEVER use this machine for other materials.
Do not modify equipment or add attachments that
are not approved by Erskine Attachments LLC.
Remember, YOU are responsible for the safe
operation and maintenance of the equipment.
Most accidents can be prevented. Good safety
practices not only protect you, but also the
people around you.
Wear Protective Equipment
Protective clothing and equipment should be
worn.
Wear clothing and equipment appropriate for the
job. Avoid loose fitting clothing.
Prolonged exposure to loud noise can cause
hearing impairment or hearing loss. Wear
suitable hearing protection such as earmuffs or
earplugs.
Operating equipment safely requires the full
attention of the operator. Avoid wearing radio
headphones while operating equipment.
Avoid High Pressure Fluids Hazard
Escaping fluid under pressure can penetrate the
skin causing serious injury.
Avoid the hazard by relieving the pressure
before disconnecting hydraulic lines.
Use a piece of paper or cardboard, NOT BODY
PARTS, to check for suspected leaks. Wear
protective gloves and safety glasses or goggles
when working with hydraulic systems.
If an accident occurs, see a doctor immediately.
Any fluid injected into the skin must be
surgically removed within a few hours or
gangrene may result.
6
SERIAL NUMBER AND SAFETY DECAL LOCATIONS
Serial Number Location:
It is important to refer to the serial number of the Erskine™ Snow Blower when making repairs or ordering parts.
Early or later models (identification made by serial number) may use different parts, or it may be necessary to
use different procedures in doing a specific operation.
D
A
H
B
F
C
E
G
B
Model Decal
Serial Plate
Small Brand Decal

7
SERIAL NUMBER AND SAFETY DECAL LOCATIONS_______
A
C
D
B
E
Part number: 102935
Location: On each side of blower assembly
Quantity: 2
Part number: 102946
Location: On front of chute assembly
Quantity: 1
Part number: 102957
Location: On each side of chute
assembly
Quantity: 2
Part number: 103206
Location: Chute rotation chain cover.
Quantity: 2
Part number: 200139
Location: Rear of Transfer Case
Quantity: 1
Part number: 201415
Location: Auger drive cover &
Transfer Case Cover
Quantity: 1
F
G
Part number: 320302
Location: Rear of Transfer Case
Quantity: 1
H
Part number: 200001
Location: Left rear of blower housing
Quantity: 1
Small Brand Decal
Location: On each endplate
Quantity: 2

8
1. Align and drive the tractor forward over the
push frame.
2. Drive the tractor forward until the long
tapered pin on the tractor mount plate is
almost contacting the Qwik-A-Tach bracket.
3. Apply the park brake. Shut down the
engine and connect the hoses for the
hydraulic lift cylinders to the remote
couplers.
USER’S INSTRUCTIONS FOR MOUNTING THE SNOW BLOWER
After the initial set-up assembly is completed, and with the transfer case rotated on its side, use the following
procedure to mount the Erskine™ Snow Blower to the Tractor for user operation.

9
4. Start the engine; use the remote hydraulic
control lever to raise the blower lift arm until
all free travel in the lift linkage is removed
(rigid). Shut down the engine and install the
lock pin for the lift linkage.
NOTE: This will allow hydraulic down pressure
to be applied on the blower to lift the push frame
for Qwik-A-Tach alignment.
5. Start the engine, use the remote hydraulic
control to raise the frame and align the long
tapered pin on the tractor mount plate to the
Qwik-A-Tach. Drive the tractor forward so
the long pin engages the hole in the Qwik-A-
Tach a small amount.
NOTE: In the event that the blower is not sitting
level, one lift pin is longer to allow the operator to
align the long pin and drive the tractor forward
until the pin engages the hole a small amount.
Then raise or lower the frame to align the short
pin and drive forward until both pins are fully
engaged to complete the hook-up.
6. Shut down the engine. Apply the park brake.
Use the jack to raise the transfer case and
frame in position under the drawbar.
USER’S INSTRUCTIONS FOR MOUNTING THE SNOW BLOWER_____

10
USER’S INSTRUCTIONS FOR MOUNTING THE SNOW BLOWER
7. Install the drawbar coupler and retaining
pins.
8. Secure the drawbar coupler retaining pins
with spring clips
9. Rotate the transfer case upright. Install and
tighten the (2) 3/4” NC bolts to secure the
transfer case.
IMPORTANT: These bolts must be tight to
prevent damage in the event the transfer case
is hung-up or should strike a solid object.

11
USER’S INSTRUCTIONS FOR MOUNTING THE SNOW BLOWER____
10. Connect the PTO driveline. Be sure the
retaining pin snaps into position on the PTO
shaft.
WARNING: Be sure the PTO
master shield is secured in its
operating position.
IMPORTANT: Maximum rear driveline
extension is 3 inches (76 mm). Extending
beyond 3 inches (76 mm) will allow driveline
separation and damage will occur.
11. Connect chute rotator hoses to the couplers.
12. Completed rear mounting connection shown
with screw jack in horizontal storage position.
NOTE: Screw jack may be removed if desired.

12
USER’S INSTRUCTIONS FOR MOUNTING THE SNOW BLOWER
13. Raise the blower enough to release
pressure on the locking pin and remove it
from the lift linkage to allow snow blower
free float. Install and secure the pin in the
storage hole provided.
14. Mounting is now complete and you are
ready to blow snow.
Use the reverse order of the above to
dismount the snow blower from the tractor.
WARNING: Read the operating
and safety instructions in this
manual before using the snow
blower.

13
OPERATING THE SNOW BLOWER______________
WARNING: DO NOT operate from any position except seated in the operator’s seat
with the seat belt fastened. DO NOT permit riders.
1. Before starting the tractor, to control snow
discharge angle and distance, adjust the
discharge chute deflector to the desired
angle. To adjust; remove the lock pin, slide
the adjusting strap up or down to the desired
deflector angle and reinstall the strap lock pin
and retainer clip.
NOTE: Blower will obtain the best casting
distance in the up most position.
2. Skid shoes are used to control the minimum
desired cutting depth. To adjust the skid
shoes, raise and block the snow blower.
Remove the two skid shoe retaining bolts and
adjust the shoes up or down equally to the
desired cutting depth. Reinstall and tighten
the retaining bolts.
WARNING: To prevent personal
injury, never work on a raised
implement without using
additional support blocking or
jack stands.
3. Check to be sure all tractor-operating controls
are in the neutral position and start the
engine.
CAUTION: Be sure all bystanders
are clear of the equipment before
starting. Keep bystanders at
least 10 feet (3m) away when in
operation. Thrown objects and
ice can cause serious injury.
4. With engine idling, check the hydraulic
remote functions for the discharge chute
rotator and blower lift cylinders. Rotate the
chute toward a clear area.

14
OPERATING THE SNOW BLOWER_______________
5. Lower the snow blower to rest on the skid
shoes.
6. Engage the tractor PTO system (see tractor
operating manual)
IMPORTANT: To prevent the possibility to
damage, always idle the engine when engaging
or disengaging the PTO.
CAUTION: Be careful if using
imported tractor. Some have multi-
speed PTO systems. The PTO
speed must NEVER exceed 540 rpm.
7. Select the lowest tractor forward gear and
operate the engine at full throttle. Start the
tractor moving forward into the snow. Blow
the snow toward a clear area. When possible
direct snow discharge downwind.
NOTE: Tractor forward speed can be varied
according to tractor power, snow depth and
density. Always operate at full throttle for
maximum snow blower efficiency.
CAUTION: Know your work area.
Avoid obstructions and/or other
debris.
NOTE: If surface to be cleaned is very dense or
compacted snow, the blower should be resting
on the skid shoes during operation with the lift
cylinders completely retracted. This puts the
blower in the “float” position. If operating in soft
snow conditions, the blower can be carried
slightly above the ground with the lift cylinders to
prevent gouging.
WARNING: Disengage PTO shaft,
lower blower to rest on skid shoes,
stop engine, set the parking brake
and wait for all motion to stop
before leaving the operators seat for
any reason.

15
ROUTINE SNOW BLOWER MAINTENANCE ________
It is the operator’s responsibility to make daily inspections of the blower and tractor for damage, loose bolts, fluid leaks, or
anything else that could cause a potential service or safety problem. Preventive maintenance is the easiest and least
expensive type of maintenance.
IMPORTANT: Bolts and set screws can loosen after initial usage. After first hour of operation check
all bolts and set screws.
WARNING: Lower the snow blower to rest on the skid shoes, shut down the engine, wait for
all motion to stop, and set park brake before leaving the operator’s seat to perform service
of any kind.
LUBRICATION
30
4
Use No. 2 lithium base gun grease when lub-
ricating all snow blower grease fittings.
Grease the main drive shaft pillow block
bearings (three) after every 30 hours of
operation.
WARNING: These are
requirements. It is the
responsibility of the
owner/operator to make sure
the attachment is serviced on a
daily basis. Improper
maintenance can cause
extensive damage to the
attachment and/or your
equipment.
Grease the front and rear PTO drive shaft u-
joints and slip joints after every 4 hours.
No. 2 Lithium
base gun grease
Clean engine oil

16
ROUTINE SNOW BLOWER MAINTENANCE
Check the PTO drive transfer case oil level
weekly. The oil level must be at or near the
lower level of the check plug hole. Use SAE
80W-90 gear oil.
Drain and refill the transfer case with new oil
once a season (12 months).
Grease the four (4) transfer case shaft bearings
after every 30 hours of operation.
Grease the bearings at each end of the auger
after every 30 hours of operation.
Grease the bearing at the end of the auger drive
shaft assembly after every 30 hours of operation.
Lubrication (continued)
30
30

17
ROUTINE SNOW BLOWER MAINTENANCE_____________
LUBRICATION (continued)
Grease each of the two (2) push arms on the
frame system after every 30 hours of
operation.
Grease the auger drive shaft assembly and the
gearing on the end of the auger drive shaft,
after every 30 hours of operation.
Grease each of the (3) roller guides after every
6 hours of operation.
30
30
6

18
ROUTINE SNOW BLOWER MAINTENANCE
LUBRICATION (continued)
FILL
ADD
DRAIN
VENT
Check the auger drive gearbox oil level weekly.
Three plugs are located on the side of the
gearbox, fill (full), add, and drain.
To check oil level, remove the add plug. Oil
must drain from the plug. If necessary to add
oil, remove the upper fill/full plug. Add oil until
the oil level is at or near the lower level of the
“ADD” plug hole. Use SAE 80W-90 gear oil.
Gearbox oil capacity is approx. 2 quarts for the
960FM and 1080FM and 1 quart for the 901FM.
Drain and refill the gearbox with new oil once
a season (12 months).
Whenever the gearbox oil is changed, remove
and clean the gearbox vent.

19
Grease the blower lift bracket pivot pins (one
each side) after every 30 hours of operation.
Use clean engine oil to lubricate the auger
drive chain, frame coupler chain, and the chute
rotator chain after every 30 hours of operation.
ROUTINE SNOW BLOWER MAINTENANCE____________
LUBRICATION (continued)
30

20
ROUTINE SNOW BLOWER MAINTENANCE
A properly tensioned auger drive chain will
extend the roller chain life.
To adjust the chain tension, loosen the set
screw that secures the idler sprocket
assembly. Screw the threaded adjusting bolt
in to increase chain tension until all slack in the
chain is removed or out to decrease chain
tension. After adjustment tighten the set
screw.
IMPORTANT: Do not overtighten roller chains.
Tighten only enough to remove slack.
To adjust the discharge chute roller chain:
1. Remove the two screws securing the
sprocket and chain shield. Remove the
shield.
2. Loosen the bolt and nut securing the orbit
motor mounting bracket. Using a wrench
on the welded nut, take all of the slack out
of the chain by moving the bracket
outward. Tighten the bolt and nut.
3. Reinstall the sprocket and chain shield.
IMPORTANT: Do not overtighten roller chains.
Tighten only enough to remove slack.
AUGER DRIVE CHAIN ADJUSTMENT
DISCHARGE CHUTE ROTATOR ADJUSTMENT
This manual suits for next models
1
Table of contents
Other Erskine Attachments Snow Blower manuals

Erskine Attachments
Erskine Attachments 2010X User manual

Erskine Attachments
Erskine Attachments 2020 Series User manual

Erskine Attachments
Erskine Attachments 960R User manual

Erskine Attachments
Erskine Attachments 965RM User manual

Erskine Attachments
Erskine Attachments ES2000 User manual

Erskine Attachments
Erskine Attachments 620RP User manual

Erskine Attachments
Erskine Attachments 725FM User manual

Erskine Attachments
Erskine Attachments 54 User manual

Erskine Attachments
Erskine Attachments Mini Snow Blade User manual