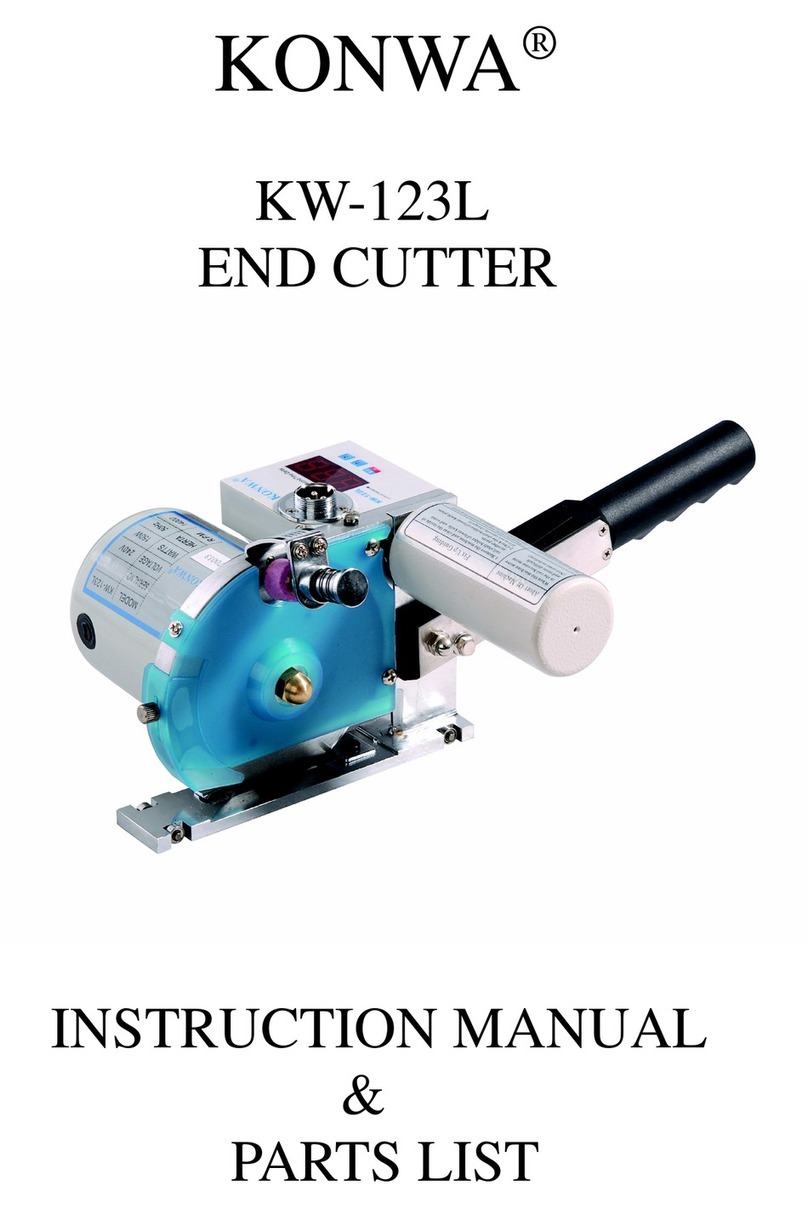
ES manufacturing MB110 Series User guide

______
Documentation & Warranty Packet
MB110 ( 600 rpm’s)
Thank you for purchasing the MB110 If properly operated and
maintained, this Heavy Duty Fiber Cutter will provide years of
trouble free service.WARRANTY
This model MB110 is warranted against defects for a period of 90 days. Keep your
original sales receipt for proof of purchase. ES Mfg., Inc. will replace or repair any
defective part, either directly, or through the distributor, at the option of ES Mfg.
Warranty shall not cover mis-use or damaged caused by the user. ES Mfg. Reserves
the right to inspect the merchandise at our facility, and is not responsible for
transportation cost to ES Mfg. ES Mfg. Is not responsible for damage, loss, lost
production or any other expenses due to the failure of this product. No other warranty
is expressed or implied.
Copyright 2007 ®
ES Manufacturing, Inc.
2647 24th Street North
St. Petersburg, FL 33713
US / Canada: 800-55ES-MFG Local / International: 727-323-
4040 Fax: 727-327-9872

OPERATING INSTRUCTIONS, MAINTENANCE & SAFETY
Cutters are precision tools made by master
creaftsman.
In order to maintain this precision and the
adjustments which are essential to satisfactory
operation of your cutter, it is important to
conscientiously follow these instructions.
1.In General
Handle cutter with great care. Do not drop it or
handle it roughly as this will change its
adjustments and may cause serious damage
mechanism.
2.Prior to Starting the Cutting Operation
Firstly set the “ON/OFF” switch to the “off”
position, connect the female plug of the electric
cord with the machine terminal and then tighten
the screw on the female lug. Now connect the
male plug of the electric cord to the electrical
outlet. Prior to starting the cutting operation
remove any obstacle from the path of the base
plate.
3.Cutting Operation
Do not force cutter through material. By nature of
their texture and because of the properties of their
fibers, not all materials can be cut with the same
speed or ease. Trail cutting will readily let you
find the best speed at which the machine is to be
advanced through the material.
4.Sharpening the Blade
1. Connect the plug of the electric cord to the
Power supply.
2. Push the switch to start the machine.
3. Pressing the Push Knob (#21) down for a few
seconds so that the sharpening stone lightly
touches and grinds the blade several times.
5. How to replace Blade
1. Make sure the electrical cord is disconnected
from power source.
2. Turn the screw for finger guard (#4) and
remove finger guard (#5).
3. Remove the blade lock nut (#1) by turning it
(#61,28,29,30).
4. Remove blade (#27) clean and dust or dirt
from machine.
5. Replace dirt blade.
6. How to Replace Carbon Brush
1. While the machine is unplugged.
Remove the two screw (#57) &
pull the cover (#54) upward.
2. Remove the screw cap (#49)
Over the carbon brush and re-
place the carbon brush (#50-1).
3. Put the cover (#54) back into its
original position and tighten the
screw.
4. Check the right and left carbon
brushes from time to time and
always replace both right and left
carbon brushes when worn out.
7. Lubrication and Maintenance
1. Turn the grease cup (#7) clockwise a
little bit to inject the grease into gear
box.
2. Make sure to add grease supplied
with the machine to the grease cup
(#6) when the grease cup is screwed
down to clean the bottom.
3. Always keep the machine clean
and free from remnants.
8. Maintenance and Inspection
1. Keep machine clean by removing all
accumulations of lint, thread and
cuttings from around the knife itself
to clean away from behind it, any
accumulated matter.
2. In addition, add grease to the
grease cup monthly using the
special grease the is supplied
with the machine.
3. From time to time, check the
right and left carbon brushes
and replace when necessary.
4. It is recommended that the
machine be turned off when not in
use.
5. Never put your hands in front of the
blade when operating.
6. Before doing any work on the
machine, be sure to disconnect the
machine from the electrical
outlet.
MB110-115V
600 rpms

.
www.esmfg.com
MB110-001 Adjusting Nut For Blade MB110-025 Worm Gear Washer MB110-049 Cab for Carbon Brush
MB110-002 Spring MB110-026 Worm Gear MB110-050-ASSYCarbon Brush w/Spring
MB110-003 Shaft for Gear MB110-027 Blade MB110-051 Motor Cover
MB110-004 Screw For Finger Guard MB110-028 Lock cover for Blade MB100-052 Snap Ring (E7)
MB110-005 Finger Guard MB110-029 Bearing MB100-053 Bearing
MB110-006 Grease Cup MB110-030 Srew for Blade MB100-054 End Cover
MB110-007 Cap for Grease Cup MB110-031 Bearing MB110-055 Cap for Cover
MB110-008 Gear Box MB110-032 Cap for Bearing MB110-056 Screw
MB110-009 Screw MB110-033 Oil Felt Tube MB110-057 Screw
MB110-010-1 Worm Gear MB110-034 Rollers MB110-058 Screw
MB110-011 Guide Plate MB110-035 Rollers Shaft MB110-059 Handle Fixed Base
MB110-012 Gear Box Fixed Base MB110-036 Rollers Shaft Fix. Plate MB110-060 Handle
MB110-013 Screw MB110-037 Screw MB110-061 Nut For Switch
MB110-014 Sharpening Stone MB110-038 Rollers MB110-062 Switch
MB110-014-ASSYSharpening Stone Ass’y MB110-039 Roller Shaft MB110-063 Nut For Switch
MB110-015 Lock Nut for Stone MB110-040 Base Plate MB110-064 Screw
MB110-016 Snap Ring (E3) MB110-041 Screw MB110-065 Screw
MB110-017 Spring MB110-042 Retaining Ring MB110-066 Screw
MB110-018 Screw MB110-043 Front Cover MB110-067 Plug
MB110-019 Sharpening Stone Bracket MB110-044 Snap Ring MB110-068 Wave Washer
MB110-020 Spring MB110-045 Wave Washer MB110-069 Motor Cover
MB110-021 Push Knob For Stone MB110-046 Beariing MB110-070 Screw For Worm Gear
MB110-022 Screw MB110-047-1 Rotor MB110-071 Cord complete w/Earch
MB110-023 Oil Felt MB110-048-1 Stator MB110-072 Grease
MB110-024 Counter Blade

.
www.esmfg.com
Supplemental instructions for MB110 Fiber Mat Cutters
Thank you for purchasing our MB110 Heavy Duty Cutter for your fiberglass cutting
needs. This tool will give you years of service provided you maintain and care for the
tool properly. Our experience in the composite industry allows us to supplement the
instructions supplied by the manufacturer.
1. Inspect daily the concentricity and condition of the blade. The alignment of the
rotating blade to the carbide counter blade is crucial to the operation of this tool.
Hard items, such as cured composites will damage the blade, the counter blade,
drive gears and possibly the motor. This is a heavy duty textile cutter and is not
meant for cured composites or other hard materials.
2. On or before 150 hours of usage, replace the MB110-050-ASSY. We have
supplied this assembly with your new purchase. This is common with all small
motors. If not changed in a timely, regular manner, critical damage will occur to
the rotor section of the motor. This damage can be fatal and expensive to repair.
Usually to cost of the repair is higher than the cost of a new unit.
3. When replacing the blade, be sure that all surfaces are completely clean. Just
the slightest contamination, especially under the blade will cause damage to the
arbors, blade and counter blade of this unit.
4. Never modify the cord of this unit. It is designed for the correct amperage drawn
from the motor. Any modification of this cord will not only void the warranty, but
create a significant risk of fire or explosion.
5. Use the self sharpening device included with your cutter only when neccessary.
This should be used sparingly, as overuse will cause excessive wear to the
blade.
6. Be sure to lubricate your MB110 daily or every 2 hours of operation, which ever
is greater.

Please take a few
Minutes to fill out
the below warranty
sheet. It will help
us serve you better.
ES MANUFACTURING, INC.
PO BOX 11692
ST. PETERSBURG, FL 33733- 1692 USA
FOLD HERE
Thomas D. Elder
President, ES Manufacturing, Inc.
If you have pictures of the products you make, we would like to
display them at our domestic and international trade shows.
Date of Purchase:_____________________________________
CompanyName:______________________________________
StreetAddress:_______________________________________
City / State / Zip;______________________________________
Phone#:____________________Fax#:____________________
Contact:_____________________________________________
Primary Line of Business:_______________________________
Is this your first ES Mfg., Inc. purchase? Yes No
Who did you purchase this unit from?:_____________________
What was your purchase price?:__________________________
Which was more important in your purchase?:
Simplicity Effectiveness Price Reputation
Would you like a free catalog?: Yes No
Comments:__________________________________________
___________________________________________________
___________________________________________________
Please return this sheet in the enclosed envelope.
ENGINEERED SOLUTIONS
ES MANUFACTURING, INCORPORATED
SAINT PETERSBURG, FLORIDA, U.S.A.
(727) 323-4040 800-55ES-MFG
MB110
This manual suits for next models
2
