Escooter H7 User manual
Please read the user manual and get to know the performance
of H7 intelligent electric scooter before using the product.
Don’t lend the scooter to the people who can’t handle it.
English
Owner Manual for H7
English | Français | Nederlands
Page 2 Page 13 Page 24

2
Ower’s Manual
Content
1. Product Overview............................................... 3
2. Specification...................................................... 4
3. Folding Steps & Display ..................................... 6
4. Operation Steps ................................................. 7
5. Warranty ............................................................ 8
6. Charging Precautions/Maintenance.................. 9
7. Failures and Solutions ..................................... 10
8. Warnings.......................................................... 11
9. CE Certification ............................................... 12

3
Ower’s Manual
Product Overview
Folding Latch
Accelerator
Right Handle Bar
Brake
Left handle bar
Charging port
eScooter
serial number
Disc Brake
Rear Fender
Rear Wheel
Front Fork
Decoration
Kick Stand
Front Wheel
Deck
Stem
Front light
Current speed
Battery Level
Speed gear
Start mode
Front Light
POWER BUTTON
ON/OFF/MENU
Digital Display Version

4
Ower’s Manual
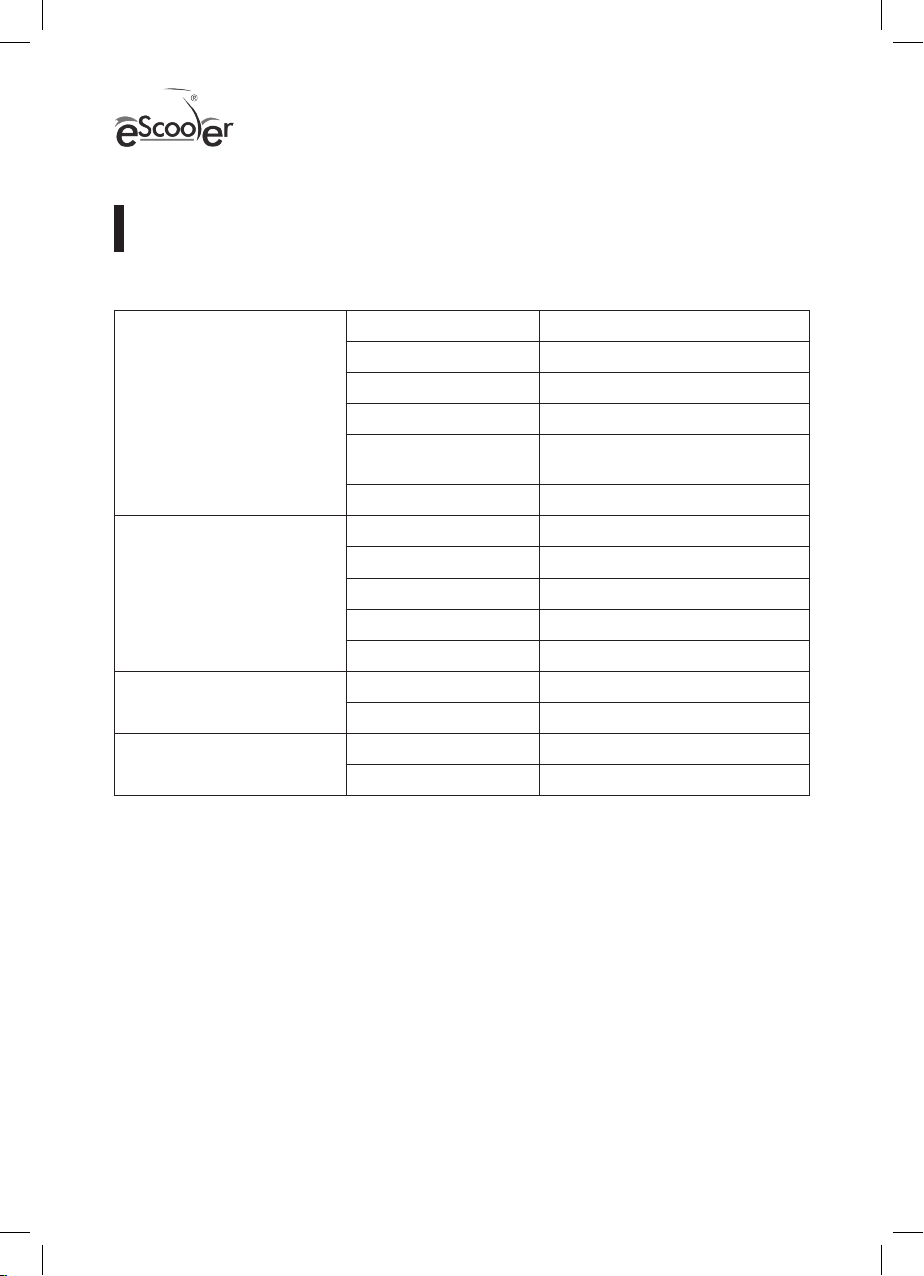
Performance Index Item Specs
Materials & Size
Color Black/yellow – Black-Red
Material Aluminum – powder coated steel
Folded Size (cm) 116*15.5*37.6cm
Unfolded Size(cm) 102*41.5*115cm
Deck height(mm) 90mm
Weight
User height / AGE 120-200cm / >12 YEARS
N.W 11.5kg
Max Load 120kg
Scooter
Max speed (km/h) 25km/h
Max range(km) 10-30km
Max incline -15%
Using terrain Flat road with incline<15%
Step height ≤1cm
Using temperature 0°C-45°C
Waterproof level IP55
Motor
Rated power(W) 300W
Rated volt(V) 36V
Rated currency (A) 17A
Rated torsion(N.m) 6N.m
No-load currency ≤1.4A
No-load rotate speed d640±5%
Front Wheel Size 8.0inch
Rear Wheel Size 8.0inch
Specification
5
Ower’s Manual
Battery
Brand 18650 battery cells,3P10S,30pcs
Capacity(Ah) 6
Rated volt(V) 36V
input volt(V) 42V
Intelligent BMS Equilibrium/overcharge/over
discharge/ Over
Rechargeable times 500-800times
Charger
Rated power(W) 84W
Rated input volt(V) 100-240V AC 50/60Hz 1.5A
Rated currency(A) 1.5A
Charging time(H) ~6H
Rated output volt(V) 42V
Front light Working voltage 12V
Working currency 100mA
Rear light Working voltage 5V
Working currency 20mA
Specification

6
Ower’s Manual
1> Press the
folding latch
2> Put down
the stem slowly
3> Fold stem fully
into place
1> Press the folding latch to unlock 2> Pull the stem up slowly
3> Secure stem fully into
place till you hear the
click that the mechanism
has locked
Folding Steps (folding)
(unfolding)

7
Ower’s Manual
Power button function description:
1. Power on/off
Long press the button on the
display for 2s to power on the
scooter,
Long press the button 2s again to
turn it off.
2. Gear switch (There are 3 gears)
Gear 1: (10 km max speed):
Gear 2: (18 km max speed):
Gear 3: (25 km max speed):
3. Lighting
Double click the button to turn on
or turn off the front light and brake
light, brake light will be high light
when braking.
4. Zero start mode ((Please note the
factory setting is kick start mode)
Triple click the button to switch to
the zero start mode.
5. KM/MPH
Default is Kilometers, long press
the button for 5s to switch to miles.
6. Cruise control mode
Press the accelerator and brake at
the same time for 3s to switch on.
Safe Driving:
1. Avoid accentuating the body while
accelerating or decelerating and
do not keep the body weight on the
handle.
2. Riding a standing position, please
keep the two feet one after the
other, so that riding more stable,
and easy to step on the rear brake.
3. Keep your body and handle parallel
when turning. Please confirm the
road condition before turning and
keep safe.
4. Brake - When braking, please
shift your body weight back. You’d
better learn to control your body’s
center of gravity when you brake.
Otherwise it will cause two possible
situations(
( 1) Scooter forward, causing
personal injury;
2) Braking and steering system
damage.
Operation Steps
Display
Current speed
Battery Level
Speed gear
Start mode
Front Light
POWER BUTTON
ON/OFF/MENU
Digital Display Version
8
Ower’s Manual
1.
2.
3.
4.
5.
6.
7.
8.
Strictly abide by local laws
and regulations and traffic
laws.
Do not ride this scooter under the
condition of low visibility.
Do not use this scooter to do stunt,
wheel or take-off, it will increase
the probability of injury and
damage to the scooter. Do not carry
passengers.
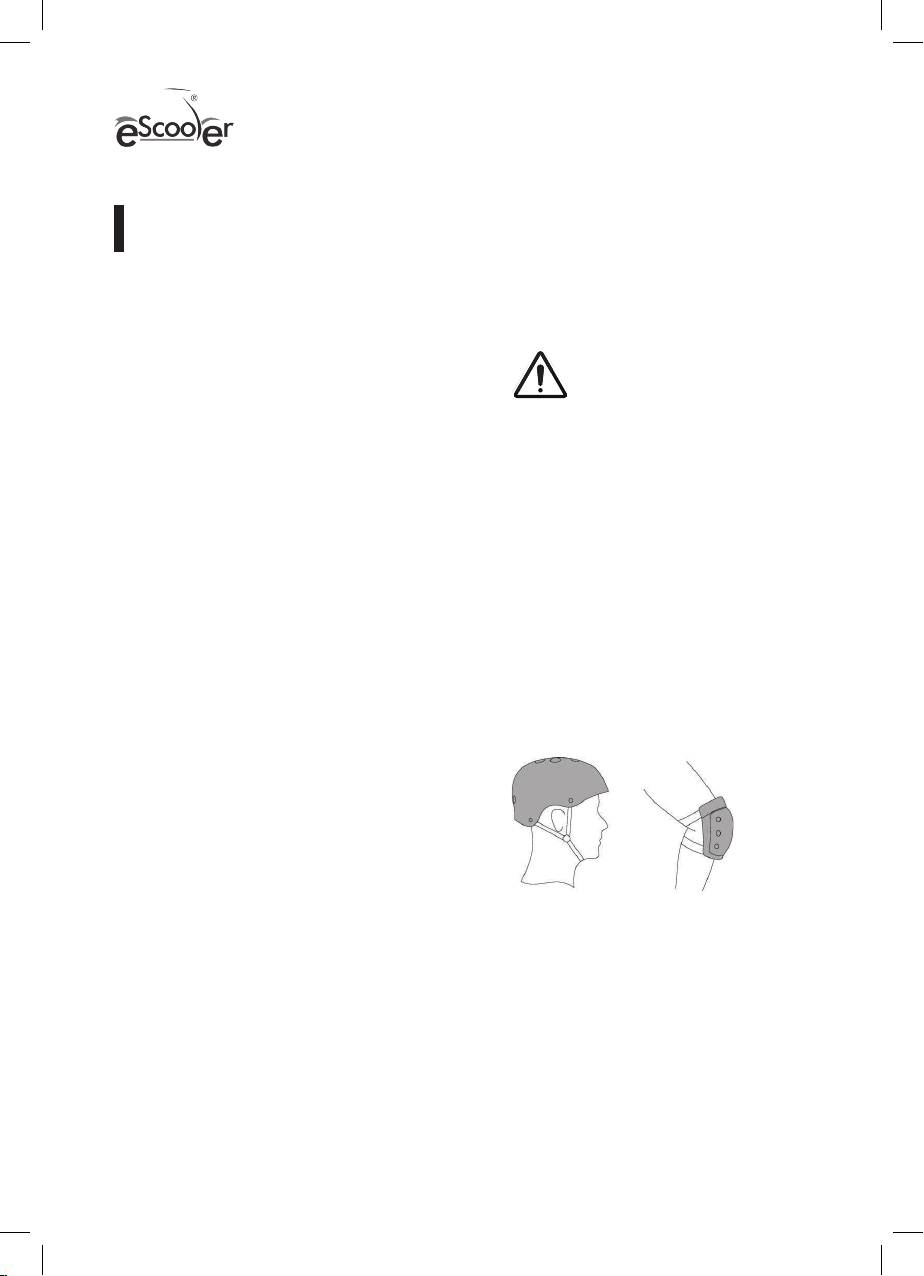
There is a risk of falling down
and injury during the course of
study. Please wear a helmet and
protective gear throughout the
study.
Your eScooter is covered by a two-year limited warranty, except for the
conditions as follows:
Warranty
Warranty/guarantee has expired
Damage due to incorrect assembly
or use not in accordance with the
user instruction manual
Failures due to non-authorized
disassembly, repair or modification
Damages due to incorrect charging
or not using original charger
Damages during loading and
transportation by user
Damages caused by force majeure
like earthquake or fire
The battery is covered by a limited
warranty of 1 yearThe battery is
covered by a limitedwarranty of 1
year. This warranty isvoid in the
event if your scooter is not
charged fully at least once per
month.
Consumable parts like (but not
limited to) brakes, tyres, tyre tubes
and brake liners are not covered by
the warranty.

9
Ower’s Manual
When charging the electric scooter H7, please pay attention to the following
points.
1. Ensure that it is charged in dry
and clean environment, the input
voltage is guaranteed between
110v-240v and the other end
connects the charging port of
H2 electric scooter. The red light
indicates the scooter is being
charged.
2. The light of the charger shows
green, indicating that the charging
is completed.
3. Don’t turn on the scooter during
charging for your safety.
4. Disconnect the scooter from the
charger when the charging is
completed.
Charging Precautions
1. Battery maintenance: In order
to guarantee the battery life,
when the battery level is low,
please charge the scooter timely
(Note:When it is not in use for
a long time, it is recommended
that charge it once a month),
If you want to check or replace
the battery, please do it with the
assistance of professionals. The
most suitable temperature of the
battery storage is 15°C - 25°C(; don’t
use and place the scooter when
the environmental temperature is
higher than 40°C, in order to avoid
the lithium battery’s failure, and
even lead to the combustion. Do
not place the scooter in the car
during the hot seasons, because
it may lead to the lithium battery’s
failure or even the combustion.
2. Tire maintenance: In order to
guarantee the tire life, please
check the tires of the scooter
regularly. Once the wheel is
abnormal, please repair or
replace timely, so as not to cause
unnecessary damage during the
riding.
3. Appearance maintenance: Swab
the scooter body with water or mild
detergent, it will make your scooter
clean. Please do not clean the
scooter with irritating potions or
any chemical reagents.
Maintenance

10
Ower’s Manual
The display board is working but the motor doesn’t work.
Reason analysis Solutions
a. The break handle is damaged a. Pull out the socket of the break handle (normally open
type brake handle), if the motor works, then it is the
failure of break handle, should replace the break handle.
b. The speed regulating steering handle
is damaged
b. Firstly check the speed regulating steering handle and
motor’s hall switch are short circuit or not. Generally it is
easier to cause the joint short circuit after rain affected
with damp, so notice the short circuit of steering handle
and the motor hall switch. Otherwise there will be a
continuous damage of the replacement controller!
c. The motor is damaged c. If the motor doesn’t turn, please inspect the motor’s
hall switch and turning handle’s signal. Once the power-
on, the controller shell is very hot, generally it is short
circuit of the controller internal power tube, should
immediately cut off the power.
Charging doesn’t work
Reason analysis Solutions
a. The battery charging port is loose a. Change a good charging port
b. The connection of the charger plug is
not well
b. Change a good changer connector.
Can’t turn on the scooter
Reason analysis Solutions
a. The battery is discharged Charge the scooter for1-2hours according to the user
manual
b. The power button is out of order b. Check the power button which has got stuck or not.
Common Failures and Solutions

11
Ower’s Manual
Warnings
Always wear shoes, A helmet and appropriate
safety gear.
Do not ride after
consuming alcohol or
drugs
Do not ride at high speeds, on
unevern terrain or on slopes
without if not confident. Do not
perform stunts or turn abruptly
Do not carry any passengers
Do not ride in the rain or
on smooth surfaces such
as snow/ice avoid heavy
impacts, water, sand/dirt, and
excessive heat
The rider should be over 120cm Tall and must
weigh more than 20 kg - 100 kg. minimum age
12 years
You must comply with local laws
and give way to pedestrians Whenever you ride this vehicle,
you risk injury due to loss of
control, collision and falling.

12
Ower’s Manual
CE Certificate
Veuillez lire le manuel de l’utilisateur avant toute utilisation et
comprendre les performances de cette trottinette électrique
intelligente H7 avant d’utiliser le produit, ne prêtez pas le scooter à
des personnes qui ne peuvent pas le gérer.
English
Mode d’emploi de votre H7
Français
13

14
Ower’s Manual
Table des matières
1. Présentation du produit ................................... 15
2. Spécifications techniques ............................... 16
3. Comment plier votre H7 et affichage............... 18
4. Comment conduire votre H7 ............................ 19
5. Garantie ........................................................... 20
6. Chargement de votre trottinette et entretien .. 21
7. pannes et solutions.......................................... 22
8. Consignes de sécurité...................................... 23
9. CE Certification ............................................... 12

15
Ower’s Manual
Diagramme du produit
loquet pliant
accélérateur
Poignée droite
Frein
Poignée gauche
Port de charge
numéro de série
eScooter
Frein à disque
Garde-boue arrière
Roue arrière
Décoration
de la fourche
avant Béquille
Roue avant
Plate-forme
Tige
Phare avant
Vitesse actuellew
niveau de la batterie
Engrenage de vitesse
ode de démarrage
Phare avant
Bouton On/Off/
Menu
Affichage numérique

16
Ower’s Manual
Spécifications H7 Item Quelques spécifications
Matériaux et taille
Couleur Noir et jaune – Noir et rouge
Matériel Aluminium-acier enduit
Dimensions pliées 116*15.5*37.6cm
Dimensions dépliées 102*41.5*115cm
Hauteur du pont(mm) 90mm
Poids
Taille utilisateur / Age 120-200cm / >12 YEARS
N.W 11.5kg
Charge maximale 120kg
Trottinette
Vitesse maximale (km/h) 25km/h
Autonomie(km) 10-30km
Angle maximal -15%
Terrain d’utilisation Routes plates avec angles <15%
Hauteur de l’étape ≤1cm
Température de
fonctionnement 0°C-45°C
Niveau
d’imperméabilisation IP55
Moteur
Puissance nominale(W) 300W
Tension nominale(V) 36V
Ampérage nominal 17A
(A) 6N.m
Torsion nominale(N.m) ≤1.4A
Monnaie sans-charge d640±5%
Vitesse à vide 8.0 pouces
Taille de la roue avant 8.0 pouces
Specification

17
Ower’s Manual
Batterie
Marque 18650 batterie, 3P10S, 30pcs
Rong(Ah) 6Ah
Tension nominale(V) 36V
Tension de charge
maximale(V) 42V
BMS intelligent
Équilibre/surcharge/décharge/
protection contre les courts-circuits
de surintensité
Nombre de recharge 500-800times
Chargeur
Puissance nominale(W) 84W
Tension d’entrée
nominale(V) 100-240V AC 50/60Hz 1.5A
Devise ampérage(A) 1.5A
Temps de charge(H) ~6H
Tension de sortie
nominale(V) 42V
Les phares
Tension de
fonctionnement 12V
Ampérage 100mA
Feu stop
Tension de
fonctionnement 5V
Ampérage 20mA
Specification

18
Ower’s Manual
1> Appuyer le loquet
pliant
2> Poser doucement
la tige
3> Plier la tige
entièrement
1> Appuyer le loquet pour
déverrouiller
2> Amener doucement la
tige vers le haut
3> Complètement
sécuriser la tige jusqu’à
entendre le clic du
mécanisme qui s’est
vérrouillé.
Pliage Pas (Pliage)
(dépliage)
Affichage
Vitesse actuellew
niveau de la batterie
Mode de vitesse
ode de démarrage
Phare avant
Bouton On/Off/
Menu
Affichage numérique

19
Ower’s Manual
Description du fonctionnement du
bouton d’alimentation:
1. Allumer/ éteindre
Faites un appui long sur le bouton
de l’écran, pendant 2 secondes,
pour allumer le scooter.
Refaites un appui long de 2
secondes sur le bouton de l’écran
pour éteindre le scooter.
2. Changer de mode de vitesse
Mode 1 (max 10km/h)
Mode 2 (max 18km/h)
Mode 3 (max 25 km/h)
3. Eclairage
Faites un double clic pour
allumer ou éteindre la lumière
avant et le feu stop, le feu stop
sera intensément éclairé lors du
freinage.
4. Mode “Zero start” (Veuillez noter
que les paramètres d’usines sont
sur démarrage avec élan)
Faites un triple clic pour active le
mode “zero start”.
5. KM/MPH
L’unité de mesure par défaut est le
kilomètre, faites un appui long de 5
secondes pour changer aux miles.
6. Mode régulateur de vitesse
Appuyer sur l’accélérateur et le
frein en même temps pendant 3
secondes pour allumer le mode.
Conduite sûre:
1. Evitez de plier votre corps tout
en accélérant ou en ralentissant,
ne gardez pas votre poids sur la
poignée.
2. Lors d’une position debout, veuillez
garder les deux pieds l’un à côté
de l’autre, de sorte que la conduite
soit plus stable et que l’appui sur
le frein arrière soit plus facile et
rapide.
3. Gardez votre corps parallèle aux
poignées pendant la rotation.
Veuillez confirmer votre intention
de direction avant de tourner afin
de rester en sécurité.
4. Lors du freinage, ajustez votre
poids en arrière. Apprenez
à contrôler votre centre de
gravité lors du freinage. Sinon
cela entrainera deux situations
possibles :
( 1) La trottinette électrique
basculera en avant, causant des
blessures ;
2) Vous risqueriez de créer des
dommages au système de freinage
et de direction.
Etapes d’opération

20
Ower’s Manual
Respectez strictement les lois
et les règlements locaux liés à
la circulation routière.
Ne roulez pas avec cette trottinette
lors d’une météo offrant une faible
visibilité.
N’utilisez pas cette trottinette pour
des cascades, des wheelies ou
des décollages, ce qui augmente
la probabilité de blessures et
d’endommagements. Ne transportez
pas des passagers.
Il y a un risque de tomber et de
blessures durant le processus
d’apprentissage. Veuillez porter un
casque et des protections durant
l’apprentissage.
Recommandations ou descriptions de surfaces appropriées (planes, propres, sèches et si
possible éloignées des autres usagers de la route); instructions pour vérifier que le système
de direction est correctement ajusté et que toutes les pièces de connexion sont fermement
fixées et non cassées.
Le mécanisme pour réduire la vitesse deviendra chaud suite à une utilisation continue,
ne pas toucher après le freinage note concernant l’entretien des roulements; Aucune
modification autre que les indications du fabricant ne doit être apportée; Remarque
indiquant quand les écrous autobloquants et autres fixations autobloquantes peuvent se
desserrer en raison de fortes vibrations. Vérifiez-les périodiquement.
Votre trottinette électrique eScooter est soumise à une garantie limitée de deux
ans, sous réserve des conditions suivantes:
Garantie:
Si la garantie n’a pas expiré
Dommages causés par un
assemblage
incorrect ou une utilisation
non conforme
aux instructions de
l’utilisateur
Défaillance due à un démontage, une
réparation ou une
modification non
autorisés
Dommages dus à une charge
incorrecte
ou sans utiliser le chargeur
d’origine
Dommages de l’utilisateur
pendant le
chargement et transport
Dommages causés par une force
majeure
telle qu’un tremblement de terre
ou un
incendie
La batterie a une garantie limitée de 1 an.
Cette garantie est annulée si votre
scooter n'est pas rechargé complètement
au moins une fois par mois.
Les pièces consommables telles que les
freins, les pneus, les chambre a air et les
plaquettes de frein (mais sans ‘y limiter –
liste non exhaustive) ne sont pas couverts
par la garantie.
1.
2.
3.
4.
5.
6.
7.
8.
Table of contents
Languages:
Other Escooter Scooter manuals


