niu N Series User manual

USER MANUAL

Attach the
SN Code here
The SN Code of your scooter.
Please see P.7 and P.8 for
detailed information.

CONTENTS
General Notice
Precautions
Safety Notice
Installation Guide
Downloading the App
Parts Info
Dashboard Display Info
Operation Guide
Battery Use and Maintenance Guide
DOs and DON'Ts while Riding
Maintenance and Repair
Regular Maintenance Checklist
Technical Parameters
Maintenance Record
················································1
···················································2
··················································3
··············································4
··········································7
······················································9
·······································11
··············································14
··························21
································25
······································27
······························30
········································37
··········································41

1
General Notice
Please read this User Manual carefully for proper operation
before riding the scooter.
For your safety, please check whether the parts are in good
condition according to this User Manual before riding. Contact
your dealer in time in case of any problems.
Please follow the traffic laws. Slow down on slippery roads in bad
weather to allow greater braking distance for your safety.
Please pay attention to deep water. It may cause rusting or failure
of the motor, battery, or other parts if water level reaches wheel
axle.
Do not dismantle the scooter on your own. Please contact your
dealer for replacement or purchase of original parts.
For others' safety and preventing unnecessary damage to your
scooter, do not lend your scooter to those who can’t operate.
Please keep the User Manual properly.

2
Precautions
Rider and Passenger
This scooter is not designed for a ride of more than 2 persons.
Road Conditions
This scooter is not designed for off-road use.
This User Manual should be deemed as a permanent document
of This scooter. If this scooter is transferred to others, this User
Manual should also be handed over to the new owner.
Reproduction or reprint of any part of this User Manual is strictly
prohibited.
Warning: Failure to follow the instructions herein may lead to
serious casualties, personal injury, or scooter damage.
Attention: Do not exceed speed limit and apply brakes
cautiously. Always use side stand or central stand when parking.

Safety Notice
Using a helmet and protective goggles is strongly advised.
You are advised to take proper training or exercise before using on
open roads.
Please follow the Operation Guide (P.14) to fully understand how
to properly operate the scooter.
It should be noted that the braking distance in bad weather will
be much longer. Please avoid braking on paint markers, manhole
covers, and oil stains to prevent slipping. Pay extra attention when
riding through railway crossings, junctions, tunnels, and bridges.
Slow down if road conditions are unclear.
Do not use high beam indiscriminately. Continuous use of high
beam may disturb the vision of other drivers and pedestrians.
Do not use mobile phones or other electronic devices which may
draw your attention while riding.
Do not change the lane without signaling. Changing the lane at
will is one of the major causes for accidents. When you need to
change the lane, remember to switch on the Turn Signal Indicator
first. Always check the vehicles approaching from behind before
changing the lane.
3
Installation Guide
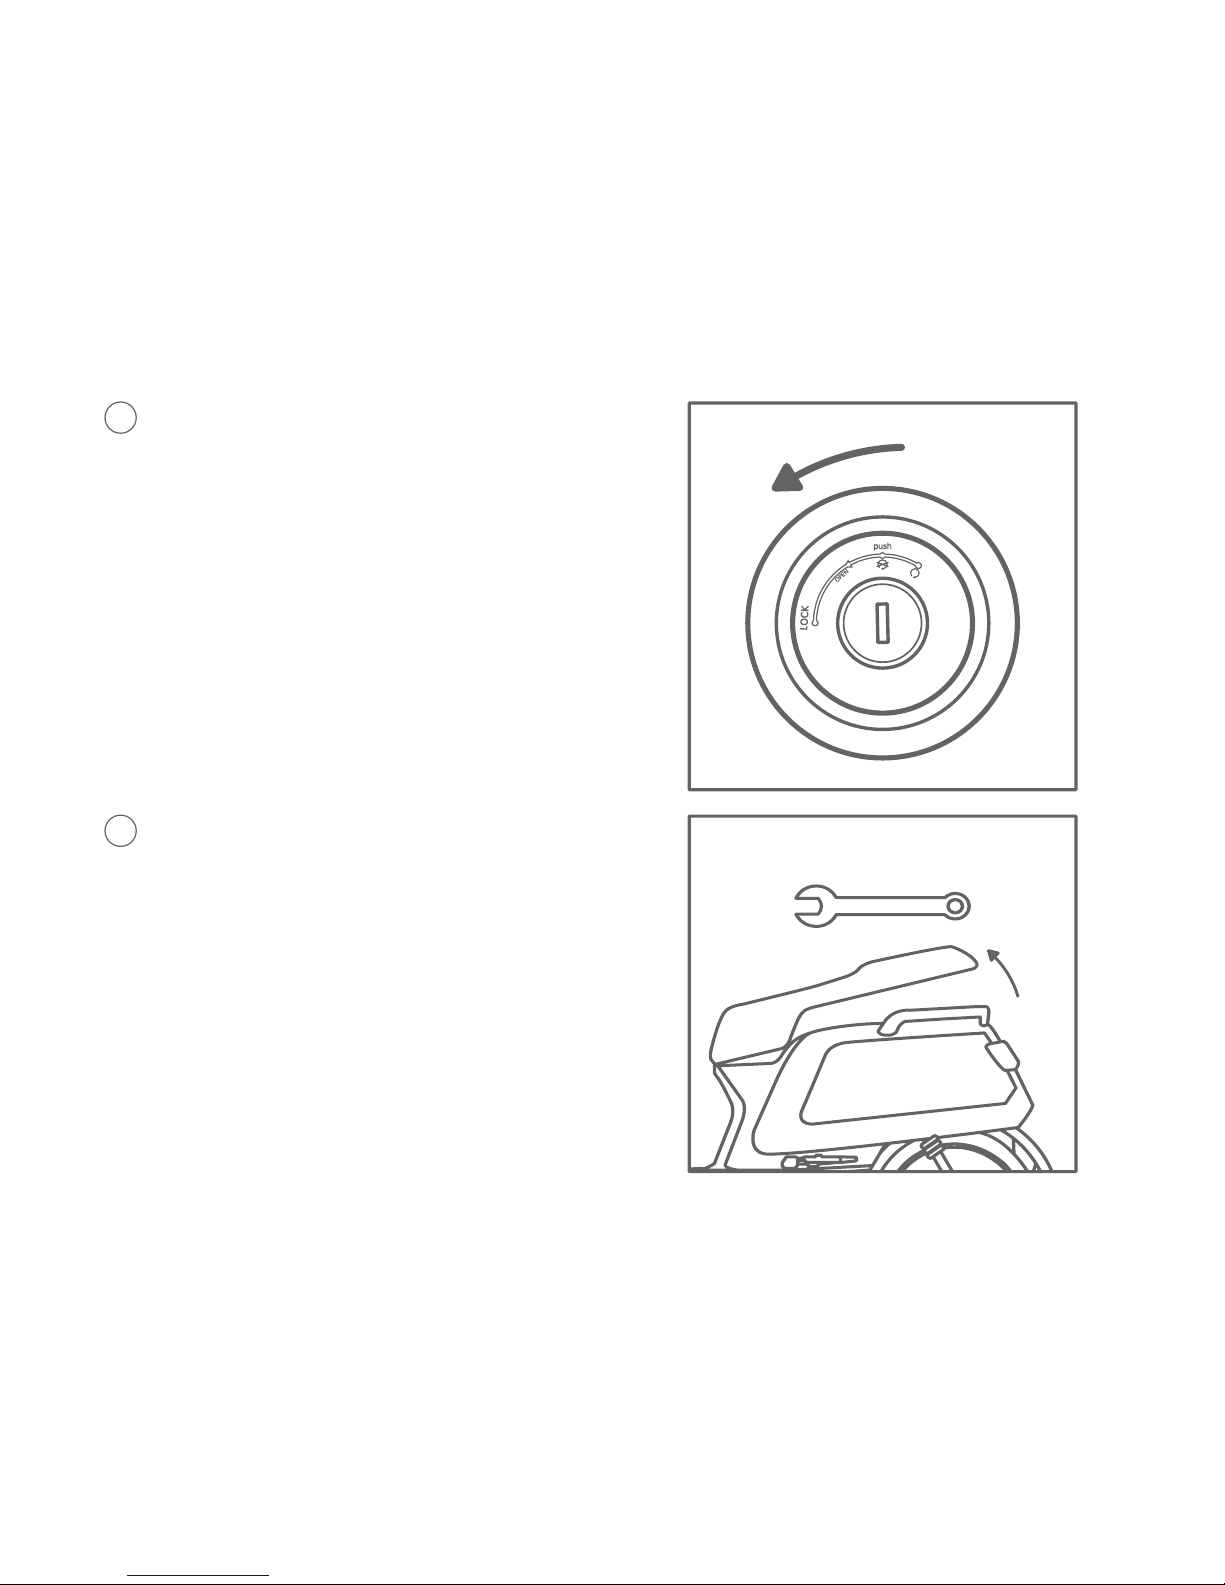
1
2
Insert the key to the main lock and
turn to the icon of "OPEN" as shown
in the right figure.
Open the saddle to take out the
key box, windshield package (with
rubber pads and standard parts),
and installation tools.
Insert the key into the keyhole in
the rear storage and turn it to open
the battery compartment. Take out
the charger and rearview mirrors
package inside.
4

3
4
Take out the rearview mirrors
and check them carefully.
Install the left rearview mirror
into the mounting hole on
the left brake lever and turn
it clockwise. The bolt shall
be screwed in for more than
15mm.
Adjust the rearview mirrors
to an appropriate position
and then tighten nuts on the
rearview mirror with a spanner.
Properly set the dust cover.
Install the right rearview mirror
in the same way.
Installation Guide
5
6
5
6
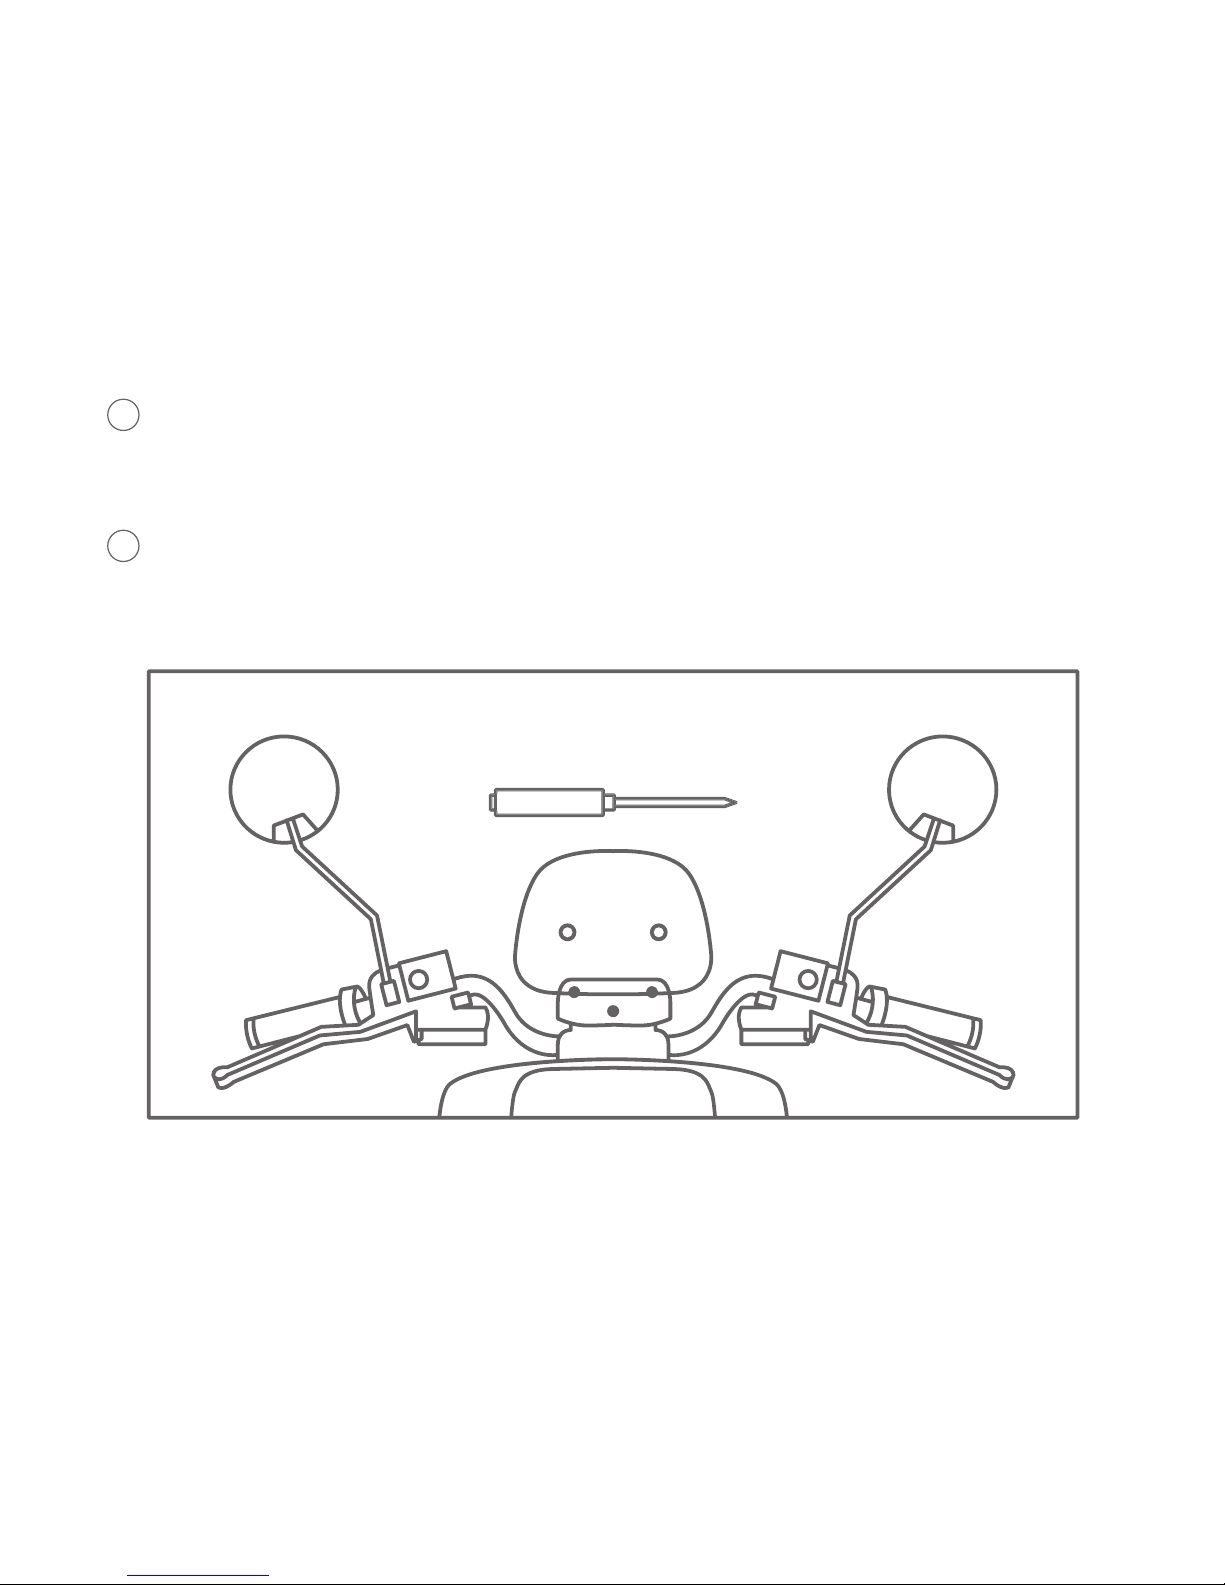
Align the windshield rubber part with the windshield holes and
then install it.
Tighten the two screws with the screwdriver to secure the
windshield.

Downloading the APP
Functions such as checking battery level, locating, and
management can be implemented on the electric scooter through
the app.
Scan the QR code below to download the APP titled Niu E-Scooter.
1
7

Run Setup after downloading and register.
Please scan the QR code on the inside of cover page for app
registration.
Note:
The mobile phone system is required to be at least Android 4.0 or
iOS 8. Make sure that the mobile phone has been connected to the
Internet when running the app (Wi-Fi / 2G / 3G / 4G).
2
3
8

Parts Info
Handrail
Reflector
Headlight
Right
Combination
Switch
Front
Storage
Turn Signal
Indicator
Foot pegs
9

Windshield
Taillight
Rearview
Mirror
Left
Combination
Switch
Side Stand Central
Stand
Rear
Storage
Battery
Compartment
10

Ready Indicator
Economic Mode
GSM Signal
GPS Signal
Energy Recycling
Time
Riding Mode
Cruise Mode
Diagnostic Code
Instant Electric Current
Battery Bar
Charging
Distance Travelled
Battery Percentage&
Remaining Charging Time
Speed
Charging
Percentage
High Beam
Low Battery Indicator
Left Turn
Indicator
Right Turn Indicator
Dashboard Display Info
11
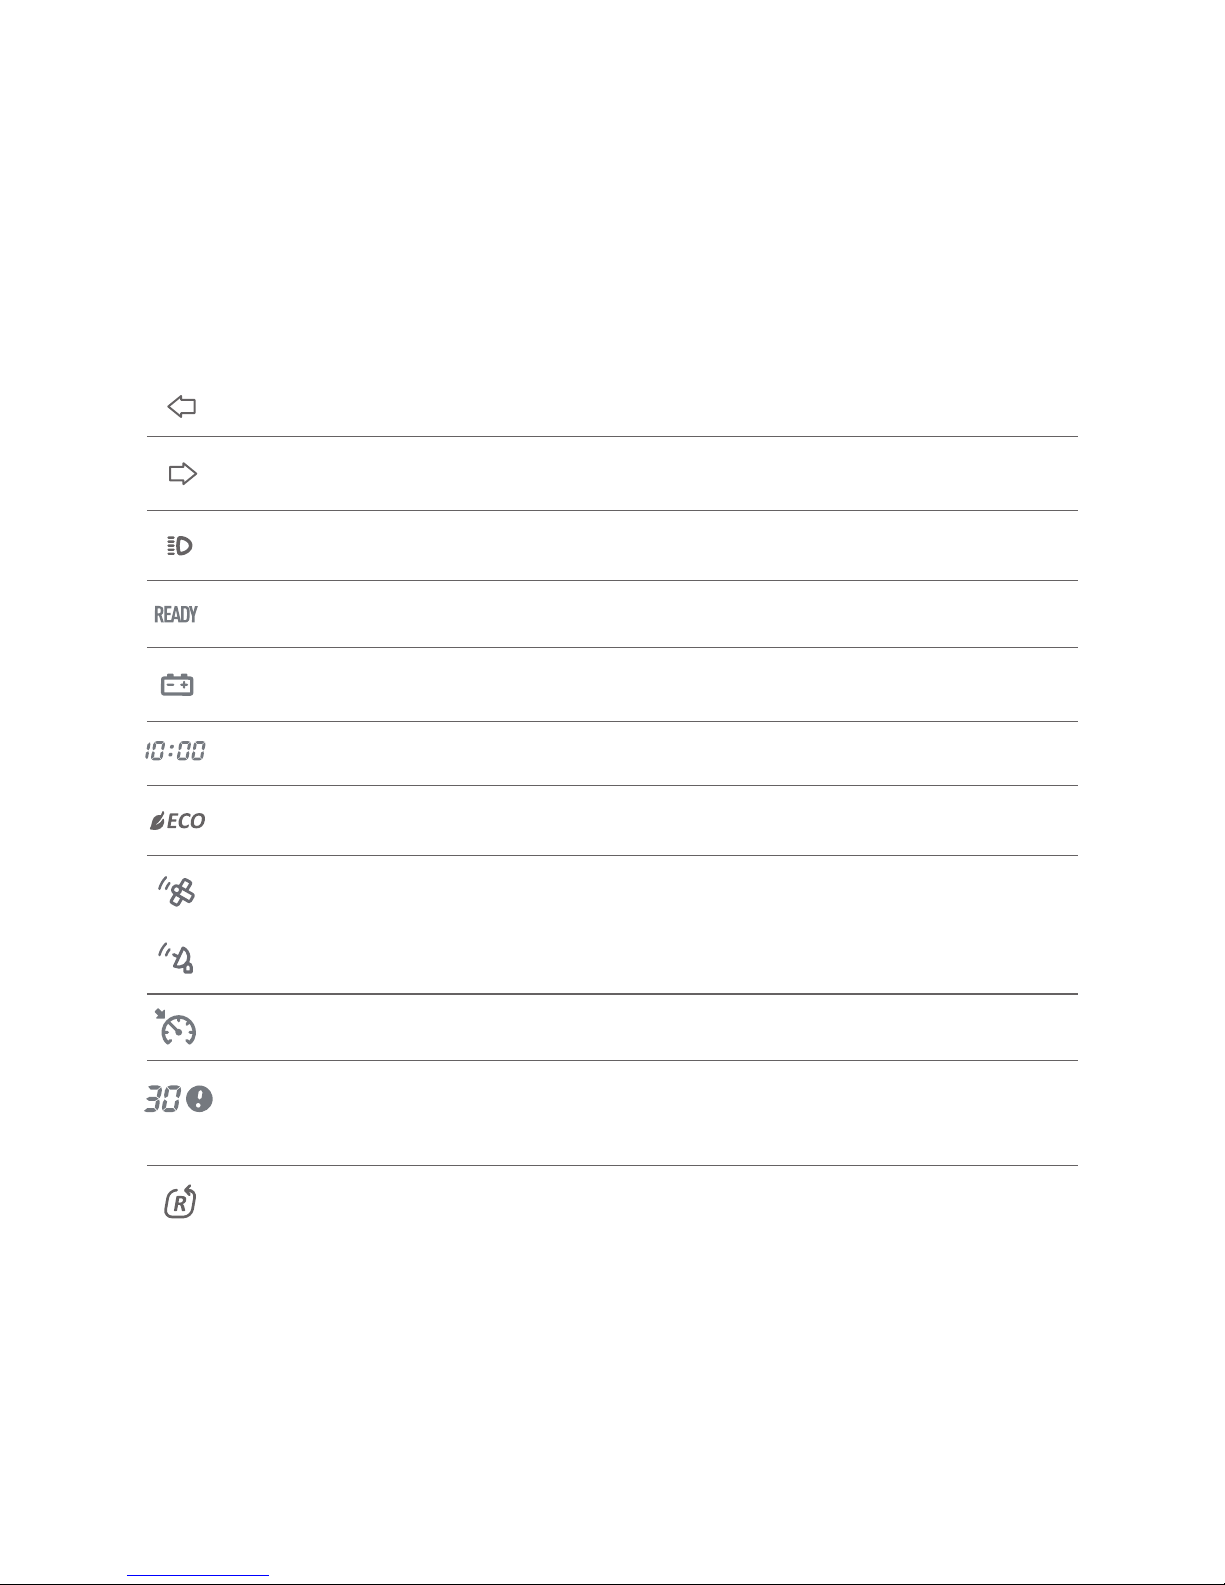
Left Turn Indicator
Right Turn Indicator
High Beam
Ready Indicator
Low Battery Indicator
Time
Economic Mode
GPS Signal
GSM Signal
Cruise Mode
Diagnostic Code
Energy Recycling Status
The Left Turn Indicator is on.
The Right Turn Indicator is on.
The High Beam is on.
In Riding Mode.
Battery level less than 10%.
Now is 10:00
Ideal energy consumption status.
No flashing: Signal strong.
Bars are falshing: Signal weak.
Entire icon flashing: No signal.
The scooter is in Cruise Mode.
The Diagnostic Code is 30.
Please see P.34-37 for details.
Energy is being recycled from
braking.
12

Dashboard Display Info
Battery Bar
Battery Percentage
(Small)
Remaining Charging
Time
Charging
Distance Travelled
Instant Electric
Current
Riding Mode
Speed
Charging Percentage
(Large)
Current battery level is 80~89%.
Current battery level is 85%.
The remaining charging time is
3.2h (using scooter charging port).
Battery is being charged.
Distance Travelled is 802km.
Indicates instant power output.
Mode 2 is selected.
Current speed is 26km/h.
Current battery charging progress
is 13% (using scooter charging
port).
13

Left Combination Switch
Front Storage Area
High/Low Beam Light
USB Charging Port
Main Lock
Hook
Front Storage
Turn Signal Indicator
Horn
Cruising Mode
Operation Guide
1
1
2
2
3
3
4
4
14

Off
On
Open Saddle Turn on the Scooter
Push the key and
turn to LOCK
position to lock the
Steering Handlebar
Open Saddle
to access Rear
Storage
Lock the
Steering
Handlebar
Operation Guide
15
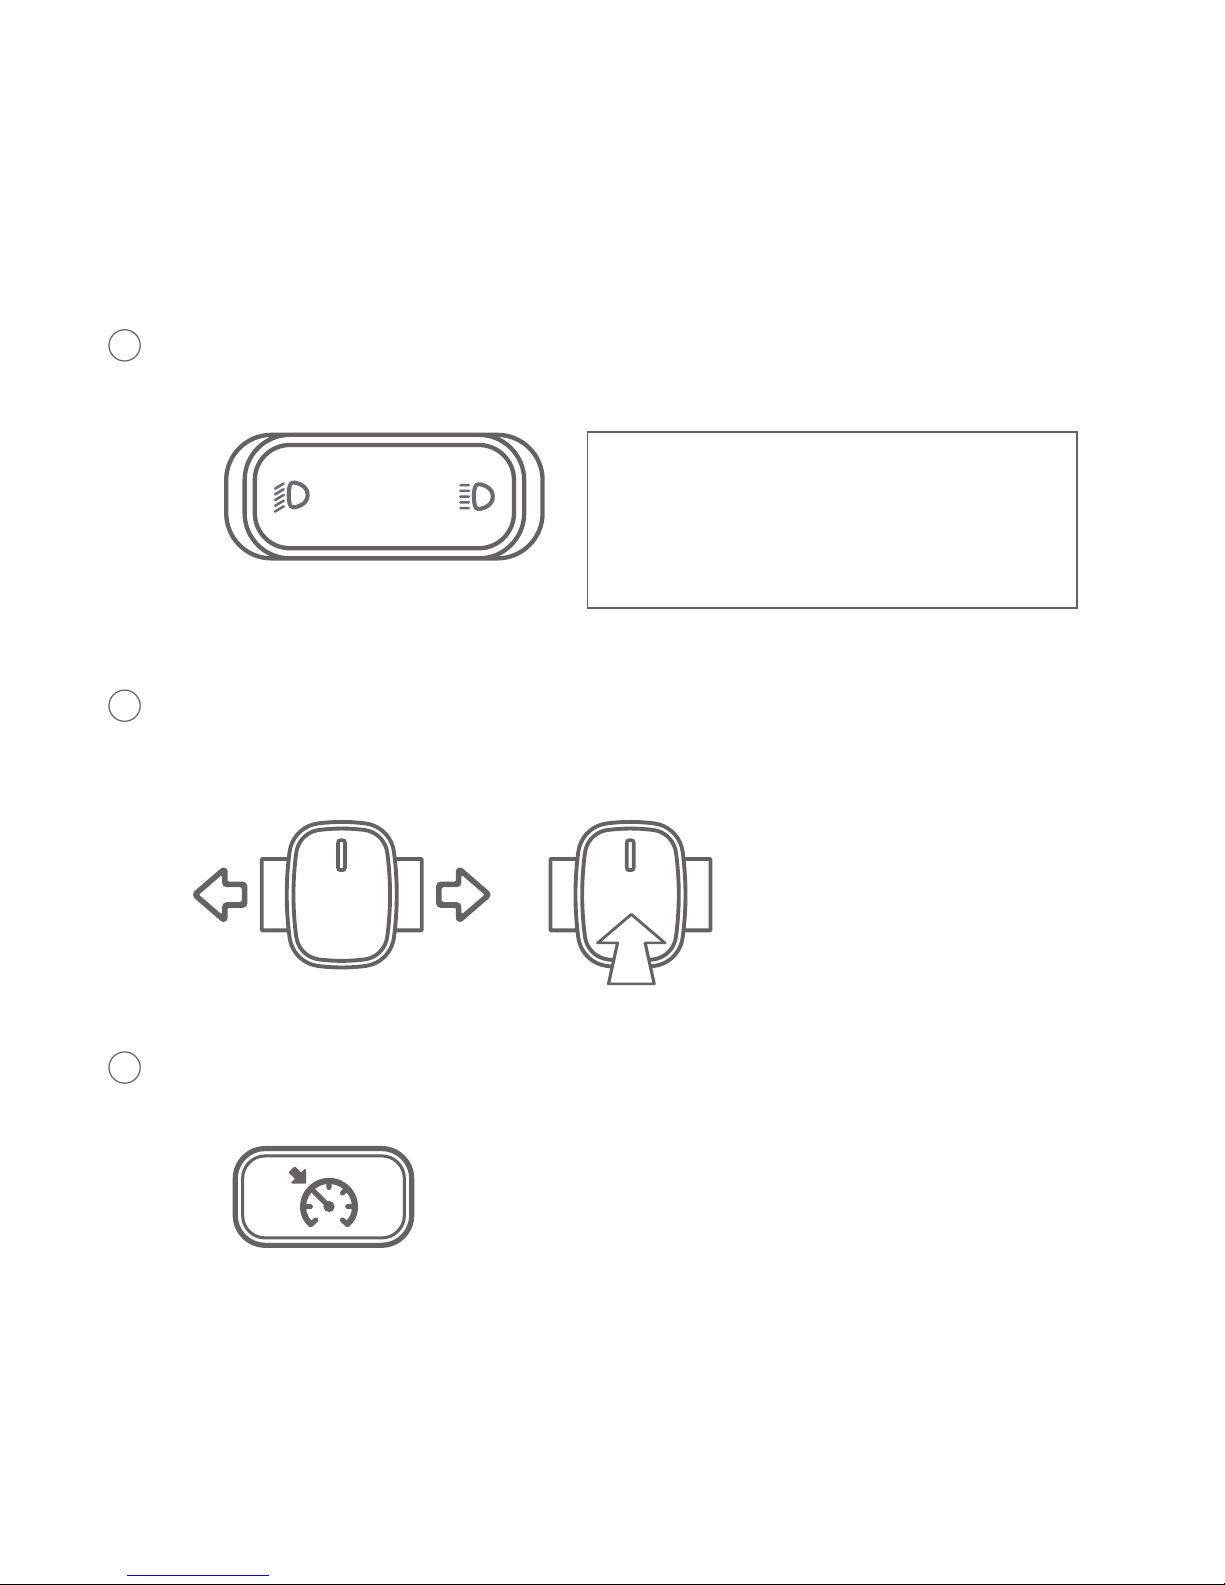
High
Beam
Low
Beam
Remarks: To signal overtaking
with flashing light, the rider may
press and release the left part of
the button repeatedly.
High/Low Beam: Press the right part to switch to high beam;
press the left part to switch to low beam.
1
Turn Signal Indicator: Push the button left to turn on the Left Turn
Signal Indicator; push the button right to turn on the Right Turn
Signal Indicator. Press the button to turn off.
2
3Cruising Mode: Push the button to cruise at current speed. Press
again or brake to turn it off.
16
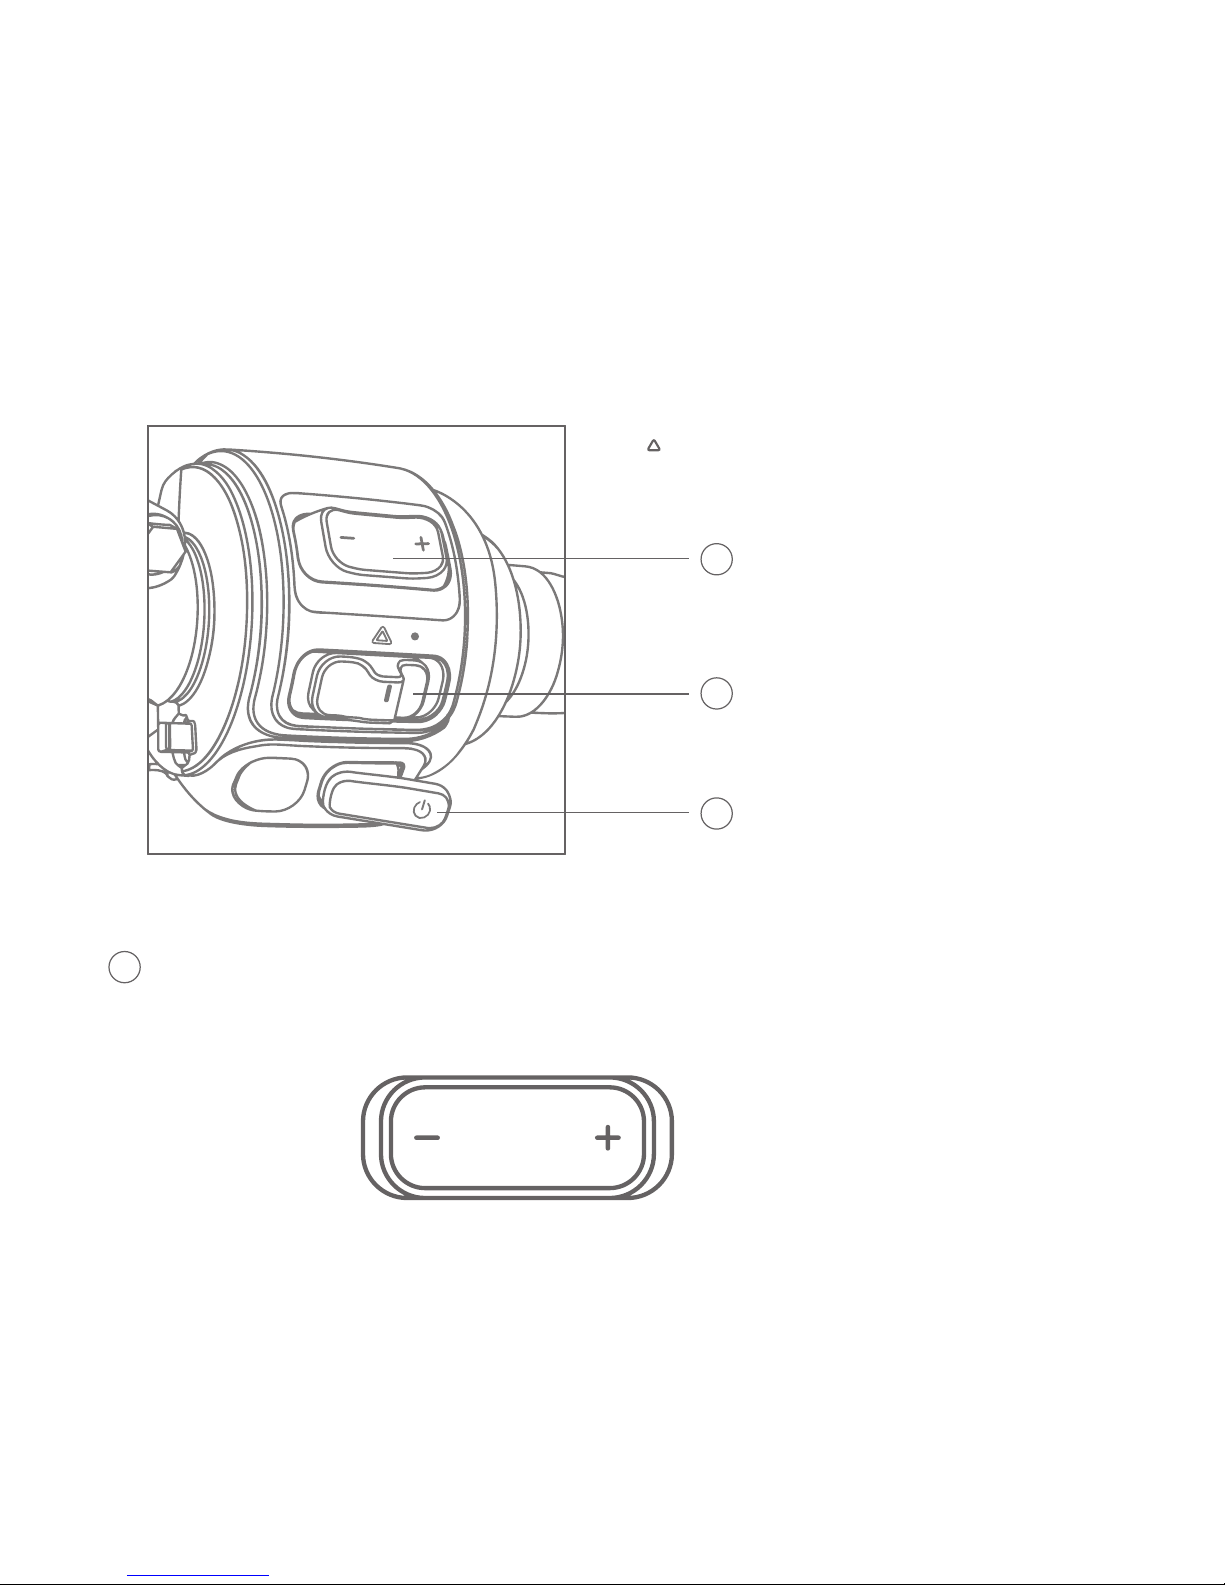
Mode Selector
Right Combination Switch
Hazard Light Switch
Start/Stop Button
Switch down Switch up
Operation Guide
1
2
3
Mode Selector: Press right part to switch up the mode. Pess
left part to switch down the mode.
17
1
Table of contents
Other niu Scooter manuals


