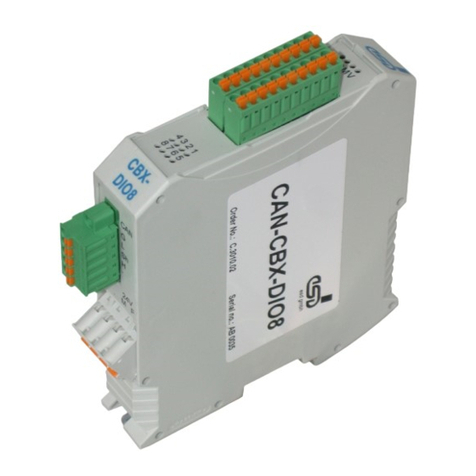
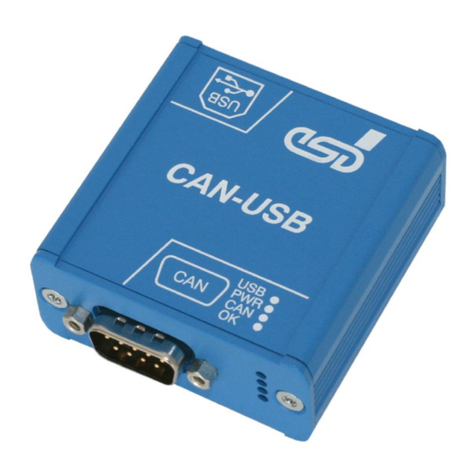
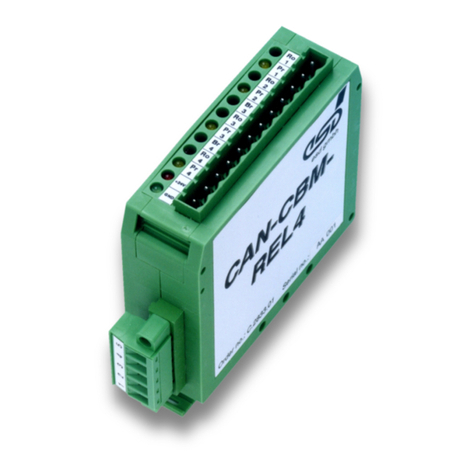
ESD CAN-CBX-DIO8-J1939 User manual

CAN-CBX-DIO8-J1939
Digital I/O module as J1939 ECU
!"#$ %#&
esd electronic system design gmbh
Vahrenwalder Str. 207 • 30165 Hannover • ermany
http://www.esd.eu
Phone: +49 (0) 511 3 72 98-0 • Fax: +49 (0) 511 3 72 98-68

N O T E
'(#)&*))()+*#(+,###&-(#.#)+,#)#$#,##)#-#),#
esd*.#+/-&-.)/)(#%(#*#))()+*#0++*#+
#+1+),))- & - #+ ( *- 11# ) ()+ *# 1) #+)1)+
#()+1#)&)#)()+*#*-,#+)#,#%##1&##+
)-#%+#+#
esd#+#$#+(#)%(*.#(%#+/)()#()+0-&)+1+0)*1$#
#),))-01#&*##+)%
)%(+()+*#)##+#$#,-esd)+),)()1)#+0#1)
&()+*#)-&*0/(#)10#+,2#esd3+/)#11$.
4 #+##)+-+#*#+)%%*,(05$#
#+##)+-+#*#+)%%*,(
6(#/#7 8
95$#
:#*-
(# ;<8
=> ;<8 9
?) )&@#+#
## ///#+#
'#*.)#+
1#A)A##%)+##**)-#*.+&)*)#6
B)/+A)+#%)+###*.&)+&1))(#C)#7#+(#)#+
(##*.+01*#+0*1-*#+*1-%++#)()+*##+#$#,-(#)
#+1#)$#/#+
%# & !"#$

Do ument file: D'#>#D.DCE7DDDDFF#F
Date of print:
Do ument
type number:
Hardware version:
Do ument History
'(#(%#+)(#*#)+#,#/&&#(%#+)(#(/#+/#+(%#+)
(##+)1)&(#&+0-
Rev. Chapter Changes versus previous version Date
=)+?%)+(*&
'#()#)+#+,2#(%#/)(&(#)#
!"#$ %#&

Safety Instru tions
G B(#/.)%/)(&/(#)+)+,#/#(#*#&-1#
-+#&&*)2-(#&**%#
G 1#(#(+)%&(#
G '(#1#*)#1#)%1+)))++1#)&)#++(/H=)%#I(#1#)%1+))+#/#
G #$##)J)+%#)+)#(#(#/)+#0##)+(.++())+*-#+
G #(#&*+0*)+#+#*
G #(#&*+(.+$),)+
G '(#*-,#*#/*)%*+#/-+/#J#$#))(#
+##/(#()%
G 1##(#2#(#+#+#>1+#)##++-(#*
))?+#*,)##*1##++1#)&)#)(##()
G +#*%##&#)$#,#+#(#
G +#&*%#+(##$)#0/()(*)%(&&#+&#-0111)#)**#)#*#+#+*+,#.#0(
#>##%#*#&1#++*#+))*+11#-
G #))+/()(###(##$)#($#,#+&&))#-1##%)+(K+$%#H7?E6
)%?9I
G '(#*--,#)$#,-1/#+11-#))+0(#1##
1/#+11-0(1$)#++&#-#>/$%#H7?E6?E6I)%?90*1)#+/)(()+
))+
Qualified Personal
'()+*#))+)###>+)$#-/+1#+J)&)#)*)#%)##)%
'(#)+)**)++))%&(#1*--,#)#,-J)&)#1#+0/()()+
()K#1#$)#+0+-+#*+##)))+)1#))%(#11),#)
++&+&#-#%)##)%
Conformity
'(#)+)+)1*##+(##*+&(#?C#%)+?
++1)#)(#&*)-#)(##&()+*
Warning: #+)#)0**#))%()+)#$)*#(#*-+#
))#&###+)/()(+#(#+#*-,##J)#.##J#*#+#+
Intended Use
'(#)##+#&(#)+(#1#)+)%)!*#+?C+1
&(#7#L)C7! &B)/+H#+#I
'(# %## %)$# ,- #+ #+ $# *%#+ /()( #+ &* )*11# +#0 +%# )
#/)(#%)+)+#%&+&#-)+)+/)%+
G '(#)+)##&)+#-
G '(#1#)&(#)(K+#+0#+#>1+#1#)-#>1+)$#
*#)+)+1#*)#
G '(#1#)&(#&*#)11+#+)+1(),)#
Servi e Note
'(##+)-1+(#J)#*)##,-(#+#'(#
#+#J)#-*&)%)&(#(/# C()K#)#$#))(#
#$)#$)+/-)*+
Disposal
#$)#+/()(($#,#*##&#)$#)(#%($#,#)+1+#)111)#/-($#
,###(#*&#&11#)+1+#+#0*.#),)#$)*#1#)
%#<& !"#$

Table of ontents
$#$)#/
+&7#L)
#)%)%*
E?+
+))&(#E?7
E?))
7##++?E?
7#E?
?E?
<6E?
E?+
)%7/)(#+<
7#)%(##)-*,#<
7&/#
<5/#+)9
<+)&(##C+)%")+#8
<#)%/#711-7)%+")+
< #)&(#/#711-6%#
<#)&
< "#*$#(##&*")+
'#()
:##'#()
CC)
#&#
<)%)!1+
9#++)%*#+
9 <6/#711-6%#
9 <
9 #&# <
9
9 1#,#,# 9
9/#711-$)")+# 8
9<)%)!1+<
9<)%)1+
9< )%)1+
9<#++)%*#
9#)!++7#)+
8"#&###+
#)&&*)-
#&*)
!"#$ %#&

Typographi al Conventions
'(%( ()+ #+)% +1#)&)) (# &/)% -1%1() $#)+ # +#
)+)%)+(#()#*+
Convention Example
=)#1(*#+ /dev/null<stdio.h>
=)*#+ open()
%**)%++ NULL
%**)%-1#+ uint32_t
6),#*#+ Count
'(#&/)%))+#+#()%()%()#,##+)1)+
Attention:
B)%+)+#-, 1#)+/()( *)%(($#/#+)#
#&&#+
Note:
#+1)+*#()%)*1+#&
Number Representation
*,#+)()+*##,+##++#+)%#(#/)+#
=(#>#)**,#+3(3)+11##=#>*1#0< )+#1#+##+ ()(#>#)*
&*
Abbreviations
11))%**)%#&#
###/.
C ##++)%C)
) )*)
5B 5/#
! 1!1
E7 E#+7)%)&))
7 +7)%)&))
11),#
7 1#)%7-+#*
7L 7&/##$#1*#L)
!"#$ %#8&

Overview
1. Overview
Figure 1:.)))%*
'(#*#+/)(#)%()%))11(#+7)>&(#+#)%)
+#1+0/#)1+
'(#*#1##+/)(=<8*)#/()(,&&#+)7"
'(#&)*/#)+)#)(#&+(*##+#+#)+#)??"
'(#&##+(#1++),))-#(#1/#+11-(#,+
+)%+$)(#")+#H'C7#I)#%#)(#*)%))$)
*#+(#,##*$#/)()#1)%(#,++)%+
'(#7*1))#&#&(#/++&##
& L,)!+
'(#)#&#)+##)-)+#,-)%))+!$##
'(#)#)-*,#,#&)%#$))%+/)(#+
%#& !"#$
+5 V=
+5 V=
C
A
N
B
U
S
CAN
Disabled
Identity No.
LEDs
Physical
CAN
Layer
Digital
Isolator
Microcontroller
MB 04 7
Electrical Isolation Coding Switches
Power Supply
24 V(DC)
InRailBus Connector
for CAN-CBX-TBUS
Power Connector
MSTBO 2,5/4-
G1L-KMGY
CAN Connector
MC1,5/5-GF-3,81
DC/DC
Converter 8x Digital
Input/Output
I/O-Connector
MCDN 1,5/10-G1-3,5
RNP26THR

Overview
1.1 CAN-CBX-DIO8-J1939 as Part of J1939 Starter Kit
'(# H# I )+ #)$## ) (# +1# & #)$#- & (#
7#L)C7! &B)/+H#+#I
Figure 2:+1&7#L)C7! &B)/+
!"#$ %#&
PC/Notebook
(Windows)
Software
Digital I/O-Module
CAN-CBX-DIO8-J1 3
CAN Cable
Termination connector "CAN-Termination-DSUB"
with female and male contacts
CAN-USB/2 Module
CAN-CBX-
DIO8-J1939
CAN-
USB/2
24 VDC
Power
Supply
CAN Cable 2,0 m
USB Cable
J1939
CAN-Starter Kit

Overview
1.2 Conne ting Diagram
Figure 3:#)%)%*&
Note:
7##+1%# &+)%++)%*#&(##+
#+##%#&)&*)#)++
+#)
%#& !"#$

LEDs
2. LEDs
2.1 Position of the LEDS
Figure 4:#+E?+
'(#*#)+#J)11#/)(<++E?+E?+&(#)1
1(#+
2.2 LED Indi ation
'(#))+#+&(#))$)E?+##+),#)(#&/)%(1#+1))1#(#
&/)%))+#+#)+)%)+(#
Indi ator
state
#+)1) 7#J##
H#((##+1+
*+I
ON E?+-
OFF E?+-&&
FLICKER E?&).#)%/)(&#J#-&11>5K
BLINK E?,).)%/)(&#J#-&11>5K
FLASH1 E? *+0*+&&
FLASH2 E? *+0E? *+&&0 *+0*+&&
FLASH3 E? >H *+0 *+&&I;>H *+*+&&I
Table 1:#+)1)&))+#+
!"#$ %#&

LEDs
2.2.1 Sour e Address Error LED
LED Colour Fun tion Indi ator
State Des ription
*#)
+(#*)
)%*M
E#
7#
#++
?
== #
E?
=EL?"
+##++,#)*#
H'(#1#&###++)+9<0(#
#++#+N 9O#*)-
)#I
M'(#+(#*))%*)+1&()+*
Table 2:#+)1)&7##++?E?+
2.2.2 CAN State LED
LED Colour Fun tion Indi ator
State Des ription
*#)
+(#*)
)%*M
S%## 7#
+#L
E?
EL B)%#$##(#
=EL?" +#1++)$#
== +&&
M'(#+(#*))%*)+1&()+*
Table 3:#+)1)&(#+#E?
2.2.3 Error LED
LED Colour Fun tion Indi ator
State Des ription
*#)
+(#*)
)%*M
M# ? == C+#0E?)+/-+&& E?
M'(#+(#*))%*)+1&()+*
Table 4:#+)1)&(#?E?
2.2.4 VIO LED
'(# 6 E? ))#+ (# P>))- 7+Q 7## (1# P7&/#P0 1%# & &(#
)&*),(#)1+
LED Colour Fun tion Indi ator
State
Des ription
*#)
+(#*)
)%*M
State of the Inputs
I8 I7
V%## 6
==
E?
=E75
=E75
=E75
M'(#+(#*))%*)+1&()+*
Table 5:#+)1)&(#6E?
%# & !"#$

LEDs
2.2.5 LEDs 1 - 8
'(#E?++(/(#++&(#)%)1+9&(#)%))1+8
H)!,-#)%++(##I
E? (# )&)
R!(#+#
*#)
+(#*)
)%*M
)+*11#,)&,-#&:9 E?<
)+*11#,)&,-# &:9 E?<
)+*11#,)&,-#&:9 E?<
< < <)+*11#,)&,-#&:9 E?<
)+*11#,)&,-#8&:9 E?<
9 9 9)+*11#,)&,-# <&:9 E?<
8 8 8)+*11#,)8&,-#&:9 <
H780S>))-!TSI
E?<
)+*11#,)&,-#&:9 <
H78 0S>))-!T SI
E?<
M'(#+(#*))%*)+1&()+*
E?> 7+&(#
&& )1$%#&(#(#>)+3&&3
)1$%#&(#(#>)+)$#H(##+1)%,)&(#:)++#I
>
!"#$ %#&

LEDs
2.3 Coding Swit hes
Figure 5:+))&(#)%+/)(#+
Note:
(#**#(#*#)++/)(#UV0(#+#&(#)%+/)(#+)+
##*)#(%#+&(#+#)%+(##&#($#,#*#,#&#+/)()%(#
*#0,#+#(%#+&(#+#)%+###*)#)%1#)
2.3.1 Setting the Identity Number
'(# )#)- & (# *# ,# +# #)* &* 8
(#>#)*&*(8=((#$#+##+#$#
'(#&()%(##,)+H()%(##),,#I,#+#/)()%+/)(5:50(#&/#
#,)+,#+#/)()%+/)(EB
EB #)-)N<O
5:5 #)-)NO
H)NO)+#+#$#,#+#)(#I
%#<& !"#$

Software
3. Software
'(#H#+#I+#+(#+*#(/#+(#1#A
*#H#+# I0,/)(*)&)#&)*/#7(##$)#
++?C)+#
++#+#+&/+
+N9O1+HW9I
+N8O1+H80I
H)!-#)%++(##I
1+
C1#/(#(##$)#++##+:9 !9 HG#)&):+I
)+*11#,)&,-#&:9
)+*11#,)&,-# &:9
)+*11#,)&,-#&:9
<)+*11#,)&,-#&:9
)+*11#,)&,-#8&:9
9)+*11#,)&,-# <&:9
1+
6#)+,+#$#-+#):9 <HS>))-7+SI
8)+*11#,)8&,-#H780S>))-!TSI
)+*11#,)&,-#H78 0S>))-!T SI
'(#E?S6S+(/+(#+#+&80+##(1#S6E?S1%#
!"#$ %#&

Hardware Installation
4. Hardware Installation
'1(#)1#)01#+#&/(#)+)#+
Step Pro edure see
page
Read the safety instru tions at the beginning of this do ument
arefully, before you start with the hardware installation! <
#+# # (# (1# P+) & (# # C+)% ")+
#QX 8
+(# *#+*1#&(#
7#L)C7! &B)/+#(#)#&#+H1/#+11-
$%#00)%))1+0)%)1+I
0
#+##((#,+(+,##*)#,(#+X esd
&&#++1#)'#+#*))#+))-(#
F:+)%(+,####(exa tly one1))
(##/.
1))1/)()#&#/()()+##)-)+#
#+1+(#%)%&(#:
& *)1# #+# )(#+*# 01#+#
#+#(#(#$)#(+)J#*#X
&##++-0(%#(#)#)-*,#$)(#)%+/)(#+
<
< 11-(# <61/#+11-$%#&(#
%#9& !"#$

Hardware Installation
4.1 Installation of the Module Using InRailBus-Conne tor
&(#,++)%+(#1/#+11-$%#+(,#&#$)(#")+01#+#1##
+&/+
Figure 6:)%)/)(,+#
+))(#")+#(#*)%)+1)(#*)%)+)%
+)%(1#++#%(#,+#+%#(#(#**))1/#
+)%+ H) 1# /)( #I '(# ,+ #+ ,# 1%%# %#(# ,#&# &#
*)%(#*#+
#(#*#/)((#)%)#/-(#1#%#&(#*)%)
Figure 7:)%*#+
7/)$# (# *# (# *)% ) ) 1#++)% (# *# //+
)%(#/++(/)&)%#8'(#(+)%)+*#()-%)#,-(#)
,+#
< B(#*)%(#*#(#*#&(+1+(#,*#%#&(#
*)% ) / (# *# )+ *# (# *)% ) ## (#
")+ $) (# ,+ # # (# ,+ #+ (# ")+0 )&
#-#
!"#$ %#8&

Hardware Installation
Figure 8:#*#
4.1.1 Conne ting Power Supply and CAN Signals to CBX-InRailBus
'#(#1/#+11-(#+)%+$)(#")+0#*)1%)+###
'(##*)1%)+)#)#)$#-*+,###+#1#-H# 0
+###)&*)I
Figure 9:)%)/)(")+#*)1%
% (# #*) 1% ) (# +.# (# )%( & (# *)%) ,+ # & (#
")+0+#+),#)=)%#'(##(#)#&#(#1/#+11-$%#
$)(##*)1%
%#& !"#$

Hardware Installation
4.1.2 Conne tion of the Power Supply Voltage
Attention:
#+# # (# +&#- )+)+ ))% (# #J)#*#+ 1/# +11-
#))+H+##1%#<IX
Attention:
'(##)+&(# <61/#+11-#)#-##*+,#
+11)#,-/)#1##1/#+#+(#+*#)*#X
Figure 10:#)%(#1/#+11-$%#(#+)
Earthing of the Mounting Rail
Note:
'(#*#)+##/)((#*)%)$))+&)#(
'()+)*1$#+(#+,))-%)+##*%#))+,#+
'(+(#*)%)+(,###111)#&)#()
(##$)*#)(#)+)
#+##0((#)*1##&(##)(+,#.#1/
'(#&)#(&(#*##+#+###)+&#-
!"#$ %#&

Hardware Installation
4.1.3 Conne tion of CAN
Figure 11:#)%(#+)%+(#+)
:##-(#+)%+,#&#$)(##&(#&)+*#&(#
+)'(#+)%+#(###(%((#+)$)(#")+'
1(%((#+)%+(#,+#&(#+*#&(#
+)(+,#+#'(##+&(#*#+/()(#(#
#+&(#+)*+,###(#,+0,#+#()+/+#
)#,()%
,+#*))*+,###(##&(#*#(##&
(#")+H+##=)%#I0)&(#,+#+(##
4.2 Remove the CAN-CBX Module from InRailBus
&(#*#)+##(#")+1#+#1##+&/+
"##+#(#*#&*(#*)%))*$)%(#&(H+##=)%#I//+H#%
/)(+#/)$#I/(#*#)+#(#&*(#,*#%#&(#*)%)
,##*$#
Note:
)+1++),##*$#))$)#$)#+&*(#+)/)()#1)%(#
")+#)0,#+#(#()/),#)+1#
%# & !"#$

Te hni al Data
5. Te hni al Data
5.1 General Te hni al Data
/#+11-
$%#
*)$%# <6!
)1$%#%# 6!
YZ[[\]^_Y`]aZbc^d`]_efg_hi_fj_klmn -1*0H/)(6I
*><*
#+
<6
00
")+
H<1)1%#/)(+1)%%##)0I
<61/#+11-$%#
H 1)1%#0<I
)%))1!1
H1)))#09I
)#&#
H1)?'C7#0(#)>I
)#/#+11-$%#$)")+
-&#+1%**)%11+#+H)#I
H91)+.##I
'#*1##
%# ;8o*,)##*1##
5*))- *>p0#+)%
#)++
)#%## *>)**1#*)++),#)%?9
)#%##
5+)% 1+)(+)%&)#)*)%7!80?98
)*#+)+ /)( **0(#)%(**0#1(<**
H/)(#+I
B#)%( 11>%H),#I
Table 6::##&(#*#
5.2 CPU Unit
C 9,)q=<8
" L,-#)#%#
=+( 9<L,-#)#%#
??" L,-#$)r
Table 7:)1#++#*-
!"#$ %# &
Table of contents
Other ESD Control Unit manuals
Popular Control Unit manuals by other brands

inVENTer
inVENTer sMove Operation instructions

Imi Heimeier
Imi Heimeier Hydrolux quick start guide

Festo
Festo MS4/6-E-IPM-40-80 Assembly instructions

Telit Wireless Solutions
Telit Wireless Solutions LE910C1-NA Hardware user's guide

Grundfos
Grundfos MAGNA1 D manual

FrSky
FrSky R9M Lite Pro instruction manual

Festo
Festo CPX-AP-A-12DI4DO-M12-5P operating instructions

IBA
IBA ibaFOB-io-ExpressCard Series manual

Grundfos
Grundfos CU 401 Installation and operating instructions

Still
Still Easy Control Original instructions

Leb Electronics
Leb Electronics CTR61 instruction manual

Zennio
Zennio ZVPCB1MB Assembly instructions