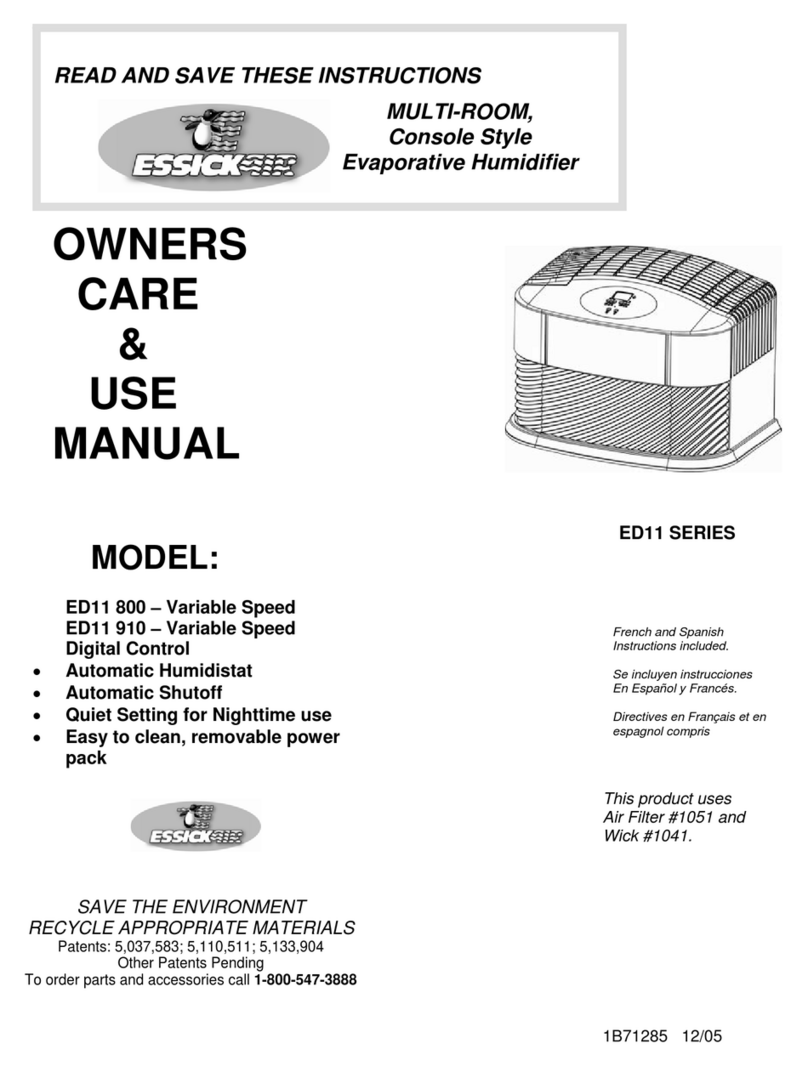
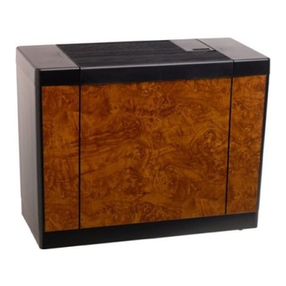
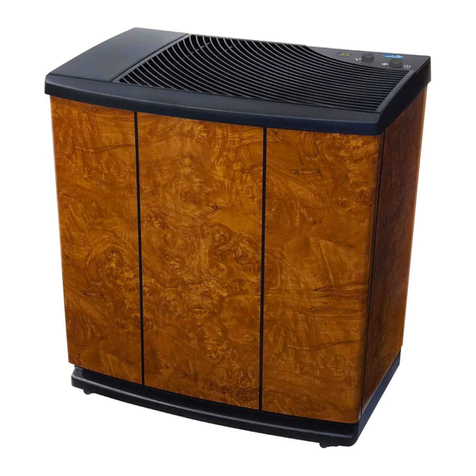
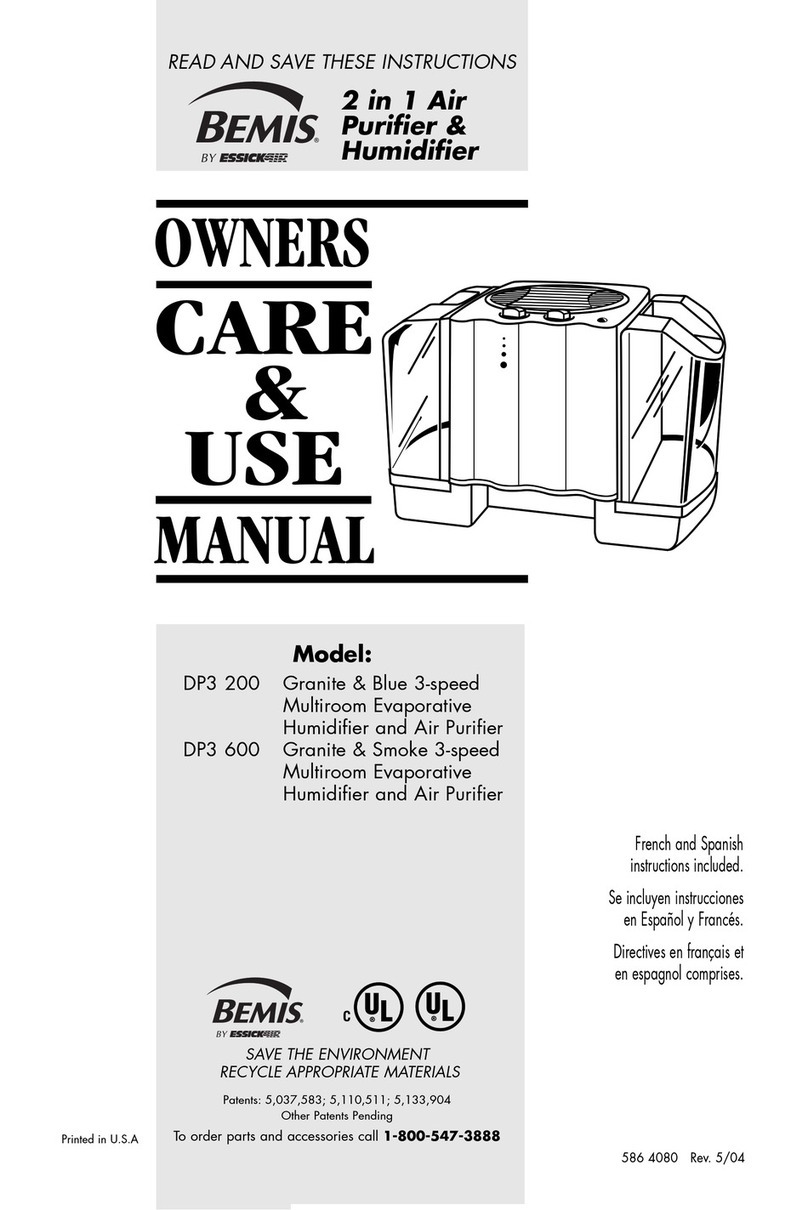
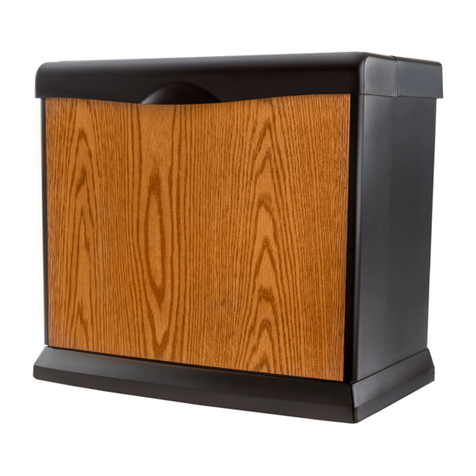
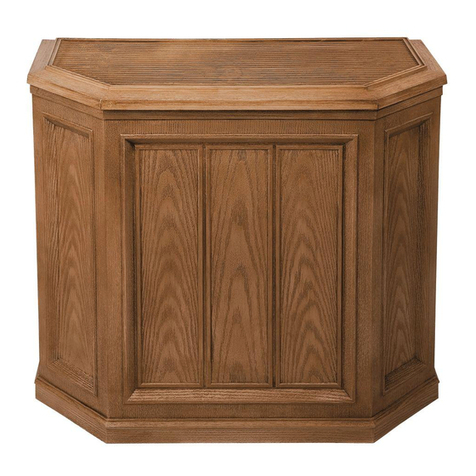
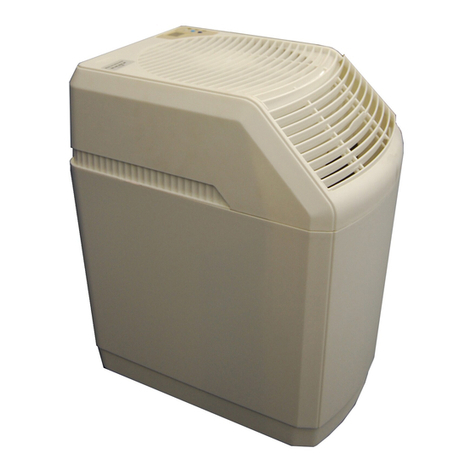
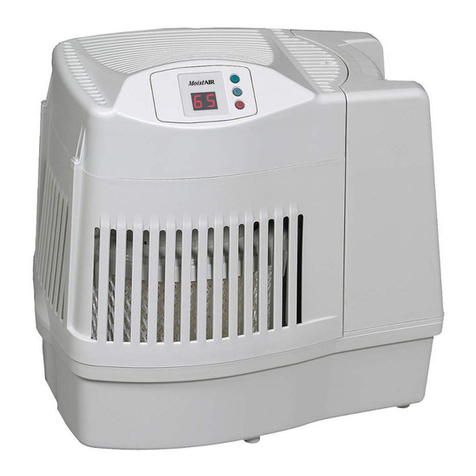
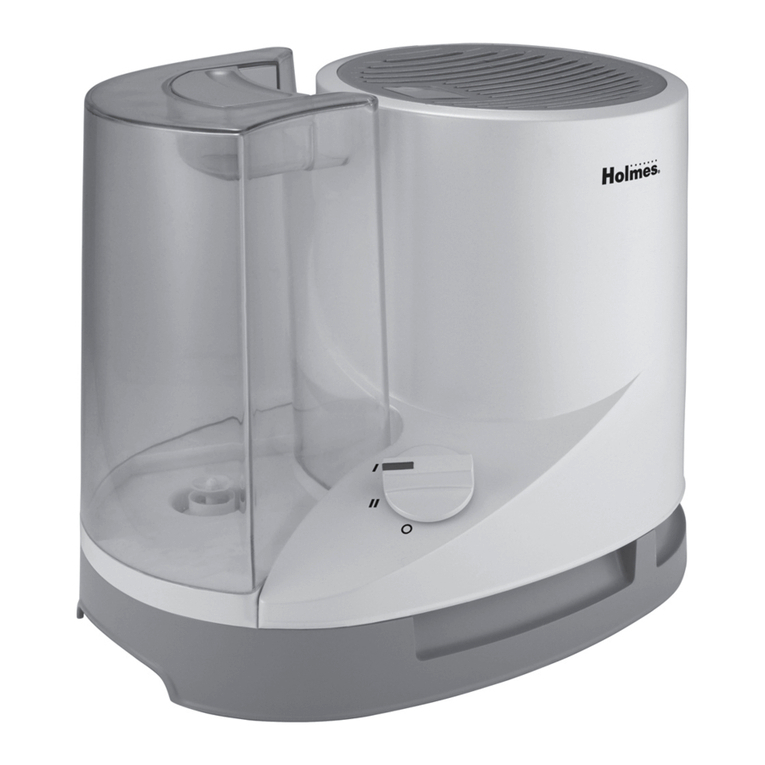
Essick Bemis H12 001 Guide

L
U
®
C
Printed in U.S.A
READ AND SAVE THESE INSTRUCTIONS
586 2040 Rev. 4/04
L
U
®
French and Spanish
instructions included.
Se incluyen instrucciones
en Español y Francés.
Directives en français et
en espagnol comprises.
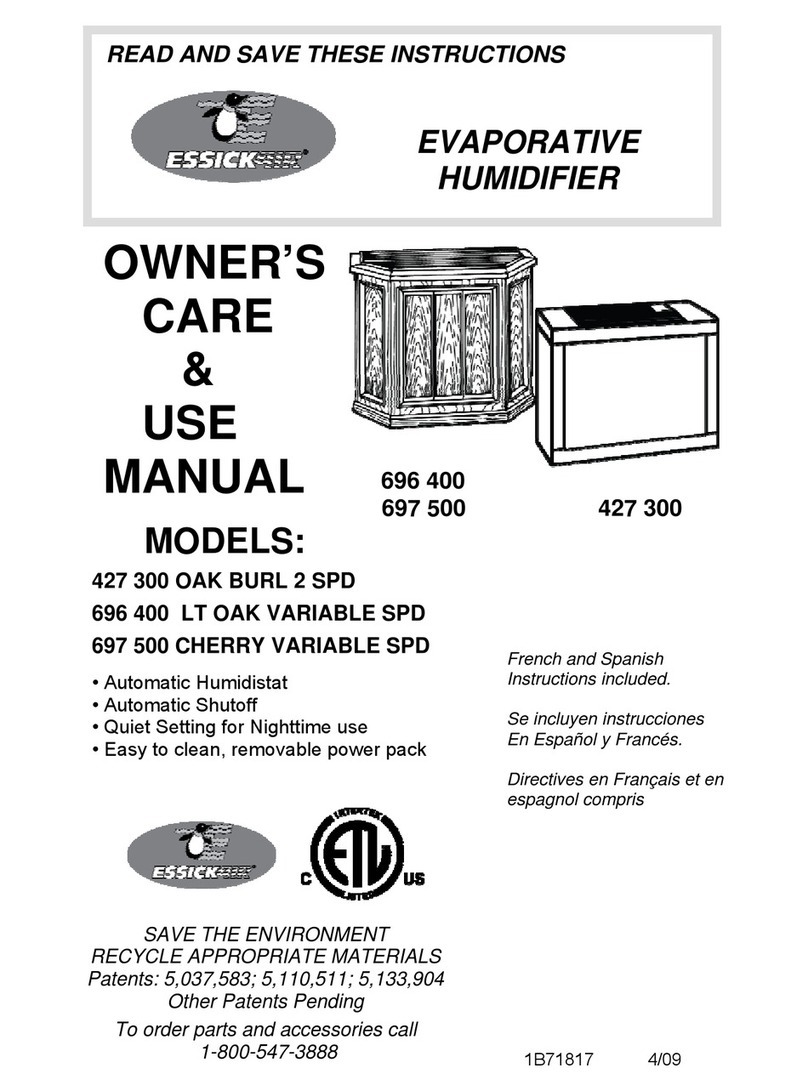
Evaporative
Humidifier
OWNERS
CARE
&
USE
MANUAL
Models:
H10 400 Console, Two Speed
H12 001 Console, Three Speed
H12 300 Console, Three Speed
H12 400 Console, Three Speed
H12 600 Console, Three Speed
• Easiest to Fill
• Easiest to Clean
• Quiet Setting for Nighttime Use
• Automatic Humidistat
• Automatic Shutoff
SAVE THE ENVIRONMENT
RECYCLE APPROPRIATE MATERIALS
Patents: 5,037,583; 5,110,511; 5,133,904
Other Patents Pending
To order parts and accessories call 1-800 547-3888

Important Safeguards
READ BEFORE USING YOUR HUMIDIFIER
1) This appliance has a polarized plug (one blade is wider than the other). To reduce the
risk of electric shock, this plug is intended to fit into a polarized 120-volt, 15-amp outlet
in only one way. If the plug does not fit fully in the outlet, reverse it. If the plug still does
not fit, contact a qualified electrician. Do not attempt to defeat this safety feature. If an
extension cord must be used, it should also accept the wide blade plug and meet this
electrical rating.
2) Do not place the cord under rugs, in traffic areas, or near heat sources.
3) Do not use the humidifier if the cord is damaged.
4) Always unplug the power cord before cleaning, servicing, or when the unit is not in use.
5) Do not place the humidifier near loose drapes, combustible materials, or heat-producing
objects.
6) This humidifier is UL listed with the Bemis by Essick Air brand evaporative wicks in
place. To maintain your UL rating, see your service center for all repairs. To maintain
your certified rating, use only Bemis by Essick Air brand replacement wicks and chemi-
cals. To order parts, wicks, and chemicals, call 1-800-547-3888.
7) Regular cleaning is recommended. Refer to the CARE & MAINTENANCE section in this
manual.
8) It is very important that cleaning solutions and other liquids (such as bleach) which may
be used to clean the cabinet are not sprayed or applied to the power pack/chassis
assembly. These cleaning solutions can cause a serious electrical malfunction of the
humidifier.
Introduction
Your Bemis by Essick Air humidifier adds
invisible moisture
to your home by moving dry
inlet air through a saturated wick. As air moves through the wick, the water evaporates into
the air, leaving behind any white dust, minerals, or dissolved and suspended solids. Because
the water is evaporated, there is
no messy mist or spray
and
no white dust
, just clean
and invisible moist air. As the wick traps accumulated materials from the water, its ability to
absorb and evaporate water decreases.
We recommend changing the wick at least
once a year
, preferably disposing of the used wick at the end of the humidifying season
and starting with a new wick at the beginning of the next humidifying season. In hard water
areas, more frequent replacement may be necessary to maintain your humidifier’s efficiency.
CAUTION - We recommend Bemis by Essick Air Bacteria Treatment whenever
you refill the water bottles to eliminate bacteria growth. Follow the directions
to determine the proper amount to be added to the 2.5-gal. water bottle.
The wick does not require the use of chelating agent-type water treatments that
are intended for use in Rotobelt or waterwheel-type humidifiers.

Important Filling
Information
1) Your humidifier is equipped with one water bottle. When both the water bottle and reser-
voir have emptied, the humidifier fan will automatically shut off, but will start again auto-
matically when the water bottle and reservoir are refilled.
2) When the bottle is being filled for the first time and the wick is still dry, it will take
approximately 20 minutes to drain the bottle into the reservoir. After the bottle has emp-
tied into the reservoir, it should be refilled again to obtain maximum running time.
3) When refilling the bottle and the wick is still wet, it will take approximately 12 minutes
to refill the reservoir. At this time, you should refill the bottle for maximum running time.
4) Dry air is drawn into the humidifier through the back and moisturized as it passes
through the evaporative wick. It is then fanned out into the room.
1) Water bottle
2) Chassis/Power Pack
(motor and fan assembly)
3) Evaporative wick
4) Water reservoir
5) Dry room air intake
6) Moist air output
5) Locate your humidifier on an inside wall near an electrical outlet. The humidifier should
be at least 4” away from the wall for best results. Do not position the unit directly in
front of a hot air duct or radiator.
Assembly and Operation
1) Remove the two polyfoam inserts from the top of the humidifier.
2) Lift off the black water bottle cover (left-hand side). Remove the water bottle, lift off the
chassis/power pack and then remove the humidifier cabinet from the carton.
3) Remove the evaporative wick, float assembly (black rod with white float), and all of the
remaining packaging materials from the cabinet. Check to see that you have all of the
following items removed from the boxed accessory kit and cabinet before discarding the
packaging:
• Filler hose • Bacteria treatment
• Caster kit • Water bottle with cap.
• Optional AirCare®filter. (May be purchased as an accessory.)
6
2
1
5
53
4

ASSEMBLY
CASTERS
4) Turn the emptied cabinet upside down. Insert each caster stem into the four caster holes
in each corner of the humidifier bottom. The casters should fit snugly and be inserted
until the stem shoulder reaches the
A.
cabinet surface. Do not force.
5) Turn the cabinet right side up.
EVAPORATIVE WICK
6) When placing the wick back into the humidifier,
the rod and float assembly must also be reat-
tached. Insert the top of the float rod through the
hole on the extended wick retainer (attached to
the top of the wick frame) (A). Holding
B.
the float in place, lower the wick and float
assembly together into the cabinet. The wick has
a mounting rib on the top edge which hooks over
a rib at the inside back of the cabinet. The white
float must be positioned into the pocket in the
bottom of the cabinet. (B)
AIR CLEANING FILTER
(OPTIONAL)
7) The AirCare filter has four tangs
C.
that engage into four keyhole slots that mount
the AirCare filter onto the outside of the back of
the cabinet. (C)
CHASSIS/POWER PACK
8) Place the chassis/power pack unit into the cabi-
net, so it fits without tipping or rocking.
BOTTLE
9) Fill the bottle with cool, fresh
D.
(preferably unsoftened) water. If you only have
softened water available in your home, you can
use it, but you will notice a buildup of minerals
on the wick much sooner.
The bottle holds 2.5 gallons. When filling, be
careful not to pressurize it by overfilling. Bottle
damage can result from this. A fill hose is provid-
ed with your humidifier which will fit most
faucets.
Place the water bottle into
the left side of the humidifier with the valve cap end down, so

that the groove in the water bottle faces the inside.
(D) Replace the
black water bottle cover, and this will complete assembly.
Do not attempt to move a filled humidifier as the water in the reservoir will spill out the
rear grille opening. Empty the unit before relocating.
Note: for optimum running time, fill the water bottle, tighten the cap, and
place inside unit, allowing it to completely drain into the water reservoir. This
may take up to a half hour. Then refill the bottle and replace in cabinet. Do
not fill the reservoir with a bucket, as overfilling will result in water damage.
Use only the bottle provided.
10) We recommend using Bemis by Essick Air Bacteria treatment whenever you refill the
water bottle to eliminate bacterial growth. Add bacteriostat according to the instructions
on the bottle and then tighten the valve cap on your water bottle.
OPERATION
11) Plug cord into wall receptacle. Your
humidifier is now ready for use. Position the
unit at least four inches from the wall for
best results.
12) The H10 2-speed or H12 3-speed fan
control allows you to use a low setting for
the most quiet operation or a high setting
for maximum output.
13) All models have an automatic humidistat. The humidistat will turn the humidifier on when
the relative humidity in your home is below the humidistat setting and will turn the humid-
ifier off when the relative humidity reaches the humidistat setting. For initial operation,
set the humidistat at the “two-droplet” position and adjust up or down from there to
achieve the desired humidity level.
14) The refill light will indicate when the unit is completely out of water. The motor will also
shut off. To refill the unit, see Step 9.
Optional AirCare®Filter
The first stage of the air filter is 3M Filtrete™, a high-efficiency, electrostatically charged filter
media which traps dust, pollen, and airborne pollutants. The second stage of the AirCare fil-
ter is an activated carbon media which absorbs odors from cooking, pets, or tobacco smoke.
We recommend replacing the AirCare filter at least once a year, and more often if necessary.
When the white filter media is coated with a layer of dust and dirt, it is time to replace the
AirCare filter.
The certified water output of your humidifier will be reduced when using the AirCare filter.
AirCare filters are optional and are not required for normal operation of the humidifier.
FILTRETE™ is a trademark of 3M Corp.

Care and Maintenance
IMPORTANT: We recommend cleaning your humidifier every two weeks.
Follow instructions.
Humidifiers provide comfort by adding moisture to dry, heated indoor air. To get the most
benefit from the humidifier and to avoid product misuse, follow all instructions carefully,
specifically the operation and care and maintenance guidelines. Please note this is an electri-
cal appliance and requires careful attention when in use.
In addition, if you do not follow the recommended care and maintenance guidelines, microor-
ganisms may be able to grow in the water within the humidifier’s reservoir.
Caution: Disconnect power before cleaning or servicing unit.
WARNING: It is very important that cleaning solutions, such as bleach, bacte-
ria treatment, or descaler which could be used to clean the cabinet are not
sprayed or applied to the chassis/power pack assembly. Additionally, do not
immerse the power pack in water or any other solution. These solutions can
cause a serious electrical malfunction of the humidifier.
1) Turn unit off by turning humidistat completely counterclockwise.
2) Unplug electrical cord from wall outlet.
3) Lift out water bottle.
4) Lift off chassis/power pack.
5) Carefully lift wick with rod and float assembly from cabinet, allowing any water to drain
from it into cabinet reservoir. Then remove float assembly from wick.
REMOVING SCALE FROM THE CABINET
6) Remove any remaining water in the reservoir with a sponge. Fill the reservoir with one
gallon of fresh warm water and one 8-oz. cup of undiluted white vinegar. Let solution
stay 20 minutes. Clean all interior surfaces with soft brush. Dampen soft cloth with undi-
luted white vinegar and wipe out the reservoir to remove scale.
7) Rinse the reservoir thoroughly with water to remove scale and cleaning solution before
disinfecting.
DISINFECTING CABINET RESERVOIR
8) Fill the reservoir with a mixture of one teaspoon chlorine bleach and one gallon of fresh
warm water. Let solution stay 20 minutes, swishing every few minutes. Make sure the
cleaning solution does not come in contact with the chassis/power pack. Do not attempt
to pour liquid directly through the grille into the humidifier cabinet.
9) Empty the reservoir after 20 minutes. Rinse with water until bleach smell is gone. Dry
with clean cloth or paper towel.
10) Clean all surfaces of the chassis/power pack with a soft, dry cloth. DO NOT USE LIQ-
UID CLEANING SOLUTIONS, INCLUDING WATER, TO CLEAN THE CHASSIS/POWER
PACK. AN ELECTRIC SHOCK MAY RESULT OR THE HUMIDIFIER MAY BE DAMAGED.

DISINFECTING THE BOTTLE
11) Remove the water bottle cap and empty remaining water into a drain. Pour a mixture of
one pint of water and two tablespoons of household bleach into the bottle. Replace cap
and shake bottle thoroughly. Remove cap, drain bottle into sink, rinse well with fresh water.
RE-ASSEMBLE THE UNIT
12) Replace the wick with rod and float assembly into water reservoir, allowing the wick to
hang from the rib on the inside back wall of the cabinet and positioning the white float
into the pocket on the bottom of the cabinet.
13) Replace chassis/power pack unit in cabinet, ensuring that the chassis sits correctly on
the front, back, and right edges of the cabinet.
14) Replace filled water bottle into cabinet, allow to drain, then refill the bottle for maximum
running time.
15) Replace the bottle cover onto cabinet.
16) Plug cord into wall outlet.
17) Reset humidistat to desired setting.
EVAPORATIVE WICK
18) We recommend replacing the wick at least once a season, more often in hard water
areas. When the wick appears excessively clogged with mineral deposits, discard it and
restore your humidifier’s efficiency with a new wick. Bemis by Essick Air wick No. 1045
fits only the H12 Series. Call 1-800-547-3888 to order.
Only Bemis by Essick Air
Wicks guarantee the certified output of your humidifier.
Use of evaporative
wicks other than Bemis by Essick Air evaporative wicks will void your warranty, as well
as the certification of output, and may reduce the efficiency and output of your humidifier.
19) NOTE: When replacing the wick, the float rod retainer must be extended prior to insert-
ing the float rod.
Summer Storage
To dry your unit before storage, unplug the cord, remove and empty the water bottle, remove
the power pack, and use a clothespin to clamp the wide circular disk on the float rod to the
wick retainer. This will hold the float in an upright position causing the unit to run continuous-
ly. Re-assemble the unit, plug it in and turn the humidistat fully clockwise to lock the unit on.
Run on any speed until the wick is dry. When your wick and unit have thoroughly dried,
remove the clothespin.
1) Clean unit as outlined in Care & Maintenance section.
2)
Discard the used wick. Install a new Bemis by Essick Air wick at the beginning of the next
season. Only Bemis by Essick Air wicks guarantee the rated output of your humidifier
.
3) Do not store with a wet wick or water inside the unit or water bottle, as this could
become a potential source of bacteria growth.
4) Do not store unit in attic or other high-temperature area.
5) Clean humidifier and install new wick before the next season begins.
6) A convenient order form for wicks and accessories is found in the back of this manual.

Accessories
EVAPORATIVE WICK
Model 1045.
Replaceable evaporative wick continuously draws up moisture as it
filters out mineral deposits. Reduces scale buildup in the unit. Only
Bemis by Essick Air wicks are UL and AHAM certified to provide the
rated performance from your Bemis by Essick Air Evaporative
Humidifier. The Model 1045 wick includes a float rod retainer,
which must be extended prior to use.
AIRCARE FILTER (OPTIONAL)
Model 1051
Replaceable two-stage AirCare filter - 3M Filtrete(tm) - removes air-
borne particles and activated carbon removes odor. This is not stan-
dard on all units. It may, however, be added as an accessory to any
Bemis by Essick Air Console Humidifier.
BACTERIA TREATMENT
No. 1970 - 32-oz. Bacteria Treatment
No. 1970CN - 32-oz. Bacteria Treatment (in Canada)
Controls bacteria growth in humidifiers. and helps eliminate unpleasant
odors. Follow directions on bottle for proper application. This solution should
not be used to clean the humidifier chassis/power pack. Improper use of this
solution can cause a serious electrical malfunction of the humidifier. Do not
allow it to come in contact with any electrical component.
HUMIDIFIER DESCALER/CLEANER
No. 1961 - 32-oz. Descaler/Cleaner
Bemis by Essick Air Humidifier Descaler will clean and prepare your humidifi-
er for efficient operation by removing any lime scale buildup or sediment in
the water reservoir. This solution should not be used to clean the humidifier
chassis/power pack, or as an additive to the water bottle or reservoir during
humidifier operation. Improper use of this solution can cause a serious electri-
cal malfunction of the humidifier. Do not allow it to come in contact with any
electrical component.

HOME COMFORT DIVISION
ONE-YEAR LIMITED WARRANTY
The Bemis by Essick Air humidifier warranty covers defects in materials and workman-
ship for a period of one year from date of retail purchase. This warranty applies only to the
original purchaser of the product.
Within the first 12 months from date of purchase, Essick Air will repair or replace, at its
discretion, any defective part of the humidifier covered by this warranty.
This warranty gives you specific legal rights, and you may also have other rights which
vary from state to state or province to province.
This warranty does not cover damage resulting from misuse or abuse of the humidifier,
accidents or alterations to the product, commercial use or damage during shipment. Misuse
includes malfunctions caused by negligence in cleaning or parts fouled with mineral deposits
due to hard-water conditions. Alterations to the product include the substitution of non-
Bemis by Essick Air brand components including, but not limited to, wicks.
If service becomes necessary, take or send the product to any Bemis by Essick Air
service center.
Essick Air Products
5800 Murray Street
Little Rock, AR 72209
501.562.1094

Impreso en EE.UU.
LEER Y CONSERVAR ESTAS INSTRUCCIONES
Humidificador
Vaporizador
MANUAL
CUIDADO
Y USO
POR EL
PROPIETARIO
Modelos:
H10 400 Consola, dos velocidades
H12 001 Consola, tres velocidades
H12 300 Consola, tres velocidades
H12 400 Consola, tres velocidades
H12 600 Consola, tres velocidades
• El más rápido de llenar
• El más rápido de limpiar
• Configuración silenciosa para uso
nocturno
• Arranque automático
• Interrupción automática
PROTEJA EL MEDIO AMBIENTE
RECICLE LOS MATERIALES APROPIADOS
Patentes 5,037,583; 5,110,511; 5,133,904
Otras patentes pendientes
Para ordenar repuestos y accesorios llamar al 1-800 547-3888
L
U
®
C
L
U
®

Salvaguardas importantes
LEER ANTES DE USAR EL HUMIDIFICADOR
1) Este artefácto doméstico tiene un enchufe polarizado (una espiga es más ancha que la
otra). A fin de reducir el riesgo de shock eléctrico este enchufe ha sido ideado para
encajar de una sola manera en un tomacorriente polarizado de 120 Voltios y 15
Amperes. Si el enchufe no entrara completamente dentro del tomacorriente, inviértalo. Si
el tomacorriente aún no encaja, contacte a un electricista calificado. No intente anular
este dispositivo de seguridad. Si se requiere el uso de un cordón de extensión eléctrica,
el mismo debería también aceptar la espiga ancha del enchufe y lograr esta condición
operativa eléctrica.
2) No coloque al cordón debajo de alfombras, en áreas de tráfico, o cerca de fuentes de
calor.
3) No utilice el humidificador si el cordón está dañado.
4) Siempre desconecte el cable eléctrico antes de la limpeza, mantenimiento, o cuando la
unidad no está en uso.
5) No coloque el humidificador cerca de cortinas sueltas, materiales combustibles, u obje-
tos que produzcan calor.
6) Este humidificador está certificado UL cuando tiene la mecha vaporizadora marca
Bemis by Essick Air instalada. A fin de mantener el rendimiento UL, visite a su servi-centro
para todas las reparaciones. Para mantener el rendimiento certificado utilice solamente
repuestos humidificadores y productos químicos de marca Bemis by Essick Air. Para
ordenar piezas, mechas vaporizadoras y productos químicos llame al 1-800-547-3888
.
7) Se recomienda limpiar con regularidad. Referirse a la sección de este manual: CUIDA-
DO Y MANTENIMIENTO.
8) Es muy importante que las soluciones de limpieza y otros líquidos (tales como el cloro)
que pueden ser usados para limpieza del gabinete, no sean rociados o aplicados al
conjunto de chassis/fuente alimentadora. Esas soluciones de limpieza pueden causar un
serio defecto eléctrico al funcionamiento del humidificador.
Introducción
El humidificador Bemis by Essick Air agrega invisible humedad al hogar circulando la entra-
da de aire seco a través de una mecha vaporizadora saturada. A medida que el aire pasa
a través de la mecha, el agua se vaporiza dentro de la misma, dejando detrás cualquier
polvo, minerales, o sólidos disueltos o en suspensión. Dado que el agua se encuentra vapor-
izada, no existe niebla que ensucie ni polvo blanco, tan solo aire húmedo límpio e invisible.
A medida que la mecha vaporizadora atrapa los materiales acumulados del agua, decrece
su facilidad para absober y vaporizarar el agua.
Recomendamos reponer la mecha vaporizadora por lo menos una vez al año, preferible-
mente tirando la mecha vaporizadora usada al fin de la estación de humidificación y comen-
zando con una nueva al principio de la nueva estación. En lugares de aguas duras, puede
hacerse necesario el reemplazo más frecuente a fin de manterner la eficiencia del humidifi-
cador.

PRECAUCION – Recomendamos el Tratamiento Bactericida Bemis by Essick Air
cada vez que vuelva a llenar las botellas de agua a fin de eliminar el desar-
rollo de baterias. Seguir las indicaciones para determinar la adecuada canti-
dad que debe adicionarse a 2.5 galones (11.36 Lts.) de agua.de la botella.
La mecha vaporizadora no requiere el uso de agentes ionizantes para el
tratamiento del agua intentados en Rotobelt o humidificadores del tipo “rueda
de agua”.
Información importante para
el rellenado.
1) El humidificador está equipado con una botella para el agua. Cuando ambos, el
depósito y la botella de agua se hayan vaciado, el ventilador del humidificador se apa-
gará automáticamente, pero arrancará automáticamente cuando la botella de agua y el
depósito estén llenos nuevamente.
2) Cuando la botella se llena por primera vez y la mecha vaporizadora está aún seca,
tomará aproximadamente 20 minutos vertir la botella dentro del depósito. Luego que la
botella se ha vaciado dentro del depósito , esta debe ser llenada nuevamente a fin de
obtener el máximo de tiempo de trabajo.
3) Cuando se llena la botella y la mecha vaporizadora está aun húmeda tomará aproxi-
madamente 12 minutos volver a llenar el tanque. En este punto la botella debe ser llena-
da para lograr el mayor tiempo posible de trabajo.
4) El aire seco es succionado dentro del humidificador a través de su parte trasera y
humedecido a medida que pasa a través de la mecha vaporizadora. Es luego soplado
dentro de la habitación.
1) Botella de agua
2) Chassis/Fuente de poder
3) Mecha vaporizadora
4) Depósito de agua
5) Habitáculo de toma de aire seco
6) Salida de aire húmedo
5) Ubicar el humidificador en una pared interior cercana al toma corriente. El humidifi-
cador debería estar por lo menos 4” alejado de la pared para un mejor resultado. No
instalar la unidad directamente enfrente a un conducto de aire caliente o radiador.
Armado y operatividad
1) Quitar los dos insertos de plástico expandido (espuma) de la tapa del humidificador.
6
2
1
5
53
4

2) Levantar la cobertura negra de la botella de agua (lado izquierdo). Quitar la botella de
agua, levantar el paquete chassis/fuente alimentadora y luego quitar el gabinete del
humidificador de la caja de cartón.
3) Remover la mecha vaporizadora, el conjunto flotador (varilla negra con flotador blan-
co), y todos los restantes materiales de embalaje del gabinete.Antes de descartar el
embalaje, verifique que los siguientes items hayan sido retirados del embalaje del
equipo de accesorios y gabinete,.
• Filler hose
• Manguera de llenado
• Tratamiento bactericida
• Equipo de ruedas de agua
• Botella de agua con tapón
• Filtro opcional de aire AirCare‚. (Puede ser comprado como un accesorio)
ARMADO
RUEDAS
4) Ponga invertido el gabinete vacío. Inserte cada vástago de rueda dentro de los cuatro
agujeros para las ruedas en cada esquina del fondo del humidificador. Las ruedas de
agua deben calzar ajustadas y deben ser
A.
insertadas hasta que el hombro del vástago
alcance la superficie del gabinete. No lo fuerce.
5) Vuelva el gabinete hacia arriba.
MECHA VAPORIZADORA
6) Cuando se coloca la mecha vaporizadora dentro
del humidificador, el conjunto de varilla y flota-
dor deben ser re-ensamblados. Insertar el
extremo de la varilla flotante a través del
B.
agujero en el retén extendido de la mecha
vaporizadora (adherido al tope del marco del
humidificador). (A) Sujetando el flotador en su
lugar, bajar la mecha vaporizadora y el conjunto
flotante dentro del gabinete. La mecha vapor-
izadora tiene una pestaña en el borde superior
que engancha por encima la a la parte interior
trasera del gabinete. El flotador blanco debe ser
posicionado dentro del alojamiento en el fondo
del gabinete. (B)

FILTRO LIMPIADOR DE AIRE C.
(OPCIONAL)
7) El filtro de aire tiene cuatro espigas, que ajustan
dentro de los cuatro agujeros ranurados que
montan el filtro de aire dentro del exterior de la
parte trasera del gabinete. (C)
CHASSIS/FUENTE ALIMENTA-
DORA
8) Colocar la unidad del chassis/fuente alimentadora dentro del gabinete de manera que
calce sin necesidad de golpear ni oscilar.
BOTELLA
9) Llene la botella con agua limpia
D.
(preferentemente desendurecida). Si solo tiene
agua dura puede usarla, pero notará antes de
tiempo una acumulación de minerales en la
mecha vaporizadora.
La botella contiene 2.5 galones (11.36 Lts.).
Cuando se llene, tener la precaución de no
presurizarla por sobre llenado. De esto podría
resultar la botella dañada. Junto al humidificador
se provee una manguera de llenado que encaja
en la mayoría de las canillas.
Coloque la botella de agua adentro, del
lado izquierdo del humidificador con el extremo de la tapa de
válvula hacia abajo, de manera que la ranura de la botella
de agua mire hacia el interior.
(D) Reemplace la cobertura negra de la
botella de agua y esto completará el ensamblado.
No intente mover al humidificador lleno dado que el agua del depósito se derramará
fuera de la rejilla de apertura. Vacíe la unidad antes de re-ubicarla.
Nota: para un óptimo resultado de trabajo, llene la botella de agua, ajuste
la tapa, y coloque la unidad interna, permitiendo que ésta desagüe comple-
tamente dentro del depósito del agua. Esto puede tomar hasta media hora.
Luego llene la botella y reemplácela en el gabinete.No llene el depósito con
un balde, porque el exceso del llenado resultaría un daño por agua. Utilice
solamente la botella provista.
10) Recomendamos el uso del tratamiento Bacteriológico Bemis by Essick Air cada vez que
se llene la botella a fin de eliminar el desarrollo bacteriológico. Agregar Bacteriostat
conforme a las instrucciones de la botella y luego ajustar la tapa de la válvula en la
botella de agua.
OPERACION
11) Enchufe el cordón en el tomacorriente de la pared. El humidificador está ahora listo
para el uso.Situar la unidad por lo menos a cuatro pulgadas (aprox. 10 cm.) de la
pared para un mejor resultado.

12) El ventilador H10 de 2 velocidades o el H12 de 3 velocidades, el permite utilzarlo en
una regulación baja permitiendo una operación más silenciosa, o a una regulación alta
para obtner una máxima salida.
13) Todos los modelos tienen un hidrostato. El hidrostato arrancará al humidificador cuando
la humedad relativa del hogar sea menor que la establecida en el hidrostato, y apa-
gará al humidificador cuando la humedad relativa llegue a los valores fijados en el
hidrostato. Para la operación inicial fijar el hidrostato en la posición “two-droplet ” y
ajustar desde aqui hacia arriba o abajo para lograr el nivel de humedad deseado.
14) La luz de re-llenado indicará que la unidad está sin agua completamente. El motor tam-
bién se apagará. Para re-llenar la unidad ver paso 9.
Filtro Opcional AirCare®
El primer estado del filtro de aire es el 3M Filtrete™, un filtro de alta eficiencia, cargado
electrostáticamente, el cual atrapa polvo, polen, y contaminantes en suspensión. El segundo
estado del filtro AirCare es un elemento medio de carbón activado que absorbe olores de
comida, de animales domésticos o del humo del tabaco. Recomendamos reemplazar los fil-
tros AirCare por lo menos una vez por año, y más a menudo si fuera necesario. Cuando el
filtro AirCare está cubierto por una capa de polvo y suciedad es momento de reemplazarlo.
Los filtros AirCare son opcionales y no son requeridos para una operación normal del humid-
ificador.
FILTRETE™ es marca registrada de 3M Corp.
Cuidado y Mantenimiento
IMPORTANTE: Recomendamos limpiar el humidificador cada dos semanas,
siguiendo las instrucciones.
Los humidificadores proporcionan confort agregando humedad al seco y caldeado aire de la
casa. Para obtener el mayor beneficio del humidificador y a fin de evitar un inadecuado uso
del producto siga las instrucciones con cuidado, específicamente la operación, cuidado e
instrucciones de mantenimiento. Notar que este es un artefacto doméstico eléctrico y requiere
atención cuidadosa cuando está en uso.
Además, si no se siguen las indicaciones de cuidado y mantenimiento pueden desarrollarse
los microorganismos dentro del depósito de agua del humidificador.
Precaución: Desconectar la alimentación eléctrica antes de limpiar o manten-
er la unidad.
ADVERTENCIA: Es muy importante que las soluciones de limpieza, tales como
el cloro, tratamiento bactericida o desincrustantes, las cuales pueden uti-
lizarse para limpiar el gabinete, no sean rociados o aplicados al ensamble
de la fuente alimentadora/chassis. Asimismo, no sumerja la fuente alimenta-
dora dentro del agua o cualquier otra solución. Esas soluciones pueden
causar un serio funcionamiento eléctrico defectuoso del humidificador.
1) Apague la unidad girando el hidrostato en sentido contrario a las agujas del reloj.
2) Desenchufe el cordón eléctrico del tomacorriente de la pared.
3) Levante la botella de agua

4) Levante la fuente alimentadora/chassis
5) Cuidadosamente levante del gabinete la mecha vaporizadora junto con el conjunto de
la varilla y flotador, permitiendo que drene el agua dentro del depósito del gabinete.
Luego extraiga el conjunto flotador de la mecha vaporizadora.
QUITAR LAS INCRUSTACIONES DEL GABINETE
6) Secar con una esponja cualquier remanente de agua del depósito. Llenar el depósito
con un galón de agua limpia tibia y una taza de 8 onzas de vinagre blanco sin diluir.
Dejar reposar a la solución durante 20 minutos. Limpiar toda la superficie interior con
cepilllo blando. Con un trapo suave humedecido con vinagre blanco sin diluir, restregar
el depósito para quitar las incrustaciones.
7) Enjuagar completamente el tanque con agua y solución de limpieza para quitar las
incrustaciones antes de desinfectar.
DESINFECCION DEL DEPOSITO DEL GABINETE
8) Llenar el tanque con una mezcla de cloro de una cucharada de té en un galón (aprox.
4.5 litros) de agua tibia limpia. Dejar reposar la solución por 20 minutos revolviéndola
cada pocos minutos. Asegúrarse que la solución limpiadora no tome contacto con la
fuente alimentadora/chassis. No vertir el líquido a través de la rejilla dentro del gabi-
nite humidificador.
9) Vaciar el tanque después de 20 minutos. Enjuagar con agua hasta que el olor al cloro
se haya disipado. Secar con trapo limpio o tohalla de papel.
10) Limpiar todas las superficies de la fuente alimentadora/chassis con un trapo suave y
seco. NO USAR SOLUCIONES LIMPIADORAS LIQUIDAS, INCUIDA EL AGUA, PARA
LIMPIAR LA FUENTE DE ALIMENTACION/CHASSIS, UN SHOCK ELECTRICO PODRIA
RESULTAR DE ELLO, O DAÑO DEL HUMIDIFICADOR.
DESINFECCION DE LA BOTELLA
11) Quitar la tapa de la botella de agua y vaciar el contenido remanente dentro del
desagüe. Vertir una mezcla de medio litro de agua y dos cucharadas de cloro dentro
de la botella. Reponer la tapa y sacudir la botella intensamente. Quitar la tapa, escurrir
la botella dentro del desagüe, enjuagar bién con agua limpia.
RE-ARMADO DE LA UNIDAD
12) Reponer la mecha vaporizadora junto al conjunto de varilla y flotador dentro del tanque
de agua, permitiendo que la mecha vaporizadora cuelgue del reborde sobre la parte
interior de la pared del gabinete, y posicionar el flotador blanco dentro del alojamiento
en el fondo del gabinete.
13) Reponer la unidad fuente alimentadora/chassis en el gabinete, asegurando que el chas-
sis asiente correctamente adelante, atrás, y en los bordes derechos del gabinete.
14) Reponer la botella de agua dentro del gabinete permitiéndole drenar, luego llenar la
botella para un máximo período de funcionamiento.
15) Reponer la cubierta de la botella dentro del gabinete.
16) Enchufar el cordón dentro del tomacorriente de la pared.
17) Reajustar la mecha vaporizadora a los valores deseados.

MECHA VAPORIZADORA
18) Recomendamos reemplazar la mecha vaporizadora al menos una vez por temporada, y
más a menudo si se está en zonas de aguas duras. Cuando la mecha vaporizadora
aparece excesivamente saturada con depósitos minerales, descartar y restituir la eficien-
cia del humidificador con una nueva mecha vaporizadora. La mecha Bemis by Essick
Air No. 1045 corresponde solo a la serie H12. Llamar al 1-800-547-3888 para formu-
lar pedidos. Solamente las Mechas Bemis by Essick Air garantizan la eficiencia certifica-
da de su humidificador. El uso de otras mechas vaporizadoras diferentes a las Bemis by
Essick Air anularán su garantía tanto como la certificación de su salida, y pueden
reducir la eficiencia de su humidificador.
19) NOTA: Cuando se reemplace la mecha vaporizadora, el retén de la varilla del flotador
debe estar extendido antes de insertar la varilla del flotante.
Almacenamiento en verano
Secar la unidad antes del almacenaje; desenchufar el cordón, quitar y vaciar la botella de
agua; quitar la fuente de poder, y usar broches de la ropa para asegurar el ancho disco cir-
cular en la varilla del flotador al retén de la mecha vaporizadora. Este sostendrá el flotador
en una posición vertical haciendo que la unidad trabaje continuamente.
1) Limpiar la unidad conforme a lo indicado en la sección Cuidado y Mantenimiento.
2) Descartar la mecha vaporizadora usada. Instalar una nueva mecha Bemis by Essick Air
al comienzo de cada estación. Solo Bemis by Essick Air garantiza el rendimiento de sal-
ida de su humidificador.
3) No guarde la unidad con la mecha humeda o agua dentro de ella o en la botella,
dado que esto podría ser el origen del desarrollo de bacterias.
4) No almacene la unidad en el desván u otras áreas de alta temperatura.
5) Limpie el humidificador e instale una nueva mecha antes del comienzo de la nueva tem-
porada.
6) Al final de este manual se encuentra un formulario diseñado para pedir mechas vapor-
izadoras y accesorios.

Accesorios
MECHA VAPORIZADORA
Modelo 1045.
Mecha vaporizadora reemplazable que contínuamente emite
humedad mientras filtra depósitos minerales. Reduce la acumulación
de incrustaciones en la unidad. Solo las mechas Bemis by Essick Air
son UL y AHAM certificadas para suministrar la performance pre-
vista de su Humidificador Vaporizador Bemis by Essick Air. La
mecha del Modelo 1045 incluye un retén de varilla flotadora, el que
debe ser extendido previo a su uso.
FILTRO AIRCARE (OPCIONAL)
Modelo 1051.
Filtro AirCare reemplazable en dos etapas – 3M Filtrete ‚ - quita las
párticulas en suspensión y el carbón activado elimina los olores. Este
no es estandard en todas las unidades. Sin embargo puede agre-
garse como un accesorio a cualquiera de las Consolas
Humidificadoras Bemis by Essick Air.
TRATAMIENTO BACTERICIDA
Tratamiento Bactericida N° 1970 – 32 Onzas (aprox. 900 ml.)
Tratamiento Bactericida (en Canada)
N° 1970CN – 32 Onzas (aprox. 900 ml.)
Controla el desarrollo de bacterias en los humidificadores, y ayuda a elimi-
nar olores desagradables. Seguir las indicaciones de la botella para su apli-
cación adecuada. Esta solución no debería ser usada para limpiar el
humidificador o la fuente alimentadora/chassis. El uso inadecuado de esa
solución puede causar una seria falla eléctrica en el humidificador. No per-
mitir que tome contacto con componentes eléctricos.
DESINCRUSTANTE/LIMPIADOR DEL HUMIDIFICADOR
Desincrustante/Limpiador N° 1961- 32 Onzas (aprox. 900 ml.).
El Desincrustante del Humidificador Bemis by Essick Air limpia y prepara al
humidificador para una eficiente operación, removiendo cualquier acumu-
lación de incrustaciones o sedimentos en el tanque de agua. Esta solución no
debería ser utilizada para limpiar el paquete de la fuente
alimentadora/chassis, ni ser agregado a la botella de agua o del tanque
durante la operación de humidificación. El uso inadecuado de esta solución
puede ocasionar una seria falla eléctrica en el humidificador. No permita
que esté en contacto con componentes eléctricos.

DIVISIÓN DE CONFORT PARA EL HOGAR
GARANTÍA LIMITADA DE UN AÑO
La garantía del Humidificador Bemis by Essick Air cubre defectos de materiales y de
mano de obra por un período de un año a partir de la fecha de compra al por menor. Esta
garantía se aplica únicamente al comprador original del producto.
Dentro de los primeros 12 meses a partir de la fecha de compra, Essick Air reparará o
reemplazará, a su discreción, cualquier parte defectuosa del humidificador cubierto por
esta garantía.
Esta garantía le otorga derechos legales específicos, y usted podría tener otros dere-
chos los cuales varían de un estado a otro y de una provincia a otra.
Esta garantía no cubre los daños ocasionados por mal uso o abuso del humidificador,
accidentes o alteraciones al producto, uso comercial o daño durante el envío. El mal uso
incluye los malos funcionamientos ocasionados por negligencia en el procedimiento de
limpieza, o partes obstruidas con depósitos minerales debido a la presencia de condi-
ciones de agua dura. Las alteraciones al producto incluyen la sustitución de componentes
con otros de marca diferente a Bemis by Essick Air, incluyendo pero no limitándose a los
filtros/mecha vaporizadores.
Si es necesario hacerle servicio, llevar o enviar la unidad a cualquier Estación de
Servicio Bemis by Essick Air.
Essick Air Products
5800 Murray Street
Little Rock, AR 72209
501.562.1094

L
U
®
C
Imprimé aux É.-U.
LIRE ATTENTIVEMENT CES DIRECTIVES
ET LES CONSERVER.
L
U
®
Humidificateur
évaporateur
GUIDE
D'UTILISATION
ET
D'ENTRETIEN
DU PROPRIÉTAIRE
Modèles:
H10 400 Console, deux vitesses
H12 001 Console, trois vitesses
H12 300 Console, trois vitesses
H12 400 Console, trois vitesses
H12 600 Console, trois vitesses
• Plus facile à remplir
• Plus facile à nettoyer
• Mode silencieux pour la nuit
• Hygrostat automatique
• Arrêt automatique
PROTÉGER L'ENVIRONNEMENT
RECYCLER LES MATIÈRES APPROPRIÉES.
Brevets :5,037,583; 5,110,511; 5,133,904
Autres brevets en instance.
Pour placer une commande de pièces et d'accessoires, composer le : 1-800 547-3888
Other manuals for Bemis H12 001
1
This manual suits for next models
4
Table of contents
Languages:
Other Essick Humidifier manuals

Essick
Essick D46 720 Guide

Essick
Essick EP9 500 Owner's manual

Essick
Essick 821 Guide

Essick
Essick EA1407 Guide

Essick
Essick 821 000 Guide

Essick
Essick Bemis Driftwood Credenza 696 100 User manual

Essick
Essick EA1201 Guide

Essick
Essick Bemis H12 300 Guide

Essick
Essick EP9 500 Guide

Essick
Essick E27 000 User manual