manuals.online logo
Brands
  1. Home
  2. •
  3. Brands
  4. •
  5. Established & Sons
  6. •
  7. Indoor Furnishing
  8. •
  9. Established & Sons ISLAND User manual

Established & Sons ISLAND User manual

ISLAND
Ronan & Erwan Bouroullec
ESTABLISHED & SONS
United Kingdom
Phone +44 (0)20 7608 0990
establishedandsons.com
ESTANDSONS LTD
Estandsons Warehouse
Intereuropa d.d.
Mednarodni prehod 8,
SI-5290 Šempeter pri Gorici,
Slovenija
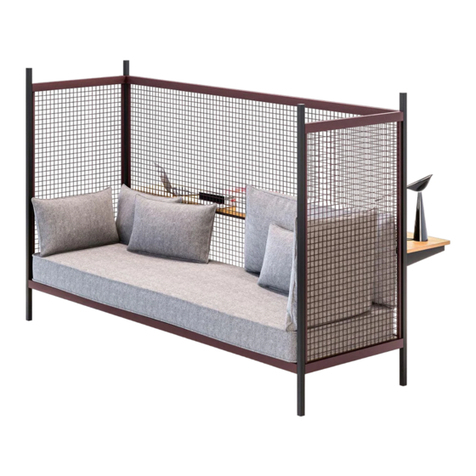
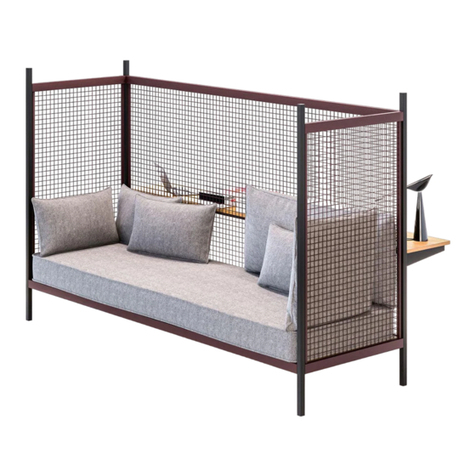
A versatile, space-optimising bench seating system with unlimited congurations, ISLAND
gives in-between areas a collaborative, functional use. Inviting passersby to sit, perch
or lounge, its understated design creates a central focal point for high-trac communal
environments.
THE DESIGNER
Ronan & Erwan Bouroullec have been working together for over 20 years, bonded
by diligence and challenged by their distinct personalities. From designing spaces
to furniture, taking on architectural projects to designing textile wall systems or
comprehensive collections, the brothers maintain drawing and experimental activity
as essential to the development of their work. Their designs are part of select
international museums’ permanent collections, including the Musée National d’Art
Moderne, Centre Pompidou and the Musée des Arts Décoratifs in Paris, New York’s
MoMA, the Art Institute of Chicago, the Design Museum in London, and the Museum
Boijmans van Beuningen in Rotterdam.
ISLAND
Ronan & Erwan Bouroullec
General Information
DESIGN
2022
DESCRIPTION
Modular seating
MATERIALS
Powder-coated mild steel (legs), powder-coated aluminium (platform), Fenix veneer MDF
(table option), larch veneer triply (seat and table option), upholstered foam and plywood
(seat option), upholstered plywood (partition) foam, feather and foam (cushion), nylon feet
DIMENSIONS
Conguration 01: L4400mm x D655mm x H730mm, SH450mm
Conguration 02: L6400mm x D655mm x H730mm, SH450mm
Conguration 03: L4400mm x D1265mm x H730mm, SH450mm
Conguration 04: L6400mm x D1265mm x H730mm, SH450mm
Conguration 05: L4400mm x D655mm x H630mm, SH450mm
Conguration 06: L2400mm x D655mm x H730mm, SH450mm
Display Conguration: L6400mm x D1875mm x H730mm, SH450mm
CLEANING GUIDELINES
Larch veneered triply & Fenix: Clean with duster. Use a lint-free cloth with warm soap foam
for tougher stains. Avoid abrasive solvents, as they may damage the material. This product
is for indoor use only.
Upholstery cover: vacuum frequently, ideally every week, at half power. Dust can be
removed by brushing with a garment brush. For stains consult professional
upholstery cleaner.
Powder-coated steel frame: the frame should rst be dry dusted with a clean lint
free cotton cloth. If wet cleaning is required then the item should be cleaned using a
soft, slightly damp sponge with a mild detergent and water solution. It then must be
immediately cleaned again with a soft dry cloth.
For major maintenance or repairs, consult the retailer. Once the product or its components
are no longer used, make sure that they are disposed of correctly through the public waste
disposal services.
USER INSTRUCTIONS
Island seats and tables are designed and tested for EN 16139:2013+AC2013 and EN
15372:2016 - Level 2, “General Use” areas. Appropriate applications include oce
buildings, showrooms, general hotel spaces, function rooms, cafés, restaurants, public
halls, banks, bars, meeting rooms, churches, or libraries.
Installation
Conguration 01
REQUIRED FOR INSTALLATION
8x Countersunk
M8 x 20
8x Button head
M6 x 16
2x Cylindrical Head
M5 x 25
2x Grub Screw
M6 x 8
16x Button Head
M8 x 70
8x Button Head
M8 x 25
12x Button Head
M6 x 25
4x Button Head
M5 x 20 with washer
Installation
Conguration 03
Installation
Conguration 02
REQUIRED FOR INSTALLATION REQUIRED FOR INSTALLATION
12x Countersunk
M8 x 20
16x Countersunk
M8 x 20
8x Button head
M6 x 16
12x Button head
M6 x 16
4x Cylindrical Head
M5 x 25
2x Collar
Ø18 x 50
2x Grub Screw
M6 x 8
2x Cylindrical Head
M10 x 80
2x Cylindrical Head
M5 x 25
3x Grub Screw
M6 x 8
24x Button Head
M8 x 70
32x Button Head
M8 x 70
12x Button Head
M8 x 25
16x Button Head
M8 x 25
15x Button Head
M6 x 25
9x Button Head
M6 x 25
8x Button Head
M5 x 20 with washer
4x Button Head
M5 x 20 with washer
Installation
Conguration 05
Installation
Conguration 04
REQUIRED FOR INSTALLATION
8x Countersunk
M8 x 20
20x Button head
M6 x 16
1x Grub Screw
M6 x 8
16x Button Head
M8 x 70
8x Button Head
M8 x 25
9x Button Head
M6 x 25
REQUIRED FOR INSTALLATION
24x Countersunk
M8 x 20
16x Button head
M6 x 16
2x Collar
Ø18 x 50
2x Cylindrical Head
M10 x 80
4x Cylindrical Head
M5 x 25
4x Grub Screw
M6 x 8
48x Button Head
M8 x 70
24x Button Head
M8 x 25
12x Button Head
M6 x 25
8x Button Head
M5 x 20 with washer
Installation
Conguration 06
Installation
Display Conguration
REQUIRED FOR INSTALLATION
20x Countersunk
M8 x 20
36x Button head
M6 x 16
4x Button Head
M5 x 20 w/ washer
2x Collar
Ø18 x 50
2x Cylindrical
Head M10 x 80
2x Cylindrical
Head M5 x 25
3x Grub Screw
M6 x 8
45x Button Head
M8 x 70
20x Button Head
M8 x 25
9x Button Head
M6 x 25
14x Button Head
M6 x 60 w/ Hex nut
REQUIRED FOR INSTALLATION
4x Countersunk
M8 x 20
4x Button head
M6 x 16
2x Cylindrical Head
M5 x 25
1x Grub Screw
M6 x 8
8x Button Head
M8 x 70
4x Button Head
M8 x 25
9x Button Head
M6 x 25
4x Button Head
M5 x 20 with washer
Installation
Large Table Installation
Large Table with Integrated Power
REQUIRED FOR INSTALLATION REQUIRED FOR INSTALLATION
8x Button Head
M6 x 60 with Hex Nut
8x Button Head
M6 x 60 with Hex Nut
16x Button Head
M6 x 16
16x Button Head
M6 x 16
Installation
Integrated Power Unit
REQUIRED FOR INSTALLATION
2x Button Head
M6 x 60 with Hex Nut
1x Button Head
M8 x 70
Assembly
Platforms, Legs & Seat Panels
1.
2.
Layout components on a rug or soft surface to prevent scratching of the parts.
Check the correct xings are included before assembling.
Begin assembly by securing single / double platforms to single / double legs.
REQUIRED FOR INSTALLATION
Countersunk
M8 x 20
3. To assemble seat panels to platforms, select appropriate type
(MIDDLE / END / SOLO) and align with holes on frame.
IMPORTANT
Each platform type is a specic length
MIDDLE
L2000mm
END
L2200mm
SOLO
L2400mm
4. Secure appropriate seat panel (MIDDLE / END / SOLO) to platform.
REQUIRED FOR INSTALLATION
Button Head
M8 x 70
Button Head
M8 x 25
5. Insert cap into top of legs not used for accessories.
Assembly
External Single Partition
1. To assemble Internal Single Partition, insert stainless steel
tube into structure and secure with xings.
REQUIRED FOR INSTALLATION
4x Button Head
M6 x 25
3.2. Pass xings through upholstered panel and tighten into frame.Secure Cylindrical Head Screws at either end of tubular structure.
REQUIRED FOR INSTALLATION
2x Cylindrical
Head M5 x 25
REQUIRED FOR INSTALLATION
4x Button Head
M5 x 20 with washer
4.
5.
Insert tubular frame of External Single Partition into open tops of legs.
Secure in place using xing at underside of leg at the two locations shown.
REQUIRED FOR INSTALLATION
2x Button Head
M6 x 25
Assembly
External Double Partition
1. To assemble External Single Partition, insert stainless steel
tube into structure and secure with xings.
REQUIRED FOR INSTALLATION
6x Button Head
M6 x 25
2. 3. Pass xings through upholstered panel and tighten into frame.
Secure locator pins at ends of tubular structures.
REQUIRED FOR INSTALLATION REQUIRED FOR INSTALLATION
4x Cylindrical
Head M5 x 25
8x Button Head
M5 x 20 with washer
4.
5.
Insert tubular frame of External Single Partition into open tops of legs.
Secure in place using xing at underside of leg at the three locations shown.
REQUIRED FOR INSTALLATION
3x Button Head
M6 x 25
Assembly
Internal Single Partition
1. Secure Cylindrical Head Screws at either end of tubular structure.
REQUIRED FOR INSTALLATION
2x Cylindrical
Head M5 x 25
3. Place assembled Internal Single Partition between seat panels and
secure to platform using xings at the two locations shown.
2. To assemble Internal Single Partition, pass xings through
upholstered panel and tighten into frame.
REQUIRED FOR INSTALLATIONREQUIRED FOR INSTALLATION
2x Collar
Ø18 x 50
2x Cylindrical Head
M10 x 80
4x Button Head
M5 x 20 with washer
Assembly
Internal Double Partition
1. Secure locator pins at ends of tubular structures.
REQUIRED FOR INSTALLATION
4x Cylindrical
Head M5 x 25

Other Established & Sons Indoor Furnishing manuals
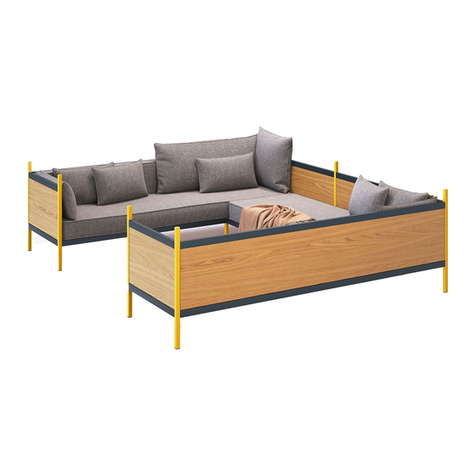
Established & Sons SURFACE TABLE User manual

Established & Sons

Established & Sons SURFACE TABLE User manual

Established & Sons Zero-In User manual

Established & Sons

Established & Sons Zero-In User manual

Established & Sons Quilt Chair Operating and maintenance instructions

Established & Sons

Established & Sons Quilt Chair Operating and maintenance instructions

Established & Sons STACK Raw Edges User manual

Established & Sons

Established & Sons STACK Raw Edges User manual

Established & Sons TIKI Nao Tamura User manual

Established & Sons

Established & Sons TIKI Nao Tamura User manual

Established & Sons Ronan Bouroullec User manual

Established & Sons

Established & Sons Ronan Bouroullec User manual

Established & Sons Ronan & Erwan Bouroullec User manual

Established & Sons

Established & Sons Ronan & Erwan Bouroullec User manual

Established & Sons UDUKURI User manual

Established & Sons

Established & Sons UDUKURI User manual

Established & Sons STACK User manual

Established & Sons

Established & Sons STACK User manual

Established & Sons GRID U SHAPE User manual
Established & Sons

Established & Sons GRID U SHAPE User manual

Popular Indoor Furnishing manuals by other brands

kd frames 7722-BI-F instructions

kd frames

kd frames 7722-BI-F instructions

Forte JKBK011STB Assembling Instruction

Forte

Forte JKBK011STB Assembling Instruction

Yaheetech 610377 Assembly instructions

Yaheetech

Yaheetech 610377 Assembly instructions

WEBER Buro M60EN169 quick start guide

WEBER Buro

WEBER Buro M60EN169 quick start guide

Pedro Ortiz PATAS METAL TESSA Assembling instructions

Pedro Ortiz

Pedro Ortiz PATAS METAL TESSA Assembling instructions

Stompa UNO S DRAWER Assembly instructions

Stompa

Stompa UNO S DRAWER Assembly instructions

Delta Childrens Products TODDLER BED Assembly instructions

Delta Childrens Products

Delta Childrens Products TODDLER BED Assembly instructions

Sauder 411985 manual

Sauder

Sauder 411985 manual

Next MURPHY 665907 Assembly instructions

Next

Next MURPHY 665907 Assembly instructions

Walker Edison D31S29 Assembly instructions

Walker Edison

Walker Edison D31S29 Assembly instructions

Cooper Lighting Luminous Wall Sconce 606 Specification sheet

Cooper Lighting

Cooper Lighting Luminous Wall Sconce 606 Specification sheet

CALICO ASHWOOD Assembly instructions

CALICO

CALICO ASHWOOD Assembly instructions

Habitat Cajou 821349 manual

Habitat

Habitat Cajou 821349 manual

Sliding Wardrobe World SPACEPRO Assembly instructions

Sliding Wardrobe World

Sliding Wardrobe World SPACEPRO Assembly instructions

Songmics VASAGLE LCD810 manual

Songmics

Songmics VASAGLE LCD810 manual

Furniture of America CM3770T-3PK Assembly instructions

Furniture of America

Furniture of America CM3770T-3PK Assembly instructions

pottery barn kids DOLLHOUSE instructions

pottery barn kids

pottery barn kids DOLLHOUSE instructions

Home Decorators Collection WINDLOWE 15101-M24-SG Assembly instructions

Home Decorators Collection

Home Decorators Collection WINDLOWE 15101-M24-SG Assembly instructions

manuals.online logo
manuals.online logoBrands
  • About & Mission
  • Contact us
  • Privacy Policy
  • Terms and Conditions

Copyright 2025 Manuals.Online. All Rights Reserved.