LS820 Microscope Manual 2023
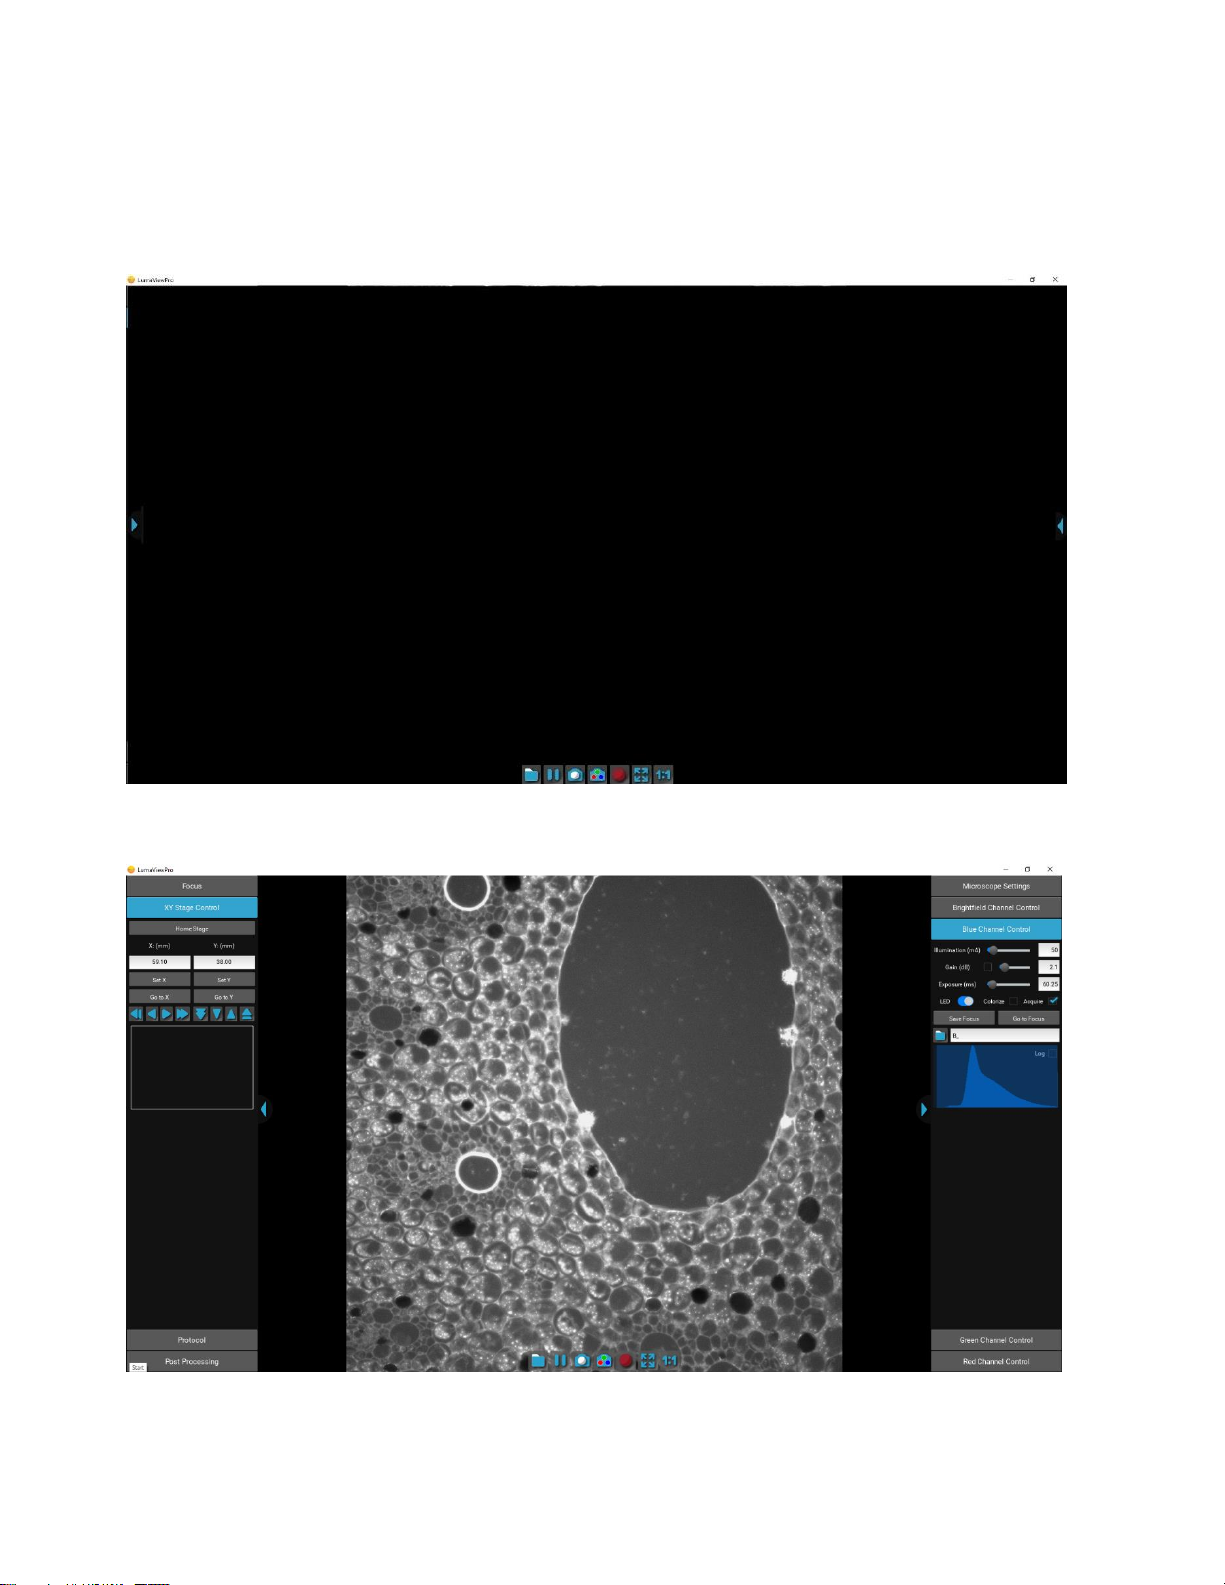
LumaviewPro
The LS820 is controlled by the LumaviewPro software program. The latest LumaviewPro version is downloadable from
Etaluma’s website and should be installed prior to connecting your computer for the first time.
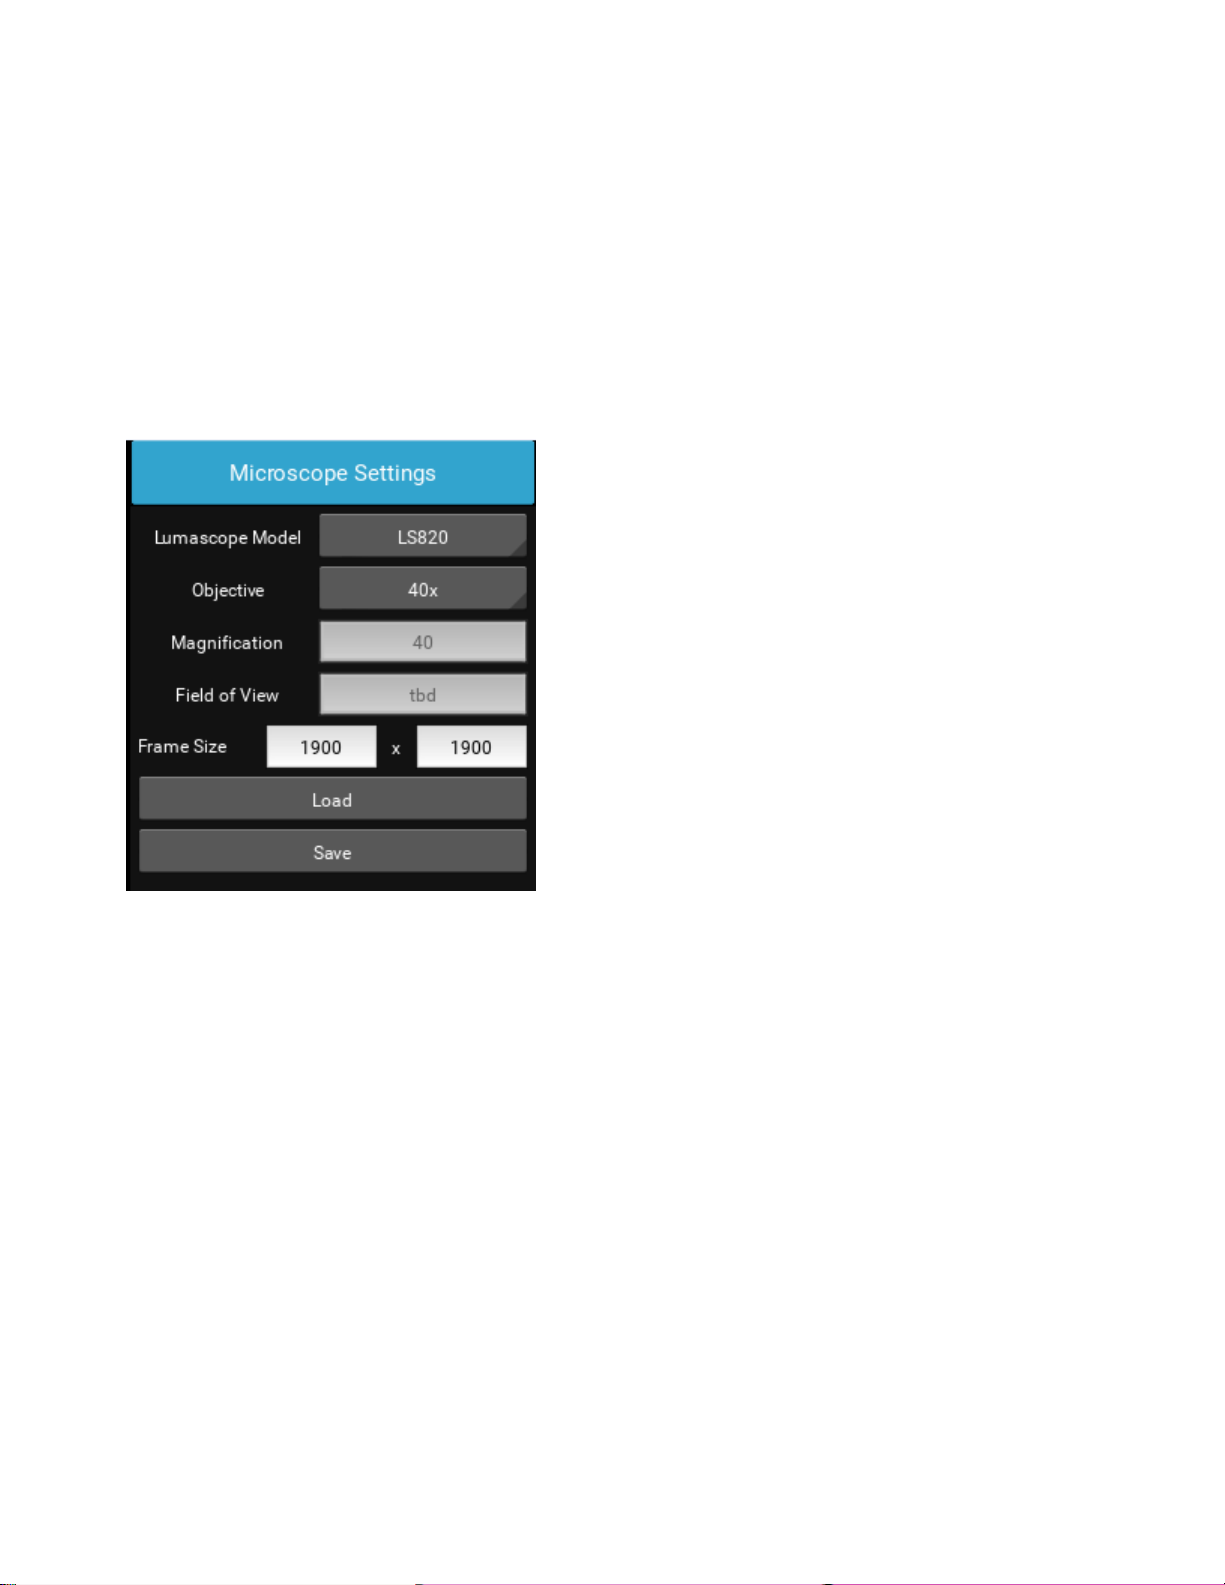
LumaviewPro can be run on Windows10/11, Mac, and Linux. Desktop computers and laptops can be used, but the
best visualization correlates with monitor resolution equal to the sensor resolution (up to 2100x 2100 pixels). Note:
The monitor does not affect image resolution unless the monitor is low quality and affects your ability to judge focus.
Downloading and Installing LumaviewPro
To download Lumaview, go to http://etaluma.com/products/downloads (under the Resources tab). Click on LumaviewPro
- ZIP link foryour operatingsystem to start the download and save the folder when prompted. Go to your downloadslocation
and click to open the LumaviewPro.zip file.
Alternatively, the same LumaviewPro.zip file can be copied from the flash drive that comes with the microscope. It
may be helpful to verify that this file is the latest version as posted on the Etaluma website.
After installation, a LumaviewPro shortcut (orange logo icon) convenient for launching the software will be present on
the desktop.
Connecting the LS820 Microscope
Insert the standard USB-A end of the supplied USB cable into a USB port on your computer and the other USB-C end into
the port labelled “Computer”.It is also important to connect the Microscope directly to the computer USB port and not
use a USB hub.
Plug the barrel connector from the AC power supply into the port labelled “Power Input 24VDC”. A 2 meter extension is
available if required.
Pass the communication and DC power cable through the incubator port, which is often located on the upper back wall.
A plug or filtered stopper may be present. The power supply transformer should not be placed in the incubator, only the
24 VDC cable and its extension. The transformer should not be left hanging by the DC cord and should be supported or
attached to the back of the incubator. Every microscope comes with a foam plug that can be used to seal around the
cables going through the port or the existing plug can be adapted. Make sure there is enough slack in the cables inside
the incubator to accommodate any sliding out of the shelf. Place the computer on a flat and stable surface near the
incubator and within the reach of the 3 meter USB cable provided.
WARNING: Do not extend the USB cable or use another USB cable other than that
supplied as communication issues will arise. To extend the user interface to
microscope distance use a long HDMI for the monitor and wireless mouse and
keyboard. See Appendix D.