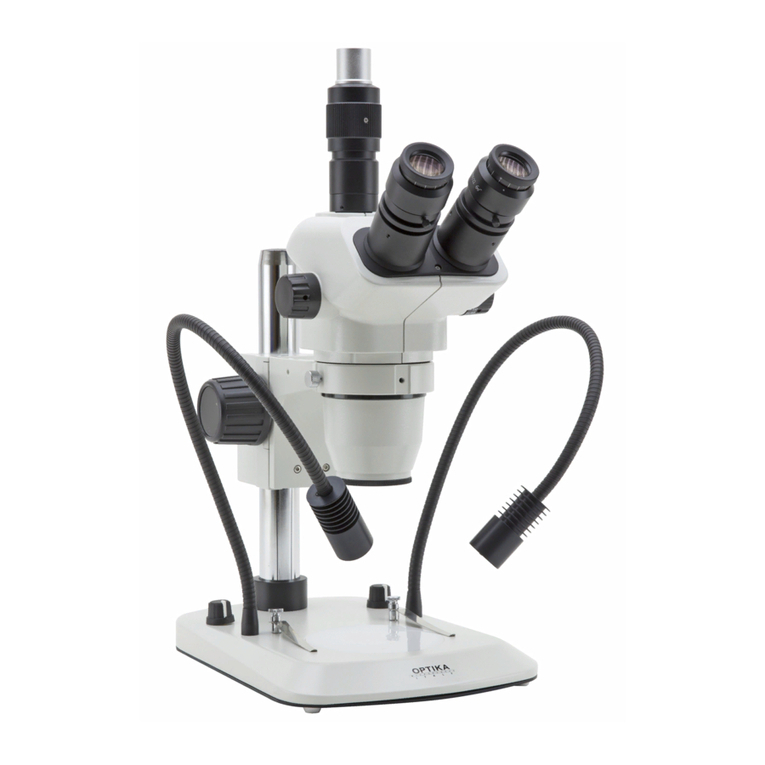
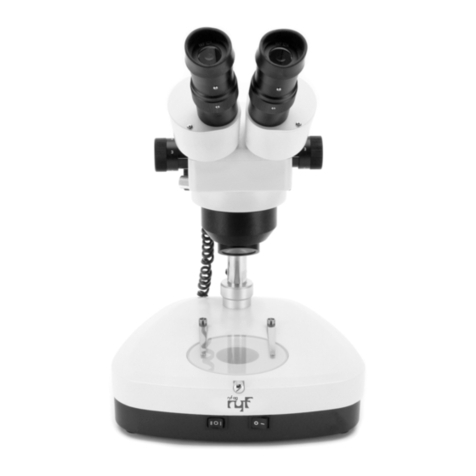
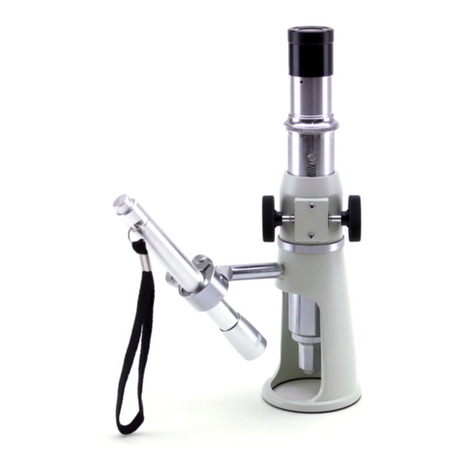
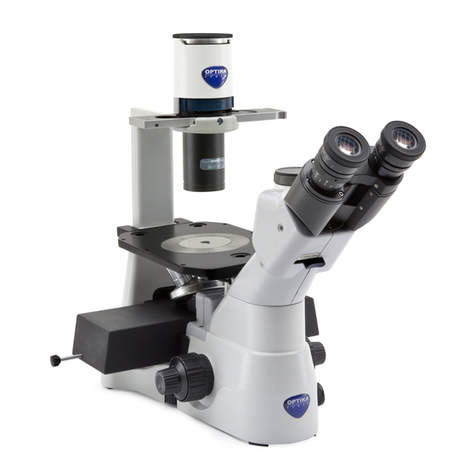
Optika STEREO Instruction Manual

OPTIKA MICROSCOPES - ITALY
Ver. 4.0.0
STEREO
OPERATION MANUAL
MANUEL D’INSTRUCTIONS
GUIDA UTENTE
MANUAL DE INSTRUCCIONES
BEDIENUNGSANLEITUNG

Page 2
INDEX
1.0 DESCRIPTION pag 4
2.0 INTRODUCTION pag 5
3.0 UNPACKING AND ASSEMBLING OF THE MICROSCOPE pag 5
4.0 ALIGNEMENT AND OPERATION OF THE MICROSCOPE pag 6
5.0 KNOWING YOUR MICROSCOPE pag 6
6.0 MAINTENANCE pag 7
7.0 RECOVERY AND RECYCLING pag 8

Page 3
This microscope is a scientific precision instrument designed to last for many years with a minimum of main-
tenance. It is built to high optical and mechanical standards and to withstand daily use.
Optika reminds you that this manual contains important information on safety and maintenance, and that it
must therefore be made accessible to the instrument users.
Optika declines any responsibility deriving from instrument uses that do not comply with this ma-nual.
Safety guidelines
This manual contains important information and warnings regarding safety about installation, use and
maintenance of the microscope. Please read this manual carefully before using the equipment. To
ensure safe use, the user must read and follow all instructions in this manual. OPTIKA products are
designed for safe use in normal operating conditions. The equipment and accessories described in
the manual are manufactured and tested according to industry standards for safety instrumentation
laboratory. Misuse can cause personal injury or damage to the instrument. Keep this manual at hand
close to the instrument, for an easy consultation.
Electrical safety
Before connecting the power cord to wall outlet, ensure that your mains voltage for your region corre-
sponds to the voltage supply of the instrument, and that the illuminator’s switch is in position OFF. The
user must observe the safety regulations in force in his region. The instrument is equipped with CE sa-
fety marking, in any case the user has full responsibility concerning the safe use of that instrument.
Warning/Caution symbols used in this manual
The user should be aware of safety aspects when using the instrument. Warning or hazard symbols
are shown below. These symbols are used in this manual.
The instructions on this symbol to avoid possible severe personal injuries.
Warning of use; the incorrect operation on the instrument can cause damages
to the person or instrument.
Possibility of electric shock.
Attention: high temperature surfaces. Avoid direct contact.
Technical notes or usage tips.
SAFETY GUIDELINES

Page 4
1.0 DESCRIPTION
EYEPIECE DIOPTRIC
COMPENSATION
BINOCULAR HEAD
FOCUSING KNOB
FIXED OBJECTIVE
STAND
ROTABLE
OBJECTIVE
LIGHT SELECTOR
CLIPS
PLATE
BASE ON-OFF SWITCH

Page 5
2.0 INTRODUCTION
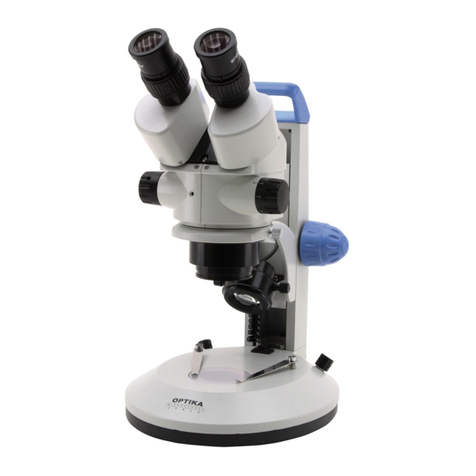
The OPTIKA microscopes STEREO series are high-performance stereo microscopes with a large possibility
of choice between various models with fixed magnification or rotable objective.
Total magnification ranges from 5x to 80x depending on the eyepieces (standard or optional).
These microscopes are suitable to analyze a variety of objects in 3D, for industrial, biological or educational
applications.
Using the rotable objective (ST-30/40/45) you can change the magnification keeping a perfect parfocality (the
focus is kept when changing the magnification) and a perfect centering of the field.
Depending on the model, the binocular head can be fixed or 360° rotating.
3.0 UNPACKING AND ASSEMBLING OF THE MICROSCOPE
The components for stereo series are shipped detached for protection.
Open the styrofoam protection with care and do not leave any components attached to the packing being
removed.
Normally this series is shipped ready to be used and you have only to put the eyepieces into their tube.
If damage occurs during the transport please contact immediately both the carrier and your supplier.
Connect the mains plug into the socket at the base
Make sure, before you turn the illumination on, that the voltage selector is set to the mains voltage for
your region.
The power cord should be used only on network sockets equipped with adequate grounding.
Contact a technician to check the state of your electrical system. If there is no need to install additional
accessories, the instrument is now ready for use. Once positioned and installed with the necessary
components, the microscope is ready to be used. Your microscope is a laboratory instrument desi-
gned to last. Handle it always carefully and avoid abrupt vibrations or shocks. Always disconnect the
power cable from the microscope when not in use for long time, while you clean it or when you perform
any maintenance.
AVOID DISASSEMBLING THE INSTRUMENT
Do not disassemble the instrument. This entails the cancellation of the warranty and may cause
malfunction.

Page 6
4.0 ALIGNMENT AND OPERATION OF THE MICROSCOPE
Interpupillary distance
Move the two eyepiece tubes until only one circular field can be seen through the two eyepieces. If two cir-
cles appear the interpupillary distance is too big, if two overlapped circles appear the interpupillary distance
is too small.
Focusing the microscope
Try to focus the sample with the magnification 2x by using the focusing knobs or, if necessary, adjust the hei-
ght of the microscope along the vertical stand.
Magnification
Select the magnification (when it’s possible) by adjusting the rotable objective. The total magnification can be
calculated by the following equation:
EYEPIECE MAGNIFICATION X OBJECTIVE LENS MAGNIFICATION
5.0 KNOWING YOUR MICROSCOPE
Stereo head
In the microscopes ST-30, ST-40, ST-45, the binocular tube is built together with the stereo body to form a sin-
gle piece named “stereo-head”. Stereo-head contains two optical systems that work separately for the right
and the left eyepiece. With this system, the user can obtain a great depth of view and a stereoscopic effect.
Stand, illuminator
The stand is equipped with an inox pole and the focusing mechanism (with stereo head) can be moved verti-
cally to obtain the right focusing.
The double illumination system of model ST-40-2L allows to use two illuminators at the same time; use the
master switch and selector switch to turn one or both lights on.
The plate for the samples is provided with two clips that help to “block” in place the object. The plate is sup-
plied in two different versions: black/white (for incident light) and translucent glass (for transmitted light).
Nosepiece rotation to change
magnifying lenses
Incident light
Transmitted light

Page 7
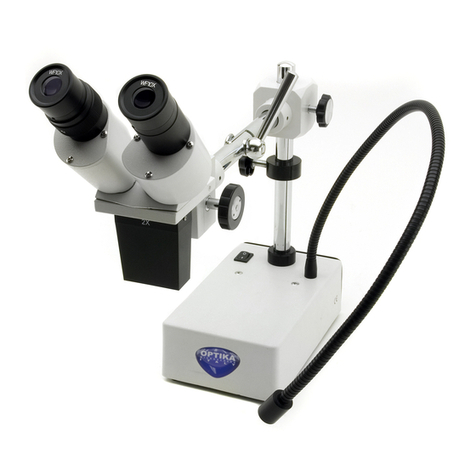
The models ST-50 and ST-50LED are provided with overhanging stand with flexible arm and a stop ring that
prevents the binocular head from being taken down too much
External illumination
The light can be incident, transmitted and if necessary it is possible to use an external cold light source (opti-
cal fiber or LED illumination). By using the correct light it’s possible to obtain the best image of your sample.
6.0 MAINTENANCE
To take good care of the microscope, the user should avoid the attack of dust and water. If dust and water
come to the microscope, sooner or later, fungus will grow and kill the microscope. Please notice that once
fungus is grown, even after cleaning, the microscope will have a good chance to be re-infected again. Moreo-
ver, grease stain and fingerprints will distort the image, which should be avoided.
Protection against Dust
When the instrument is not used for a long period of time, cover it with the enclosed dust cover. Never lea-
ve the eyepiece tube open without any covers. Either leave the eyepiece in the tube (recommended if the
microscope is used very frequently) or cover it with wrapping paper or covering cap. Eyepieces and other
optical accessories, when not in use, are recommended to be kept in a dry box to protect them against dust
and water.
Protection against Water
The instrument should be kept away from water source, pipeline or water sink. Humidity in the room where
the instrument located should be as low as possible (relative humidity should be kept below 70%). All the
optical accessories are recommended to be kept in a dry box when not in use. The use of dehumidifier and
24-hours air conditioning is highly recommended if the surrounding is too humid.
Cleaning
If dust is found on the optical surface, try to remove by air blower or compress air.
For fingerprint, grease stain or dust which cannot be removed by the air blower, 2 possible methods are re-
commended:
- To breathe lightly on the glass surface and wipe with a clean piece of cloth, lens paper or
cotton swab. Please notice that small cotton fibre may be left onto the lens surface if cotton
swab is used.
5.0 KNOWING YOUR MICROSCOPE

Page 8
- Use a cotton swab or lens paper, dip with a small amount of absolute alcohol, and clean the
lens surface carefully. No other aggressive solvents should be used.
In no circumstances should the user clean any lens surface with dry cotton swab, cloth or lens paper. This will
scratch the lens surface causing irreparable damage.
Water is not recommended for cleaning of lens as it will leave some water stain on the lens surface and if
water residue is left on the lens, fungus can grow causing irreparable damage.
Electrical Parts of the Microscope
Before plugging in the power cord with the supply, make sure that the supplied voltage matches with the ope-
ration voltage of the equipment.
Turn off the equipment before plugging in the power cord with the supply.
Do not turn the power on-off-on rapidly as this will shorten the life span of the bulb and may cause damage
to the electrical system.
Users should observe all safety regulations of the region.
The equipment has acquired the CE safety label. However, users do have full responsibility to use this equi-
pment safely.
7.0 RECOVERY AND RECYCLING
Art.13 Dlsg 25 july 2005 N°151. “According to directives 2002/95/EC, 2002/96/EC and 2003/108/EC relating
to the reduction in the use of hazardous substances in electrical and electronic equipment and waste dispo-
sal.”
The basket symbol on equipment or on its box indicates that the product at the end of its useful life should be
collected separately from other waste.
The separate collection of this equipment at the end of its lifetime is organized and managed by
the producer. The user will have to contact the manufacturer and follow the rules that he adop-
ted for end-of-life equipment collection. The collection of the equipment for recycling, treatment
and environmentally compatible disposal, helps to prevent possible adverse effects on the environ-
ment and health and promotes reuse and/or recycling of materials of the equipment. Improper dispo-
sal of the product involves the application of administrative penalties as provided by the laws in force.
6.0 MAINTENANCE

Page 9
SOMMAIRE
1.0 DESCRIPTION pag 11
2.0 INTRODUCTION pag 12
3.0 DÉBALLAGE ET MONTAGE DU MICROSCOPE pag 12
4.0 ALIGNEMENT ET UTILISATION DU MICROSCOPE pag 13
5.0 CONNAITRE LE MICROSCOPE pag 13
6.0 NETTOYAGE ET ENTRETIEN DU MICROSCOPE pag 14
7.0 RÉCYCLAGE ET RÉCUPÉRATION pag 15

Page 10
Ce microscope est un appareil scientifique de précision pensé pour durer de nombreuses années avec un en-
tretient minimum. Pour son élaboration il a été utilisé des éléments optiques et mécaniques de grande qui le
convertisse en un appareil idéal pour une utilisation journalière dans les salles de classes et les laboratoires.
Optika informe que ce manuel contient d’importantes informations concernant la sécurité et l’entretient de ce
produit et par conséquent il doit être accessible à toutes personnes susceptibles d’utiliser cet appareil.
Optika décline toute responsabilité dérivant d’une utilisation inappropriée de cet appareil non contemplée
dans ce mode d’emploi.
Sécurité
Ce manuel contient d’importantes infomations concernant les normes de sécurité à suivre durant
l’installaton, ainsi que sur l’utilisation et l’entretien du microscope. Si raccomanda di leggere attenta-
mente il manuale prima di qualsiasi utilizzo dello strumento. Il est donc important de lire ce manuel et
de suivre les normes de sécurité.
Les produits OPTIKA peuvent être utilisés en toute sécurité dans des conditions de travail normales.
L’instrument et les accéssoires décrits dans ce manuel ont été realisés et testés selon des standard
industriels de sécurité pour l’instrumentation scientifique.
Une utilisation inapropriée risquerait de provoquer des blessures à l’utilisateur et au microscope.
Garder ce manuel à portée de main durnat l’utilisation du microscope.
Précautions de sécurité électrique
Avant de brancher le cable d’alimentation à la prise, s’assurer que la tension dans votre région corre-
sponde à la tension de l’instrument et que l’interrupteur de l’éclairage soit éteint.
L’utilisateur se doit de suivre les normes de sécurité de son propre pays.
L’instrument a un marquage de sécurité CE, l’utilisateur est responsable de l’utilisation appropriée de
l’instrument.
Symboles d’avertissement / risque utilisés dans le manuel
Avant d’utiliser l’instrument, l’utilisateur doit connaitre toutes les précautions liées à la sécurité.
Les symboles d’avertissement ou de danger sont indiqués ci-dessous.
Suivez les instructions marquées de ce symbole afin d’éviter d’éventuelles bles-
sures.
Avvertissement concernant l’utilisation; l’utilisation inapproprièe du microscope
riquerait de provoquer des blessures à l’utilisateur et d’abimer l’instrument.
Risque de choc életrique.
Attention: surfaces à haute température. Eviter le contact direct.
Notes techniques et conseils pour l’utilisation.
PRÉCAUTIONS DE SÉCURITÉ
Page 11
1.0 DESCRIPTION
OCULAIRES COMPENSATION
DIOPTRIQUE
TÊTE BINOCULAIRE
RÉGLAGE MISE
AU POINT
GROSSISSEMENT
FIXE
TUBE DE
GLISSEMENT
OBJECTIF
ROTATIF
SÉLECTION LUMIÈRE
CLIPS
PORTE-PRÉPARATIONS
BASE INTÉRRUPTEUR

Page 12
2.0 INTRODUCTION
3.0 DÉBALLAGE ET MONTAGE DU MICROSCOPE
Les microscopes stéréoscopiques OPTIKA de la série STÉRÉO offrent un choix très valide gràce à une gran-
de varieté de modèles en mesure de satisfaire l’utilisateur professionnel et de l’étudiant. La série STÉRÉO
est formée de stéréomicroscopiques de hautes prestations dôtés d’objectif à agrandissement fixe ou bien
variable (selon les modèles).
Le grossissement total varie de 5x à 80x en foction des oculaires de la série ou additionnel fournis comme
accessoires facultatifs. Ces appareils sont aptes à examiner des objets de toute nature en trois dimensions,
en applications industrielles, biologiques, didactiques, et etc.
Avec la rotation du corps objectif (ST-30/40/45) l’utilisateur peut changer le grossissement avec une parfaite
parafocalité (la mise au point est toujours maintenue durant le changement de grossissement) et un parfait
centrage (le grossissement change de manière parfaitement concentrique).
En fonction des modèles la tête peut être fixe ou tournant à 360°.
Les composantes du microscope sont délivrées dans leur emballage pour prévenir des ruptures accidentel-
les pendant le transport.
Ouvrir la boîte en carton et ensuite l’emballage en polystyrolène, en extraire toutes les composantes, ne rien
oublier à l’intérieur de la confection.
La série STÉRÉO est délivrée déjà montée,pour certains modèles seuls les oculaires ne sont pas montés.
Avant d’allumer, vérifier que le sélecteur de tension soit régler selon la tension de votre pays.
Le câble d’alimentation doit être utiliser uniquement dans des prises avec mise à la terre appropriée.
Contacter votre téchnicien pour vérifier l’état de votre circuit électrique.
Si vous ne devez installer aucun autre accessoire, le microscope est prêt à l’utilisation
Votre microscope est un instrument de laboratoire conçu por durer longtemps. Traitez le avec soin et évi-
tez de le soumettre à chocs et vibrations. Débranchez toujours le câble d’alimentation quand le microsco-
pe n’est pas utiliser pendant longtemps, lors du nettoyage ou lorsque que vous en effectuez l’entretien.
NE PAS DEMONTER LINSTRUMENT
Ne pas démonter l’instrument. Ceci annulerait la validité de la garantie et risquerait de provoquer des
dysfonctionnements.

Page 13
4.0 ALIGNEMENT ET UTILISATION DU MICROSCOPE
Distance interpupillaire
Mise en fonctionnement des deux illuminateurs à travers les intérrupteurs appropriés ; observer ensuite à
travers les oculaires; agir sur les deux tubes porte-oculaires jusqu’à obtenir la vision d’un champ lumineux
unique et circulaire.
Mise au point du microscope
Placer un objet à observer sur le plan d’observation. Mettre en position le corps objectif sur le facteur de
grossissement minimum 2x, éssayer, en agissant sur les commande de mise au point de l’objet à observer.
Si cela n’était pas possible, changer la hauteur du support du corps stéréoscopique, variant la position du
support.
Grossissements
Sélectionner le grossissement désiré à travers la rotation du corps objectif. Le grossissement total peut être
calculé de la manière suivante: grossissement des oculaires x grossissement objectif.
Avant de substituer les lampes, s’assurer que le câble d’alimentation ne soit pas relié à la prise de courant.
5.0 CONNAITRE LE MICROSCOPE
Corps stéréoscopique de tube binoculaire
Pour les microscopes ST30, ST 40,ST 45 le tube binoculaire est fourni avec le corps stéréoscopique pour for-
mer une pièce unique nommée “tête stéréoscopique”. Le corps stereoscopique est la partie du microscope
qui contient le mécanisme de l’objectif. Ce système inclut deux composantes optiques qui travaillent séparé-
ment pour les oculaires droits et gauche. Avec ce système, l’utilisateur peut obtenir une excéllente profondeur
du champ et un éffet stéréoscopique.
Statif, base e illuminateurs
Le Le statif est dôté d’ un tube en acier inox, sur lequel est fixé le support du corps stéréoscopique. Le sytè-
me double éclairage du modèle ST-40-2L permet d’utiliser contemporainement les deux illuminateurs. Pour
la mise en fonctionnement, utiliser l’intérrupteur général et sélectionner l’intérrupteur respectif à l’une des
illuminations. Le plan porte-préparations est dôté de deux pincettes qui permettent de fixer la préparation de
façon à pouvoir l’observer sans qu’elle ne puisse bouger. Le plan peut être sélectionné entre deux modèles
en dotation : disque blanc/noir (pour usage en lumière incidente), et disque en verre translucide (pour usage
en lumière transmise, c’est à dire du bas).
Rotation corps objectif pour changementments
Lumière incidente
Lumière transmise

Page 14
Substitution de la lampe
La substitution des lampes doit être effectuée ainsi:
1. Illuminateur incident. Après s’ être assuré que l’instrument est complètement éteint et débranché la
prise du courant, extraire la lampe de son siège et la substituer par une nouvelle.
2. Illuminateur de la lumière transmise. Enlever le disque porte-préparations et effectuer la substitution
de la lampe.
Nettoyage de l’instrument
Afin de protéger l’instrument contre la poussière, il est présent dans la dotation standard une couverture
anti-poussières en matière plastique, qui doit être utilisé après chaque session de travail.Il est de toute façon
conseillé de conserver l’instrument dans un endroit propre et sec .
Pour l’éventuel nettoyage du microscope, ne pas utiliser du matériel ou des produits abrasifs. Il est conseillé
d’utiliser un pan simple de coton et éventuellement de l’air comprimé, confection en vente, utilisée par exem-
ple pour enlever la poussière sur les claviers des ordinateurs.
Pour enlever les taches de graisse, ne jamais utiliser les solvants organiques dérivés du pétrole. Dans ces
cas diluer un peu d’alcool dans l’eau et utiliser un pan de coton.
Nettoyage optique
Pour enlever la poussière des composantes optiques, il est strictement nécessaire d’utiliser exclusivement
les suivants produits:
- alcool éthylique absolu (non dénaturé)
- air comprimé
- papier ou tissé pour le nettoyage des lentilles (comme celui utilisé pour le nettoyage des
lentilles des lunettes)
- peaux animaux non abrasives (celle du daim)
6.0 NETTOYAGE ET ENTRETIEN DU MICROSCOPE
Les modèles ST-50 et ST-50LED sont munis d’une base, d’un bras articulé et d’un anneau de fin de course
autour de la colonne pour éviter que la tête ne descende trop bas.
Eclairage externe
Dans certaines occasions, il pourrait être utile d’utiliser une source de lumière externe. Dans ce cas là, il est
conseillé d’utiliser un générateur de lumière froide et éclairages LED ou en fibre optique.
5.0 CONNAITRE LE MICROSCOPE

Page 15
- brosses ou pinceaux en soies très souples
Ruptures et pannes
Dans ces cas il faut s’adresser toujours à un centre d’assistance OPTIKA. Il ne faut intervenir ou tenter de
réparer quel que soit la panne ou la rupture.
7.0 RÉCYCLAGE ET RÉCUPÉRATION
Conformément à l’Article 13 du D.L du 25 Juillet 2005 nº151
Action des Directives 2002/95/CE, 2002/96/CE et 2003/108/CE, relatives à la réduction de l’utilisation de
substances dangereuses dans l’appareil électrique et électronique et à l’élimination des résidus.
Le Symbole du conteneur qui figure sur l’appareil électrique ou sur son emballage indique que le produit
devra être, à la fin de sa vie utile, séparé du reste des résidus. La gestion du ramassage sélectif du présent
instrument sera effectuée par le fabricant. Par conséquent, l’utilisateur qui souhaite éliminer l’appareil devra
se mettre en contact avec le fabricant et suivre le système que celui-ci a adopté pour permettre le ramassage
sélectif de l’appareil. Le ramassage sélectif correct de l’appareil pour son recyclage, traitement et élimina-
tion compatible avec l’environnement contribue à éviter d’éventuels effets négatifs sur l’environnement et
la santé et favorise sa réutilisation et/ou recyclage des composants de l’appareil. L’élimination du produit de
manière abusive de la part de l’utilisateur entraînera l’application de sanctions administratives sur la norme
en vigueur.
6.0 NETTOYAGE ET ENTRETIEN DU MICROSCOPE

Pagina 16
INDICE
1.0 DESCRIZIONE pag 18
2.0 INTRODUZIONE pag 19
3.0 DISIMBALLAGGIO E MONTAGGIO DEL MICROSCOPIO pag 19
4.0 ALLINEAMENTO E UTILIZZO DEL MICROSCOPIO pag 20
5.0 CONOSCERE IL MICROSCOPIO pag 20
6.0 PULIZIA E CURA DEL MICROSCOPIO pag 21
7.0 MISURE ECOLOGICHE pag 22

Pagina 17
Il presente microscopio è uno strumento scientifico di precisione studiato per durare molti anni con una manu-
tenzione minima, essendo costruito secondo i migliori standard ottici e meccanici e progettato per un utilizzo
quotidiano.
Optika ricorda che il presente manuale contiene informazioni importanti per un uso sicuro e una corretta ma-
nutenzione dello strumento. Esso deve quindi essere accessibile a chiunque lo utilizzi.
Optika declina ogni responsabilità derivante da un uso improprio dei suoi strumenti non indicato dalla pre-
sente guida.
Avvertenze di sicurezza
Questo manuale contiene importanti informazioni e avvertenze riguardanti la sicurezza riguardo l’in-
stallazione, l’utilizzo e la manutenzione del microscopio. Si raccomanda di leggere attentamente il
manuale prima di qualsiasi utilizzo dello strumento. Per assicurare un utilizzo sicuro l’utente deve
leggere e seguire tutte le istruzioni poste nel presente manuale.
I prodotti OPTIKA sono studiati per un utilizzo sicuro in condizioni operative normali. Lo strumento e
gli accessori descritti nel manuale sono realizzati e testati secondo standard industriali di sicurezza
per strumentazione da laboratorio.
L’utilizzo non corretto può causare lesioni alla persona o danni allo strumento.
Mantenere questo manuale a portata di mano vicino allo strumento, per una facile consultazione.
Precauzioni di sicurezza elettrica
Prima di collegare il cavo di alimentazione alla presa di rete, assicurarsi che la tensione di rete della
vostra regione corrisponda alla tensione di alimentazione dello strumento, e che l’interruttore dell’illu-
minatore sia in posizione spenta.
L’utente deve osservare la regolamentazione riguardante la sicurezza in vigore nel proprio Stato. Lo
strumento è dotato di marcatura di sicurezza CE, in ogni caso l’utente ha piena responsabilità riguar-
do all’utilizzo sicuro dello strumento stesso.
Simboli di avvertenza/pericolo usati nel manuale
L’utente deve essere a conoscenza degli aspetti legati alla sicurezza nel momento in cui utilizza lo
strumento. I simboli di avvertenza o pericolo sono indicati sotto. Tali simboli sono utilizzati in questo
manuale di istruzioni.
Seguire le istruzioni contrassegnate da questo simbolo per evitare possibili gra-
vi danni alle persone.
Avvertimento di utilizzo; la non corretta operazione sullo strumento può causare
danni alla persona o allo strumento.
Possibilità di shock elettrico.
Attenzione: superfici ad elevata temperatura. Evitare il contatto diretto.
Note tecniche o consigli di utilizzo.
INDICAZIONI PER LA SICUREZZA

Pagina 18
1.0 DESCRIZIONE
OCULARI
COMPENSAZIONE
DIOTTRICA
TESTATA BINOCULARE
REGOLAZIONE FUOCO
INGRANDIMENTO
FISSO
ASTA
SCORRIMENTO
OBIETTIVO
ROTANTE
SELETTORE LUCE
PINZETTE
PORTAPREPARATI
BASE ACCENSIONE

Pagina 19
2.0 INTRODUZIONE
I microscopi stereoscopici OPTIKA Serie STEREO rappresentano una validissima scelta, grazie ad una
grande varieta’ di modelli in grado di soddisfare l’utilizzatore professionale e lo studente. La serie STEREO
e’ formata da stereomicroscopi ad alte prestazioni dotati di obiettivo ad ingrandimento fisso oppure variabile
(a seconda dei modelli).
L’ingrandimento totale varia da 5x a 80x in funzione degli oculari di serie o addizionali forniti come accessori
opzionali. Questi apparecchi sono adatti ad esaminare oggetti di qualsiasi natura in tre dimensioni, in appli-
cazioni industriali, biologiche, didattiche, etc.
Con la rotazione del corpo obiettivo (ST-30/40/45) l’utilizzatore può cambiare l’ingrandimento con perfetta
parafocalità (il fuoco é sempre mantenuto durante il cambio di ingrandimento) e con perfetto centramento
(l’ingrandimento cambia in modo perfettamente concentrico).
A seconda dei modelli la testata puo’ essere fissa o ruotante a 360°.
3.0 DISIMBALLAGGIO E MONTAGGIO DEL MICROSCOPIO
I componenti dei microscopi sono consegnati imballati per prevenire rotture accidentali durante il
trasporto.
Aprire la scatola in cartone e poi l’imballo in polistirolo, avendo cura di non lasciare alcun componen-
te all’interno della confezione.
Non scartare alcun componente fino a che tutto il materiale é stato estratto. La serie STEREO è
consegnata gia’ montata a seconda dei modelli possono al limite non essere montati i soli oculari.
Connettere il cavo di alimentazione nella presa posta nella base dello stativo.
Assicurarsi, prima dell’accensione, che il selettore del voltaggio sia impostato sulla tensione di rete
della vostra regione.
Il cavo di alimentazione deve essere utilizzato solo su prese di rete dotate di adeguata messa a terra.
Contattare un vostro tecnico per assicurarsi sullo stato dell’impianto elettrico. Se non vi è necessità di
installare altri accessori, lo strumento è ora pronto per l’utilizzo. Una volta posizionato e installato con
i necessari componenti, il microscopio è pronto per l’utilizzo. Il vostro microscopio è uno strumento da
laboratorio progettato per durare a lungo. Maneggiatelo sempre con cura ed abitate brusche vibrazio-
ni o colpi.Scollegare sempre il cavo di alimentazione dal microscopio quando non viene utilizzato per
lunghi tempi, mentre lo si pulisce o quando si esegue una qualsiasi manutenzione.
EVITARE DI SMONTARE LO STRUMENTO
Non disassemblare lo strumento. Questo comporta l’annullamento della garanzia e potrebbe causare
malfunzionamenti.

Pagina 20
4.0 ALLINEAMENTO E UTILIZZO DEL MICROSCOPIO
Distanza interpupillare
Accendere entrambi gli illuminatori attraverso gli appositi interruttori, dopodiché porre lo sguardo negli ocula-
ri; muovere i due tubi portaoculari fino ad ottenere la visione di un unico campo circolare.
Messa a fuoco del microscopio
Porre un oggetto da visionare sul piano di osservazione . Posizionando il corpo obiettivo sul fattore di in-
grandimento minimo 2x (nel caso di obiettivo rotante), provare, ruotando le manopole di messa a fuoco a
focalizzare l’oggetto da visionare. Se ciò non fosse possibile, cambiare l’altezza del supporto del corpo ste-
reoscopico, variando la posizione del supporto stesso sull’asta di scorrimento verticale.
Ingrandimenti
Per le versioni dotate di obiettivo rotante, selezionare l’ingrandimento desiderato attraverso la rotazione del
corpo obiettivo. L’ingrandimento totale può essere calcolato nel seguente modo:
INGRANDIMENTO DEGLI OCULARI X INGRANDIMENTO OBIETTIVO.
5.0 CONOSCERE IL MICROSCOPIO
Corpo stereoscopico con tubo binoculare
Per i microscopi ST-30, ST-40, ST-45 il tubo binoculare é fornito insieme al corpo stereoscopico, a formare
un unico pezzo denominato “testata stereoscopica”. Il corpo stereoscopico é la parte del microscopio che
contiene il meccanismo dell’obiettivo. Questo sistema include due ottiche che lavorano separatamente per
gli oculari destro e sinistro. Con questo sistema, l’utilizzatore può ottenere una eccellente profondità di
campo ed un effetto stereoscopico.
Stativo, base e illuminatori
Lo stativo é dotato di un’asta in acciaio inox, sulla quale viene fissato il supporto per il corpo stereoscopico.
Il doppio sistema di illuminazione del modello ST-40-2L, consente il contemporaneo utilizzo di entrambi
gli illuminatori. Per l’accensione, utilizzare l’interruttore generale e gli interruttori che selezionano l’una e
l’altra illuminazione. Il piano portaoggetti é dotato di due pinzette che consentono di “bloccare” il preparato
in modo da poterlo osservare senza che esso si muova. Il piano può essere selezionato tra due modelli in
dotazione: disco bianco/nero (per uso con luce incidente), e disco in vetro translucido (per uso con luce
trasmessa, cioé dal basso).
Rotazione corpo obiettivo per cambio
ingrandimenti
Luce incidente
Luce trasmessa
Table of contents
Languages:
Other Optika Microscope manuals

Optika
Optika B-380 Series User manual

Optika
Optika B-500BSp User manual

Optika
Optika B-810 Series User manual

Optika
Optika B-350 User manual

Optika
Optika DM-5UP User manual

Optika
Optika IM Series User manual

Optika
Optika B-500TiFL User manual

Optika
Optika SZN Series User manual

Optika
Optika B-600 MET User manual

Optika
Optika B-50 User manual

Optika
Optika SZM User manual

Optika
Optika XDS-3 User manual

Optika
Optika B-510 Series User manual

Optika
Optika IM-2 User manual

Optika
Optika ECOVISION M-100FL User manual

Optika
Optika B-150D-MRPL Mounting instructions

Optika
Optika B-1000FL HBO User manual

Optika
Optika B-190 User manual

Optika
Optika B-150POL User manual

Optika
Optika B-150POL-M User manual