Eton Satellit 750 User manual

© Copyright 2009 Etón Corporation. All Rights Reserved.
Satellit 750
AM/FM-stereo/Shortwave/Airwave Band Radio
with SSB (Single Side Band)
OWNER’S MANUAL

3
SATELLIT 750 OWNER’S MANUAL
DO YOU NEED HELP? Contact Us
If you need help, please contact us, Monday-Friday, 8:00 a.m.- 4:00 p.m.,
North American Pacic Time. 1-800-872-2228 from the U.S; 1-800-637-
1648 from Canada; 650-903-3866, worldwide;
FAX: 650-903-3867; web site, www.etoncorp.com;
Etón Corporation, 1015 Corporation Way, Palo Alto, CA 94303, USA
WARNING
• Do not expose this appliance to rain or moisture.
• Do not submerge or expose for extended period to water.
• Protect from high humidity and rain.
• Only operate within specied temperature range (0 °C to 40 °C).
• Unplug immediately if liquid has been spilled or objects have fallen into the
apparatus.
• Clean only with a dry cloth. Do not use detergents or chemical solvents as
this might damage the nish.
• Unplug and disconnect external antennas (not included) during lightning
storms.
• Do not remove cover [or back].
• Refer servicing to qualied service personnel.
Disposal
According to the European Directive 2002/96/EC all
electrical and electronic products must be collected
separately by a local collection system.
Please act according to your local rules and do not dispose of your old prod-
ucts with your normal household waste.
ENVIRONMENT

4
SATELLIT 750 OWNER’S MANUAL
5
SATELLIT 750 OWNER’S MANUAL
Thank you for purchasing the Satellit 750. Its features and capabilities are
shown below:
• Shortwave (1711-30000 KHz) with SSB (single sideband), LW, AM, FM
and Aircraft Band (117-137 MHz)
• Set 9/10 KHz AM tuning; set FM tuning range starting at 87 or 88 MHz
• Dual Conversion and Single Side Band (SSB)
• 1000 station memories
• 360 degree, rotating AM antenna
• Auto/Manual/Direct frequency key-in and station memory tuning
• Auto Tuning Storage function (ATS) for FM/AM/Shortwave
• Mute function
• 24 hour Clock and Dual alarm clock function
• Line in socket (can be used as speaker for MP3)
• Line out socket (radio broadcasting can be transferred to other device)
• External antenna jacks for SW, AM and FM
• Power source: 4D alkaline batteries; AC/DC-6V power supply
• Dimensions: 14.65” x 7.24” x 5.75” and 372mm x 184mm x 146mm (W x
H x D)
• Weight: 5.25 lbs (2.38 kg)
• Accessories: owner’s manual, warranty card
• Specications subject to change
AC adapter; Owner’s manual
Power the SATELLIT 750 by installing 4 D alkaline, lithium or Ni-MH batter-
ies or by plugging in the included 6 VDC AC adapter. The AC adapter plugs
into the 6 Volt DC socket on the left side of the radio. A battery symbol
appears in the lower right of the LCD, indicating battery or AC adapter
power. If there’s a power failure with the AC adapter attached and batteries
installed, the batteries will take over and supply power to the radio.
To minimize the possibility of battery acid leakage, only use high quality al-
kaline, lithium or rechargeable nickel-metal-hydride batteries. Never intermix
old with new, or different brands or types of batteries. Damage caused by
battery acid leakage is not covered by this product’s warranty.
To use the SATELLIT 750 in North America (U.S. or Canada), no changes to
the initial factory settings are needed.
In North America, AM stations are spaced by 10 KHz. In Europe and other
areas, they are spaced by 9 KHz. In North America, the FM band begins at
88 MHz. In other parts of the world, it may begin at 76 MHz or 87 MHz.
Follow these steps to set this for your area:
To change these settings for your area turn the SATELLIT 750 off. Press
the ENTER button and notice that -- appears in the upper right corner
of the display. While -- appears, enter 09 or 10 with the numeric keypad
and press ENTER. Repeat this procedure and press 88, 87 or 76 and press
ENTER.
PREVENTING BATTERY LEAKAGE
SETTING UP AM AND FM OUTSIDE OF
NORTH AMERICA
WHAT’S INCLUDED?
FEATURES POWER SOURCES

6
SATELLIT 750 OWNER’S MANUAL
7
SATELLIT 750 OWNER’S MANUAL
SHORTWAVE LISTENING
Press the POWER button to turn it on and off.
With the SATELLIT 750 on, turn the VOLUME knob, located in the lower left
front, clockwise to increase the volume, counterclockwise to decrease the
volume.
The Satellit 750 receives FM on 88-108 MHz, AM on 520-1710 KHz,
Longwave on 100-519 KHz, Shortwave on 1711-29999 KHz and Aircraft
on 118 -137 MHz.
Turn the Satellit 750 on. Select FM by pressing the FM button, MW(AM)
and Longwave by pressing the MW/LW button (press it twice if necessary),
Shortwave by pressing the SW button sequentially until you have selected
the desired band (the band number ashes in the upper right corner of the
display) and the Aircraft band by pressing the AIR button.
NOTE: Be sure to fully extend the telescopic antenna when listening to
SW, FM and AIR. The swivel AM antenna is located at the top of the radio;
swivel it for best AM reception.
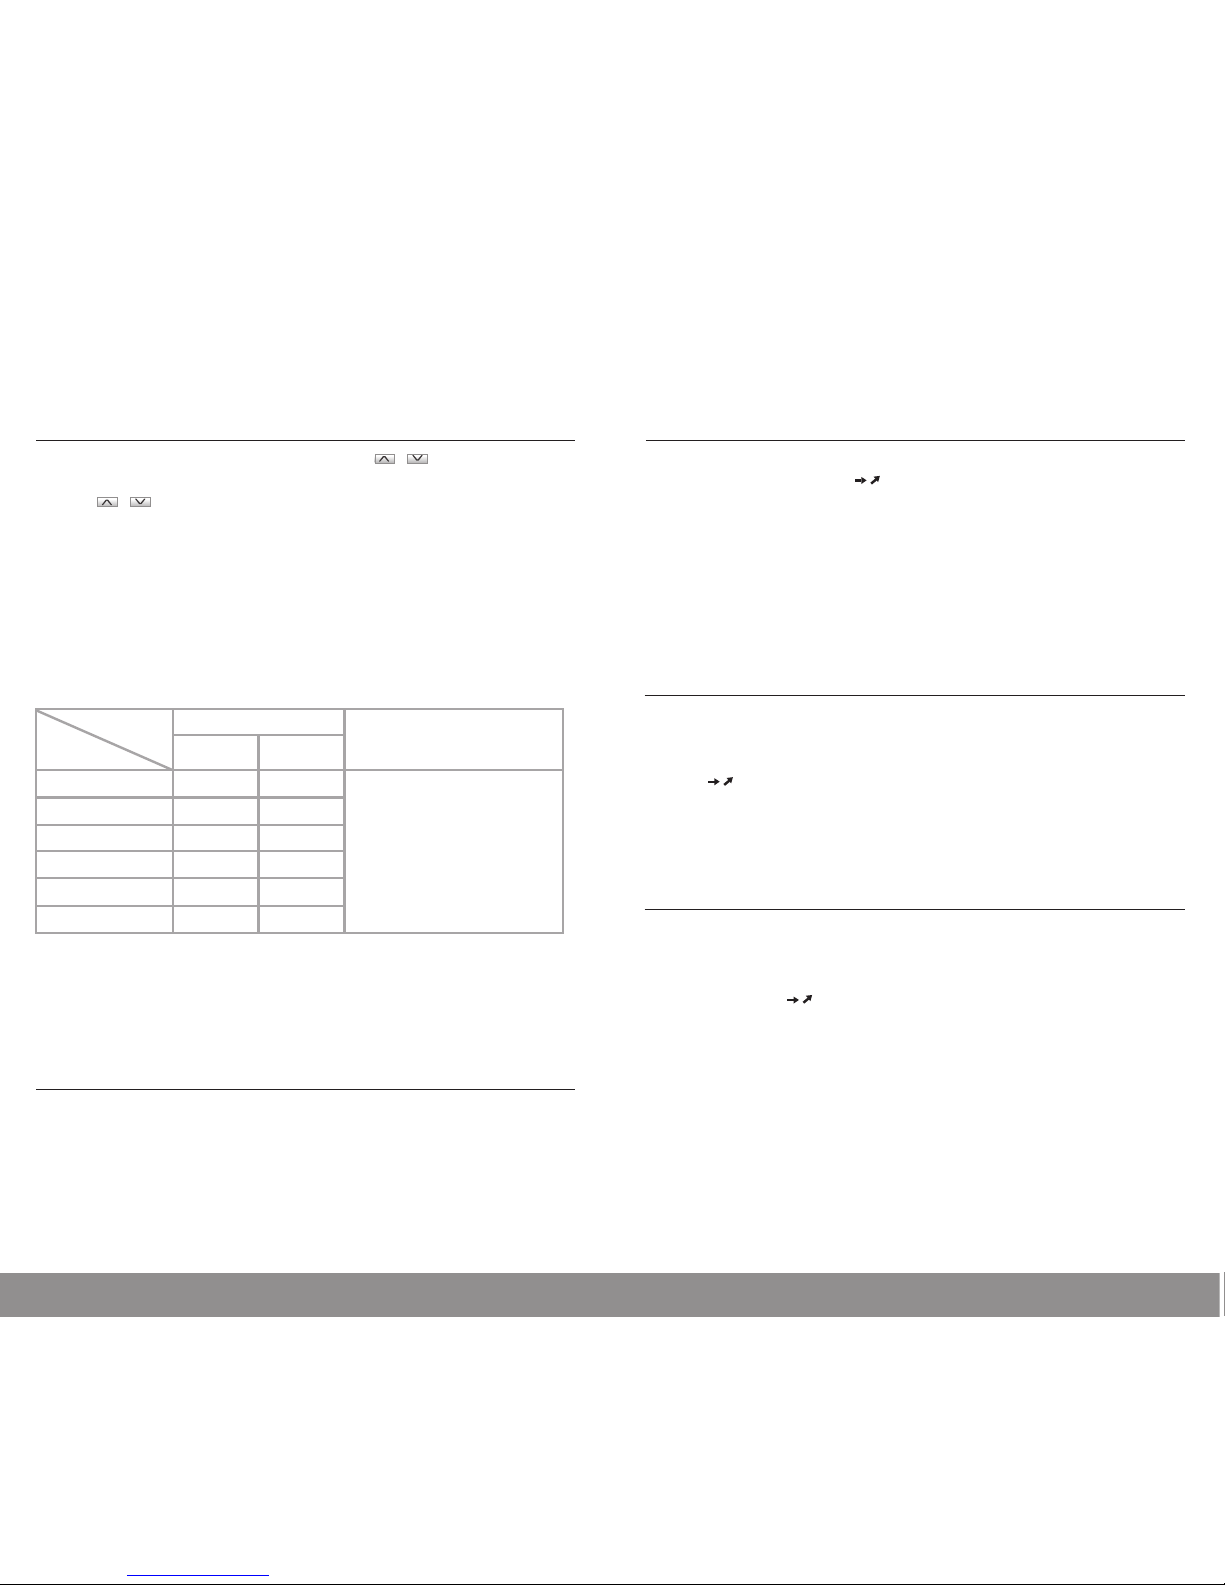
The Satellit 750 receives shortwave on all meter bands and between the
meter bands. A band is a frequency range that contains shortwave stations.
All 14 of the international broadcast bands can be accessed. The bands are
numbered 120, 90, 75, 60, 49, 31, 25, 22, 19, 16, 15, 13 and 11 meters
and are commonly called ‘Meter Bands’. Bands with frequencies above
13000 KHz are best during the day; below 13000 KHz are best at night. To
access the beginning of a band, press SW over and over. As you press you’ll
see the band number on the upper right side of the display. Just go to the
beginning of a band and start tuning.
To learn about shortwave we recommend the two publications below, pub-
lished yearly and available from major booksellers. Additionally, the Internet
is a great resource for learning about shortwave.
PASSPORT TO WORLD BAND RADIO Published by International Broad-
casting Services (IBS); IBS North America, Box 300, Penn’s Park PA 18943.
Phone: (215) 598-9018. www.passband.com.
WORLD RADIO TV HANDBOOK Published in the USA by Watson-Guptill
Publications, 770 Broadway, 7th Floor, New York, NY 10003-9595. www.
watsonguptill.com.
Shortwave enables listening to broadcasts over vast distances including
other countries and continents. The following information will help you get
the best results.
• During the day, use bands with frequencies above 13000 KHz.
• At night, use bands with frequencies below 13000 KHz.
• Around sunset and sunrise, use bands with the entire shortwave range.
• Getting very close to a window improves shortwave reception.
SSB enables listening to shortwave two way communications using the
single sideband mode such as amateur radio, Morse code, weather-fax
transmissions and other signals often referred to as ‘utility’ signals. The
Internet and your local library are great resources to learn more. Type ‘ama-
teur radio frequencies’ or ‘sideband’ into an Internet search engine.
VOLUME CONTROL
OPTIMIZING SHORTWAVE RECEPTION
SSB (SINGLE SIDE BAND) TUNING
TURNING THE SATELLIT 750 ON AND OFF
SELECTING FM, MW(AM), LW, SHORTWAVE
AND AIRCRAFT BAND

8
SATELLIT 750 OWNER’S MANUAL
9
SATELLIT 750 OWNER’S MANUAL
of interference from adjacent frequencies that may interfere, especially on
Shortwave. This switch does not work in FM.
Using the squelch control eliminates background noise. This control is used
mainly in the aircraft band. This control is on the lower right front of the
radio. To engage it, turn it on by turning the knob clockwise. Turn it off by
clicking the knob fully counterclockwise.
Stations are tuned using Direct Frequency Entry, the Buttons and the
Tuning Knob, as described below.
Use this method when the desired frequency of a radio station is known.
Turn on the SATELLIT 750 and select the band of your choice. AM and SW
frequencies are entered in kilohertz (KHz), e.g. 810 KHz or 9475 KHz.; FM
frequencies are entered in megahertz (MHz), e.g. 102.9 MHz, ignoring the
decimal point. Use the numeric keypad to enter the frequency.
RF GAIN CONTROL continuedSSB (SINGLE SIDE BAND) TUNING continued
To use the SSB control, turn on the SATELLIT 750 and go into Shortwave.
Press the SSB button and notice that USB appears in the display, to the
right of SW. Press the SSB button again and notice that LSB appears to
the right of SW. USB is the abbreviation for Upper Sideband, LSB is the ab-
breviation for Lower Sideband. You will need to use one of these methods
to tune in signals. Also notice that on the lower right front of the radio is
a control knob labeled SSB BFO. BFO stands for Beat Frequency Oscillator.
This control knob is used to ne tune a sideband signal.
The ANT.ATT button, located on the upper right front of the radio, is used
to attenuate a signal. Tune into a station, then press the ANT.ATT button
and notice that the signal strength indicator, located on the left side of
the display, changes at three levels. The maximum level is the highest gain
and the lowest level is minimum gain. Use the lowest level if the signal is
extremely strong and local. Use the intermediate level for average signals
and use the highest level for weak signals. Experiment with this control to
see how it works best with the signals you listen to and use it to your liking.
On the right front of the radio is the RF Gain control knob. You can leave it
fully counterclockwise in the AUTO position, where it will function auto-
matically, or you can turn it clockwise and use it manually to control the RF
(radio frequency) gain. Using it manually may improve the radio’s rejection
ANTENNA ATTENUATOR (ANT.ATT) BUTTON
RF GAIN CONTROL
SQUELCH CONTROL
TUNING IN STATIONS
DIRECT FREQUENCY ENTRY TUNING

10
SATELLIT 750 OWNER’S MANUAL
11
SATELLIT 750 OWNER’S MANUAL
BUTTON TUNING FM ST. (FM STEREO) BUTTON
Turn on the Satellit 750 and select the band of your choice. Quick, short, se-
quential presses of the buttons enables tuning up or down frequency.
A longer press engages Auto Tuning. In Auto Tuning the radio scans from
one station to the next, stays on the new station for 5 seconds and then
moves on. To stop Auto Tuning, press either of the buttons.
The tuning knob can also be used to tune stations. Select FAST or SLOW
tuning with the STEP button, under the tuning knob. FAST/SLOW tuning
is shown in the chart below for each band. If you want to LOCK the tuning
knob press the STEP button for about 3 seconds. Do a quick, short press to
unlock it.
Use the BANDWIDTH button to choose wide or narrow selectivity, which
is shown in the lower right corner of the display as WIDE or NARROW.
This may help reduce interference on some frequencies. Using WIDE
usually results in better audio delity, while using narrow limits the audio
delity somewhat.
TUNING KNOB
Press the FM ST. button when in the FM band to take the radio in or out of
stereo reception mode. When it’s in stereo mode, STEREO appears under
the left side of the frequency in the display, next to FM. As long as you are
not using headphones or earphones, it can be left in mono mode.
Use these knobs to control the Bass and Treble to your liking. Turning
clockwise increases bass or treble. Turning counterclockwise decreases
bass or treble.
There are two separate sets of 500 memories, allowing for great exibility
of memory storage. Note the chart, below.
Memory PAGE 0, noted as ‘P0’, consists of 500 memories, 100 assigned for
FM, SW, SSB and Air Band; 50 memories each assigned for AM and LW.
Memory PAGE 1 – 10, noted as ‘P1’, ‘P2’, etc., consists of 50 memories per
page, 500 memories total.
To manually store a frequency into a memory, rst choose the page, then
the memory location and then store the frequency. In the instructions
below note that MEMORY=PRESET. See the instructions below.
• Turn on the radio and tune to a station that you want to store into
memory.
• Shortly press the MEMORY button (the preset will ash in the right
corner of the LCD).
FAST .1 MHz 10 KHz 5 KHz .025 MHz 5 KHz
SLOW .01 MHz 1 KHz 1 KHz .001 MHz 1 KHz/BFO
FM AM SW AIR SSB
BW (BANDWIDTH) BUTTON
BASS AND TREBLE KNOBS
STORING FREQUENCIES INTO MEMORY

12
SATELLIT 750 OWNER’S MANUAL
13
SATELLIT 750 OWNER’S MANUAL
STORING FREQUENCIES INTO MEMORY
continued LISTENING TO WHAT’S STORED continued
• Shortly press the PAGE button and use the “ / ” buttons to select
the page that you want to store into; press PAGE again to conrm.
• Use “ / ” to select the memory location while it is ashing.
• Press the MEMORY button to conrm it (or it will automatically conrm
after 3 seconds).
To automatically store a frequency into the next available memory on the
page that you’ve selected, press and release ‘M’. Note that PRESET ashes
with the next available memory number. Press ‘M’ to automatically store it
into the next available memory or when it stops ashing it’s stored into the
memory number that was ashing.
• Turn on the radio and go to the correct page by pressing PAGE and
entering it with the numeric keypad.
• Press and release the VM/VF button and notice that the PAGE and
PRESET show in the display’s upper right corner.
• To go from one memory to another give a quick, short press to either the
up or down tuning button , or use the tuning knob.
• To auto-scan memory press one of the up or down tuning buttons for
about 2 seconds and notice that PRESET ashes. The radio scans from
one memory to another, staying on each memory for about 5 seconds.
To stop the scan give the up or down tuning button a quick, short press.
• Turn on the radio and press the VM/VF button, causing PAGE and PRESET
to appear in the display’s upper right corner.
• Use the numeric keypad, the tuning knob or the up/down tuning but-
tons ( ) to select the memory that you want to delete. To delete the
memory press the DELETE button for about 1 second, then release it
and press it again.
• Turn on the radio and select the page that you want to delete by press-
ing PAGE, note that page ashes in the display’s upper right. While it’s
ashing use the numeric keypad, the tuning knob or the up or down
tuning buttons ( ) to select the page that you wish to delete.
• Press and release the VM/VF button so that PAGE and PRESET appear
in the display’s upper right corner. If - - appears above PRESET in the
display’s upper right corner, the page is already deleted and you don’t
have to continue.
• Press DELETE for about 3 seconds or until PAGE starts blinking and
press DELETE again.
LISTENING TO WHAT’S STORED
DELETE ONE MEMORY
(FM) 100
(SW) 100
(SSB) 100
(AIR) 100
(MW) 50
(LW) 50
Other storage space
500 MEMORIES
10 pages each with 50 memories
20 pages each with 25 memories
25 pages each with 20 memories
50 pages each with 10 memories
(See the system setting chart
to change above pages)
Storage space in P0 page
P0 (page) ATS
Band
Store
DELETE A MEMORY PAGE
√
√
√

14
SATELLIT 750 OWNER’S MANUAL
15
SATELLIT 750 OWNER’S MANUAL
ATS (AUTO TUNING STORAGE)
MEMORY STORAGE
One can automatically store the strongest LW, AM or FM stations
into Page 0.
Turn on the radio and select the band that you want ATS to take place in,
either MW/LW or FM. Press the MW/LW or FM for 2 seconds. Notice that
page 0 (P0) appears in the display’s upper right corner with the presets to
the right increasing as the band is scanned and frequencies are stored into
the memory.
The SATELLIT 750’s clock is in 24-hour format and can be set with the
radio on or off. When the radio is turned off the clock shows in mid-display.
When the radio is turned on the clock shows in the upper right corner of the
display.
To set the clock:
1. Press the TIME button for about a second or until you see the hour
ashing.
2. While it’s ashing turn the TUNING knob to set it to the correct hour,
then press TIME and note that the minutes are ashing.
3. While it’s ashing turn the TUNING knob to set it to the correct minutes,
then press TIME.
Note that after setting the hour or minutes you can simply let the ashing
number time-out, without pressing the TIME button.
The SATELLIT 750 has two, independently programmable alarm timers to
turn it on and off at a specied time.
To set an alarm:
1. Press the AL.1 or AL.2 button for a second or until you see the alarm
hour ashing in the upper right corner of the display. While it’s ashing
adjust the hour with the TUNING knob and press the AL.1 or AL.2 but-
ton. Notice that the alarm minutes are ashing.
2. While it’s ashing adjust the alarm minutes with the TUNING knob and
press the AL.1 or AL.2 button. Notice the sleep timer ashing in the box
at the top of the display.
3. While it’s ashing adjust the time that the radio is to play with the TUN-
ING knob and press the AL.1 or AL.2 button.
Note that after setting the hour or minutes you can simply let the ashing
number time-out, without pressing the AL.1 or AL.2 button.
Once the alarm is on (by radio or buzzer), only the POWER, SLEEP, LIGHT/
SNOOZE and RESET can be operated. Press the POWER or SLEEP buttons
to turn off the alarm.
Press on [AL.1 on/off] key to select “ ” in “Timer A” section. Now, the
alarm will be on by the buzzer.
Note: In “Timer A” section:
“ ” Means timer is set by radio.
“ ” Means timer is set by buzzer.
“ ” Means Timer is off.
CLOCK (TIME) SETTING
ALARM SETTING
ALARM BY BUZZER

16
SATELLIT 750 OWNER’S MANUAL
17
SATELLIT 750 OWNER’S MANUAL
LIGHT/SNOOZE BUTTON
When the alarm is activated, press the LIGHT/SNOOZE button to temporar-
ily deactivate the timer for 10 minutes. You can press the LIGHT/SNOOZE
button 3 times within the alarm period, after that you can turn off the
alarm by press it again.
For the alarm to turn on the radio, it must be activated. To activate the
alarm the SATELLIT 750 can be turned on or off.
To activate the alarm, look at the top of the display, to the right of where it
reads TIMER A and TIMER B. Use quick, short presses of the AL.1 ON/OFF or
AL.2 ON/OFF buttons. When the speaker is there, it wakes you to the radio
playing; when the bell is there, it wakes you to an electronic beeper; when
nothing is there, the alarm is deactivated.
The sleep timer enables the SATELLIT 750 to play any length of time from
1 – 120 minutes and then turn off.
To turn on the sleep timer, press the SLEEP button on the upper, right front
of the radio. Notice that the number of minutes to play appears in the
display. While they appear there, press the SLEEP button over and over and
it sequences through 1 to 120 minutes. Leave it on the minutes that you
want it to play.
A quick press of the LIGHT button gives about 5 seconds of illumination
to the SIGNAL strength indicator and the display. A long press lights these
for as long as the radio is turned on, so be careful if you’re operating on
batteries, because it will make them drain faster. If you’re AC adapter is
connected, the light can be left on continuously.
The earphone socket is on the lower left front of the radio and is labeled
EAR. Plug in earphones and headphones using a 3.5 mm (1/8 inch) stereo
plug. Turn the volume down before plugging them in.
The LINE-IN socket is on the lower left front of the radio and allows you to
route the sound from another device to the Satellit 750. Use a cord with
a 3.5 mm (1/8 inch) stereo plug. This socket uses an industry standard line
level input.
On the back of the radio are the left and right line-out sockets, labeled LINE
OUT. These sockets use an industry standard line level output and can be
routed to any industry standard line level input.
ALARM ACTIVATION/DEACTIVATION
SLEEP TIMER
USING THE LIGHT BUTTON
EARPHONE SOCKET
LINE-IN SOCKET
LINE OUT SOCKETS

18
SATELLIT 750 OWNER’S MANUAL
19
SATELLIT 750 OWNER’S MANUAL
The external antenna sockets are used to connect the SATELLIT 750 to
advanced performance antennas.
On the right side of the radio are the 50 Ohm BNC sockets for FM and
Shortwave. 50 or 75 Ohm coaxial cable can be used to feed the properly
designed antenna. To nd antennas we recommend that you perform
a web search by typing ‘FM antennas’ or ‘shortwave antennas’ into an
Internet search engine.
There is also a black and red socket, labeled 500 Ohms, designed to work
with a high impedance Shortwave antenna, 300-600 Ohms, such as a
long wire antenna. Plug a long piece of wire, 10 to 35 meters or 30 to 100
feet, into the red socket and position it above ground, running in as much a
straight line as possible, not touching any other metal objects. If you do this
indoors, position the wire as close to windows as possible. Plug a 10 to 20
meter or 30 to 60 foot wire into the black socket and let it run on the oor
or ground. Or attach the black socket to a cold water pipe with as short a
piece of wire as possible.
On the rotateable AM antenna, at the top of the radio, is a socket for 50 or
75 Ohm plug-in AM antennas.
When using external sockets select EXTERNAL with the selector switch on
the right side of the radio. When using the internal antennas of the radio,
switch it to ANTENNA.
NOTE: always unplug all antennas that are mounted outside when a
lightning storm is predicted.
The reset button is located to the left under the TUNING knob. When the
unit is dead or seems to stop functioning properly, press the Reset Button
to reboot the unit. Stored memories and the alarm clock settings will not
be eliminated. After it’s pressed the AM station spacing will have to be set
again for North America.
Use the small, empty compartment next to the battery compartment as
you wish.
To enter different system codes turn off the radio and perform a quick,
short press of the ENTER button. “_ _” appears on the upper right corner of
the display. Enter the system code as below, then push ENTER to conrm
the system code.
EXTERNAL ANTENNA SOCKETS
EMPTY COMPARTMENT ON BACK OF
THE RADIO
RESET BUTTON
SYSTEM CODE SETTING

20
SATELLIT 750 OWNER’S MANUAL
21
SATELLIT 750 OWNER’S MANUAL
SPECIFICATIONSSYSTEM CODE SETTING continued
Frequency range
LW
MW
SW
AIR
FM
speaker
Earphone jack
Power consumption
Operation Temp.
Weight
Measurements
Power
100-519 kHz
522-1620 kHz – system code “09”
520-1710 kHz (America) -system code “10”
1711-29999 kHz
118-137MHz
87-108MHz
76-108MHz
8 ohm / 2W
4 inches
3.5mm, stereo
without back light 80mAh
with back light 90 mAh
-5 to +50 C
2.66 kg, not including batteries
L: 372 mm
H: 183 mm
W: 153 mm
Batteries : UM1 (alkaline) x 4
DC: 6V/500mA, negative polarity
For memory page setting (500 memories)
CODE
00 10 pages; each page 50 memories
20 20 pages; each page 25 memories
25 25 pages; each page 20 memories
50 50 pages; each page 10 memories
Step (AM)
09 9kHz
10 10kHz (North America)
Type of batteries
29 Normal D size batteries (1.5V each battery)
28 Rechargeable batteries (1.2V each battery)
FM frequency range
76 76-108 MHz (Japan)
87 87-108 MHz

22
SATELLIT 750 OWNER’S MANUAL
23
SATELLIT 750 OWNER’S MANUAL
To ensure full warranty coverage or product updates, registration of your
product should be completed as soon as possible after purchase or receipt.
You may use one of the following options to register your product:
1. By visiting our website at http://www.etoncorp.com
2. Mail in enclosed warranty card.
3. Mail your warranty card or information to following address; include
your name, full mailing address, phone number, email address, model
purchased, date purchased, retail vendor name:
Etón Corporation
1015 Corporation Way
Palo Alto, CA 94303 USA
Retain the warranty information from your warranty card with your proof of
purchase or the Limited Warranty information can also be viewed at www.
etoncorp.com.
To obtain service for your product, we recommend rst contacting an
Etón service representative at 1-800-872-2228 US, 1-800-637-1648
Canada, (650) 903-3866, customersvc@etoncorp.com or your respective
country distributor in Europe (see enclosed list) for problem determination
LIMITED WARRANTY
and trouble-shooting. If further service is required, the technical staff will
instruct how to proceed based on whether the radio is still under warranty
or needs non-warranty service.
WARRANTY – If your product is still in warranty and the Etón service
representative determines warranty service is needed, a return authoriza-
tion will be issued and instructions will be given. DO NOT ship your radio
back without obtaining the return authorization.
NON-WARRANTY – If your product is no longer under warranty and re-
quires service, the Etón service representative will refer you to the nearest
repair facility that will best handle the repair.
For service outside North America, please refer to the distributor informa-
tion included at time of purchase/receipt.
The manufacturer is not responsible for any radio or tv interference caused
by unauthorized modications to this equipment. Such modications could
void the user’s authority to operate the equipment.
SERVICE FOR YOUR PRODUCT
SERVICE FOR YOUR PRODUCT continuedWARRANTY REGISTRATION
FCC NOTE

25
SATELLIT 750 MANUAL D’OPÉRATION
AVEZ-VOUS BESOIN D’AIDE?
N’HESITEZ PAS A NOUS CONTACTER.
Si vous avez besoin d’aide, veuillez nous contacter, Du Lundi au Vendredi, 8:30
à.- 16:00., Fuseau horaire du Pacique Amérique du Nord. 1-800-872-2228
depuis les U.S.A; 1-800-637-1648 depuis le Canada; 650-903-3866, ailleurs
dans le monde; FAX: 650-903-3867; site Internet, www.etoncorp.com; Etón
Corporation, 1015 Corporation Way, Palo Alto, CA 94303, USA
AVERTISSEMENT
• Ne pas exposer cet appareil à la pluie ou à l’humidité.
• Ne pas immerger ou exposer à l’eau pendant une longue période.
• Protéger d’une grande humidité et de la pluie.
• Débrancher immédiatement si un liquide a été renversé sur l’appareil ou si un objet quelconque
est tombé à l’intérieur.
• Nettoyer seulement avec un chiffon sec. Ne pas utiliser de détergents ni de solvants chimiques
qui pourraient endommager le ni.
• Débrancher et déconnecter l’antenne extérieure en cas d’orages.
• Ne pas enlever le couvercle [ou l’arrière].
• S’adresser à du personnel qualié pour la maintenance.
Mise au rebut
Conformément à la Directive Européenne 2002/96/EC tous les
produits électriques et électroniques doivent être récupérés
séparément par un système local de collecte.
Veuillez agir suivant les règles locales et ne pas mettre au rebut
vos vieux appareils avec vos déchets ménagers ordinaires.
ENVIRONNEMENT

26
SATELLIT 750 MANUAL D’OPÉRATION
27
SATELLIT 750 MANUAL D’OPÉRATION
Nous vous remercions d’avoir effectué l’achat du Satellit 750. Ses fonction-
nalités et capacités sont décrites ci-dessous :
• Ondes Courtes (1 711 à 30 000 kHz) avec SSB (bande latérale unique),
LW (grandes ondes), AM (modulation d’amplitude), FM (modulation de
fréquence) et Aircraft Band (118 à 137 MHz)
• paramétrage du pas de réglage AM sur 9 ou 10 kHz AM ; la gamme des
fréquences FM démarre au choix à 87 ou 88 MHz
• Double conversion et bande latérale unique (SSB)
• 1000 mémoires de présélections de stations
• Antenne AM rotative à 360 degrés
• Saisie des fréquences et réglage des mémoires des stations Auto/Manu-
elle/Directe
• Fonction de stockage de syntonisation automatique (ATS) pour la FM/AM
• Fonction silence
• Fonction horloge sur 24 heures et double réveil
• Prise Line in (peut être utilisé comme haut-parleur pour un lecteur MP3)
• Prise Line out (une émission de radio peut être transférée vers un autre
appareil)
• Prises d’antennes externes pour SW, AM et FM
• Alimentation : 4 piles alcalines types 4 D ; bloc d’alimentation CA/CC-6 V
• Dimensions : 14,65” x 7,24” x 5,75” et 372 mm x 184 mm x 146 mm (L x
H x P)
• Poids : 5,25 livres (2,38 kg)
• Accessoires : manuel du propriétaire, carte de garantie
• Caractéristiques sujettes à modications
Alimentation CA ; manuel du propriétaire
Alimentez le SATELLIT 750 en insérant 4 piles alcalines 4 D, lithium ou Ni-
MH, ou en branchant le transformateur 6 Vcc/ca inclus. Le transformateur
CA (courant alternatif) se branche à la prise 6 Volt CC située sur le côté
gauche de la radio. Le symbole d’une batterie apparaît dans l’angle inférieur
droit de l’écran à cristaux liquides. En cas de coupure de courant avec le
transformateur CA et si des piles sont installées, celles-ci prennent le relai
et alimentent la radio.
Pour réduire le risque d’une fuite d’acide provenant des piles, utilisez
uniquement des piles alcalines lithium haute qualité ou des batteries re-
chargeables au nickel-métal-hydrure. Ne mélangez jamais de piles usagées
avec des nouvelles, ou différentes marques de piles. Les dommages causés
par des fuites d’acide ne sont pas couverts par la garantie de ce produit.
Pour utiliser le SATELLIT 750 en Amérique du Nord (U.S.A ou Canada),
aucun changement des paramètres d’usine par défaut n’est nécessaire.
En Amérique du Nord, les stations AM sont espacées de 10 KHz. En Europe
et dans d’autres régions, elles sont espacées de 9 KHz. En Amérique du
Nord, la bande FM commence à 88 MHz. Dans d’autres parties du monde,
SOURCES D’ALIMENTATION
CONFIGURATION DE L’AM ET LA FM EN DEHORS
DE L’AMERIQUE DU NORD
FONCTIONNALITES CE QUI EST INCLUS
PREVENTION CONTRE LES FUITES DE BATTERIE

28
SATELLIT 750 MANUAL D’OPÉRATION
29
SATELLIT 750 MANUAL D’OPÉRATION
dans le coin supérieugauche) et la bande Aircraft en appuyant sur la touche
AIR.
REMARQUE : assurez-vous de sortir totalement l’antenne téléscopique
lorsque vous écoutez SW, FM ou AIR. L’antenne AM sur rotule se trouve sur
le dessus de la radio ; la rotule permet une meilleure réception AM.
Le Satellit 750 reçoit les ondes courtes sur toutes les bandes métriques
et entre les bandes métriques. Une bande est une gamme de fréquences
qui contient les stations en ondes courtes. On peut accéder aux 14 bandes
d’émissions internationales. Les bandes sont numérotées 120, 90, 75,
60, 49, 31, 25, 22, 19, 16, 15, 13 et 11 mètres et sont communément
appelées ‘Bandes métriques’. Les bandes avec les fréquences en dessus
de 13000 KHz sont mieux réceptionnées durant la journée; en dessous de
13000 KHz la nuit. Pour accéder au début d’une bande, appuyez sur SW
plusieurs fois. Tant que vous appuyez vous verrez le numéro de bande sur
le côté droit supérieur de l’afchage. Allez juste au début d’une bande et
commencez à syntoniser.
Pour en savoir plus sur les ondes courtes, nous vous recommandons les
deux publications ci-dessous, éditées tous les ans et disponibles dans
la majorité des librairies. En outre, Internet est une source importante
d’informations pour vous documenter sur les ondes courtes.
PASSPORT TO WORLD BAND RADIO publié par International Broad-
casting Services (IBS) ; IBS North America, Box 300, Penn’s Park PA 18943.
Téléphone : (215) 598-9018. www.passband.com.
WORLD RADIO TV HANDBOOK publié aux États-Unis par Watson-Guptill
Publications, 770 Broadway, 7th Floor, New York, NY 10003-9595. www.
watsonguptill.com.
elle peut commencer à 76 MHz ou 87 MHz. Suivez ces étapes pour régler
ceci pour votre région:
Pour changer ces paramètres pour votre région, éteignez le SATELLIT 750.
Appuyez sur le bouton ENTER et remarquez que – apparaît dans le con
supérieur droit de l’afchage. Tant que – est afché, entrez 09 ou 10 avec
le clavier numérique et appuyez sur ENTER. Répétez cette procédure et
appuyez sur 88, 87 ou 76 et appuyez sur ENTER.
Appuyez sur la touche POWER pour allumer ou éteindre l’unité..
Le SATELLIT 750 allumé, tournez le bouton VOLUME, situé sur l’avant en
bas à gauche, dans le sens des aiguilles d’une montre pour augmenter le
volume, ou dans le sens inverse pour diminuer le volume.
Le Satellit 750 reçoit la FM entre 88 et 108 MHz, AM entre 520 et 1710
KHz, les grandes ondes entre 100 et 519 KHz, les Ondes courtes entre
1711 et 29999 kHz et Aircraft entre 118 et 137 MHz.
Allumez le Satellit 750. Sélectionnez la bande FM en appuyant sur la
touche FM, MW(AM), grandes ondes en appuyant sur la touche MW/LW
(appuyez deux fois si nécessaire), ondes courtes en appuyant su la touche
SW séquentiellement jusqu’à la bande désirée (le numéro de bande clignote
ALLUMER OU ETEINDRE LE SATELLIT 750
ECOUTER LES ONDES COURTES
CONFIGURATION DE L’AM ET LA FM EN DEHORS
DE L’AMERIQUE DU NORD continué
CONTROLE DU VOLUME
SELECTIONNER LA BANDE FM, MW(AM), LW,
OC OU AIRCRAFT
SELECTIONNER LA BANDE FM, MW(AM), LW,
OC OU AIRCRAFT continué

30
SATELLIT 750 MANUAL D’OPÉRATION
31
SATELLIT 750 MANUAL D’OPÉRATION
La touche ANT.ATT, située dans l’angle avant droit supérieur de la radio,
est utilisée pour atténuer un signal, puis appuyez sur la touche ANT.ATT et
remarquez que l’indicateur de la force du signal, situé sur le côté gauche de
l’afchage, change selon trois niveaux. Le niveau maximum correspond au
gain maximal et le niveau minimum est le gain minimal. Utilisez le niveau
minimum si le signal est particulièrement fort et proche. Utilisez le niveau
intermédiaire pour les signaux moyens et utilisez le niveau le plus élevé
pour les signaux les plus faibles. Faites des essais avec cette commande et
découvrez son fonctionnement optimal avec les signaux que vous écoutez,
puis utilisez-la selon vos goûts.
Sur le côté droit de la radio, vous trouverez le bouton de gain RF. Vous pou-
vez le laisser au maximum dans le sens inverse des aiguilles d’une montre
dans la position AUTO, où le fonctionnement sera automatique, ou vous
pouvez le tourner dans le sens des aiguilles d’une montre pour contrôler le
gain RF (radio fréquence) manuellement. L’utilisation manuelle améliore la
ltration des interférences des fréquences adjacentes, particulièrement en
Ondes Courtes. Ce commutateur ne fonctionne pas en FM.
L’utilisation du silencieux permet d’éliminer le bruit de fond. Ce contrôle
est principalement utilisé en bande aircraft. Cette commande se trouve
dans l’angle avant inférieur droit de la radio. Pour l’enclencher, activez-le
en tournant le bouton dans le sens des aiguilles d’une montre. Eteignez-le
en tournant le bouton totalement dans le sens inverse des aiguilles d’une
montre.
Les ondes courtes permettent d’écouter des programmes diffusés sur des
grandes distances, y compris d’autres pays ou continents. Les informations
suivantes vont vous aider à obtenir les meilleurs résultats.
• Le jour, utilisez les fréquences supérieures à 13 000 kHz.
• La nuit, utilisez les fréquences inférieures à 13 000 kHz.
• Au coucher et au lever du soleil, utilisez la largeur complète de la bande de
fréquences en ondes courtes.
• Se placer à proximité d’une fenêtre et tenir la radio, améliorent la récep-
tion des ondes courtes.
La BLU (SSB) permet d’écouter les communications en ondes courtes deux
voies en utilisant le mode bande latérale unique comme la radio amateur,
le code Morse, les transmissions fax-météo et les autres signaux souvent
référencés comme les signaux « polyvalents ». Internet et la bibliothèque
locale sont des sources importantes d’information pour en savoir plus.
Saisissez « fréquences radio amateurs » ou « bande latérale (sideband) »
dans un moteur de recherche Internet.
Pour utiliser le contrôle SSB, allumez le SATELLIT 750, allez dans Ondes
Courtes et remarquez l’apparition d’USB à l’écran, à droite de SW. Appuyez
sur la touche SSB à nouveau et remarquez maintenant l’apparition de LSB
à droite de SW. USB est l’abréviation d’Upper Sideband (bande latérale su-
périeure). Vous devez utiliser l’une de ces méthodes pour régler les signaux.
Notez en outre qu’un bouton de commande étiqueté SSB BFO se trouve en
bas à droite de la radio. BFO signie Beat Frequency Oscillator (oscillateur
de battements). Ce bouton de commande est utilisé pour régler nement
un signal à bande latérale.
BOUTON ATTENUATEUR D’ANTENNE (ANT.ATT)
OPTIMISER LA RECEPTION DES ONDES COURTES
SYNTONISATION BLU (BANDE LATERALE UNIQUE)
COMMANDE DE GAIN RF (RADIO FREQUENCE)
COMMANDE DU SILENCIEUX

32
SATELLIT 750 MANUAL D’OPÉRATION
33
SATELLIT 750 MANUAL D’OPÉRATION
Utilisez la touche BANDWIDTH (largeur de bande) pour sélectionner une
sélectivité large ou étroite, comme indiqué dans l’angle inférieur droit de
l’écran sous la forme WIDE (large) ou NARROW (étroit). Ceci peut contribuer
à réduire les interférences sur certaines fréquences. L’utilisation de WIDE
améliore généralement la délité audio, alors que l’utilisation des limites
étroites limite quelque peu la délité audio.
Appuyez sur la touche FM ST. en mode FM pour accéder ou sortir du mode
de réception stéréo. En mode stéréo, STEREO apparaît sous le côté gauche
de la fréquence sur l’écran, à côté de FM. Tant que vous n’utilisez pas de
casque ni d’écouteurs, vous pouvez rester en mode mono.
Utilisez ces boutons pour contrôler les basses et les aigus selon vos
préférences. Tourner dans le sens des aiguilles d’une montre augmente les
basses ou les aigus. Tourner dans le sens inverse des aiguilles d’une montre
réduit les basses ou les aigus.
Les stations sont réglées à l’aide de la saisie de la fréquence directe, des
touches et du bouton Tuning, comme décrit ci-dessous.
Utilisez cette méthode si la fréquence de la station de radio que vous
souhaitez est connue. Allumez le SATELLIT 750 et sélectionnez la bande
de votre choix. Les fréquences AM et SW sont saisies en kilohertz (kHz),
par exemple : 810 kHz ou 9475 kHz ; les fréquences FM sont saisies en
mégahertz (MHz), par exemple : 102,9 MHz, en ignorant la virgule décimale.
Utilisez le pavé numérique pour saisir une fréquence.
Allumez le Satellit 750 et sélectionnez la bande de votre choix. Des appuis
rapides, courts et séquentiels sur les touches permettent d’augmenter
ou de diminuer la fréquence. Un appui long enclenche l’accord automatique.
En mode accord automatique, la radio balaye d’une station à la suivante,
reste 5 secondes sur la nouvelle station, puis continue. Pour arrêter l’accord
automatique, appuyez sur l’une des touches .
Le bouton d’accord peut également être utilisé pour accorder les stations.
Sélectionnez la vitesse RAPIDE ou LENTE de l’accord avec le bouton STEP,
sous le bouton d’accord. L’accord RAPIDE/LENT est représenté dans le
tableau ci-dessous pour chaque bande. Si vous souhaitez verrouiller le
bouton d’accord, appuyez environ 3 secondes sur STEP. Appuyez une fois
rapidement, pour le verrouiller.
BOUTON LARGEUR DE BANDE (BW)
BOUTON DE SYNTONISATION
RAPIDE 0,1 MHz 10 KHz 5 KHz 0,025 MHz 5 KHz
LENT 0,01 MHz 1 KHz 1 KHz 0,001 MHz 1 KHz/BFO
FM AM SW AIR SSB
BOUTON DE SYNTONISATION
BOUTON FM ST. (FM STEREO)
BOUTONS BASS ET TREBLE (GRAVES ET AIGUS)
REGLAGE DES STATIONS
SAISIE DIRECTE DE LA FREQUENCE
BOUTON DE SYNTONISATION continué

34
SATELLIT 750 MANUAL D’OPÉRATION
35
SATELLIT 750 MANUAL D’OPÉRATION
SAUVEGARDE DES FREQUENCES EN MEMOIRE
continué
ECOUTER LES RADIOS SAUVEGARDEES
SAUVEGARDE DES FREQUENCES EN MEMOIRE
Il existe deux jeux séparés de 500 mémoires, permettant une grande
exibilité de la gestion de la mémoire. Prenez connaissance du tableau
ci-dessous.
PAGE Mémoire 0, noté « P0 », se compose de 500 mémoires, 100 sont
affectées aux bandes FM, SW, SSB et Air Band ; 50 sont affectées aux
bandes AM et LW.
PAGE Mémoire 1 à 10, notées « P1 », « P2 », etc., se composent de 50
mémoires par page, soient 500 mémoires au total.
Pour sauvegarder manuellement une fréquence en mémoire, commencez
par choisir la page, puis l’emplacement mémoire, puis enregistrez la
fréquence. Dans les instructions qui suivent, remarquez que MEMORY =
PRESET (présélections). Suivez les instructions ci-dessous.
• Allumez la radio et réglez une station de radio que vous souhaitez sauveg-
arder.
• Appuyez rapidement sur la touche MEMORY (préselection clignote dans
l’angle droit de l’écran à cristaux liquides).
• Appuyez rapidement sur la touche PAGE et utilisez les touches « /
» pour sélectionner la page de votre choix pour sauvegarder la station ;
appuyez à nouveau sur PAGE pour conrmer.
• Utilisez « / » pour sélectionner l’emplacement mémoire pendant
qu’il clignote.
• Appuyez sur la touche MEMORY pour le conrmer (ou la conrmation sera
automatique après 3 secondes).
Pour sauvegarder automatiquement une fréquence dans la prochaine mé-
moire disponible de la page sélectionnée, appuyez sur « M » puis relâchez.
Remarquez que PRESET clignote avec le numéro de la prochaine mémoire
disponible. Appuyez sur « M » pour la sauvegarder automatiquement dans
(FM) 100
(SW) 100
(SSB) 100
(AIR) 100
(MW) 50
(LW) 50
Autres espaces de sauvegarde
500 mémoires
10 pages chacune avec 50 mémoires
20 pages chacune avec 25 mémoires
25 pages chacune avec 20 mémoires
50 pages chacune avec 10 mémoires
(reportez-vous au tableau de réglage du
système pour changer les pages ci-dessus)
Espace de sauvegarde
dans la page P0
P0 (page) ATS
Bande
Sauvegarde
√
la prochaine mémoire disponible, ou elle sera sauvegardée à l’arrêt du
clignotement dans le numéro de mémoire qui clignotait.
• Allumez la radio et accédez à la page correcte en appuyant sur PAGE et en
saisissant le numéro avec le pavé numérique.
• Appuyez et relâchez la touche VM/VF et remarquez que PAGE et PRESET
apparaissent dans l’angle supérieur droit de l’écran.
• Pour passer d’une mémoire à l’autre, appuyez rapidement soit sur les
touches d’accord haut ou bas , ou utilisez le bouton d’accord.
• Pour balayer automatiquement les mémoires, appuyez sur l’une ou l’autre
des touches d’accord haut/bas environ 2 secondes et remarquez que
PRESET clignote. La radio balaye les mémoires l’une après l’autre, restant
environ 5 secondes sur chaque mémoire. Pour interrompre le balayage,
appuyez rapidement sur l’une des touches d’accord haut ou bas.
√
√

36
SATELLIT 750 MANUAL D’OPÉRATION
37
SATELLIT 750 MANUAL D’OPÉRATION
• Allumez la radio et appuyez sur la touche VM/VF, faisant apparaître PAGE
et PRESET dans l’angle supérieur droit de l’écran.
• Utilisez le pavé numérique, le bouton d’accord ou les touches d’accord
haut/bas ( ) pour sélectionner la mémoire que vous souhaitez
supprimer. Pour supprimer la mémoire, appuyez environ 1 seconde sur la
touche DELETE, puis relâchez-la, et appuyez à nouveau.
• Allumez la radio et sélectionnez la page que vous souhaitez supprimer en
appuyant sur PAGE, remarquez que PAGE clignote dans l’angle supérieur
droit de l’écran. Pendant que PAGE clignote, utilisez le pavé numérique, le
bouton d’accord ou les touches d’accord haut/bas ( ) pour sélectionner
la page que vous souhaitez supprimer.
• Appuyez et relâchez la touche VM/VF pour faire apparaître PAGE et PRE-
SET dans l’angle supérieur droit de l’écran. L’apparition de - - au-dessus
de PRESET dans l’angle supérieur droit signie que la page est déjà
supprimée, vous n’avez pas besoin de continuer.
• Appuyez sur DELETE environ 3 secondes ou jusqu’à ce que PAGE com-
mence à clignoter et appuyez à nouveau sur DELETE.
La radio peut sauvegarder automatiquement les fréquences les plus fortes
des bandes AM, FM ou ondes courtes sur la page 0.
Allumez la radio et sélectionnez la bande avec laquelle vous souhaitez
appliquer la fonction ATS, soit MW/LW ou FM. Appuyez 2 secondes sur MW/
LW ou FM. Remarquez que page 0 (P0) apparaît dans l’angle supérieur droit
avec les présélections s’incrémentant au fur et à mesure que la bande de
fréquence est balayée et que les fréquences sont sauvegardées dans la
mémoire.
L’horloge du SATELLIT 750 est au format 24 heures et peut être réglée que
la radio soit allumée ou éteinte. Si la radio est éteinte, l’horloge est afchée
au milieu de l’écran. Si la radio est allumée, l’horloge s’afche dans l’angle
supérieur droit de l’écran.
Pour régler l’horloge :
1. Appuyez sur la touche TIME environ une seconde ou jusqu’à ce que vous
voyiez les heures clignoter.
2. Pendant que les heures clignotent, tournez le bouton TUNING pour les
régler à l’heure correcte, puis appuyez sur TIME et remarquez que les
minutes clignotent.
3. Pendant que les minutes clignotent, tournez le bouton TUNING pour les
régler, puis appuyez sur TIME.
Remarquez qu’après avoir réglé les heures ou les minutes, vous pouvez
simplement laisser le nombre clignoter sans avoir à appuyer sur la touche
TIME.
EFFACEMENT D’UNE PAGE MEMOIRE
EFFACEMENT D’UNE MEMOIRE
SAUVEGARDE DE MEMOIRE ATS (SAUVEGARDE
DE SYNTONISATION AUTOMATIQUE)
SAUVEGARDE DE MEMOIRE ATS (SAUVEGARDE
DE SYNTONISATION AUTOMATIQUE) continué
REGLAGE DE L’HORLOGE

38
SATELLIT 750 MANUAL D’OPÉRATION
39
SATELLIT 750 MANUAL D’OPÉRATION
Le SATELLIT 750 dispose de deux alarmes programmables indépendam-
ment, qui s’allument et s’éteignent à des heures programmées.
Pour régler l’alarme :
1. Appuyez une seconde sur la touche AL.1 ou AL.2 ou jusqu’à ce que
l’heure de l’alarme clignote dans l’angle supérieur droit de l’afchage.
Pendant que l’heure clignote, réglez l’heure avec le bouton TUNING
et appuyez sur la touche AL.1 ou AL.2. Remarquez que les minutes de
l’alarme clignotent.
2. Pendant que les minutes clignotent, réglez les minutes de l’alarme avec le
bouton TUNING et appuyez sur la touche AL.1 ou AL.2. Remarquez que la
minuterie de mise en veille clignote dans le cadre en haut de l’écran.
3. Pendant le clignotement, réglez avec le bouton TUNING le temps
pendant lequel la radio restera allumée et appuyez sur le touche AL.1 ou
AL.2.
Notez qu’après avoir réglé les heures ou les minutes, vous pouvez simple-
ment laisser le nombre clignoter sans avoir à appuyer sur la touche AL.1 ou
AL.2.
Une fois que l’alarme est activée (par radio ou buzzer), seules les touches
POWER, SLEEP, LIGHT/SNOOZE et RESET peuvent être activées. Appuyez
sur les touches POWER ou SLEEP pour désactiver l’alarme.
REGLAGE DE L’ALARME ALARME PAR BUZZER
Appuyez sur la touche [AL.1 on/off] pour sélectionner « » dans la section
« Timer A ». L’alarme est alors réglée en mode buzzer.
Remarque : Dans la section « Timer A » :
« » signie que l’alarme est réglée sur Radio.
« » signie que l’alarme est réglée sur Buzzer.
« » signie que la minuterie est désactivée.
Lorsque l’alarme est activée, appuyez sur la touche LIGHT/SNOOZE pour
désactiver temporairement la minuterie pour 10 minutes. Vous pouvez ap-
puyer 3 fois sur la touche LIGHT/SNOOZE dans le délai déni pour l’alarme,
ensuite vous pouvez arrêter l’alarme en appuyant à nouveau sur cette
touche.
Pour que l’alarme vous permette d’allumer la radio, elle doit être activée.
L’activation de l’alarme peut être réalisée avec le SATELLIT 750 allumé ou
éteint.
Pour activer l’alarme, regardez le haut de l’écran, sur la droite on peut voir
TIMER A et TIMER B. Appuyez rapidement sur les touches AL.1 ON/OFF ou
AL.2 ON/OFF. Si le haut-parleur est afché, vous serez réveillé par le son de
la radio ; si la cloche est afchée, vous serez réveillé par un son électronique
; si rien n’est afché, l’alarme correspondante est désactivée.
TOUCHE LIGHT/SNOOZE
ACTIVATION/DESACTIVATION DE L’ALARME
Other manuals for Satellit 750
1
Table of contents
Languages:
Other Eton Radio manuals

Eton
Eton American Red Cross FR350 User manual

Eton
Eton WEATHERTRACKERFR800 User manual

Eton
Eton Mini Owner's manual

Eton
Eton G1000A User manual

Eton
Eton Microlink FR140 User manual

Eton
Eton American Red Cross FR350 User manual

Eton
Eton FIELD RADIO 550 User manual

Eton
Eton FR1000 User manual

Eton
Eton FIELD BT User manual

Eton
Eton FRX4 User manual