eTrikeCo ETR100C User manual

Go Where There Are No Limits
DO GOOD WHILE YOU GO

1-844-874-5326
support@etrikecom.com
www.etrikeco.com
This manual contains important safety, performance
and service information. Please read it before taking
the firs ride on your eTrike.
This manual is not intended as a comprehensive use,
service, repair or maintenance manual. Please seek
assistance from a qualified technician for service,
repairs or maintenance.
1
Introduction 2
General Warning 3
Routine Inspection Before Riding 4
Operating Your Etrike 5-9
Charging Your Etrike/Battery Information 10-12
Preventative Maintenance 13-16
ETR100C - Overview 17-18
ETR100C - Main Technical Parameters 19
Warranty 20
Congratulations on the purchase of your new eTrike. This manual is designed to give you the
information that you need for the safe operation and maintenance of your eTrike. Please read it
thoroughly before riding your eTrike.
Your eTrike’s serial number is adhered underneath the VIN cap in the front interior panel. Please
record it below in the event that your eTrike is lost or stolen. You may also want to register your
serial number with your local police department. Please retain your sales receipt as proof of
purchase and keep with the information below.
MODEL NO:
SERIAL NO:
COLOR:
DATE OF PURCHASE:
2

Riding an eTrike involves risk of injury and damage. By choosing to ride an eTrike, you assume
the responsibility for that risk, so it is important to know and practice the rules of safe and
responsible riding, and of proper use and maintenance. Proper use and maintenance of your
eTrike reduces risk of injury.
This manual makes no representation about the safe use of the eTrike under all conditions.
There are risks associated with the use of an eTrike which cannot be predicted or avoided, and
which are the sole responsibility of the rider. As with all vehicles, practice defensive riding to
ensure your safety and the safety of others.
Electric tricycles are relatively new to the vehicle landscape. Riders are at present generally
required to obey current state and local bicycle laws and regulations where they ride, in addition
to relevant motor vehicle and traic laws. These laws and regulations vary by jurisdiction. It is
the responsibility of the rider to be aware of, understand and obey these laws and regulations
and any changes therein as they aect the riding of your eTrike. For information on your state
and local laws and regulations, contact the appropriate state and local government oices
directly or visit their oicial websites.
Laws in your jurisdiction may not require wearing a helmet. For your safety, eTrikeCo
recommends wearing a helmet and protective eye wear when operating your eTrike. Proper
helmets must meet standards set by the Consumer Product Safety Commission (CPSC).
Also, for your safety and the maximum life service of your eTrike, ensure you understand and
adhere to the capacities for your eTrike model including load, climbing ability and maximum
range.
eTrikeCo further recommends the following resources for helpful information on riding your
eTrike under current bicycle laws. (Note: eTrikeCo does not endorse or claim the information
provided by these resources to be legally accurate. Please refer to your oicial state and local
laws and regulations to ensure compliance when riding your eTrike.):
The League of American Bicyclists – www.bikeleague.org
People For Bikes – www.peopleforbikes.org
American Disability Act - www.ada.gov/opdmd.htm
3

1. Battery - Check the battery life indicator and charge, if needed. Your eTrike can travel a
max range of 65 miles on a full charge. To maximize use per trip, it is recommended you do
not allow the battery capacity to decrease to less than 20%. When the battery is at 20% or
lower, promptly charge the battery to full capacity.
FIRST RIDE: Charge the battery to full capacity before your first ride.
2. Front/rear brakes – Make sure both the front and rear hand brakes engage eectively to
bring the eTrike to a complete stop.
3. Tires – Make sure all tires are at the recommended 36 psi, and that there is no damage or
extreme wear that compromises their integrity.
NOTE: Improper tire inflation can lead to dangerous conditions including, but, not limited
to abnormal tire wear, tire slippage and other compromises in vehicle performance.
4. Lights – Make sure the headlight, front/rear turn signals, hazard lights, taillights including
braking lights, function properly.
5. Instrument display – Make sure the display for battery life, speedometer and odometer
functions properly.
6. Horn – Make sure the horn sounds when pushed.
7. Parking break – Make sure the parking brake eectively locks and releases the brakes.
8. Mirrors – Make sure both mirrors are properly adjusted for eective peripheral viewing on
either side.
9. Steering control/alignment – Make sure the steering column is stable and aligned, and
turns properly to the left and right.
To ensure optimal and safe performance of your eTrike, it is important to perform
the following checks before every ride. Failure to do so could result in unsafe
conditions, poor performance, and/or potential damage to your eTrike.
CAUTION
4

I.
To engage the electric motor and enable the eTrike to be driven:
a.
Press the unlock button on the Key Fob.
b.
Hold the left hand brake and at the same time press the ENGINE
START/STOP button. The eTrike will turn on.
To disengage the electric motor and turn o the eTrike:
a.
Press the ENGINE START/STOP button. The eTrike will turn o.
II.
a.
Forward – Turn the knob to the DRIVE (D) position to allow the
eTrike to drive forward when the throttle controller is engaged.
b.
Reverse – Turn the knob to the REVERSE (R) position to allow the
eTrike to drive in reverse when the throttle controller is engaged. For
safety, this setting enables the reverse camera.
c.
Neutral – Turn the knob to the NEUTRAL (N) position to allow the
eTrike to be neutral.
CAUTION
Exercise due caution when operating your eTrike in inclement weather and where
conditions on the road, sidewalk or other driving areas may be hazardous.
Although your eTrike is weather-resistant, prolonged exposure to moisture can
potentially cause minor, temporary shut down in the vehicle’s circuitry. This
interruption will self-correct once the eTrike is allowed to suiciently dry out.
AVOID taking turns sharply and at high speed. This can result in tipping the eTrike.
BOTH HANDS must be used on the steering handles at all times. Sudden and abrupt
turns, not using both hands or riding in uneven terrain while operating can cause the
eTrike to become unstable and tip over.
NEVER drive your eTrike through standing water! Immersion of the motor, battery
or other electrical components can cause short circuits and/or serious damage
to those components.
5
Lock
Unlock
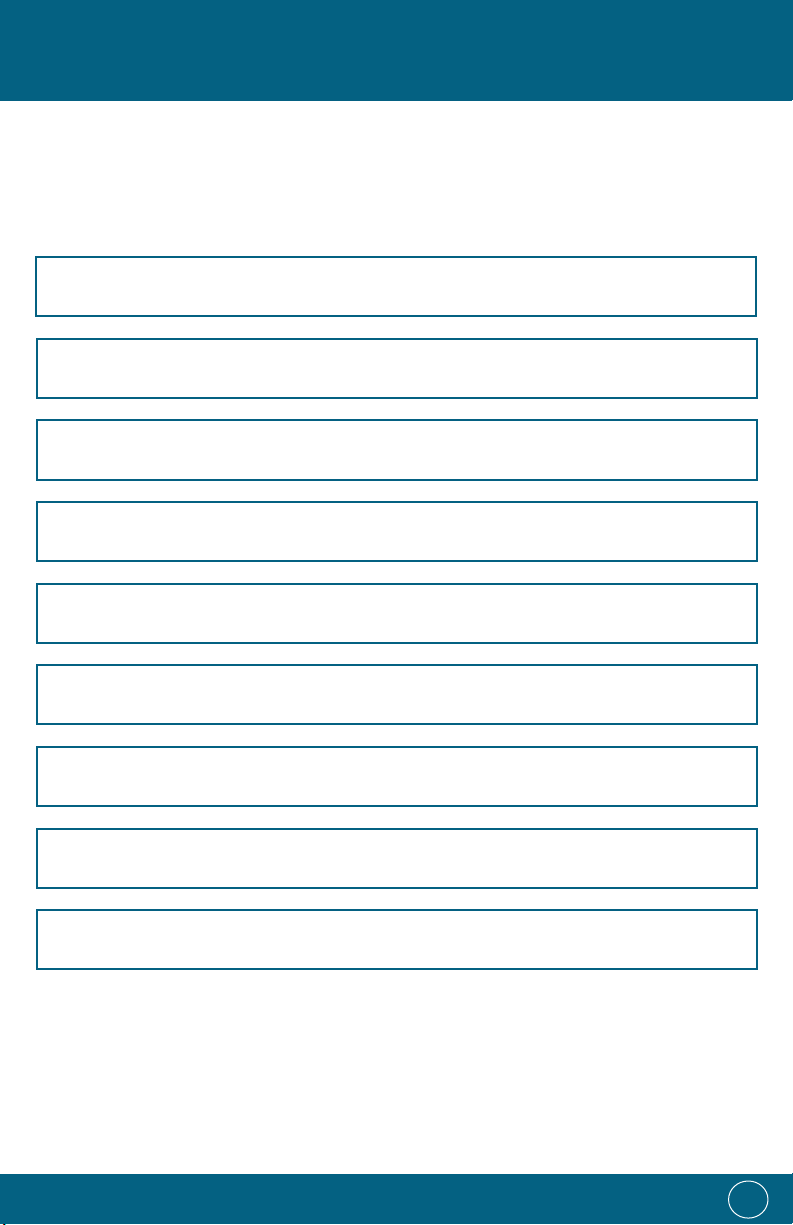
III.
The throttle controls the flow of electrical power to the motor
which propels the eTrike.
a.
Grasp the throttle and roll it backwards/towards you to
propel the eTrike.
b.
Release the throttle to stop the eTrike from continuing to propel.
c.
The speed of the eTrike can be regulated by adjusting the amount of roll of the throttle.
Full roll to the throttle’s stopping point allows the eTrike to travel at the maximum speed.
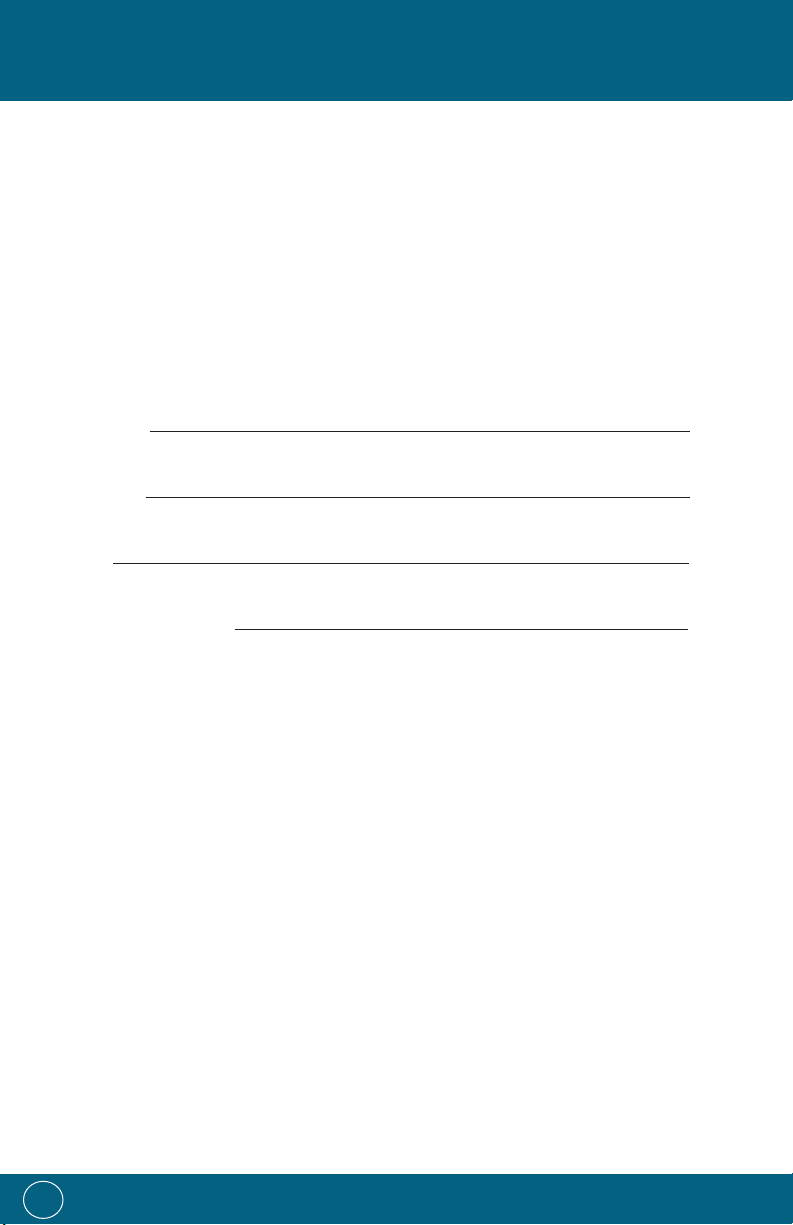
IV.
In the United States, bicyclists are required to use hand signals to alert
surrounding traic of their intention to turn or change lanes. Your eTrike
is equipped with left and right turn signals and hazard lights which may
be used in place of hand signals for this purpose. If you opt not to use
the turn signals, you must instead use proper hand signals.
a.
Left Turn/Lane Change – Before making a left turn or lane change, move the turn signal
switch to the left. The front and rear left turn lights will blink. Press the white button in
the middle of the switch to turn the light o once you have completed your turn or lane
change.
b.
Right Turn/Lane Change – Before making a right turn or lane change, move the turn signal
switch to the right. The front and rear right turn lights will blink. Press the white button in
the middle of the switch to turn the light o once you have completed your turn or lane
change.
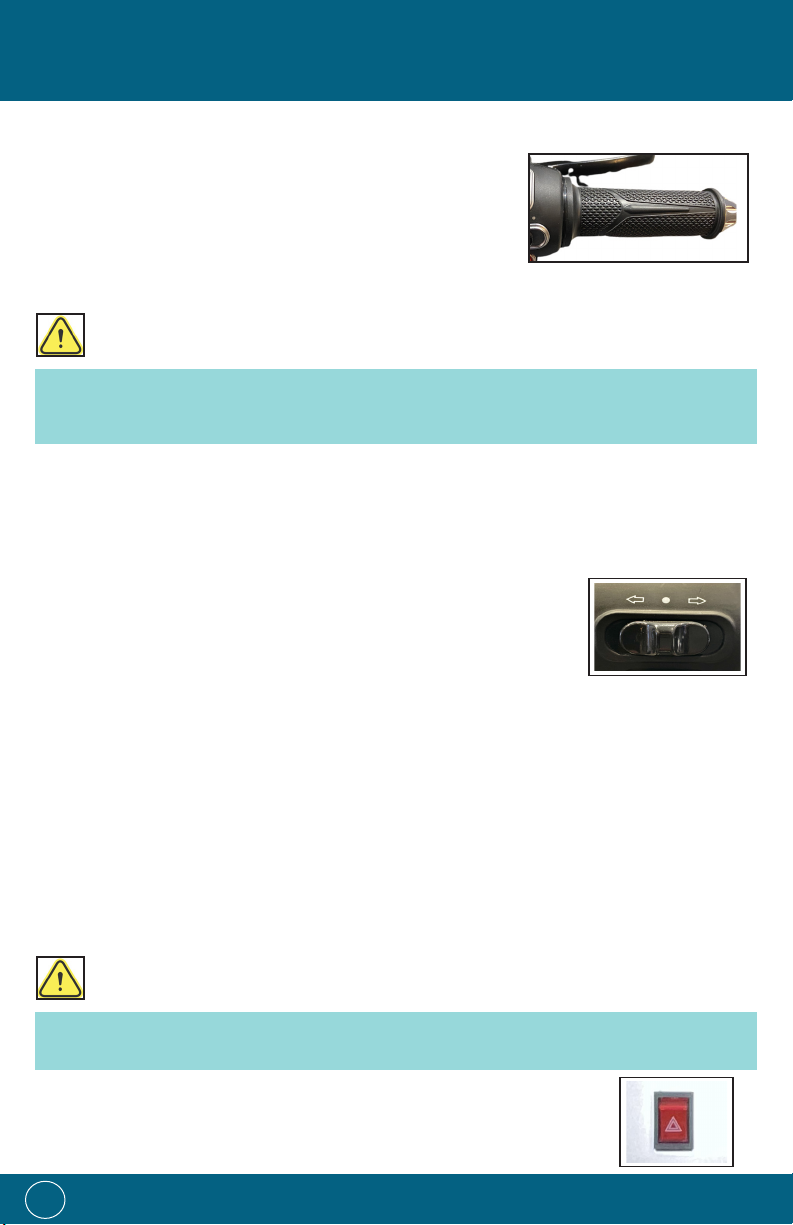
c.
Hazard Lights - Use the Switch located in the front panel beneath the
steering wheel.
CAUTION
Release of the throttle does NOT engage the braking system. In order to fully stop
the eTrike from moving, you must engage the brakes.
CAUTION
6
V.
The eTrike comes with two (2) spped settings: Low and High. On
setting Low it will reach a top speed of 18 miles per hour while on
setting High it will reach the top speed of 28 miles per hour. Switch
is located on the right handle controllers.
VI.
In the United States, bicyclists are required to use a hand signal to alert surrounding traic
of their intention to slow down or stop. Your eTrike is equipped with rear braking lights which
activate when you engage either hand brake, and which may be used in place of the hand signal.
If the rear braking lights are not functional, you should have the eTrike serviced immediately
for repair. The proper hand signal must be used if riding the eTrike without rear braking lights.
a.
Braking: Release the throttle and squeeze both the front and rear hand brakes with equal
pressure until the eTrike comes to a full stop.
b.
Slow Down: Release the throttle and squeeze both the front and rear hand brakes with
enough equal pressure to slow the eTrike down to the desired speed.
VII.
a.
Speedometer – Displays your current speed.
b.
Battery Life Indicator – Displays the current battery life
graphically, in percentage and voltage.
c.
Trip Odometer – Displays the mileage per trip/ignition.
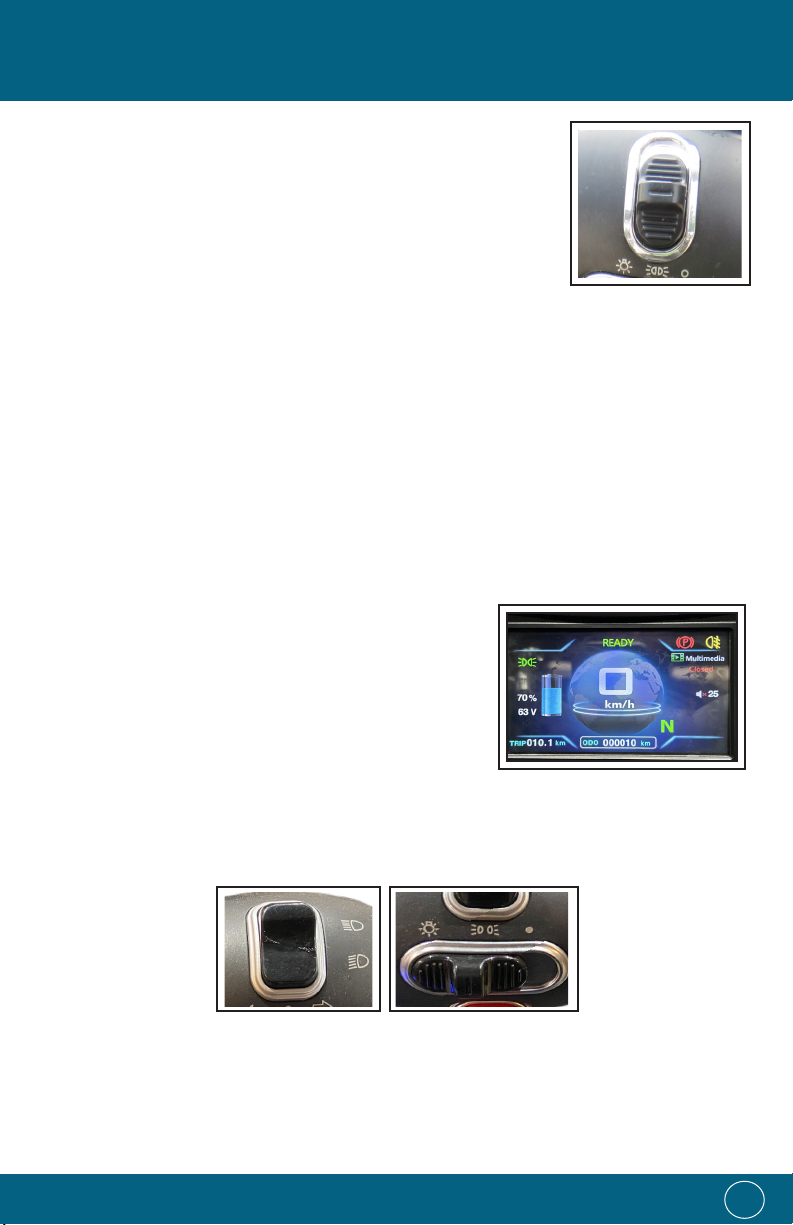
VIII.
The headlight can be used whenever low visibility in natural light compromises the safe
operation of your eTrike.
a.
To turn the running light on, move the switch on the right hand to the middle position.
b.
To turn the headlight on, move the switch on the right hand to the far left.
c.
To adjust the brightness, move the switch on the left hand.
7
Bright light switch Headlight switch
IX.
To sound the horn push down the horn button on the left handle.
X.
a.
To use the parking brake located next to the driver’s seat:
• Pull the handle up.
b.
To release it
• Press the button and push it down to the original position.
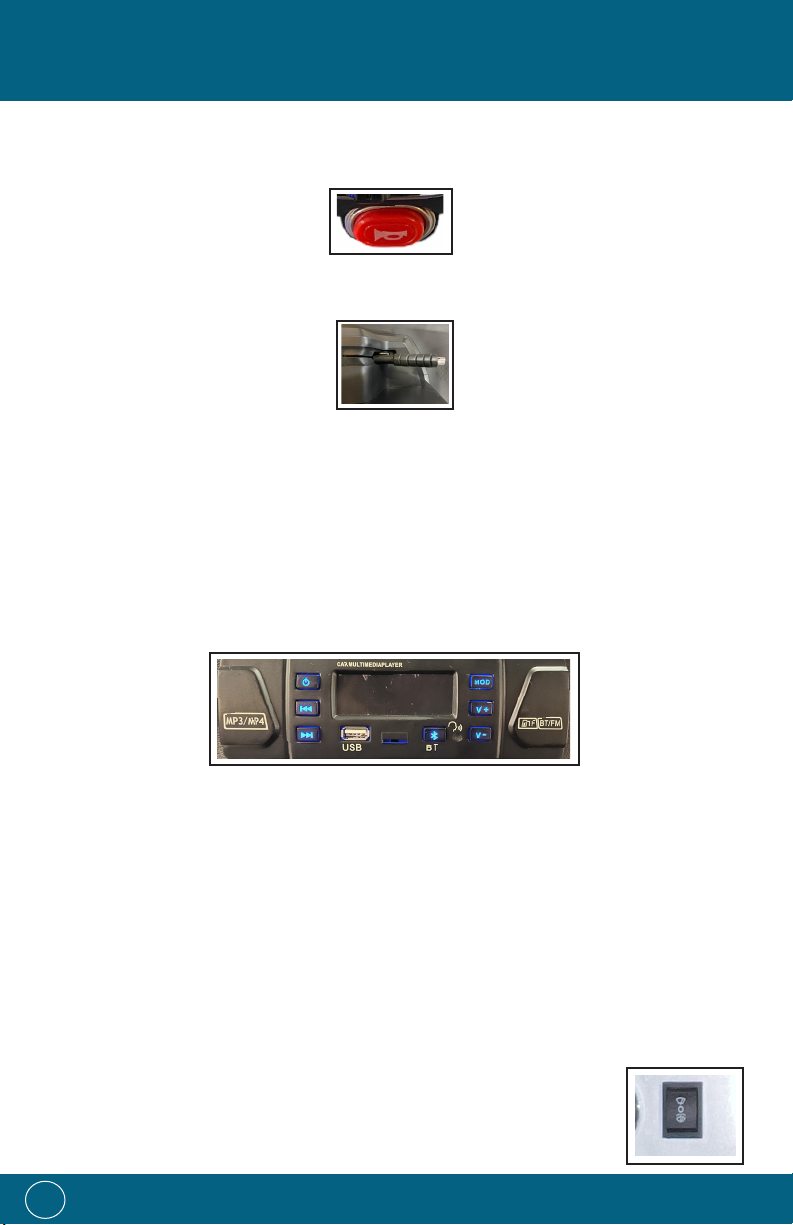
XI.
a.
The power button turns the device on/o. The mode button changes the mode to radio
or bluetooth.
b.
To pair the bluetooth with a smartphone, go to the phone settings, turn on the bluetooth
and select the device corresponding to the eTrike (the name vary per eTrike). If a pin is
required, enter 0000. Once the pin is entered, it will be paired to the device for use.
c.
The back and forward buttons are used to change songs or radio station.
d.
The volume buttons increase and decrease the volume of the device. If a phone paired
with bluetooth is being used, check the volume on the smartphone too.
XII.
To activate the wiper blade, push the windshield wiper switch on the front
panel.
Parking Brake Stick
8

XIII.
To activate the heater, push the switch on the front panel. For the fan, use the switch next on
the side of the fan.
XIV.
The key fob controller lock and unlock the eTrike’s doors.
The panic button makes your eTrike to beep quickly for a few times.
9
Heater Switch Fan Switch
Lock
Unlock
Panic Button
Your eTrike comes with a battery charger. DO NOT use other chargers to charge your eTrike.
Use the battery life indicator on the eTrike instrument display to gauge the battery life. To
maximize use per trip, do not allow the battery life to decrease to less than 20%. When the
battery life is at 20% or lower, promptly charge the battery to full capacity.
FIRST RIDE: Charge the battery to full capacity before you take your first ride.
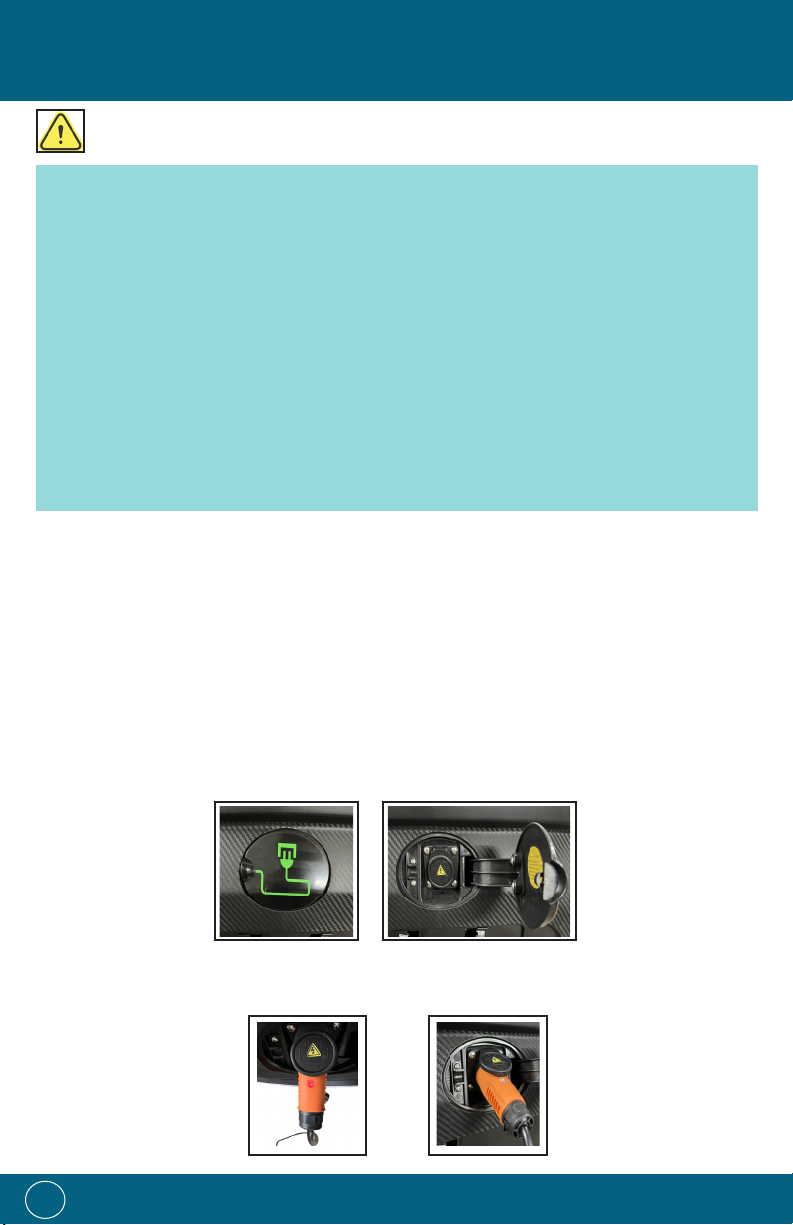
I.
a.
Turn o the eTrike following the steps in section I (page 5).
b.
Locate the charging port on the back of the eTrike.
c.
Plug the receptacle (female) end of the charger power cable into the eTrike’s charging
port.
CAUTION
10

d.
Plug the charger power cable into a standard household AC 110V outlet.
NOTE: To protect the eTrike from potential damage as a result of power surges, it is strongly
recommended that a surge protective device is used when plugging into a standard household
AC 110V outlet. Damage resulting from a power surge is not covered by the warranty.
II.
There are two (2) charging light indicators on the eTrike:
a.
Light incorporated on the charger: When the charger is plugged into the household AC
110V outlet, the light will turn on red. This indicates that the battery is not fully charged, but
that there is a proper connection and the battery is receiving an electrical charge.
b.
Light on driver’s seat: There is an additional charging light indicator at the bottom left side
of the driver’s seat. When the charger is plugged into the charging port of the eTrike, the
light indicator will turn red, indicating that the battery is not fully charged, but that there
is a proper connection and the battery is receiving an electrical charge. An intermittent
green light on this indicator means that the battery is between 80% to 99% charged. Once
the battery is fully charged, the light will turn green.
11

NOTE: Promptly unplug the charger once these lights are displayed. Full charge can take
around 3 hours depending on the level of depletion in the battery.
III.
The LifePo4 battery that comes with your eTrike can last approximately 3000 charge cycles
or roughly 10 years with average use and proper care. Do not use the battery for any other
purpose than to power your eTrike. Do not attempt to disassemble or modify the battery.
12

All vehicles experience some level of wear over the course of operation. In addition to
performing the Routine Inspection listed in this manual, it is recommended that you perform
preventative maintenance to further ensure the optimal performance and service life of
your vehicle, and for your safety. If you are uncertain of how to perform any of the following
preventative maintenance, seek professional service. Preventative maintenance should
include the following:
I.
a.
Keep the motor dierential clean to insure proper acceleration and dynamic performance.
b.
Make sure the throttle rotates freely.
c.
Make sure the parking brake is operational.
d.
Inspect the front and rear shock absorbers for damage and insure both are functioning
properly.
e.
Make sure all tires are properly inflated to the recommended psi of 36.
f.
Inspect all electrical components to make sure they are functioning properly.
g.
Make sure all fasteners and screws are tightly secured throughout the eTrike body.
h.
Keep your eTrike vehicle clean as a buildup of dirt and other substances can impair proper
functioning.
i.
Make sure all lubrication points are well-oiled. Do not allow oil to leak onto the eTrike.
j.
Make sure the battery power cable and any attached wires within the battery compartment
are secure.
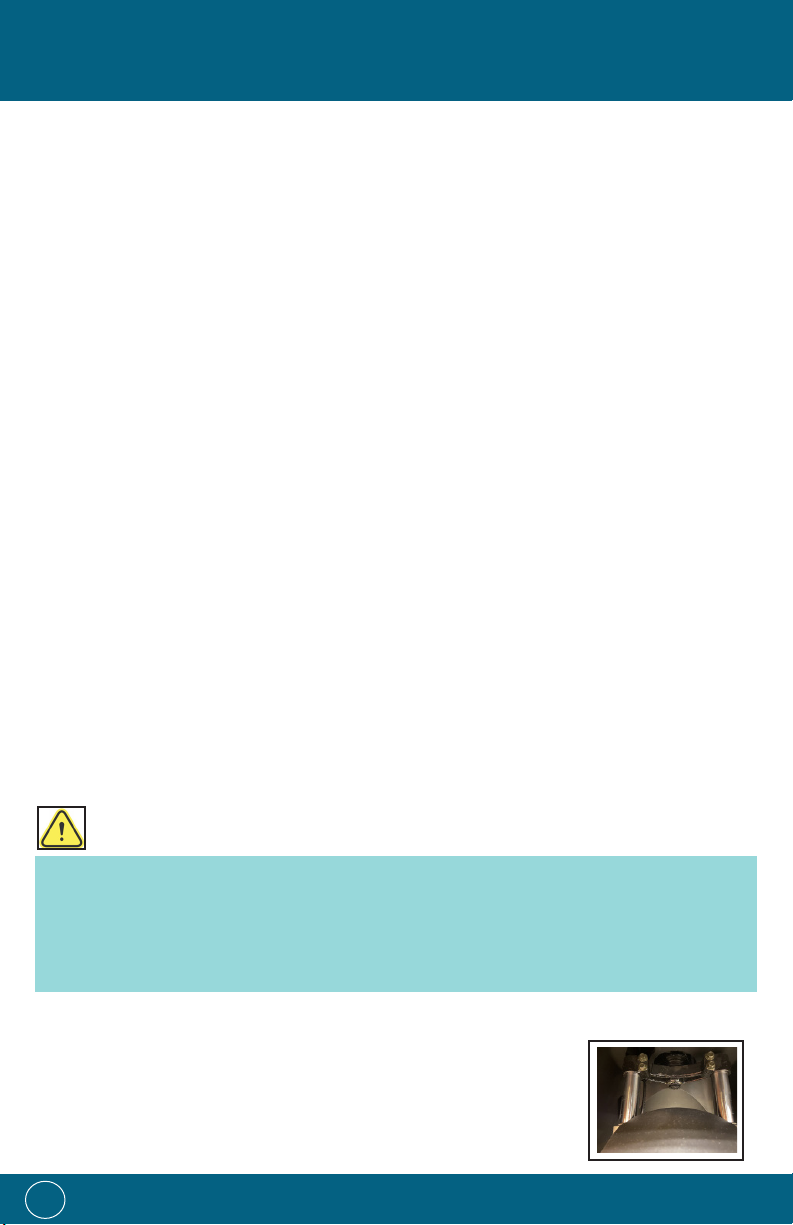
II.
It is essential that the brake system, which is engaged by squeezing both
brake handles, be properly adjusted to allow for adequate clearance
while the eTrike is moving, but still allow for eective braking.
The disc brake system includes brake fluid/oil and is engaged by
squeezing the brake handles, where the brake fluid/oil reservoir is also
located. It can be inspected and maintained as follows:
a.
Check the brake fluid/oil level in the reservoir. If the level falls below
the bottom score line, add ONLY either DOT3 or DOT4 brake fluid/oil until it reaches the
upper score line.
NOTE: A drop in the brake fluid/oil level indicates potential plate friction, brake disc wear or
brake fluid leakage, and further inspection into these potential issues is needed.
13
b.
If the brake fluid/oil changes color, replace it with new braking fluid/oil.
c.
Check the friction plate and brake disc wear condition. When any of the friction plates is
worn down to the marking line of 3mm or 3.5mm, it must be replaced in pairs. The disc
brake thickness and wear limits may dier slightly from eTrike model to model.
d.
If the brake handles is spongy or has little resistance or eectiveness when
squeezed, exhaust the brake system as follows:
i.
Remove the main cylinder cover and add brake fluid/oil until the fluid level reaches
the upper score line. Close the cover to prevent debris from entering.
ii.
Use a hose with one end connected to the caliper oil drain screw and the other end
to an appropriate container.
iii.
Quickly squeeze and release the hand brake a few times, and then hold the hand
brake in place on the last squeeze.
iv.
While the hand brake is being held in place, loosen the air release screw by turning
it counterclockwise one quarter inch. This will allow any foamed brake fluid/oil to be
released through the hose and into the container.
v.
Tighten the air release screw.
vi.
Repeat steps 3 through 5 until all of the foaming brake fluid/oil is emptied and
the brake handle is no longer spongy and has proper resistance and eectiveness.
vii.
Tighten the drain screw and disconnect the drain pipe.
viii.
Add brake fluid/oil to the main cylinder until it reaches the upper score line.
ix.
Close the cover.
III.
a.
Front shock absorbers – Inspect the front shock absorbers
regularly. Replace the shock absorbers immediately if damage or
failure is found. Note: The front fork should be kept clean to insure
proper functioning of the front shock absorbers.
14
CAUTION

b.
Rear shock absorbers – Inspect the rear shock absorbers after every 125
miles of use. Replace the shock absorbers immediately if looseness
or cracks are found.
IV.
a.
Inspect the tires for cuts, embedded objects or other conditions/
damage that can compromise the tires’ performance.
b.
Inspect the tires for proper inflation. This inspection should always
be performed while the tires are “cold” before driving the vehicle.
Recommended tire pressure is 36 psi.
c.
Inspect the wheel rims for dents or distortions that can adversely
aect the tires’ inflation or performance.
V.
a.
Inspect the rear axle and dierential every week for proper function. Gear oil in the axle
should be changed approximately every 650 miles.
b.
Add gear oil, if needed for proper lubrication.
c.
For cold weather, use 80w/90 GL-3 gear oil. For warm weather, use 85w/90 GL-3 gear oil.
VI.
a.
Check the battery wiring and cable regularly to insure they are secure; any looseness can
cause potential damage to the circuit virtual access.
b.
It is recommended that you do not discharge the battery to less than 20%. Once the
battery has been discharged, it should be promptly charged.
c.
If the battery shows signs of warping or becomes very hot, stop use immediately.
VII.
a.
Store under cover that protects the eTrike from prolonged exposure to the elements; such
exposure can cause mechanical failure and decrease the service life of your eTrike.
b.
When storing your eTrike for an extended period, charge the battery at least once per
month. The recommended storage temperature is 60 degrees Fahrenheit and at 40%
battery capacity.
15

NOTE: Storing your battery in temperatures below 32 degrees Fahrenheit or above
97 degrees Fahrenheit can limit your battery life.
c.
Charger Storage
When not in use, store the charger in a dry, cool and clean place, taking care to insure the
ventilation holes do not become clogged by dust or other debris.
16

Instrument Display Heater Switch
Brake Fluid Reservoir Hazard Lights
Brake Handle Windshield Wiper Switch
Media Player Engine Start/Stop Button
Bright Light Switch Reverse/Neutral/Drive Knob
Turn Signals Throttle Handle
Horn Speed Switch
Power Outlet Headlight Switch
17
1
22
3
4
56
7
8
910 11
12
13
14
15
16

Graphic Battery Indicator Media On/O Button
State of Charge in % Media Previous Button
Voltage Indicator Media Next Button
Trip Odometer USB Port
Odometer TF Card
Drive/Reverse/Neutral Bluetooth Direct Access
Speedometer Decrease Volume Button
Multimedia Indicator Increase Volume Button
Break Indicator Mode Button
18
1
2
3
456
7
10
14
21
15 16 17
19
18
20
8
9
Other manuals for ETR100C
1
Table of contents
Other eTrikeCo Scooter manuals


