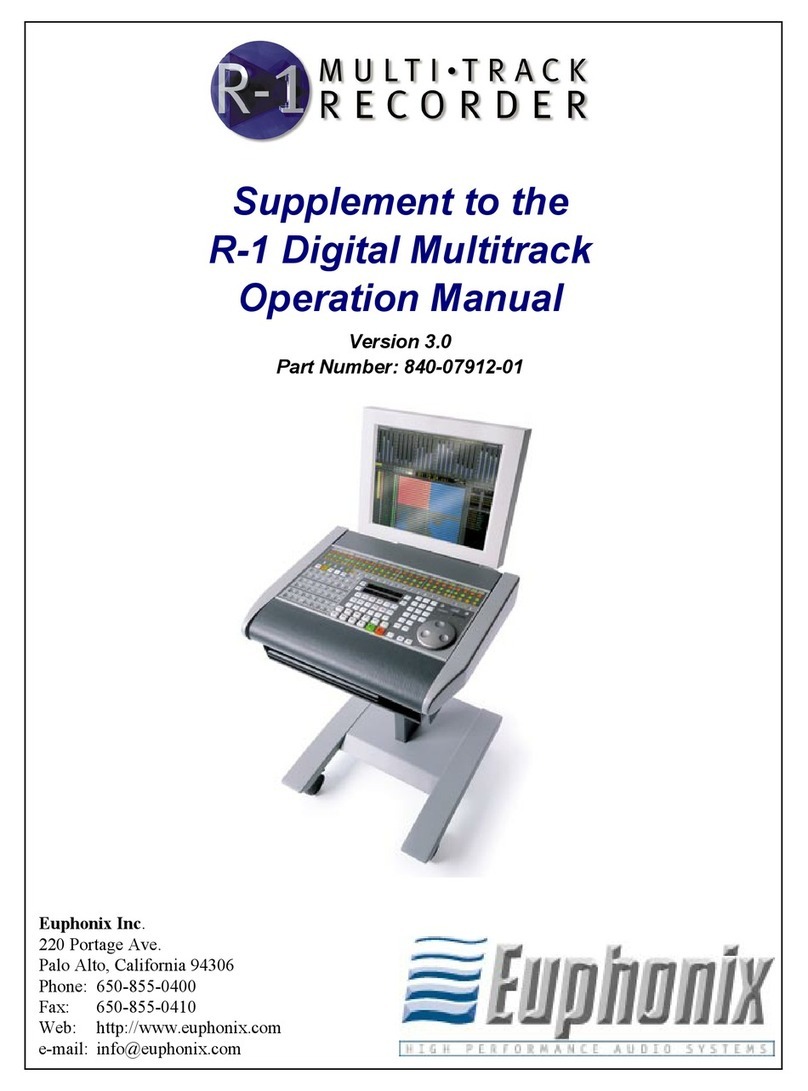
Euphonix R-1 Transfer Station User manual

R-1 Operation Manual
Version 2.0
840-07121-02
rev B
All manuals and user guides at all-guides.com
all-guides.com

Blank Page
All manuals and user guides at all-guides.com

R-1 Operation Manual 04/07/99 Version 0.987 ©1999 Euphonix Inc. Page 3
R-1 Operation Manual
Version 2.0
Euphonix Inc. 220 Portage Avenue Palo Alto, CA 94306
Tel: (650) 855-0400 Fax: (650) 855-04120 Web Site: www.euphonix.com
In the interest of continued product development, Euphonix reserves the right to make improve-
ments in this manual and the product it describes at any time, without notice or obligation.
R-1, Audio Deck, Studio Hub are trademarks of Euphonix Inc.
©1999 Euphonix Inc. All rights reserved worldwide. No part of this publication may be repro-
duced, transmitted, transcribed, stored in a retrieval system, or translated into any language by any
means with written permission of Euphonix Inc.
Adobe, Acrobat are trademarks of Adobe Systems Inc.
r1cman735
All manuals and user guides at all-guides.com

Blank Page
All manuals and user guides at all-guides.com

R-1 Operation Manual 04/07/99 Version 0.987 ©1999 Euphonix Inc. Page 5
Table Of Contents
R-1 OPERATION MANUAL ........... 1
TABLE OFCONTENTS ................. 5
NOTICE ............................................... 9
INTRODUCTION 11
R-1 Remote ......................................11
Remote Layout .................................12
Multitrack Panel Layout ...................... 13
Directory Panel Layout .......................14
Pilot Computer .................................15
Audio Deck.......................................15
Studio Hub.......................................16
A/D - D/A Converters .........................16
OPERATION MANUAL INTRODUCTION 18
Text Conventions...............................18
Mouse Conventions............................19
BASIC TRANSPORT KEYS ........................... 20
Stop................................................ 20
Play ................................................20
Fast Forward & Rewind.......................21
Reverse Play .....................................22
External Transports ............................23
ADVANCED TRANSPORT KEYS AND DISPLAYS ...... 24
Jog .................................................25
Shuttle ............................................26
Slave, Mach Ctrl & Varispeed Indicators 28
Speedometer ....................................29
Varispeed ......................................... 30
TIME DISPLAYS ..................................... 31
Current Time and Locate Displays......... 31
Time Display Format and Resolution ..... 32
Absolute vs. Relative Display Modes .....34
Relative Mode - Zero Timer .................35
Timeline Display ............................... 36
REMOTE MENU DISPLAYS .......................... 38
Menu Mode ......................................38
Selecting Menu Options......................39
Trim ................................................40
Remote Key Display Indicators ............41
SECONDARY FUNCTIONS, THE WAVE KEY .......... 42
Secondary and Display Control Keys...... 42
Independent Multi-Select, the Ctrl Key .44
Selecting Ranges, the Shift Key ...........45
Time Display Zoom ............................46
Cue List ...........................................48
SCREEN DISPLAY PANELS .......................... 50
Panel Selection, the Display Key .......... 51
Multitrack ........................................52
Multitrack Screen Meters ....................54
Meter Dimensions / 24 vs 48 Track.......55
Meter Headroom................................56
Peak Hold ........................................56
Directory ......................................... 57
Preferences ......................................60
SCREEN CONVENTIONS .............................. 64
Buttons & Menus ..............................64
On Screen Editing of Names & Values ...66
Screen Navigation Bar ........................ 66
Online Help ...................................... 67
SYSTEM CONFIGURATION 69
Powering Up the R-1..........................69
Audio Deck Configuration ...................71
SETTING UP THE R-1 MEDIA ...................... 75
Inserting and Removing Disk Drives .....75
Location of Disk Drives ......................77
New Media (Format) .......................... 78
Open Media (Load Disk or Tape) ..........81
Close Media Device (Unload) ............... 84
RECORD CONFIGURATION ........................... 88
Record Modes ...................................88
Destructive Record Mode .................... 88
Setting Destructive Record Mode .........89
Edit Record Mode ..............................91
Record Resolution .............................92
Ready Key Preferences........................ 93
Start & Stop Crossfades ......................95
Auto Save ........................................96
SAMPLE RATE CONFIGURATION ..................... 98
Setting the Sample Rate Source ........... 98
Setting the Sample Rate ................... 100
Nominal Sample Rates Over 50 kHz .... 101
Contents
All manuals and user guides at all-guides.com

Page 6 Euphonix Inc.
Contents
Video Field Rate .............................. 102
Sample Rate Pull Up/Down ............... 103
TIMECODE AND MACHINE CONTROL CONFIGURATION106
Timecode Settings ........................... 106
Timecode Source ............................. 106
Timecode Frame Rate ....................... 107
Master/Slave .................................. 108
Timecode Offset .............................. 109
MACHINE CONTROL CONFIGURATION ............. 110
Machine Control Source .................... 111
Machine Control Options .................. 112
Machine Ctrl & Slaving Considerations 113
CONFIGURING FOR TRANSFERS & BOUNCES ..... 116
From Analog Tape............................ 116
From Digital Tape ............................ 117
Digital Composites .......................... 119
FILE MANAGMENT 121
FILE SYSTEM OVERVIEW.......................... 121
TITLES ............................................ 124
New Title ....................................... 125
Setting the Title Start and End Times . 126
Open Title ...................................... 129
Close Title...................................... 131
Save Title (As) ................................ 132
Copy Title To... ............................... 133
Purge ............................................ 134
Delete Title .................................... 135
Title Storage Location ...................... 137
Safety Titles Management ................. 140
WORKING WITH TRACK SHEETS .................. 142
New Sheet...................................... 142
Open Sheet .................................... 145
Rename Sheet................................. 146
Copy Sheet To................................. 147
WORKING WITH TRACKS.......................... 148
New Track ...................................... 148
Open Track ..................................... 150
Rename Track ................................. 152
Copy Track ..................................... 153
Delete Track ................................... 154
MANAGING SOUND FILES ........................ 156
Managing Media .............................. 156
Inserting and Removing Disk Drives ... 157
Important Reminders - Disk Drives ..... 158
New Media (Format) ........................ 159
Open Media (Load Disk or Tape) ........ 162
Close Media (Unload Disk or Tape) ..... 165
Managing (Viewing) Libraries ............ 168
Delete Library ................................. 169
Delete Sound File or Clip .................. 171
Rename Sound File or Clip ................ 171
MAKING COPIES OF YOUR WORK ................ 172
Copy Disk To ............................... 173
Back Up Media................................ 176
Back Up Library .............................. 179
Restore Media ................................. 182
Restore Library ............................... 185
PRINTING FROM R-1 ............................ 188
TRACK MANAGEMENT 190
Deck Select .................................... 191
Channel/Track Numbers .................... 192
TRACK KEYS - GLOBAL FUNCTIONS .............. 194
Individual Mode .............................. 194
All Input ....................................... 194
All Repro ....................................... 194
Auto Input..................................... 194
Channel Input/Repro Switching on Screen195
TRACK / CHANNEL CONTROL KEYS .............. 196
Track Control Mode Select ................. 196
Track Ready .................................... 198
All Safe ......................................... 198
MONITORING FUNCTIONS ......................... 199
Repro ............................................ 199
Repro with Auto Input ..................... 199
Input ............................................ 200
Input with Auto Input ..................... 200
Auto Input Status ........................... 201
Track Key Functions - Solo, On, Select 202
Solo .............................................. 202
On ................................................ 202
Select............................................ 202
All manuals and user guides at all-guides.com
all-guides.com

R-1 Operation Manual 04/07/99 Version 0.987 ©1999 Euphonix Inc. Page 7
Contents
MULTIPLE TRACKS AND LINKING ................ 203
Selecting Channels/Tracks ................ 203
Setting Functions On Ranges Of Tracks 203
Linking Channel/Tracks .................... 204
TRACK SETUP MEMORY ........................... 205
Recall a Saved Track Setup................ 205
Recall Multiple Setup Memories ......... 205
Store a Track Setup.......................... 205
Track Setup Memory - Screen ............. 206
RECORDING 208
Input Source Selection ..................... 208
Check Ready Key Preferences ............. 210
Select Tracks for Recording ............... 211
Record........................................... 212
Drop In/Out with Ready Keys ............ 213
Drop Out of Record .......................... 213
Rehearse a Drop In/Out.................... 214
Storing Rec In/Out to the In/Out Point
Keys ........................................... 216
Storing Current or Locate Time to In/Out
Point Keys ................................... 217
AUTO PUNCH ..................................... 218
Auto Punch - In and Out Rehearse ..... 218
Repeating Auto Punch Rehearsal ....... 220
Auto Punch - In and Out Record ........ 221
Repeating Auto Punch Record - Loop Record
223
Auto Punch - In Point Only Rehearse.. 223
Auto Punch - Out Point Only Rehearse 224
Auto Punch - In Point Only Record .... 224
Auto Punch - Out Point Only Record ... 225
LOCATE & CUE FEATURES 226
Locate Keys That Contain Values........ 226
Screen Display of Locator / Cue Points 227
Checking Stored Locate Key Values..... 229
Store Locate and Store Current Keys ... 230
Storing Locate Key Values on-the-fly .. 231
Changing Locate Key Stored Values .... 232
Trimming Stored Locate Key Values .... 233
Resetting Locate Key Values to Defaults235
Locate to Timecode ......................... 236
Locate Key ..................................... 237
Locate with Stacked Play.................. 237
Copy Current Time To Locate Display .. 238
Locate with Pre-Roll ........................ 238
CUE POINTS ...................................... 240
Cue List Preferences......................... 240
Screen Cue List ............................... 241
Cue Track ....................................... 242
Creating a New Cue Point ................. 243
Recalling a Cue Point ....................... 244
Storing Locate Time to a Cue Point .... 244
Locate to a Cue Point ...................... 245
Scrolling Cue Points......................... 246
Editing Cues ................................... 247
Naming Cues .................................. 248
Delete Cue ..................................... 249
Instant Cues L1 - L5 ........................ 250
Store Locate Val. to Instant Locate Key250
Store to Instant Locate Key on-the-fly 251
Copy Cue to Instant Locate Key ......... 251
Check Stored Value for Instant Locate Key252
Locate to an Instant Cue .................. 252
DEDICATED LOCATE KEYS ........................ 253
Roll Back ....................................... 253
Roll Back Value & Preferences ........... 254
Changing Roll Back Value ................. 255
Locate to Title Start ........................ 255
Locate to Previous Cue ..................... 256
Check Values stored in the Locate Keys256
Locate To Next Cue .......................... 256
Return........................................... 257
Play Repeatedly .............................. 258
Play Section Once ........................... 258
Use L4 and L5 - Return .................... 259
Use Last Play and Stop - Instant Return259
Use Last Two Entries - Return............ 259
EDITING 260
SELECTION FEATURES ............................. 260
Clip-based Versus Region-based Editing261
Selection Area Time Constraints......... 262
Selecting Tracks .............................. 262
Setting Selection Start and End Points 263
Turning the Selection On and Off ....... 264
All manuals and user guides at all-guides.com

Page 8 Euphonix Inc.
Contents
Select All Tracks.............................. 264
Auditioning the Selection ................. 264
EDITING MODES .................................. 265
Ripple ........................................... 265
EDITING OPERATIONS ............................. 266
Cut ............................................... 266
Copy ............................................. 266
Paste............................................. 267
Clear ............................................. 268
Slip............................................... 269
UNDO AND REDO ................................. 271
CALCULATOR ...................................... 273
Cue Calculations.............................. 273
STUDIO HUB INTERNAL MADI ROUTING ....... 277
Preset Router Configurations ............. 277
REGISTRATION AND PRODUCT SUPPORT .......... 283
Registration Procedure ..................... 283
How To Get Help ............................. 283
US Sales Offices .............................. 284
Worldwide Headquarters ................... 284
International Sales Offices................ 284
All manuals and user guides at all-guides.com

R-1 Operation Manual 04/07/99 Version 0.987 ©1999 Euphonix Inc. Page 9
Your R-1 system comes to you configured per factory specifi-
cations. The installation and operation of other third party
hardware or software that has not been specifically sanc-
tioned by Euphonix will void the warranty. If the R-1 malfunc-
tions while a non-recommended third party product is in-
stalled, Euphonix will not be responsible for supporting that
unit until the third party components have been removed.
Notice
Notice
All manuals and user guides at all-guides.com

Page 10 Euphonix Inc.
Introduction
Blank Page
All manuals and user guides at all-guides.com

R-1 Operation Manual 04/07/99 Version 0.987 ©1999 Euphonix Inc. Page 11
The R-1 multi track hard disk recorder has been designed as the successor to
large format tape machines in professional recording facilities. Both forward
looking yet solidly grounded in audio tradition, the R-1 provides the highest
standards of performance by incorporating the latest technology, while of-
fering an interface that is familiar to anyone who has op-
erated a multi track tape machine from a remote. Cur-
rent and preeminent digital technology, featuring
24-bit resolution, up to 96 kHz sample rate, and 40-
bit internal DSP processing produces audio of the
highest professional quality.
INTRODUCTION
R-1 Remote
Though the performance of the R-1 is superior to tape machines in every
respect, these performance improvements are not dependent upon increased
operational complexity. Great care has been taken to make R-1 operation clear,
logical, and familiar to experienced multi track operators.
R-1 Remote
The 4 basic components of the R-1 system are the
Remote Control, the Pilot Computer, the Audio Deck,
and the Studio Hub. 24 channel A/D and D/A converters
are available for interfacing to analog consoles such as
the Euphonix CS3000 series. A screen display monitor is
necessary and may have been supplied by Euphonix or from
another source of your choosing.
Built from the finest components, the R-1 is de-
signed for reliable operation in the most demanding
applications. And because R-1 is modular and com-
puter based, your investment can continue to grow as
development for R-1 continues, providing additional
functionality for many years to come. Euphonix be-
lieves youll find R-1 to be the most capable, sophis-
ticated, and satisfying recording tool available.
The key to the familiar feel of the R-1 lies in the design of the dedicated R-
1 Remote Control. The Remote is used to control the R-1 for all functions that
have traditionally been performed with multi track tape machines. The dark
gray rectangle in the lower right quadrant of the Remote contains only keys
and controls that would be found on a standard locator. The Remote typically
ships in a dedicated stand, but can also be mounted in any rack space or desk
slot that accepts a 19 device. In addition to the Remote, the R-1 can also be
controlled from the software interface via mouse and keyboard.
All manuals and user guides at all-guides.com
all-guides.com

Page 12 Euphonix Inc.
Introduction
Remote Layout
Repro
Ready
Input Repro
Ready
Select On
Solo
Select
Solo
On
Select
Restore
Dial
789
123
456
0.
Clear
+
-=
Enter
24
25 DF
96
cust 48
44.1
%
Adj
Vari Speed
On
L1 L2 L3 L4 L5
Loc
Reh
Rec
Roll
Back
Punch
Auto
Jog Return
Pre
Roll
Post
Roll
In
Point Out
Point Trim
+
Trim
-
Store Recall
Cue
Auto
Load Loop
Delay
Store
Current Locate
hr min sec / ft fr / ms
current time
locate time
bar beat tick
01:00:00:23
01:00:00:23
Title Time Free Time
Abs Rel
Time
Display
+/-
Escape
1234 5678
1234 5678
Deck
Sheet
Mem
Store Mem
Recall
Time CodeSample Rate
Ready Solo
Repro On
Input Select
IndivSafe
All Input
All
Repro
All Input
Auto
Record Mode Sync Mode
Sheet Media
Title Track
Help
Open
Close Save
New Copy
To...
Slip
Ripple Cut Copy Paste
Redo
Select
Enable
Select All
Audition
Skip
Store
Start
Enable
Zoom
In Display
Zoom Ctrl
(group)
Shift
(range)
Delete
NDF
Select
Device
Cntrlr Slave Prop-
erties
Destruc-
tive Rec Edit
Undo
Vid
Ext
Ready
Repro
Input
Ready
Repro
Input
Store
End
Enable
Up
Dn
Zoom
Out
Library
Back-up
Clear
Alt
Global Track
Control Keys
Track Control
Keys Track Mode Keys Quick Select
Keys Sample Rate
Speedometer
Timecode
Navigation & Modifier Keys
Edit Keys
File & Data Management
Keys
Transport
Control Locate and Cue Numeric Keypad Spinknob
Selection Keys
System
Control
Keys
The Euphonix R-1 introduces the world to Reel Feel in the first true multi-
track professional performance disk recording system. Not only is there a fully
industry standard exceptionally high quality Remote, but underneath the beau-
tiful exterior is the performance ballistics and tactile behavior that will make
you swear youre using a tape machine. Whether in a single room installation
or a multi room facility, the R-1 has the features and flexibility to take the role
of the Recorder to new levels of sound quality, reliability, and functionality
while maintaining the familiar operating interface that audio professionals ex-
pect.
All manuals and user guides at all-guides.com

R-1 Operation Manual 04/07/99 Version 0.987 ©1999 Euphonix Inc. Page 13
Multitrack Panel LayoutComputer
Multitrack Panel Layout
Meters
Global
Track
Controls
Transport Bar Navigation
Bar Cue Track Speedometer
Track Sheet
Track Controls Cue List
Locate
Time
Locate
Values
All manuals and user guides at all-guides.com

Page 14 Euphonix Inc.
Varispeed
Directory Panel Layout
Introduction
Titles
Browser Tree Section Navigation
Bar List Section
Audio Browser
All manuals and user guides at all-guides.com

R-1 Operation Manual 04/07/99 Version 0.987 ©1999 Euphonix Inc. Page 15
Audio Deck
The Pilot Computer runs the system software that controls the Audio
Deck, manages the audio data and file structure, and provides a high-
resolution color graphics interface. The Pilot also has IEEE-1394
(FireWire) ports for high speed, high bandwidth communication with
the Audio Deck(s), the Studio Hub, and potentially other IEEE-1394 compliant
devices. Separate stages of the Pilot Computer manage the computer interface
and the Audio Deck, providing protection for the Audio Deck from operating
system failure. The separation of functionality into these various components
means the R-1 system is resilient to failures in any single stage.
Audio Deck
At 48 kHz the Audio Deck is a 24 channel (or 12-channel at 96 kHz), 24-
bit recorder/player with MADI I/O and IEEE-1394 control. 2 removable
SCSI drive hardware mounts are provided to allow for quick changes of
recording media. Up to 4 additional hard disks (within total storage
constraints) plus a single tape drive can be attached to each Audio Deck via
the provided external SCSI connector. With the latest DSP processing on
board, the Audio Deck features real time sample rate conversion, same-track
cross fading, monitor mixing, and metering.
Pilot Computer
Note: Version 2.0
and earlier support
one or two disk drives
up to a total of 20
gigibytes of storage.
All manuals and user guides at all-guides.com

Page 16 Euphonix Inc.
Studio Hub
The Studio Hub is the center for time code and sample rate synchroni-
zation for R-1. Supported formats include AES, word clock, internal
clock, video, blackburst, LTC, and MTC, VITC. MMC and Sony 9 in machine
control are also supported. The Studio Hubs 6 MADI I/O ports provide the
interface to its internal 336 x 336 digital audio router. The Studio Hub man-
ages the real-time digital audio patches between one or more Audio Decks and
the systems analog and digital I/O devices.
A/D - D/A Converters
Separate A/D and D/A converters provide 24-channel analog input
and output (via 16 or 24-bit, 44.1-to-96kHz MADI) for connecting the
R-1 to analog consoles, tape decks, and other gear. An ultra low jitter,
crystal-based sample clock synchronizes the premium quality conversion
process between analog signals and high-resolution digital audio.
Introduction
All manuals and user guides at all-guides.com
all-guides.com

R-1 Operation Manual 04/07/99 Version 0.987 ©1999 Euphonix Inc. Page 17
AD / DA Converters
Blank Page
All manuals and user guides at all-guides.com

Page 18 Euphonix Inc.
OPERATION MANUAL INTRODUCTION
The R1 is designed to take full advantage of operation from the Remote for
most functions that occur during a session. However, additional functionality
is available through Screen control of R-1 by the mouse and keyboard. Some
functions, such as naming of Tracks, require input from the computer key-
board. This manual is organized by feature and shows how each feature can
be implemented first on the Remote, then from the Screen with the mouse and
keyboard.
This icon accompanies notes about how the function being described may be
operated from the Remote. This icon will be followed by the sub-heading On
The Remote.
This icon accompanies notes about how the function being described may be
operated directly from the Screen using the mouse. This icon will always be
followed by the sub-heading In The Software.
Text Conventions
This manual utilizes some conventions in the formatting of the text that will hopefully make it
easier to understand. Taking a few seconds to glance over these conventions will make it easier to
follow the information presented in this manual.
When you see this: The Manual is referring to this
Bold Keys on the Remote like Play, Rec, Trim+.
Italics Buttons on Screen in the software, e.g. Cue, Zoom,
Rdy.
Underline Names of features on the Remote or in the software.
For example, Time Display, SpinKnob, Cue List.
Proper Names Proper names are also used to highlight concepts that are integral
to R-1 and may have different meanings in other contexts, such as
Project, Library, or Track.
SMALL CAPS Keys on the computer keyboard
On the Remote
In the Software
GUI
OperationalManual Introduction
All manuals and user guides at all-guides.com

R-1 Operation Manual 04/07/99 Version 0.987 ©1999 Euphonix Inc. Page 19
Conventions
Mouse Conventions
It is assumed that you will be using a two button mouse or trackball that has not
had its left/right button action swapped. While the left mouse button is used for
most operations, many controls in R-1 have multiple functions which can be ac-
cessed using the right mouse button or a combination of a mouse button and the
Shift, Ctrl, or Alt keys. If left or right is not specified for a mouse click operation,
then it is assumed to mean left-click.
When you read this: Do this:
Point Position the mouse pointer so that it is covering the
part of the Screen to which you want to point.
Click, or left-click Point to the control or place described and press and
release the left mouse button once.
Right-click Point to the control or place described and press and
release the right mouse button once.
Double-click Point to the control or place described and quickly
click the left mouse button twice without moving the
mouse.
Drag Point to the control or place described and press and
hold the left mouse Button while moving the mouse
pointer to the new position, then release the Mouse
button.
All manuals and user guides at all-guides.com

Page 20 Euphonix Inc.
Basic Transport Keys
Current Display
02:24:12.16
Play key lights to show forward play.
Shows Timer
current time.
Stop
The Stop key halts any transport action such as Play,
Locate, Wind.
All transport actions
may be initiated from the
Screen using the mouse.
Note that the Rec button
requires the keyboard
CTRL key to be held to op-
erate.
Play
On the Remote
On the Remote
In the Software
GUI
In the Software
GUI
Rec
Roll
Back
Punch
Auto
Jog Return
Note: Play
automatically stops
at 24:00:00:00
time.
All manuals and user guides at all-guides.com
Other manuals for R-1 Transfer Station
4
Table of contents
Other Euphonix Recording Equipment manuals

Euphonix
Euphonix ML530 User manual

Euphonix
Euphonix MC Control Artist Series User manual

Euphonix
Euphonix MC Media Application Controller User manual

Euphonix
Euphonix R-1 Transfer Station User manual

Euphonix
Euphonix R-1 Digital Multitrack User manual

Euphonix
Euphonix MC524 User manual

Euphonix
Euphonix MC Control User manual

Euphonix
Euphonix The CUBE User manual

Euphonix
Euphonix MC Control User manual