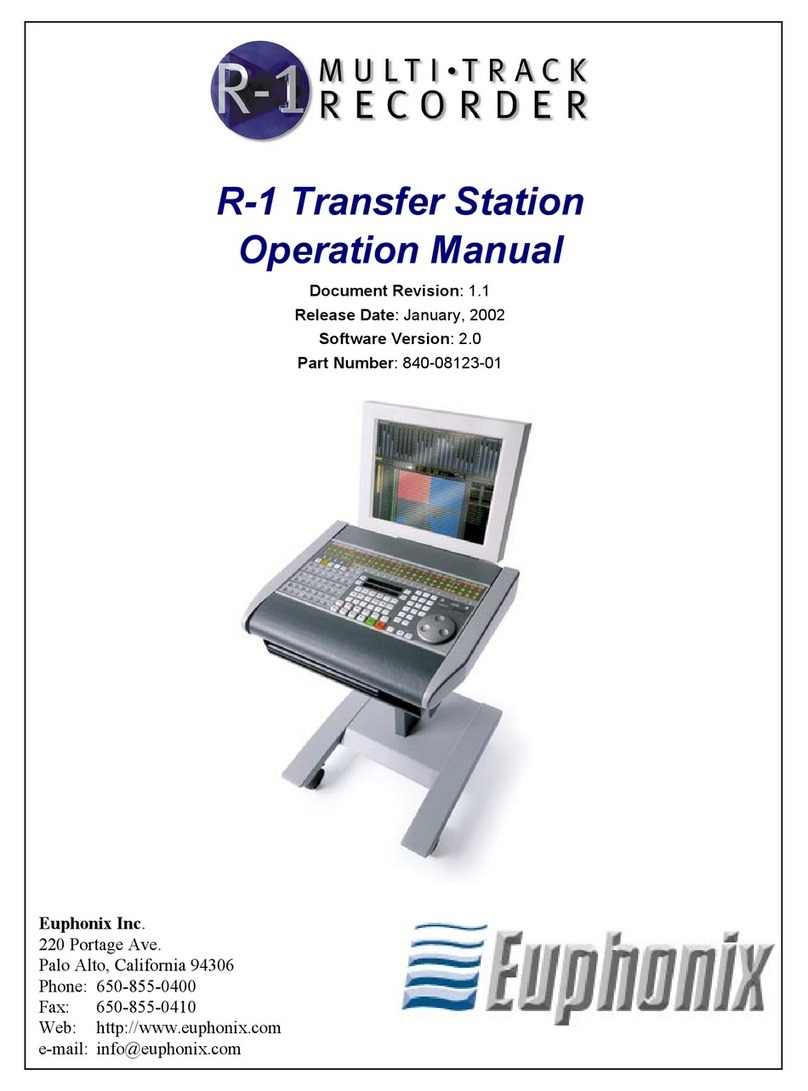
Euphonix R-1 Digital Multitrack User manual

Supplement to the
R-1 Digital Multitrack
Operation Manual
Version 3.0
Part Number: 840-07912-01
Euphonix Inc.
220 Portage Ave.
Palo Alto, California 94306
Phone: 650-855-0400
Fax: 650-855-0410
Web: http://www.euphonix.com
e-mail: info@euphonix.com

In the interest of continued product development, Euphonix reserves the right to make
improvements in this manual and the product it describes at any time, without notice or
obligation.
System 5, S-5, PatchNet, eMix, EuCon, R-1, Audio Deck, Studio Hub are trademarks of
Euphonix Inc.
©2001 Euphonix Inc. All rights reserved worldwide. No part of this publication may be
reproduced, transmitted, transcribed, stored in a retrieval system, or translated into any
language in any form by any means without written permission of Euphonix Inc.

Euphonix Version 3 Supplement to the R-1 Operation Manual
iii
Table of Contents
List of Figures .........................................................................................................................v
Chapter 1: Overview of Version 3..............................................................................7
1.1 Software Feature Overview .........................................................................8
1.1.1 Sound File Transfer to and from the R-1 .........................................8
1.1.2 Display Enhancements.....................................................................8
1.1.3 Editing Enhancements......................................................................8
1.1.4 Bars and Beats..................................................................................9
1.1.5 Transport Advancements ...............................................................10
1.2 System Configuration ................................................................................10
1.2.1 Machine Control and Varispeed behavior .....................................10
1.2.2 Studio Hub Software Routing........................................................10
Chapter 2: Display Features......................................................................................15
2.1 Waveform Display .....................................................................................15
2.2 Metering and Zoom Features .....................................................................18
2.3 Bars and Beats ...........................................................................................20
2.3.1 Tempo and Time Signature............................................................20
2.3.2 Re-order Regions ...........................................................................22
2.3.3 Create a Click Track ......................................................................23
Chapter 3: File Management.......................................................................................25
3.1 Launching New Titles................................................................................25
3.1.1 The Significance of Good Naming Practices.................................26
3.2 File Interchange .........................................................................................26
3.2.1 Export from the Directory Software Panel ....................................27
3.2.2 Export from the Multitrack Panel ..................................................28
3.2.3 Importing WAV Files ....................................................................31
3.2.4 Import to the Directory ..................................................................31
3.2.5 Import to the Multitrack.................................................................32
3.2.6 Using Imported Files or Files from Other Titles............................34
3.2.7 Restoring a Title from Its Library of Sounds.................................35

Euphonix Version 3 Supplement to the R-1 Operation Manual
iv
Chapter 4: Locator and Track Controls................................................................37
4.1 Track Controls ...........................................................................................37
4.1.1 Monitoring .....................................................................................37
4.1.2 The Effect of Linking.....................................................................37
4.2 The Locator................................................................................................38
4.2.1 The Cue Track................................................................................38
4.2.2 Reel Trim .......................................................................................39
4.2.3 Jog, Shuttle, and Reel Trim with the Pointer .................................39
4.2.4 Clip Edge Locating ........................................................................41
Chapter 5: Editing and Selection Features ........................................................43
5.1 Editing Features .........................................................................................43
5.1.1 Paste Relative.................................................................................43
5.1.2 Place Clips from the Directory.......................................................44
5.1.3 Cue Track Editing ..........................................................................45
5.2 Selection Features ......................................................................................46
5.2.1 Selecting Clips ...............................................................................46
5.2.2 Wireframe Selection ......................................................................47
5.2.3 Selecting Everything ......................................................................47
5.2.4 Context-Sensitive Popup Menus....................................................48
5.3 The Info Drop-down Panel ........................................................................49
5.3.1 Clip Info .........................................................................................50
5.3.2 Track Info (when one track is selected) .........................................52
5.3.3 Selection Info (with more than one track selected)........................53

Euphonix Version 3 Supplement to the R-1 Operation Manual
v
List of Figures
1-1 Router App: Edit Configuration Dialog ............................................................................11
1-2 Router App: Routing Dialog .............................................................................................12
1-3 Router App: Patches Dialog .............................................................................................13
2-1 Waveforms with selected region on two tracks ................................................................15
2-2 Track Edit popup menu .....................................................................................................16
2-3 Fades Display ....................................................................................................................17
2-4 Adjustable Decay Rate for Metering ................................................................................18
2-5 Right-click Metering popup menu ....................................................................................18
2-6 Default Crossfade time for all new punches .....................................................................19
2-7 The Zoom to Selection and Zoom to Extents controls .....................................................19
2-8 Zoom to Selection .............................................................................................................19
2-9 Zoom to Extents ................................................................................................................20
2-10 Edit Tempo Map Window ................................................................................................21
3-1 Export button illuminates when Sound File is selected ....................................................27
3-2 Multi-selecting Sound Files for Export ............................................................................27
3-3 Export command in the Clips popup menu ......................................................................28
3-4 The Export to Wave Dialog launched from the Multitrack ..............................................29
3-5 Change Export Name Dialog ............................................................................................30
3-6 The Import Wave Files dialog ..........................................................................................32
3-7 The Add Wave File to Import List dialog .........................................................................33
3-8 The Import Wave Files dialog ..........................................................................................33
3-9 Replace or create a new Sound File ..................................................................................33
3-10 Selecting a Sound File illuminates the Copy button .........................................................34
4-1 Cue Track right-click menu ..............................................................................................38
5-1 Paste Relative in the Track Edit and Selection popup menus ...........................................44
5-2 Ripple with Cues selected in the Track Edit popup menu ................................................45
5-3 Select a complete Clip by clicking on its waveform/block. .............................................46

Euphonix Version 3 Supplement to the R-1 Operation Manual
vi
5-4 Wireframe Selection .........................................................................................................47
5-5 Cue Track (left) and Clip Select (right) Right-click Menus .............................................48
5-6 Track Name Select Right-click menu ...............................................................................49
5-7 Clip Info dialog .................................................................................................................50
5-8 Editing the Tail Trim in the Clip Info dialog ....................................................................50

Euphonix Version 3 Supplement to the R-1 Operation Manual
7
Chapter 1: Overview of Version 3
As the first multitrack digital recorder to support the 24-bit/96 kHz format, the R-1 is
setting a new standard for professional, multitrack, audio recording. Euphonix combined
our staff’s innovations with creative feedback from our users to make version 3 more
powerful and easier to use than ever. As the R-1 continues to mature, its capabilities are
expanding into additional audio production areas and it is becoming more compatible
with other audio components.
This Supplement to the R-1 Operation Manual discusses all changes and new features
offered by the R-1 Pilot hardware and software version 3.0. If a feature’s description
differs in the R-1 Operation Manual from this supplement, the supplement should be
considered correct.
The following is included in the upgrade:
•Version 3.0 ghost-image CD: Can be used to update or restore the entire R-1 pi-
lot operating system and also upgrades the R-1 software to version 3.0.
•Version 3 R-1 application software installer: Used to upgrade only the R-1
software to the most current version at the time of purchase. The installer allows
including the newest software version without creating an entirely new ghost-
image CD-ROM.
•Upgraded and Refurbished Computer Pilot: The upgrade includes replacing
your R-1 Pilot Computer with a completely refurbished model including several
new, higher-powered components. The local non-audio hard drive and RAM
are larger (256 MB), and the CPU is much faster (933 MHz). This upgrade will
improve the overall performance of your R-1, as well as maintain compatibility
of the Pilot Computer with this and subsequent releases. Your old R-1 Pilot
must be returned to Euphonix when your upgrade is installed. Euphonix technical
support and field technicians will gladly help make this a smooth transition. All
required software is pre installed.
•New Remote button: Reel Trim resides next to the Shuttle button. Includes
a key-puller to remove blank buttons.
•Version 3 manual addendum: This document you are reading describes all
new version 3 features.
•Revised supplemental device manuals: Revisions of the Pilot, Studio Hub and
Remote manuals provide new information for version 3.
•48-track wiring diagram: Shows how to connect the components of a standard
48-track R-1 system.

Euphonix Version 3 Supplement to the R-1 Operation Manual Overview of Version 3
8
1.1 Software Feature Overview
This section introduces the most important new features; each is discussed in more de-
tail in subsequent chapters.
1.1.1 Sound File Transfer to and from the R-1
The R-1 can now capture sound files from either the R-1 Directory system or the
displayed track sheet, and export them as Broadcast WAV (BWAV) files. BWAV files
are extended versions of the WAV format. They are compatible with any software that
reads WAV files, even if that software does not use or preserve the additional data.
BWAV is the standard file format of the European Broadcast Union and of the commit-
tee developing the AES 31 file interchange standard. BWAV files are compatible with
Windows and Macintosh platforms. Because the R-1 is used extensively as a 24-bit/96
kHz mastering recorder, version 3 allows direct transfer of multichannel BWAV files to
a DVD authoring system. See Chapter 3: File Management for more information.
1.1.2 Display Enhancements
Metering in the R-1 has been widely praised and now includes the following new options:
• decay-peak hold
• no-peak hold
• re-settable, no-decay-peak hold
• adjustable decay rate
The crossfade time, now always visible on the Navigation Bar of the on-screen display,
can be set in the Record dialog as well as by its previous method.
The track sheet now shows waveforms for all Clips. In addition, the name of the file is
shown, which aids import and export operations. The file name display can be disabled
if it is too long; a selected clip and any clip under the cursor will still display its full name.
New Zoom features include: Zoom on Selection quickly jumps to the view previously
assigned to that section; zoom in on the track sheet displays sample-accurate Waveforms.
New Selection hotkeys, include Select All Time and Select All Tracks.
See Chapter 2: Display Features for complete information.
1.1.3 Editing Enhancements
Clip-based selection and editing along with the waveform display make the R-1’s editing
tools easier and more powerful to use. These enhancements allow a greater range of ed-
iting operations on the R-1 without transferring to a separate editor. On-board editing can
even fix problems that previously required punch recording. Waveform display makes
locating edit points easier and faster.

Euphonix Version 3 Supplement to the R-1 Operation Manual Overview of Version 3
9
The trackball cursor can now select Clips (punch segments) with a single click. It is now
also possible to wireframe select using the trackball and to precisely adjust Clip, selec-
tion, or track parameters in a context-sensitive Information dialog. Many edit opera-
tions are now accessed from drop-down menus, such as restoring the original recording
parameters to previously edited Clips.
Audio clips from other Titles or imported from another file format can now be placed
in tracks of the current Title.
See Chapter 5: Editing and Selection Features for complete information.
Context-Sensitive Popup Menus
Right-clicking with the trackball pointer produces context-sensitive popup menus in
several new places. Right-clicking never does anything harmful or data altering, so you
can experiment to find out how version 3.0 works. See Figure 5-5 and Figure 5-6 for
examples of the popup menus.
1.1.4 Bars and Beats
The R-1’s extensive Title Time display now includes Bars, Beats, and Ticks. When
selected, the time locator accepts and displays time information in these more musically
meaningful units. A tempo map editing page permits up to 16 tempo regions per Title.
A click track can be created using one imported WAV file for the beat marks of the cur-
rent tempo map and a second WAV file for the downbeat. (See Create a Click Track on
page 23.)

Euphonix Version 3 Supplement to the R-1 Operation Manual Overview of Version 3
10
1.1.5 Transport Advancements
The Remote now supports Reel Trim (next to the Shuttle button), allowing the
SpinKnob to navigate inaudibly through material to look for gaps or downbeats. Using the
Reel Trim simultaneously with the Remote’s quick Zoom keys locates quickly and
precisely. On the Multitrack display panel, Reel Trim, Jog, and Shuttle are all sup-
ported under trackball control. The play head can be dragged (while in Stop, Jog, or
Shuttle mode) by clicking on the Cue Track, holding down, then pulling the cursor to-
ward the material that should play. Press the Ctrl key to reverse the effect of pulling the
cursor across the Cue Track. Toggling with the Ctrl key is a convenient method for roll-
ing back and forth across a given area.
Locate to Previous and Next Cues with the |<< and >>| keys, respectively, and to Clip
edges using the Wave + |<< and Wave + >>| keys.
See Section 4.2 - The Locator for complete information.
1.2 System Configuration
1.2.1 Machine Control and Varispeed behavior
Unlike previous versions, Varispeed is not automatically defeated upon receiving a Ma-
chine Control Play commands.
A new machine control Chase command has been added that is compatible with more
machine control systems. The Chase command causes the R-1 to chase incoming time
code, while it continues to look for machine control commands for track arming and
master Record.
1.2.2 Studio Hub Software Routing
Version 3 includes an applet that runs in parallel with the R-1 software to provide real-
time routing control over the R-1’s MADI hub. The Router provides three tab-style pag-
es to manage resources and control signal flow:
•Edit Configuration: An editable configuration map of the R-1 to define and name
hardware components (Figure 1-1).
•Routing: A routing interface to interconnect components. It is no longer nec-
essary to know what port carries which signals (Figure 1-2).
•Patches: Name, store, and recall routing patches (Figure 1-3).
The Patch manager can store a virtually unlimited number of routing and configuration
set-ups in software on the Pilot. You can still use the Studio Hub front panel to set-up
MADI routing, and you can still save user routes in the 20 allocated slots in the Studio
Hub hardware.
Euphonix Version 3 Supplement to the R-1 Operation Manual Overview of Version 3
11
Edit Configuration
Figure 1-1 Router App: Edit Configuration Dialog
Click on the Edit Configuration tab to begin building a configuration. Under the head-
ing All other MADI Device, make sure all system components are listed and that the
Studio Hub is listed with the correct size. Highlight and delete unnecessary compo-
nents. Add a new component by pressing the New button and selecting R-1 and MADI
devices from the dialog box that appears.
Next, define how the MADI ports of each device are connected to each other. This rep-
licates your MADI connections on the rear of the R-1. For example:
1. Under Studio Hub Inputs, select MADI In #1.
2. Under All Other MADI Devices, select MADI Out #1 of the Analog to MADI
(AM 713)#1.
3. Click Define Studio Hub Connection to confirm the selections.
When selecting from the All Other MADI Devices, you will need to expand the list of
components to see types of connections available. For instance if you click on the + next
to Audio Deck you will see its Inputs and Outputs. Expand the Outputs to see the two
different outputs available.

Euphonix Version 3 Supplement to the R-1 Operation Manual Overview of Version 3
12
Routing
Figure 1-2 Router App: Routing Dialog
You can make individual channel patches/routes by selecting the Routing tab.
Route Width, at the bottom of the window, sets the number of contiguous channels
selected. For example, if your Route Width is four and you select channel 1, channels
1–4 are all selected for routing.
To change a patch or route, select a channel under one of the MADI devices in Devices
Generating MADI signals. For example:
1. Click on the + next to Analog to MADI (AM 713) #1 and select Output
Channel #1.
2. Under Devices receiving MADI Signals, click the + next to Audio deck #1 and
select Input Channel #2.
3. Now click on the Route Selections button at the bottom of the dialog.
This routes channel 1 from your AM 713 #1 to channel 2 of your Audio Deck #1.
You can then save this new route as a new Patch as described in the Patches section below.

Euphonix Version 3 Supplement to the R-1 Operation Manual Overview of Version 3
13
Patches
Figure 1-3 Router App: Patches Dialog
Once the MADI connections have been defined:
1. Click the Patches tab to save the configuration.
2. Click the New button under Patches.
3. Name your configuration.
4. Press the OK button.
You change your Patches later by selecting the Patch to change, editing, and then click-
ing Store. To recall a Patch simply select the Patch you want and click on Recall. You
can also create new, delete, or make current different configurations under the Config-
uration section of the Patches tab.
Once the configuration of your system is entered, numerous and very different routes
can be created quickly and easily. See Chapter 6: Routing for more information.
NOTE: Unlike beta-test versions of the routing application that were previously available but
not released, this application runs while the R-1 Application is still open.


Euphonix Version 3 Supplement to the R-1 Operation Manual
15
Chapter 2: Display Features
This section introduces version 3’s new display features:
• Waveform display
• Zoom controls
•Reel Trim and cursor-based Jog and Shuttle
• Clip-edge Locating
•Bars, Beats, and Ticks display mode
2.1 Waveform Display
The R-1 shows waveforms for all Clips in the track sheet unless you choose otherwise.
All waveforms are drawn bipolar. The 3-D tubular Clips in previous versions have been
abandoned in favor of simpler waveform displays. Waveforms allow you to more easily
see gaps in the content, fully silent edit points, clipping or near clipping, downbeats, and
similar material on separate tracks. Depending on your level of experience with using
waveforms, you may even recognize certain instruments.
Figure 2-1 Waveforms with selected region on two tracks
Regardless of your experience viewing waveforms, you will quickly discover the power
of seeing, as well as hearing, the content. Waveform display can also be disabled.
Waveforms can be visually distracting, use screen space, and may slow down display.
If you prefer to use your ear to locate by scrubbing or playing audio, you may want to
disable waveform display.
It is also possible to display the Sound File name for each Clip. It may help to turn off
the waveform display because names are easier to read against a plain block of color.
Showing the name of the Sound File can assist import and export operations. However,

Euphonix Version 3 Supplement to the R-1 Operation Manual Display Features
16
if the file name display is too much information (i.e., it can obscure the waveform) it
too can be turned off. The selected Clip and any Clip under the trackball cursor will still
display its name.
To disable the waveform view and/or the file name view on any given Track:
1. Right-click on the Track Name.
The Track Edit popup menu appears.
Figure 2-2 Track Edit popup menu
2. Select Display Waveforms and/or Display File Names.
Each item’s state toggles when selected.
3. To globally set the Display Waveforms and/or Display File Names for all
tracks, press the Wave + (Select Enable) Select All keys.
All tracks are highlighted.
4. Right-click over any one of the selected tracks.
Enabling/disabling either display mode affects all tracks.
Zooming
The R-1 allows you to zoom in on the track sheet to display sample-accurate wave-
forms. At level 6 and below (zoom in for lower levels) there may be a pause while the
waveforms calculate. This is due to the large amount of audio data being refreshed di-
rectly from the audio hard drives for each new view. The waveforms at these levels do
not refresh while the Transport is active because it uses all of the system's resources.
When Transport operations cease, the waveforms refresh.

Euphonix Version 3 Supplement to the R-1 Operation Manual Display Features
17
Caching
At zoom levels higher than 6, the audio data is not drawn from the audio disks but is
displayed using a cache of lower resolution data. This cache data is kept on the R-1 Pilot
and not on the audio disks. Moving an audio disk to a new system (with a different Pi-
lot) requires recalculating the waveforms. Initial calculation of the waveform data is
done as soon as you press the Stop button after record.
Although it may take some time for the R-1 to process the audio to create the wave-
forms, it is done in the background while you continue to work. However, the wave-
form calculation does not progress while the Transport is active. The entire disk
throughput is dedicated to play and record reliably—waveform calculation is only al-
lowed to be active during Transport idle time. The R-1 also attempts to calculate wave-
forms where you are working first. Only waveforms in the currently open Title are
calculated.
While the waveforms are still being calculated, a single zero level green line is shown
inside the Clip. Clips (full-scale points in the waveform) are shown with a red highlight
on the edge of the waveform.
Figure 2-3 Fades Display
Fades are shown by a very light blue line which superimposes over the darker blue
waveform or block (a selected Clip has these colors inverted). The figure above shows
the block display mode on all Clips. The only Clip with waveforms visible is the Clip
currently under the trackball cursor—this pointed to clip always shows waveforms and
the sound file name.

Euphonix Version 3 Supplement to the R-1 Operation Manual Display Features
18
2.2 Metering and Zoom Features
Metering
Metering in the R-1 has been widely praised and includes a decaying peak hold, no peak
hold, and no decay (manually reset-able) peak hold. R-1 metering now supports a user
adjustable decay rate to get just the effect that the engineer needs to see.
Figure 2-4 Adjustable Decay Rate for Metering
Figure 2-5 Right-click Metering popup menu

Euphonix Version 3 Supplement to the R-1 Operation Manual Display Features
19
Crossfades
The crossfade time is now always visible on the Navigation Bar of the on-screen dis-
play. Adjust the crossfade time as before or set it in the Record dialog.
Figure 2-6 Default Crossfade time for all new punches
Zoom Features
Perhaps the most useful of the new Zoom features is Zoom to Selection, which quickly
zooms to a selected section. Zoom to Extents shows the entire Title where clips are
used. New Selection hotkeys include Select All Time and Select All Tracks.
Right-click on a selected or empty track region for the popup menu and choose Zoom
to Extents or Zoom to Selection. The Zoom controls below appear.
Figure 2-7 The Zoom to Selection and Zoom to Extents controls
Figure 2-8 Zoom to Selection

Euphonix Version 3 Supplement to the R-1 Operation Manual Display Features
20
Figure 2-9 Zoom to Extents
2.3 Bars and Beats
The R-1’s extensive Title Time display now includes Bars, Beats, and Ticks. When
selected, the time locator accepts and displays time information in these more musically
meaningful units. A tempo map editing page permits up to 16 tempo regions per Title.
A click track can be created using one imported WAV file for the beat marks of the cur-
rent tempo map and a second WAV file for the downbeat (see Create a Click Track on
page 23).
Bars and Beats time display differs from other display modes because it depends on the
tempo and time signature, both of which can change independently during a single title.
The R-1 represents these changes as a tempo region; there can be 16 regions per Title.
2.3.1 Tempo and Time Signature
A beat is one unit of the bottom number of the time signature. For example, in 3/4 time,
a beat is one quarter note. Tempo is represented as beats per minute (bpm); the allow-
able range is 1–960 bpm. The top number in the time signature indicates the number of
beats per measure.
NOTE: We recommend programming the time and tempo changes into your R-1 Title before
recording. Then use the click track feature to provide a reference for recording.
Table of contents
Other Euphonix Recording Equipment manuals

Euphonix
Euphonix The CUBE User manual

Euphonix
Euphonix MC Control User manual

Euphonix
Euphonix MC Control User manual

Euphonix
Euphonix MC Media Application Controller User manual

Euphonix
Euphonix R-1 Transfer Station User manual

Euphonix
Euphonix ML530 User manual

Euphonix
Euphonix MC Control Artist Series User manual

Euphonix
Euphonix R-1 Transfer Station User manual

Euphonix
Euphonix MC524 User manual