HOW TO USE AND KEEP HANDBOOK
A copy of this handbook delivered With the machine is addressed to
the operator and to the maintenance controller, who undertake to
read it and to keep it in a protected place near the machine and to
refer to it before starting any operation on the machine. The infor-
mation written in this handbook and placed in various Sections are
aimed to describe the use of the machine and its technical features
as provided for in the plan aims, to provide instructions as to carria-
ge, displacement, installation, assembling, setting and use, as to the
staff training, maintenance interventions, spare parts orders and
residual dangers.The Manufacturer begs the Customer to read com-
pletely this Handbook when receiving the machine and, however,
before starting any operation on it.This Handbook is made and ai-
med to give the user all the information, indications and instructions
he needs to know the machine, to understand its operating principles
and limits and to be properly informed about its safe use.
We urge You to follow the instructions written in this Handbook and
to comply with any specific regulations in force.
This operating Instructions Handbook should be considered as a
part of the machine and should be kept for future references until the
final dismantling. In case the Handbook should be damaged or lost,
it is possible to make request of it to the Manufacturer as it is inser-
ted in the list of the machine spare parts with the Code n°...
The Manufacturer makes know that the Handbook reflects the
technical situation when the machine has been commercialized
and it cannot be considered unsuitable in case of updating made
according to new information.
The Manufacturer reserves the right to update the production and
Handbook, without being under the obligation to update the pre-
vious production and Handbook, exept for extraordinry cases con-
cerning the Safety and Health of people and things. The Customer,
however, may address to the Manufacturer to ask for any updating
or integration of the Handbook that should complete it.
In case the Customer would like to get further information or to sug-
gest improvements to the Handbook, he can address directly to the
Manufacturer. The Customer is asked to notify the new owner’s ad-
dress to the Manufacturer in case of transfer of the machine in order
to send any integration of the Handbook to the new user. The Manu-
facturer informs the Customer that he considers himself not respon-
sible in case of :
improper use of the machine ;
use contrary to the specific regulations in force;
wrong installation;
feeding defects;
serious maintenance faults;
non-authorized changes or interventions;
use of non-original or non-specific spare parts;
total or partial non-compliance with the instructions;
exceptional events.
UTILIZZO E CUSTODIA DEL MANUALE
Una copia di questo manuale spedita insieme alla macchina è desti-
nata all’operatore e a chi ne controlla la manutenzione, il quale si
impegna a leggerlo, a custodirlo in luogo sicuro e a consultarlo prima
di iniziare qualsiasi operazione sulla macchina stessa.
Le informazioni scritte in questo manuale sono finalizzate alla de-
scrizione dell’uso della macchina e delle sue caratteristiche tecniche,
a fornire istruzioni su trasporto, spostamento, messa in funzione,
assemblaggio, regolazioni, utilizzo, interventi di manutenzione, parti
di ricambio, rischi. Il Costruttore prega il Cliente di leggere comple-
tamente il manuale al ricevimento della macchina e comunque, pri-
ma di iniziare qualsiasi operazione su di essa. Questo manuale è fatto
ed è mirato a dare tutte le informazioni all’utente, tutte le indicazio-
ni e le istruzioni di cui ha bisogno per conoscere la macchina, per
capire i suoi principi di funzionamento e i suoi limiti ed essere infor-
mato propriamente dell’uso e della sicurezza. La preghiamo di se-
guire le istruzioni scritte in questo manuale ed accondiscendere con
alcune regolamentazioni specifiche in forza.
Questo manuale d’istruzioni di funzionamento dovrebbe essere con-
siderato come una parte della macchina e dovrebbe essere tenuto per
referenze future fino al finale smantellamento. Nel caso in cui il ma-
nuale dovesse essere danneggiato o perduto, è possibile richiederlo al
fabbricante nell’elenco dei ricambi della macchina.
Il fabbricante rende noto che il manuale riflette la situazione
tecnica nel momento in cui la macchina è stata commercializzata
e non può essere considerato disadatto in caso di aggiornamenti
fatti secondo nuove informazioni. Il fabbricante si riserva il di-
ritto di aggiornare la produzione ed il manuale, senza essere ob-
bligato ad aggiornare la produzione precedente ed il manuale, a
parte casi straordinari riguardo all’incolumità e alla salute di
persone e cose. Il cliente, comunque, può fare richiesta al fabbrican-
te per qualsiasi aggiornamento o integrazione del manuale.
Nel caso in cui il cliente desiderasse ottenere informazioni più spe-
cifiche o suggerire miglioramenti al manuale, può contattare diretta-
mente il fabbricante. Il cliente è pregato di notificare al fabbricante
l’indirizzo di un eventuale nuovo proprietario in caso di trasferimen-
to della macchina in ordine per poter provvedere alla spedizione di
qualsiasi integrazione del manuale all’utente nuovo.
Il fabbricante informa il cliente che si considera non-responsabile
in caso di:
uso improprio della macchina;
uso contrario alle regolamentazioni specifiche in forza;
installazione sbagliata;
difetti di alimentazione;
errori gravi di manutenzione;
cambi o interventi non-autorizzati;
uso di parti di ricambio non-originali o non-specifiche;
non-osservanza totale o parziale delle istruzioni;
eventi insoliti.
Via …………………..., n°
cap –……………………..
Tel. ……………………….
Fax………………………...
E-Mail: ………………………
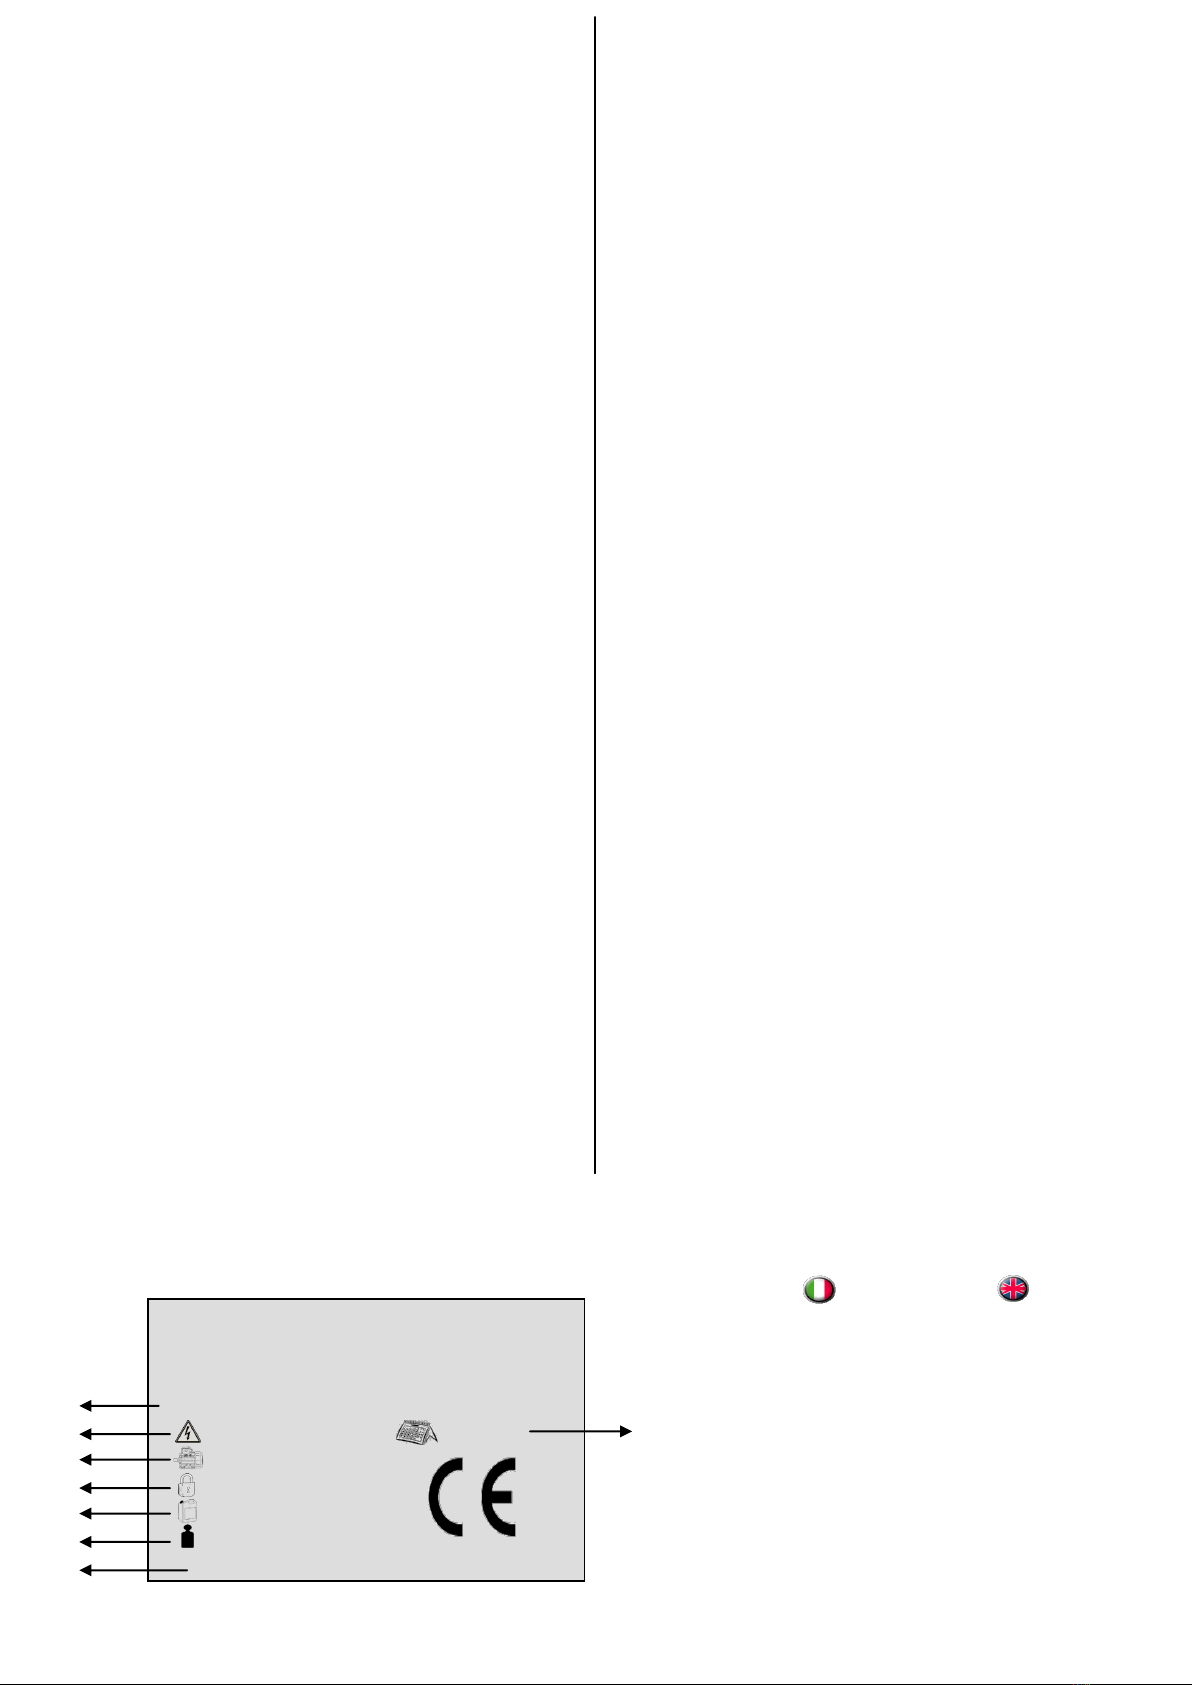
Mod. ABCDEFG
V - AC/DC 09/2008
W
IP
Lt.
Kg.
N° 000000 MADE IN ITALY
(B)
(C)
(D)
(E)
(F)
(A)
(G)
(H)
MATRICOLA E MARCHIO CE - SERIAL NUMBER AND CE MARK
(A) Modello Macchina Machine Model
(B) Alimentazione Power Supply
(C) Potenza Motori Power of Motors
(D) Protezione Protection
(E) Capacità Serbatoi Capacity of Tanks
(F) Peso Weight
(G) N° di Matricola Serial Number
(H) Data di Fabbricazione Date of Manufacture
COMPANY