Eurekazone EZ Smart User manual

Eurekazone, LLC 1904 NE Jacksonville Rd Ocala, FL 34470
Phone (352 620-2262 Fax (352 620-2576 Tech (877 681-7955 techsupport@eurekazone.com www.eurekazone.com
DUST SHIELD
v14-01
The EZ Smart Dust Shield can easily be shaped and attached to the front of the blade housing on
most circular saws on the market. The EZ Smart Dust Shield helps to contain the saw dust at the
front of the blade until it can be extracted through the EZ Smart Dust Port* with your vacuum.
Installing The Dust Shield
Step . Set the saw on a solid work surface and
unplug the saw's electrical supply before beginning
the installation process. See fig.
Step 2. Remove the blade from the saw & Lower
the saw to it's lowest position & as shown in fig. 2
Step 3. Remove the screw and bumper that
connects the blade housing to the motor housing
as shown in Fig. 3
Step 4. Clean the dust shield with a dry towel
removing any dust or debris Them apply strips of
double sided tape to the dust shield nearest to the
mounting hole end. Then peel off the protective
sheeting as shown in Fig. 4- & Fig. 4-2.
Fig.
Fig. 2
Fig. 3
Fig. 4-
Fig. 4-2
Parts Included
- Dust Shield
– Strip Double sided Tape
Notice: Prior to installing your EZ Smart Dust Shield, please
ensure that you have read and fully understand these
instructions and those provided for any power tools that you
may use during this installation. Disconnect your saw from
the power supply while completing this installation. When
required, use hearing and eye protection.
*Sold Separately
Eurekazone, LLC 1904 NE Jacksonville Rd Ocala, FL 34470
Phone (352 620-2262 Fax (352 620-2576 Tech (877 681-7955 techsupport@eurekazone.com www.eurekazone.com
DUST SHIELD
v14-01
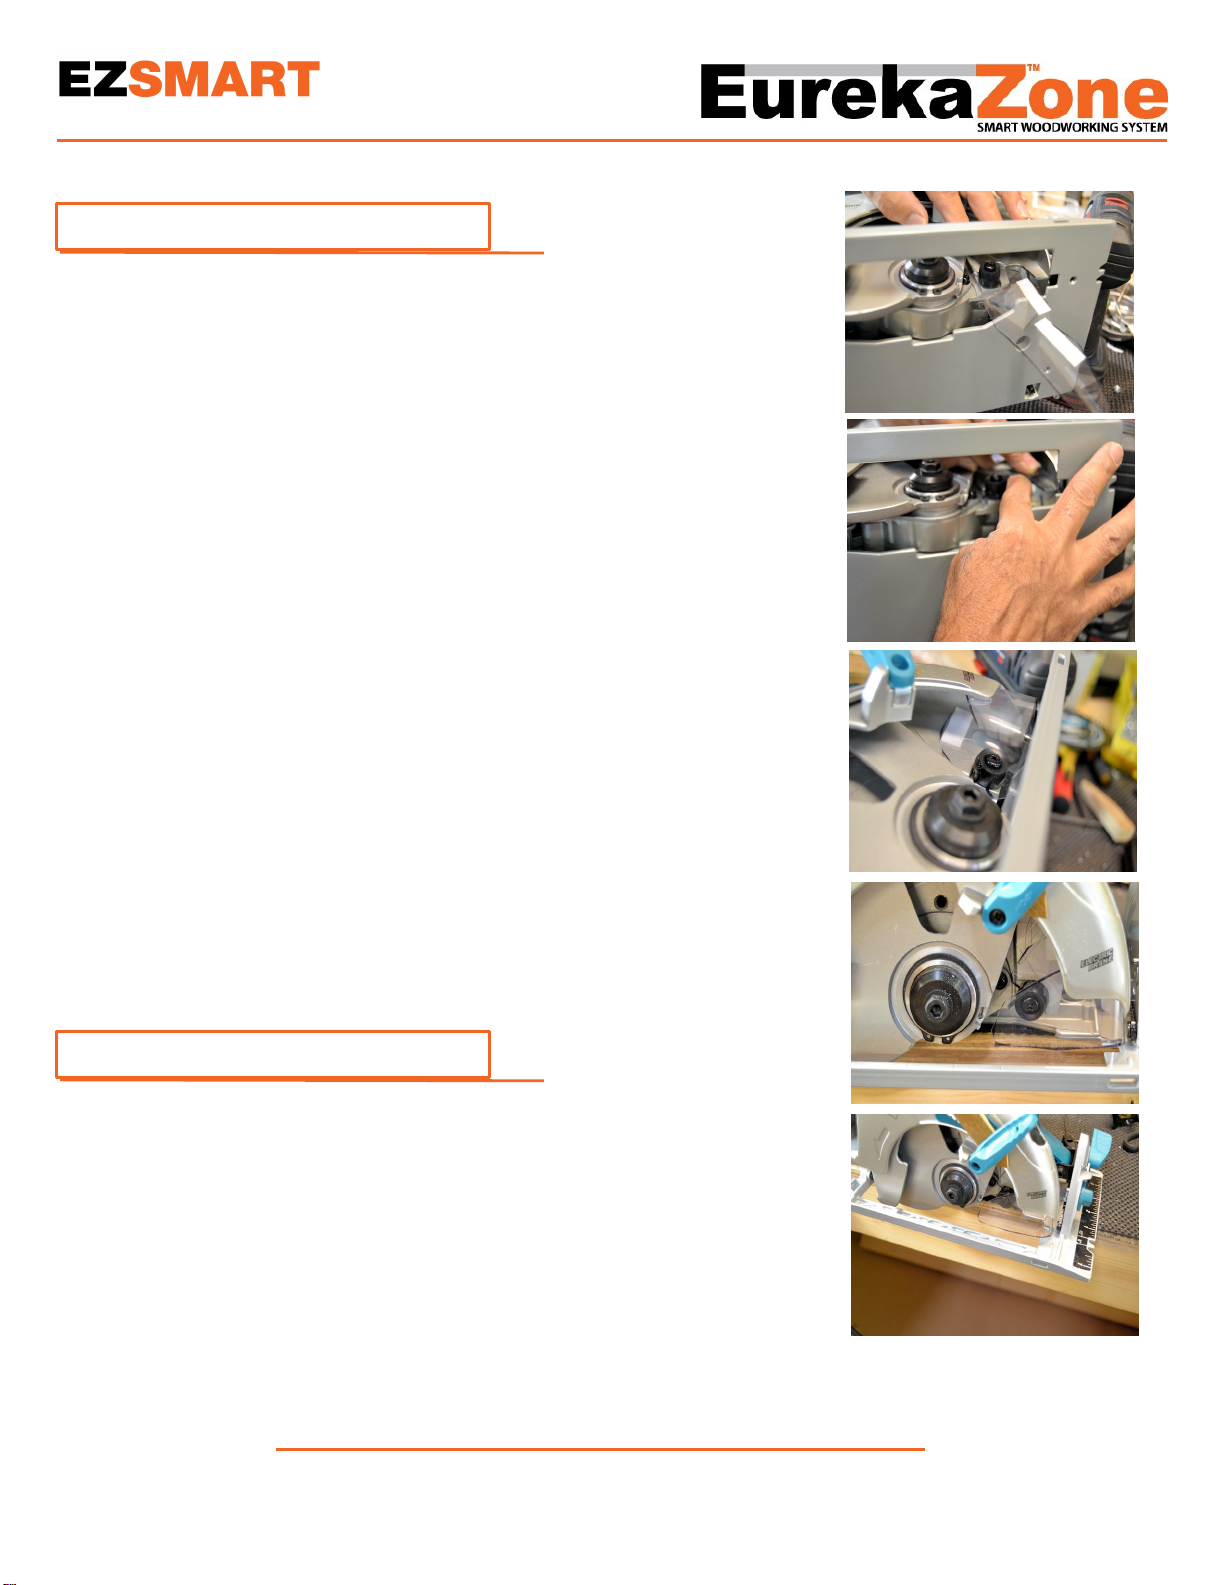
Installing The Dust Shield Continued
Step 5. Thoroughly clean the inside of the blade housing
where dust shield will be mounting with a dry cloth or
paper towel to remove and dust or debris. Next, install
the dust shield with double sided tape facing downward
and reinsert the housings mounting screw and bumper
but do not tighten the screw fully to allow movement of
the dust shield as shown in Fig. 5
Step 6. Carefully fold the dust shield bringing it up into
the inside of the blade housing. As you move the dust
shield into position use care not to let the double sided
tape make contact until the shield is properly positioned.
With your fingers, shape the dust shield to the inside
contour of the housing as shown in Fig. 6- & Fig. 6-2
Step 7. With the dust shield in position make sure double
sided tape is bonded securely. Inspect the shield to
make sure that it is not hitting the saw's base as it is
lowered and as it is tilted into a beveling position. Finish
by tightening the mounting screw securely.
Note: if the shield is hitting or interfering with the bevel or
height adjustment, trim these areas as needed. Shown in
Fig. 7- & Fig. 7-2
Fig. 5
Fig. 6-
Fig. 6-2
Fig. 7-
Fig 7-2
Tips
. Prior to applying the double
Stick tape to the dust shield, perform a
Test run to ensure proper fit of the dust shield to
your saw. This will eliminate the need to trim the
shield after installation. Use a razor knife or
scissors to shape the shield for optimal
performance.
Table of contents


