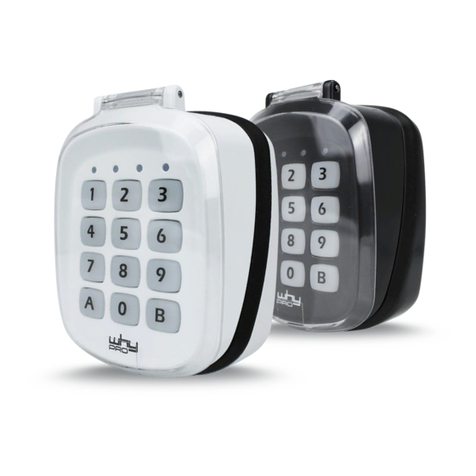
Eurobraille ESYTOUCH User manual

ESYTOUCH
User manual v1.00
User manual for Esytouch programmable keypad

30/05/2010
1
Contents
Hardware description ..................................................................................................... 2
Main parts ...................................................................................................................... 2
Keyboard......................................................................................................................... 3
Keys.................................................................................................................................. 3
Start up............................................................................................................................... 3
First connection ............................................................................................................ 3
Onward connections..................................................................................................... 3
How to customize your Esytouch.................................................................................. 4
Software utility description........................................................................................ 4
Softfware utility menu .................................................................................................... 4
File Menu ........................................................................................................................ 4
file>new (Ctrl+N) ....................................................................................................... 4
file>open (Ctrl+O)...................................................................................................... 4
file>save (Ctrl+S) ....................................................................................................... 4
file>save AS................................................................................................................. 5
file>close...................................................................................................................... 5
Tools Menu ..................................................................................................................... 5
tools>upload to EsyTouch........................................................................................ 5
tools>download from esytouch............................................................................... 5
tools>clean-up assignement .................................................................................... 5
tools>update firmware ............................................................................................. 5
tools>test ..................................................................................................................... 5
Help Menu ...................................................................................................................... 5
help>keyboard ........................................................................................................... 5
help>eurobraille ........................................................................................................ 5
help>manual............................................................................................................... 6
help>about .................................................................................................................. 6
Connect software utility and Esytouch ....................................................................... 6

30/05/2010
2
general information
E s y t ou c h is an optional, programmable keypad that reproduces a single shortcut, saved
macro or a keystroke sequence by the press of one key only.
E s y t ou c h is delivered with software which assists the user to program any of the software
or PC keys or controls. A large variety of customized key-mappings for different applications
can be created to simplify and enhance the work on the PC.
E s y t ou c h connects through the USB port to the PC. The internal micro SD-card can be
used to store the personalized key-mapping or used as an additional memory.
HARDWARE DESCRIPTION
Main parts
Mini-USB connector
Micro SDCard
9 keys keyboard
Side keys
Scrolling wheel
Control keys

30/05/2010
3
Keyboard
3 line/column keypad
2 keys on each side
2 control keys located at the bottom of the front side
1 scrolling wheel –clockwise/counter clockwise, 4 direction clicks and middle short/long click
Keys
Please note that we suggest keeping the way the keys are originally named during the
programming process.
We will call the nine keys positioned in 3x3 matrix as follow: A1, A2, A3, B1, B2, B3, C1, C2
and C3.
We will call L_LEFT and L_RIGHT the two lateral keys.
We will call M_LEFT and M_RIGHT the two control keys.
Possible actions using the wheel are:
Clockwise rotation R_CLOCKWISE
Counter-clockwise rotation R_CCLOCKWISE
Short middle click R_MIDDLE1
Long middle click R_MIDDLE2
Single click up R_UP
Single click down R_DOWN
Single click left R_LEFT
Single click right R_RIGHT
START UP
First connection
When you connect your Esystouch to a PC for the first time, a configuration utility will
automatically be run. Please select in the list of applications the one you want to use and
continue by customizing your key mapping.
Onward connections
Once you created your own key mapping, the utility software will not automatically start
anymore.
Beginning from the second connection, EsysTouch will be identified as a keyboard with 102
keys and it will work in the same way as a standard keyboard.

30/05/2010
4
Software utility
HOW TO CUSTOMIZE YOUR ESYTOUCH
Software utility description
On the micro SD-card EsyTouch stores a software utility assisting the user to customize the
key mapping. This utility also assists the user to:
-Read/write a key table installed on EsysTouch
-Read/write a key table saved on the current PC
-Open and show the key table in use
-Edit the key table in use
-Read EsyTouch serial number
-Test EsyTouch
The key table is displayed in a table using 2 columns : the first column contains EsysTouch
key sequence; the second column contains the associated PC key sequence. (Click once on
the column header to change the sorted order)
To set up a sequence, please note the different meaning of these separation characters used:
-« . » means that keys are pressed simultaneously.
-« + » means that keys are pressed one after the other.
SOFTFWARE UTILITY MENU
File Menu
file>new (Ctrl+N)
This menu items opens up an empty table.
Warning: if the table in use has been changed, the software utility will prompt you to save or
to discard any changes.
file>open (Ctrl+O)
This menu item opens up a dialog box in which the key table file (*.aml) that should be
uploaded to the EsyTouch, can be selected.
Warning: if the table in use has been changed, the software utility will prompt you to save or
to discard any changes.
file>save (Ctrl+S)

30/05/2010
5
If the file just created is a new file, the « save as » dialog box will be opened. The key
mapping made will be saved in a *.aml file in the EsyTouch folder. If required, select or create
a new folder.
If the file already exists, it will be saved using the same file name and path.
file>save AS
The « save as » dialog box will be opened. Use this menu item to change file name and path.
file>close
This menu item will close your EsyTouch software utility. If an open key mapping file has
been changed, a dialog box will ask you to save or discard any changes.
Tools Menu
tools>upload to EsyTouch
Use this menu item to upload the displayed key mapping to the currently connected
EsyTouch. If a table was already present in the software utility window, it will automatically be
erased.
tools>download from esytouch
Use this menu item to open the existing key mapping table. Once the table is displayed, use
the utility software to make changes and save the new file. Don’t forget to upload to the
currently attached EsyTouch to have those changes activated.
tools>clean-up assignement
This menu item deletes any existing key mapping in the connected EsyTouch. After clean up
is run, the keypad mapping history will be empty.
tools>update firmware
If a firmware update is available, this menu will assist the user in updating the firmwar of the
currently attached EsyTouch. Visit www.eurobraille.com for a list of existing updates.
Warning: never disconnect EsyTouch while updating. If something goes wrong during the
firmware update, we ask you to contact your local sales representative.
tools>test
This menu item will guide you through testing the different functions of EsyTouch. Follow
on-screen instructions.
Help Menu
help>keyboard
This menu item gives information about the EsyTouch serial number and version.
help>eurobraille
Use this menu item to display Eurobraille sas company information.

30/05/2010
6
help>manual
Use this menu item to go to the online manual (requires Internet connection).
help>about
This menu item provides information about the EsyTouch current firmware version and the
keyboard layout that will be used by the software utility.
CONNECT SOFTWARE UTILITY AND ESYTOUCH
In order for the software utility to automatically detect the connected EsyTouch, it is
necessary to run the EsysTouch in USB device mode instead of PC keyboard emulation mode.
Keep the key A1 pressed while connecting your USB cable to run the EsyTouch in USB device
mode.
Warning: if the key table saved on the EsyTouch has no key assignments, EsysTouch will
always run in USB mode.
30/05/2010
Table of contents


