Euromatic RCH22W User manual

Model Number RCH22W
INSTRUCTION MANUAL
AFTER SALES SUPPORT
(AU) 1300 886 649 (NZ) 0800 836 761
Radiant Convection Heater

2After Sales Support
(AU) 1300 886 649 (NZ) 0800 836 761 | info@tempo.org
Contents
Important Safety Instructions 3
Product Overview 7
Getting Started 9
Instructions 10
Other Useful Information 13

3
After Sales Support
(AU) 1300 886 649 (NZ) 0800 836 761 | info@tempo.org
Important Safety Instructions
READ CAREFULLY AND KEEP FOR FUTURE REFERENCE
Read this manual thoroughly before first use, even if you are familiar with this
type of product. The safety precautions enclosed herein reduce the risk of fire,
electric shock and injury when correctly adhered to. Make sure you understand all
instructions and warnings. Keep the manual in a safe place for future reference,
along with any warranty information, your purchase receipt and packaging. If you
sell or transfer ownership of this product, please pass on these instructions to the
new owner.
Always follow basic safety precautions and accident prevention measures
when using an electrical appliance, including the following:
Electrical safety and cord handling
• Voltage: Before plugging in the heater, make sure your outlet voltage and
frequency correspond to the voltage stated on the appliance rating label.
• Electrical outlet / circuit: Always plug this heater into a separate wall outlet
socket that must be properly earthed. To ensure you do not overload the
circuit, do not operate another high-wattage product on the same circuit.
• Connection: To insert the plug, grasp it firmly and guide it into the outlet.
• WARNING: No extension cord: Do not use this heater with an extension cord
as this may overheat and cause a risk of fire. Do not use a plug adaptor.
• Protect the power cord:
– Do not operate the heater with the cord coiled up; always fully unwind.
– Do not twist or kink the cord or let it touch heated surfaces.
– Do not put any stress on the cord where it connects to the product.
– Never carry the heater by the cord.
– Arrange the cord away from any traffic areas so no one will trip over it.
– Do not run the cord under carpeting or cover it with rugs, runners, etc.
• WARNING: To reduce the risk of fire, electric shock or injury:
– Never touch the heater with wet or damp hands or feet.
– Do not use the heater if any part of it has become wet. Immediately call a
qualified service technician to inspect the heater and replace any part of the
electrical system that has got wet.
– Never spill liquid into the heater; never immerse the cord, plug or any part of
the appliance in water or other liquids.
• WARNING: Damage: Do not pick up or operate the appliance if the power
supply cord, plug or housing is damaged, after it malfunctions, or has been
dropped or damaged in any manner. Check the power cord regularly for visible
damage. If it is damaged, it must be replaced by the manufacturer or authorised
service agent in order to avoid a hazard. Contact our after sales support centre.

4After Sales Support
(AU) 1300 886 649 (NZ) 0800 836 761 | info@tempo.org
Important Safety Instructions (Cont.)
• Plug: It is normal for the plug to feel warm to the touch; however, a loose fit
between the AC outlet and plug may cause overheating and distortion of the
plug. Contact a qualified electrician to replace a loose or worn outlet.
• After use: Always switch off the heater and disconnect the power when the
heater is not in use and before cleaning, servicing, moving or storing it.
• Disconnect: To disconnect the heater, switch it off and remove the plug from
outlet. When disconnecting, grip the plug, do not pull on the cord.
• Safety switch: Unless your home is already fitted with a residual current device
(safety switch), we recommend installing an RCD with a rated residual operating
current not exceeding 30mA to provide additional safety protection when using
electrical appliances. See your electrician for professional advice.
Usage conditions and restrictions
• Domestic use: This appliance is intended for indoor household use only. It is
not suitable for commercial, industrial or trade use. Do not use it outdoors. This
product is only suitable for well insulated spaces or occasional use.
• Space heating only: Do not use this appliance for anything other than its
intended purpose, e.g., do not use it as a drying rack for clothes or shoes. Only
use the heater as described in this manual. Any other use is not recommended
and may cause fire, electric shock or injury.
• Floor surface: Only operate the heater on a flat, steady, dry, stable and heat-
resistant surface. Do not place it on or near surfaces that may be damaged
by heat (such as delicate rugs, wallpaper, floor coverings not made of heat-
resistant material, etc.). Do not use it on soft surfaces such as bedding or long
pile or soft carpeting, where openings may become blocked.
• Protect from moisture: This appliance is not intended for use in bathrooms,
laundry areas and similar indoor locations. Never locate this appliance where it
may fall into a bathtub or otherwise become exposed to water.
• Ventilation: Only use this heater in a well ventilated area.
• Keep openings clear: To prevent a possible fire and electrical hazard, do not
insert or allow objects to enter any air outlet, ventilation or exhaust openings.
Do not block air intakes or exhaust openings in any manner. Wipe the air
openings clean if they become clogged. Never place the heater on a soft
surface (such as a bed or a couch) where the air openings may be blocked.
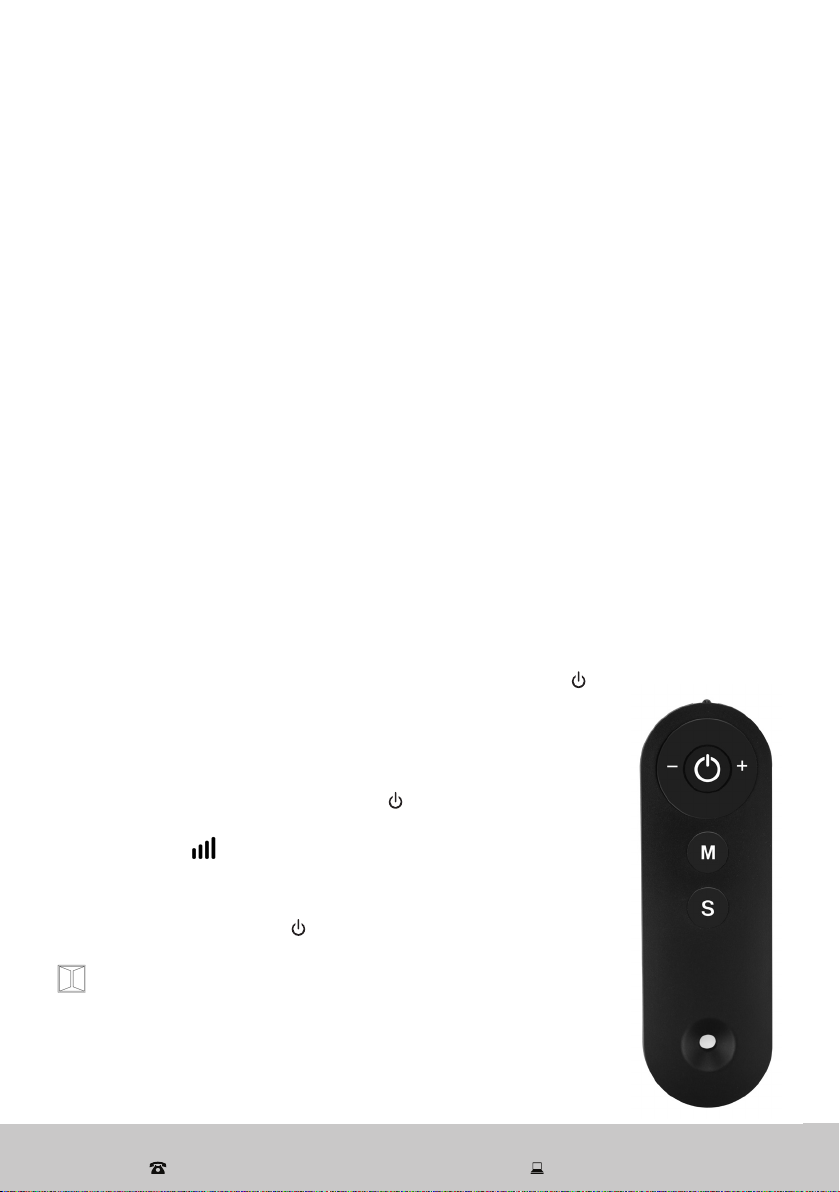
• WARNING: No external timer: Never operate the heater on a program switch,
external timer switch or any other appliance for automatic operation, as there is
a risk of fire if the heater is covered or positioned incorrectly.
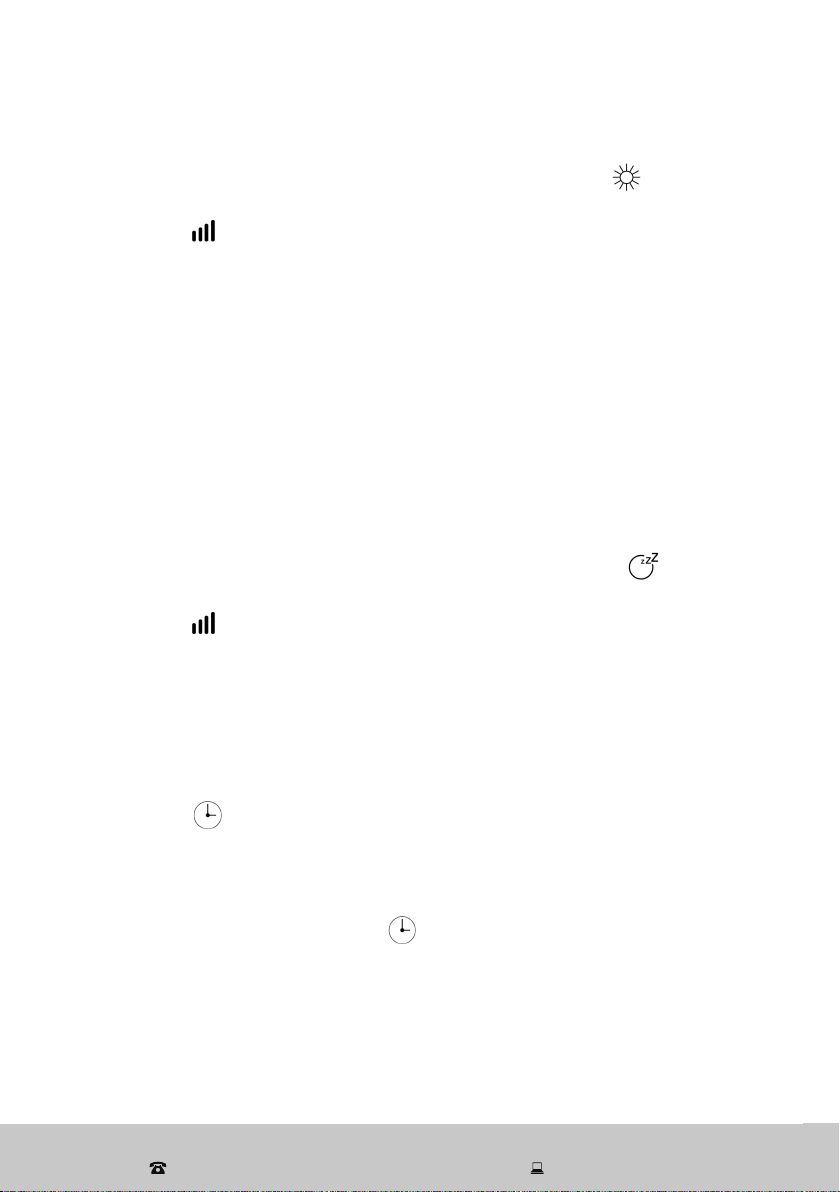
• WARNING: Do not leave on unattended: Do not use this heater in small rooms
when they are occupied by persons not capable of leaving the room on their
own, unless constant supervision is provided.

5
After Sales Support
(AU) 1300 886 649 (NZ) 0800 836 761 | info@tempo.org
Important Safety Instructions (Cont.)
• Accessories: Do not use attachments not recommended by the manufacturer,
as a risk of fire, electric shock, or serious personal injury may result.
• Operate upright: Always place the heater in an upright position.
• Flammable materials: Do not insert or place flammable materials (such as
paper, plastic or cardboard) in, on or near the product.
• Usage restriction: This appliance is not intended for use by persons (including
children) with reduced physical, sensory or mental capabilities, or lack of expe-
rience and knowledge, unless they have been given supervision or instruction
concerning use of the appliance by a person responsible for their safety.
• Children and pets: Supervise children to ensure they do not play with the
heater. Keep the product out of the reach of children and pets.
• Supervision: Take utmost care and supervise when operating the heater in
the presence of young children or disabled people as the fire guard (the grille
at the front of the heater) does not give full protection.
• To avoid creating a fire risk, do not use the heater:
– in front of or immediately below a power outlet
– near flammable materials or surfaces (such as furniture, curtains, pillows,
bedding, papers, clothes), or near open flames. Keep such materials at least
1m away from the front of the heater and away from the sides and rear
– in any areas where petrol, paint or other flammable liquids are stored, such as
in a garage or workshop, to avoid sparking
– in the immediate vicinity of a bath, shower or swimming pool.
• Service: This heater contains no user-serviceable parts inside. Do not attempt
to open and repair the heater yourself. Other components should only be
serviced by a qualified technician. In case of malfunction, disconnect the plug
immediately and contact our after sales support centre for advice.
• Do not open: Do not try to open the removable cover when the heater is
connected to the power supply. All covers are intended to prevent direct
access to the heating elements and must be in place during use.
• Storage: To avoid damaging the heater during storage or transport, keep the
heater in a dry place, free from excessive vibration.
• Misuse: Improper use or placement may result in the risk of fire, electric shock
and/or injury. We accept no liability for any eventual damages or injury caused
by improper use, incorrect handling or noncompliance with the instructions.
• WARNING: Heat output: The output of this heater may vary and its
temperature may become intense enough to burn exposed skin. Use of this
heater is not recommended for persons with reduced sensitivity to heat or an
ability to react to avoid burns.

6After Sales Support
(AU) 1300 886 649 (NZ) 0800 836 761 | info@tempo.org
CAUTION: HOT!
• This heater is hot when in use. To avoid burns and personal injury, do not
allow bare skin to touch hot surfaces.
• Attachments, when furnished, may become hot during use. Allow any
attachments to cool before handling them.
• Do not move the heater when it is in use; allow it to cool sufficiently before
moving it. If moving the heater is essential while it is still hot, take extra care
and wear protective oven mitts or gloves to avoid burns.
• A heater has hot and arcing or sparking parts inside. Always maintain your dis-
tance from the product during use to avoid serious burns and personal injury.
Important Safety Instructions (Cont.)
DANGER! Do not cover!
Do not cover the heater in any manner as it may overheat and
become a fire risk.

7
After Sales Support
(AU) 1300 886 649 (NZ) 0800 836 761 | info@tempo.org
Product Overview
Scope of delivery
Heater parts
2
NOTE: Due to continued product improvement, images and illustrations in this manual
may vary slightly from the product purchased. All images in this manual are for reference
purposes only. Parts are not necessarily pictured to scale.
1 Protective metal grille
2 LCD display panel
3 Quartz heating elements (4)
4 Castor wheel assemblies (2, with 4 wheels)
5 Remote control
3
1
4
5

8After Sales Support
(AU) 1300 886 649 (NZ) 0800 836 761 | info@tempo.org
Product Overview (Cont.)
Display panel
Power Auto mode Sleep mode Eco mode (n/a)
Temperature display
Weekly timing display
(n/a)
Time display
Open window indicator
Clock
Heating
FIRST USE
When switching on the heater for the first time, it may produce fumes or odour
when first heating up. This is due to the components being new and can be
disregarded safely. It is entirely harmless. Ensure there is adequate ventilation.
n/a: not available on this model

9
After Sales Support
(AU) 1300 886 649 (NZ) 0800 836 761 | info@tempo.org
Getting Started
Unpacking
• Packaging: This product has been packaged to protect it against
transportation damage. Unpack the appliance and keep the original packaging
carton and materials in a safe place. It will help prevent any damage if the
product needs to be transported in the future, and you can use it to store the
appliance when it is not in use. In the event that the packaging materials are to
be disposed of, please recycle them where possible.
• Plastic wrapping can be a suffocation hazard for babies and young children,
so ensure all packaging materials are out of their reach and disposed of safely.
• Cord: Unwind the cord to its full length and inspect the cord and the plug for
damage. Do not use the heater if the appliance or its cord has been damaged
or is not working properly. In case of damage, contact our after sales support
centre for advice on examination, repair or return of the damaged product.
• Documentation: Make sure you have read and understood all instructions and
warnings in this manual. Refer to the Product Overview, pages 7–8, to familiarise
yourself with the product and identify all parts. Pay particular attention to the
safety instructions on the previous pages.
• Remote control: The heater comes with a remote control, which is powered by
one 3V CR2025 button cell, which is contained inside the remote control; see
page 14 for how to insert a new battery, when it needs replacing.
• Castor wheels: The heater is packaged with the feet (castor wheel assemblies)
unattached. You must attach them before turning on the heater.
Assembly
Unpack all parts of the castor wheel assemblies. Each castor wheel assembly con-
sists of a wheel plate and two castors. Put a soft covering on a table or benchtop
and carefully lay the heater on top with the bottom end at the edge of the table.
Insert two castor wheels each through each wheel plate, affixing them with the
butterfly nuts. Slide the wheel plates in the correct positions at the underside of the
heater. Secure the wheel plates by tightening the butterfly nuts.
Turn the heater in upright position after the castor wheels are properly fitted.
WARNING!
• Do not operate the heater without the castor wheel assemblies attached.
• Only operate the heater in an upright position (wheels on the bottom,
controls at the top), any other position could create a hazard.

10 After Sales Support
(AU) 1300 886 649 (NZ) 0800 836 761 | info@tempo.org
Instructions
Introduction
This heater has 4 quartz heating elements, which can be operated on 2 heat
settings and in 3 modes: normal, auto and sleep. It is also equipped with a
thermostat for automatic mode and comes with a remote control for easy operation.
Positioning the heater
The heater is for floor-standing use only. Place it in an upright position on a firm,
level, dry and heat-resistant floor surface, taking into considering all relevant safety
information on the previous pages.
The heater must be positioned at a minimum 1m distance from any wall, fixture
and other appliance. Ensure there are no flammable or heat sensitive materials or
substances within 1m of the heater.
Connecting the heater
The heater is suitable for operation on an AC power supply having the same voltage
listed as on the rating label (240V~ 50–60Hz).
Before you insert the plug into a suitable wall outlet, ensure the heater is intact and
the cord is undamaged. To avoid overloading a circuit, only plug the heater into a
circuit that has no other appliances connected. Do not plug it into a power board or
socket adaptor; do not use an extension cord.
Insert the plug into an appropriately installed wall socket and switch on power to
the outlet. The heater will emit a short beep and the power
indicator illuminates on the display, indicating that the heater is
now in standby mode.
Switching on and off
In standby mode, press the POWER [ ] button on the remote
control to turn on the heater. It will start working with 2200W
and all heating indicators will illuminate on the display.
Always shut down the heater and wait until the heater has
stopped heating before turning the heater off. In power-on
mode, press the POWER [ ] button to shut down the heater.
It will enter standby mode (except when the open window
indicator is illuminated on the display). Let the heater cool
down before unplugging (or restarting) it.
NOTE: The heater will take some time to cool after the power is
shut off. Always wait until it has cooled before moving it.

11
After Sales Support
(AU) 1300 886 649 (NZ) 0800 836 761 | info@tempo.org
Instructions (Cont.)
Operation modes
Press the MODE button to select one of the 3 operation modes.
Mode Power Temperature Timing Weekly
Timing
Normal Full (4 tubes)
or half (2 tubes)
Cannot be set:
max. 38°C 1 – 15 hours N/A
Auto
Thermostat controlled:
half or full power
(2 or 4 tubes)
Can be set:
15°C – 32°C Cannot be set N/A
Sleep Full (4 tubes) Cannot be set:
max. 28°C 1 – 15 hours N/A
Temperature sensing
When the heater is working with full power (all 4 tubes are lit up) and the tempera-
ture sensor detects that the ambient temperature is higher than 38°C (or 28°C in
sleep mode), it will automatically turn off 2 tubes and operate with 2 tubes only.
When the sensor detects that the ambient temperature is below 38°C (or 28°C in
sleep mode), the heater will resume working with full power (all 4 tubes are lit up).
Open window sensing
When the heater is working with full power (all 4 tubes are lit up) and the sensor
detects that the ambient temperature continuously drops by 5°C within 5 minutes,
it will automatically turn off 2 tubes and operate with 2 tubes only. On the display,
the open window indicator will illuminate, alerting you that a window may be
open. To cancel the open window indication, press any button, the heater will then
resume heating with full power (all 4 tubes lit up).
Normal mode
In normal mode, the heater works with full power (4 tubes = 2200W) and all heating
indicators are illuminated on the display.
To operate the heater with half power (2 tubes = 1100W), press the [ -] button. On the
display, only half the heating indicators are lit up. If you then press [ +], the heater
will again start working with full power.
In normal mode, you can set the timer to switch off the heater after a certain time (see
page 12 for timer-setting instructions).
NOTE: The heater's temperature and open window sensors are active in normal mode.

12 After Sales Support
(AU) 1300 886 649 (NZ) 0800 836 761 | info@tempo.org
Instructions (Cont.)
OFF-timer
When the heater is operating, press the SETTING [ S] button to enter timer mode.
When the timer indicator is flashing on the display, use the [ +] and [ - ] buttons
to set the time period (between 1 to 15 hours), after which you want the heater
to stop working and return to standby mode. The heater will start counting down
after 5 seconds, or press the SETTING [ S] button again to start the countdown
immediately. On the display, the timer indicator will illuminate.
To reset the timing, press the SETTING [ S] button again.
At the end of the set timer period, the appliance will stop heating and return to
standby mode.
Auto mode
To enter auto mode, press the MODE [ M] button until the auto indicator
illuminates on the display. The heater starts working with full power (4 tubes = 2200W)
and all heating indicators are illuminated on the display.
In auto mode you can set the desired temperature within the 15°C–32°C range
using the [ + ] and [ - ] buttons. The set temperature will flash for 5 seconds on the
display and then illuminate steadily. Alternatively, press the SETTING [ S]button to
confirm the temperature immediately. The heater will start working with full power
(all 4 tubes are lit up), and the ambient (room) temperature will be shown on the
display.
When the room has warmed up to the set temperature, the heater will turn off
2 tubes and operate with 2 tubes only. It will again start operating with full power
(4 tubes) when the temperature has dropped below the set temperature.
NOTE: The heater's open window sensor is active in auto mode.
Sleep mode
To enter sleep mode, press the MODE [ M] button until the sleep indicator
illuminates on the display. The heater starts working with full power (4 tubes = 2200W)
and all heating indicators are illuminated on the display.
To set an off-timer, follow the instructions below.
NOTE: The heater's temperature and open window sensors are active in normal mode.

13
After Sales Support
(AU) 1300 886 649 (NZ) 0800 836 761 | info@tempo.org
Other Useful Information
Tip-over safety switch
This mechanism turns off power to the appliance as soon as it tips over. Should
this happen, place the heater upright again, but take care as it may still be hot.
Once the heater is in an upright position it will start working again.
Error messages and troubleshooting guide
Error Message Problem Solution
E0 Temperature sensor
short-circuit Call for service to replace the
sensor
E1 Temperature sensor
open circuit
IMPORTANT: Always switch off the heater, disconnect it from the power supply
and let it cool before troubleshooting.
If you encounter a problem with your heater, check and ensure that the appliance
is properly connected to the power supply and that the electrical outlet is
working. If you still cannot solve the problem, do not try and repair the unit
yourself. Contact our after sales support centre for advice.
WARNING!
• Allow the heater to completely cool before handling or cleaning it.
• Always turn off the heater and remove the plug from the socket outlet before
cleaning the heater.
• Never immerse the heater in water. Never allow water or other liquids to
run into the interior of the heater, as this could create a fire and/or electrical
hazard.
• Do not use any chemical cleaners such as detergents or solvents, alkaline or
abrasive products, on any part of the heater.
Care and cleaning
Make sure the heater is unplugged from the electrical outlet.
To clean dust and dirt off the heater, wipe the exterior surfaces only with a soft
cloth or brush, moistened, if necessary, but not wet. Then wipe it dry with a dry
cloth. Allow some time for the heater to dry thoroughly before reconnecting it to
the power supply.
Dust on the grilles and inside the appliance can often be removed by using a
vacuum cleaner with a crevice tool or soft brush attachment.

14 After Sales Support
(AU) 1300 886 649 (NZ) 0800 836 761 | info@tempo.org
Other Useful Information (Cont.)
Battery replacement
If the battery in the remote control is flat, insert a new 3V
CR2025 size button cell following the instructions below.
• Using a coin or similar tool, turn the cover of the battery
compartment to the unlock position.
• Remove the old button cell from the remote control and
insert a new one of the same type, observing the polarity,
as marked.
• Replace the battery compartment cover and lock it so that
the arrow points to the lock position.
WARNING!
This product contains a coin/button cell battery
inside. Keep batteries out of reach of children.
Swallowing may lead to serious injury or death in as
little as 2 hours due to internal burns.
If swallowed, immediately call the 24-hour Poisons
Information Centre on 13 11 26 (AU) or 24-hour
National Poisons Centre on 0800 764 766 (NZ).
Dispose of used batteries immediately.
Storage
When the heater is not in use, make sure it is unplugged from the wall socket.
Take off the castor wheel assemblies and store the heater in the original carton in
a cool and dry place, out of children's reach. Alternatively, store it covered with a
piece of material to protect it from dust.
Service and repair
The unit has no user-serviceable parts contained within, and there are no spare
parts available that you need to replenish. Do not attempt to repair, disassemble
or modify the appliance. Trying to repair the appliance yourself, undertaking
incorrect repairs or making any modifications to the appliance or the power cord
will expose you to considerable danger and will void your warranty.
In case of a malfunction or if in doubt about the heater's performance, please
contact our after sales support centre for advice.

15
After Sales Support
(AU) 1300 886 649 (NZ) 0800 836 761 | info@tempo.org
Other battery precautions
• Do not open the batteries or short-circuit them.
• Do not mix different types of batteries. Due to increased risk of leakage,
empty batteries should be removed. The batteries should also be removed
from the remote control if it is not being used for long periods.
• Only dispose of batteries when they are fully discharged.
• WARNING: Danger of explosion! To prevent a risk of explosion, batteries
must not be charged, heated or disposed of by burning. Never throw
batteries into a fire or subject batteries to high temperatures.
• Used batteries should not be disposed of in household waste. Dispose of
them in accordance with statutory regulations.
Other Useful Information (Cont.)
Technical specifications
Rated Voltage & Frequency 220–240V~, 50Hz
Power 2200W
Heat Settings 2: 1100W, 2200W
Ingress Protection IP24
Dimensions (approx.) 48 x 27 x 57 cm
Weight (approx.) 3.9kg
Compliance
This product has been fully tested and meets all requirements as set out by
standards AS/NZS 60335.1 and AS/NZS 60335.2.30.
The RCM Mark (Regulatory Compliance Mark) indicates that the product
complies with the relevant guidelines of the ACMA as well as corresponding
government requirements for the safety of electrical devices.
E209
Responsible disposal
At the end of its working life, do not throw this appliance out with your household
waste. Electrical and electronic products contain substances that can have
a detrimental effect on the environment and human health if disposed of
inappropriately. Observe any local regulations regarding the disposal of electrical
consumer goods and dispose of it appropriately for recycling and recovery of the
oil. Contact your local authorities for advice on recycling facilities in your area.

After Sales Support
(AU) 1300 886 649 (NZ) 0800 836 761 | info@tempo.org
Warranty returns
Should you for any reason need to return this product for a warranty
claim, make sure to include all accessories with the product.
Product does not work?
If you encounter problems with this product, or if it fails to perform
to your expectations, make sure to contact our After Sales Support
Centre on (AU) 1300 886 649 or (NZ) 0800 836 761 for advice.
Distributed by Tempo (Aust) Pty Ltd ABN 70 106 100 252
PO BOX 6056 Frenchs Forest, Australia NSW 2086
Customer Helpline:
(AU) 1300 886 649 (NZ) 0800 836 761
Email: [email protected]
For an electronic copy of this manual, please contact our after sales support centre.
IM Version No: V1.0 Issue: December 2020
Table of contents
Other Euromatic Heater manuals

Euromatic
Euromatic ERC24B User manual

Euromatic
Euromatic CH-2000E-1 User manual

Euromatic
Euromatic CH15M User manual

Euromatic
Euromatic DF-HT5313P User manual

Euromatic
Euromatic Euro 15 User guide

Euromatic
Euromatic FR-2013 User manual

Euromatic
Euromatic JCPH-1000 User manual

Euromatic
Euromatic JCPH-1500 User manual

Euromatic
Euromatic RCH-2300B User manual

Euromatic
Euromatic MCH-2400 User manual
Popular Heater manuals by other brands

Prem-I-Air Elite
Prem-I-Air Elite EH1361 quick start guide

Goldair
Goldair GFH260 operating instructions

Master
Master SSR-822R-IHR User's manual & operating instructions

Powerfix Profi
Powerfix Profi PHG 3000 B2 operating instructions

Sagola
Sagola PACK 6000X instruction manual

Orbegozo
Orbegozo CR 5016 instruction manual