Eurospec XDB5760SV User manual
Method Statement for Fitting a 2 point panic device (XDB5760SV)
and external access device (XSA5003SV)
Method Statement for Fitting 2 point panic device XDB5760SV and external access
Device XSA 5003 SV to a steel door
This document is to outline the method for how to install a 2 point panic device (XDB5760SV) onto a
blank steel door and also work in junction with an external access device (XSA5003SV). This work
should be carried out by a trained technician and checked by another technician once completed.
This document should be used in accordance with the risk assessment for the same task.
Method
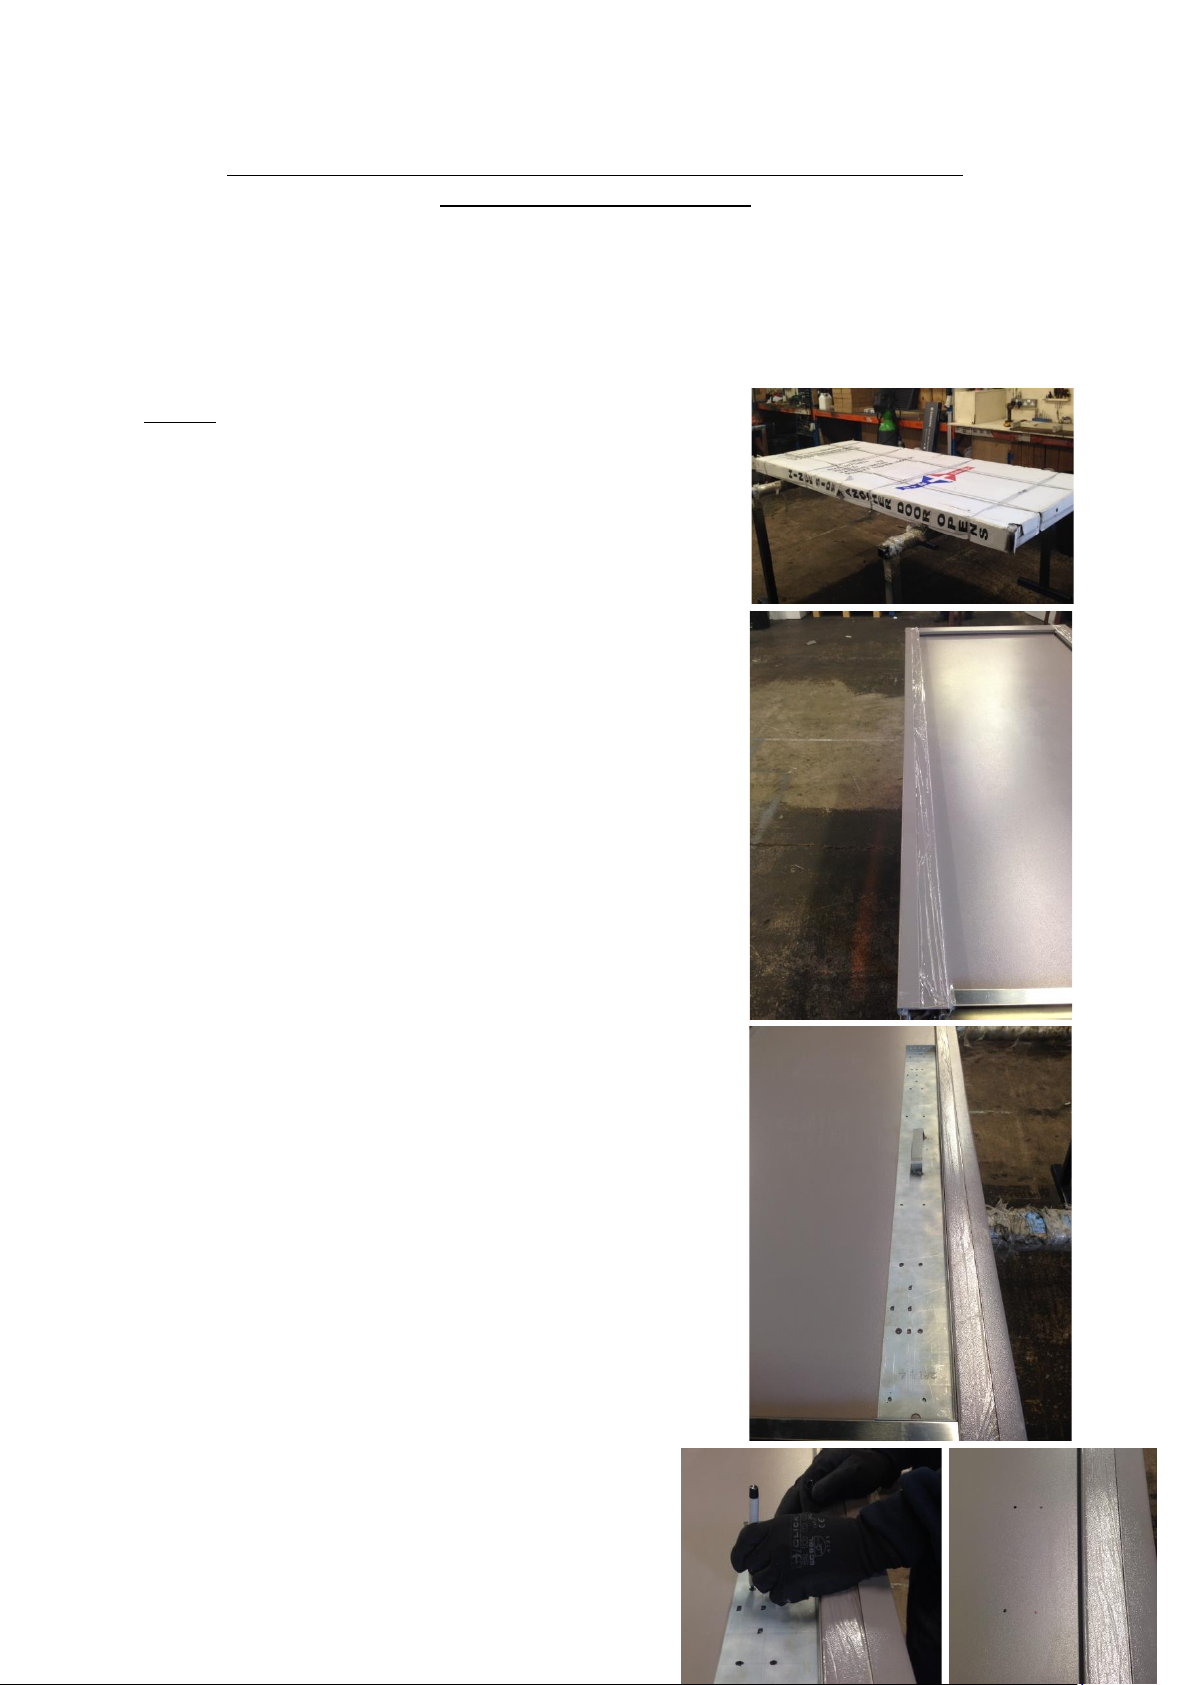
1. Using the folk lift truck collect the correct
door from the ware house and place the door
onto the trestles in your work area.
2. Remove all of the outer packaging from the
product, make sure to put the cardboard and
bubble wrap to one side as you will need this
later to re-package the door. Put the
strapping into the bin.
3. Remove all of the clear film from the door
leaf on the inside and outside and make sure
that the door is in perfect condition. If there
are any imperfections or marks on the door
leaf you must swap it or bring it to the
attention of the manager for
assessment/approval.
4. Move the door set to the edge of your
trestles with the outer face of the door facing
down. You must check that the door leaf is
sitting flush in the frame and tight up to the
seal.
5. Place the 2 point template onto the door leaf
so it sits inside the frame. Move the template
towards the hinge side of the door and make
sure it is sitting flush with the threshold and
hinge side of door frame.
6. Using a felt tip pen mark out the 4 holes in
the middle of the template. These 4 holes
should create a rectangle shape and this is
where the hinge side mechanism box is
fitted.
7. Move the template over to the opening side
of the door frame and make sure that the
template is tight into the corner.

Method Statement for Fitting a 2 point panic device (XDB5760SV)
and external access device (XSA5003SV)
8. Using a felt tip pen mark out the 4 holes in
the middle of the template. These 4 holes
should create a rectangle shape and this is
where the lock side mechanism box is fitted.
You also need to mark the top of the central
2 holes in the middle of
9. Using a felt tip pen mark the stainless steel
threshold. You only need to mark the central
2 holes. The outer 2 holes are for the top of
the door frame only.
10. Use a felt tip pen to mark the holes for the
plain guides, these are the holes directly
above the threshold and midway between
the centre of the door and threshold. These
holes should have a different colour on the
template.
11. Move the template towards the top of the
door frame on the opening side. Make sure
that the template it tight into the corner of
the frame and mark the 4 holes into the head
of the frame. You need to make 4 holes as
the top keep needs to be fitted.
12. Use a felt tip pen to mark the holes for the
plain guide/top tripper guide, these are the
holes directly below the head of the frame
and midway between the centre of the door
and top of door frame. These holes should
have a different colour on the template.
13. You are now finished using the template so
can put this away back to where it is stored.
14. Using a steel ruler and pencil measure how
far in the from the door seal the central hole
is. (this should be around 65mm)
15. Use the measurement you have just taken to
make a mark above and below the central
spindle hole. Use a pencil and steel ruler to
join the 3 markings to create a straight line.

Method Statement for Fitting a 2 point panic device (XDB5760SV)
and external access device (XSA5003SV)
16. Use the instructions to mark out the top and
bottom fixing holes for attaching the external
access device. The top hole should be
marked 27mm above the centre of the
spindle hole and the bottom fixing hole
should be 95mm below the centre of the
spindle hole.
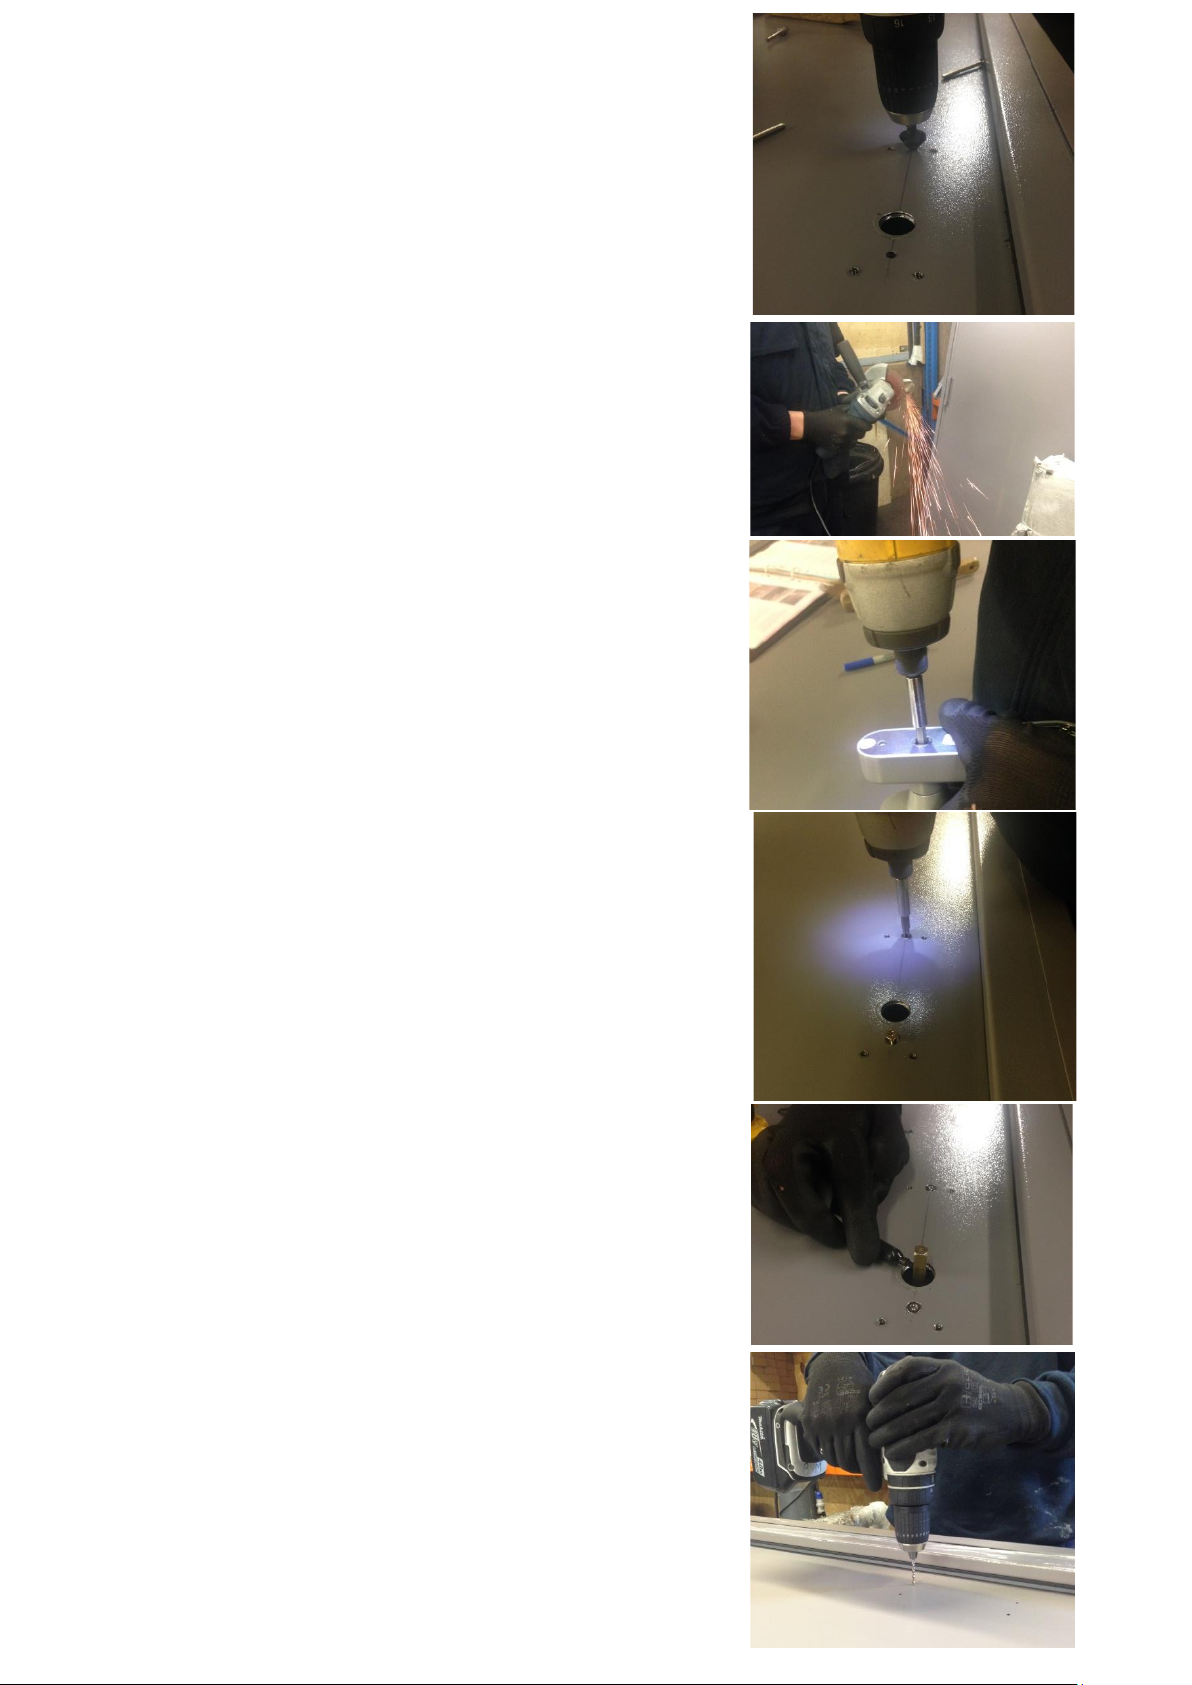
17. Use a 3mm drill bit and cordless drill to drill
out all 3 holes you have just marked out.
18. Use a 5mm drill bit and cordless drill to drill
out all 3 holes you have just marked out.
19. Use a hand brush to clear any debris off the
door blade.
20. Use a 5mm drill bit, cordless drill and drill
guide to drill straight through the door so the
drill goes through the opposite side of the
door blade. The drill guide will make sure you
drill a straight hole.
21. From the underside of the door leaf use a
7mm drill bit and cordless drill to drill out the
top and bottom fixing holes. Make sure not
to push too hard as you don’t want to push
through to the opposite side of the door
blade.
22. Use a 20mm hole saw and cordless drill to
drill out the central spindle hole. You need to
make sure to push all the way through the
door so the hole saw goes through both sides
of the door blade.
23. Use a hand brush to clean any debris off the
door blade.
24. Use a file or de burr tool to remove any
rough edges where you have drilled the door.
Method Statement for Fitting a 2 point panic device (XDB5760SV)
and external access device (XSA5003SV)
25. Use a cordless drill and countersink drill bit to
countersink the top and bottom fixing holes
for the access device. You need to do this on
the side that will be the inside of the door
only.
26. Use a hand brush to clear any debris off the
door blade.
27. Take the 2 fixing screws out of the XSA5003SV
fixing pack and mark them 10mm from the
top. Use an angle grinder to cut them down.
28. Insert the outside handle onto the XSA5003SV
unit. Use a machine screw and impact driver to
fix the handle into place.
29. Place the access handle into place on the
outside of the door leaf. Put the 2 machine
screws through the door and use an impact
driver to fix the unit, make sure the screws are
tightened up fully.
30. Look through the door and test that the
handle rotates the spindle drive when
operated.
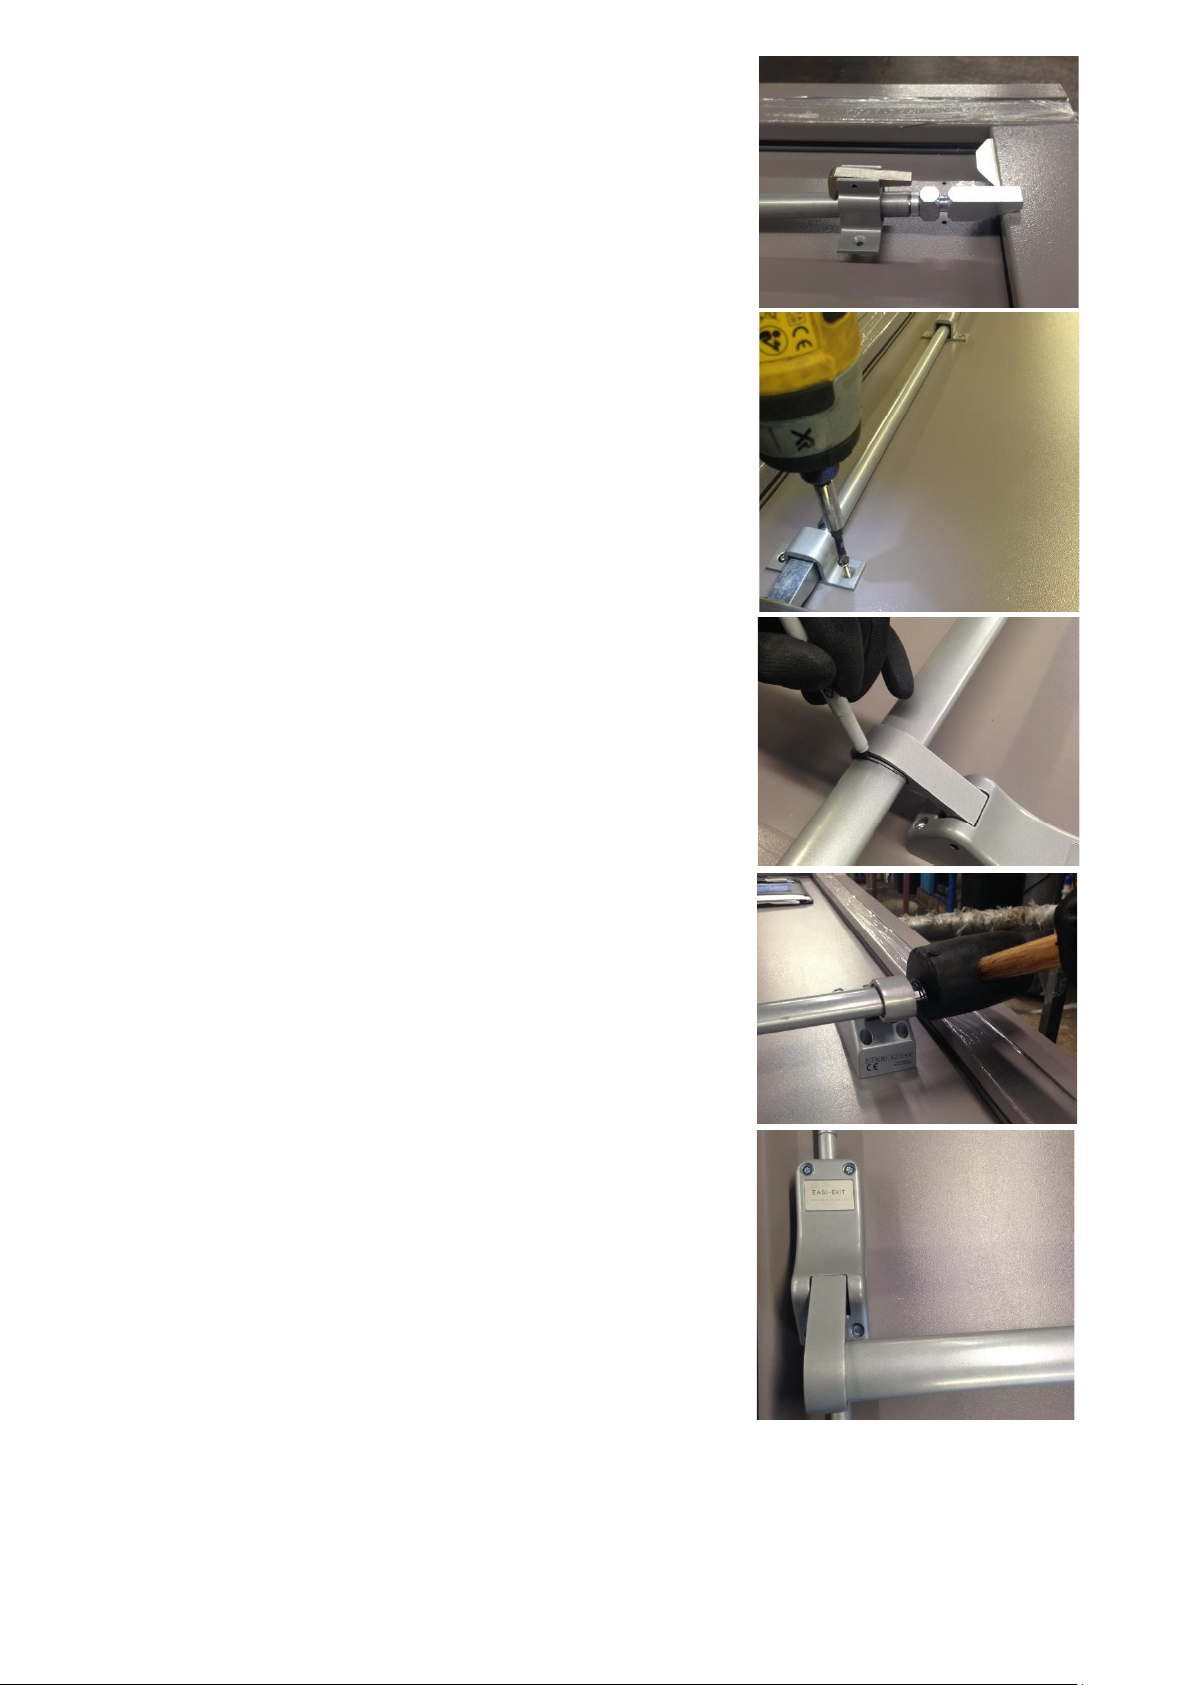
31. Insert the spindle into the door so it sticks out
the inside of the door. Use a felt tip pen to
mark the appropriate cutting line on the
spindle so once installed the panic bar and
access device work together.
32. Use an angle grinder to cut down the spindle
to required length and place inside the door.
Now we need to work on mounting the panic
bar.
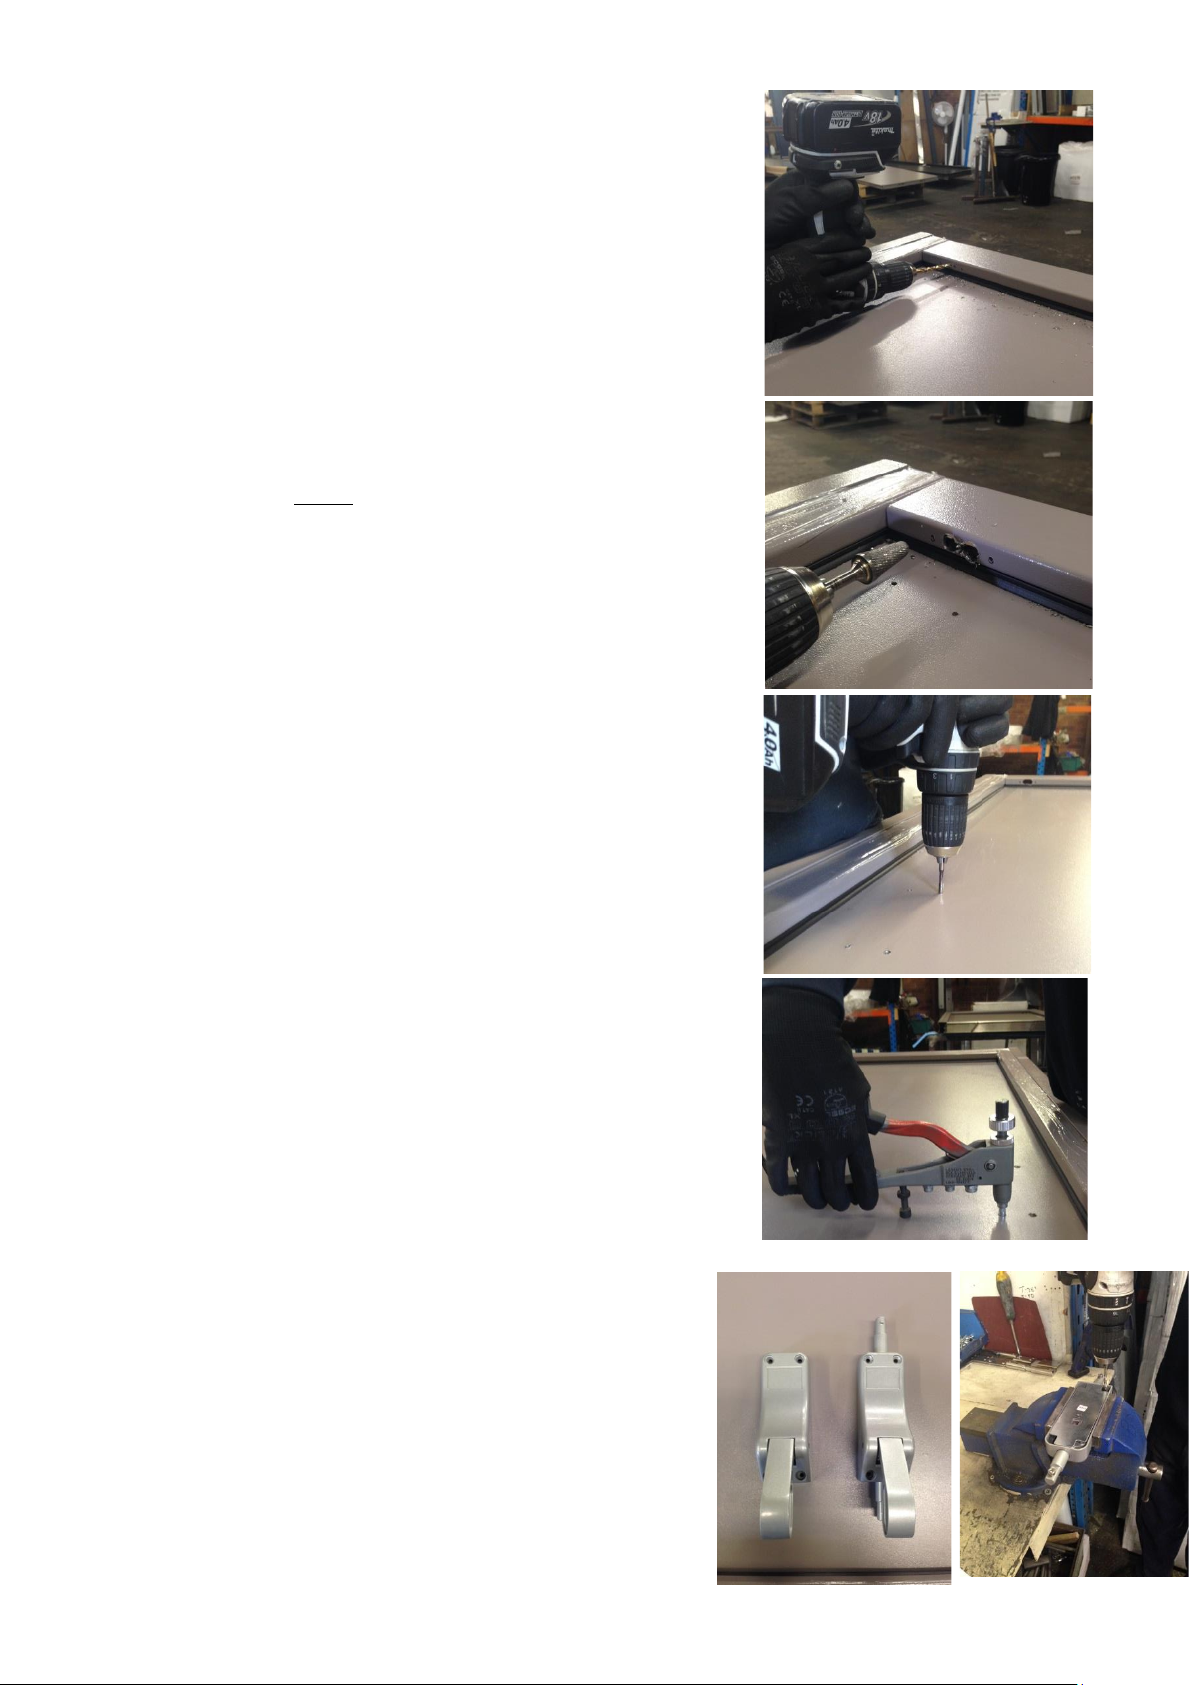
33. Using a cordless drill and 3mm drill bit, drill
out all of the holes you previously marked on
the door leaf. Do not use the 3mm drill bit on
the stainless steel threshold as this will break.
Leave these holes until later
Method Statement for Fitting a 2 point panic device (XDB5760SV)
and external access device (XSA5003SV)
34. Using a cordless drill and 4mm drill bit, drill out
all of the holes for the lock side mechanism box
and hinge side mechanism box. You also need
to drill the holes in the top of the door frame
and 2 marked holes on the stainless steel
threshold.
35. Using a cordless drill and 7mm drill bit, drill out
all of the holes for the hinge side mechanism
box. You do not need to drill out the holes for
the lock side mechanism box. You also need to
drill out the holes in the stainless steel
threshold and head of the door frame.
36. Using a cordless drill and 12mm drill bit drill out
the holes in the stainless steel threshold and
head of the door frame.
37. Using a cordless drill and Garrison Burr (acorn
shape) drill out the holes in the stainless steel
threshold and head of the door frame. This
should create an oval shape big enough for the
shoot bolt to locate. Use a file to remove any
rough edges.
38. Using a cordless drill and 5mm tap drill out the
holes for the lock side mechanism box.
39. Lift the door frame and use a hand brush to
clean any filings or debris off the door leaf.
Make sure the door is clean and put the door
frame back in place.
40. Using a nut insert gun add nut serts into the 4
pre drilled holes on the hinge side of the door
for the hinge side mechanism box.
41. Remove all components from the XDB5760SV
box and place on the side of your work station.
Remove all components from their induvial
packaging and discard all packaging into the
correct bin.
42. Use a 5mm drill to drill out the holes where the
fixings locate on the hinge side mechanism box
and lock side mechanism box. This is done so
the m5 x 40mm screws fit easily.
Method Statement for Fitting a 2 point panic device (XDB5760SV)
and external access device (XSA5003SV)
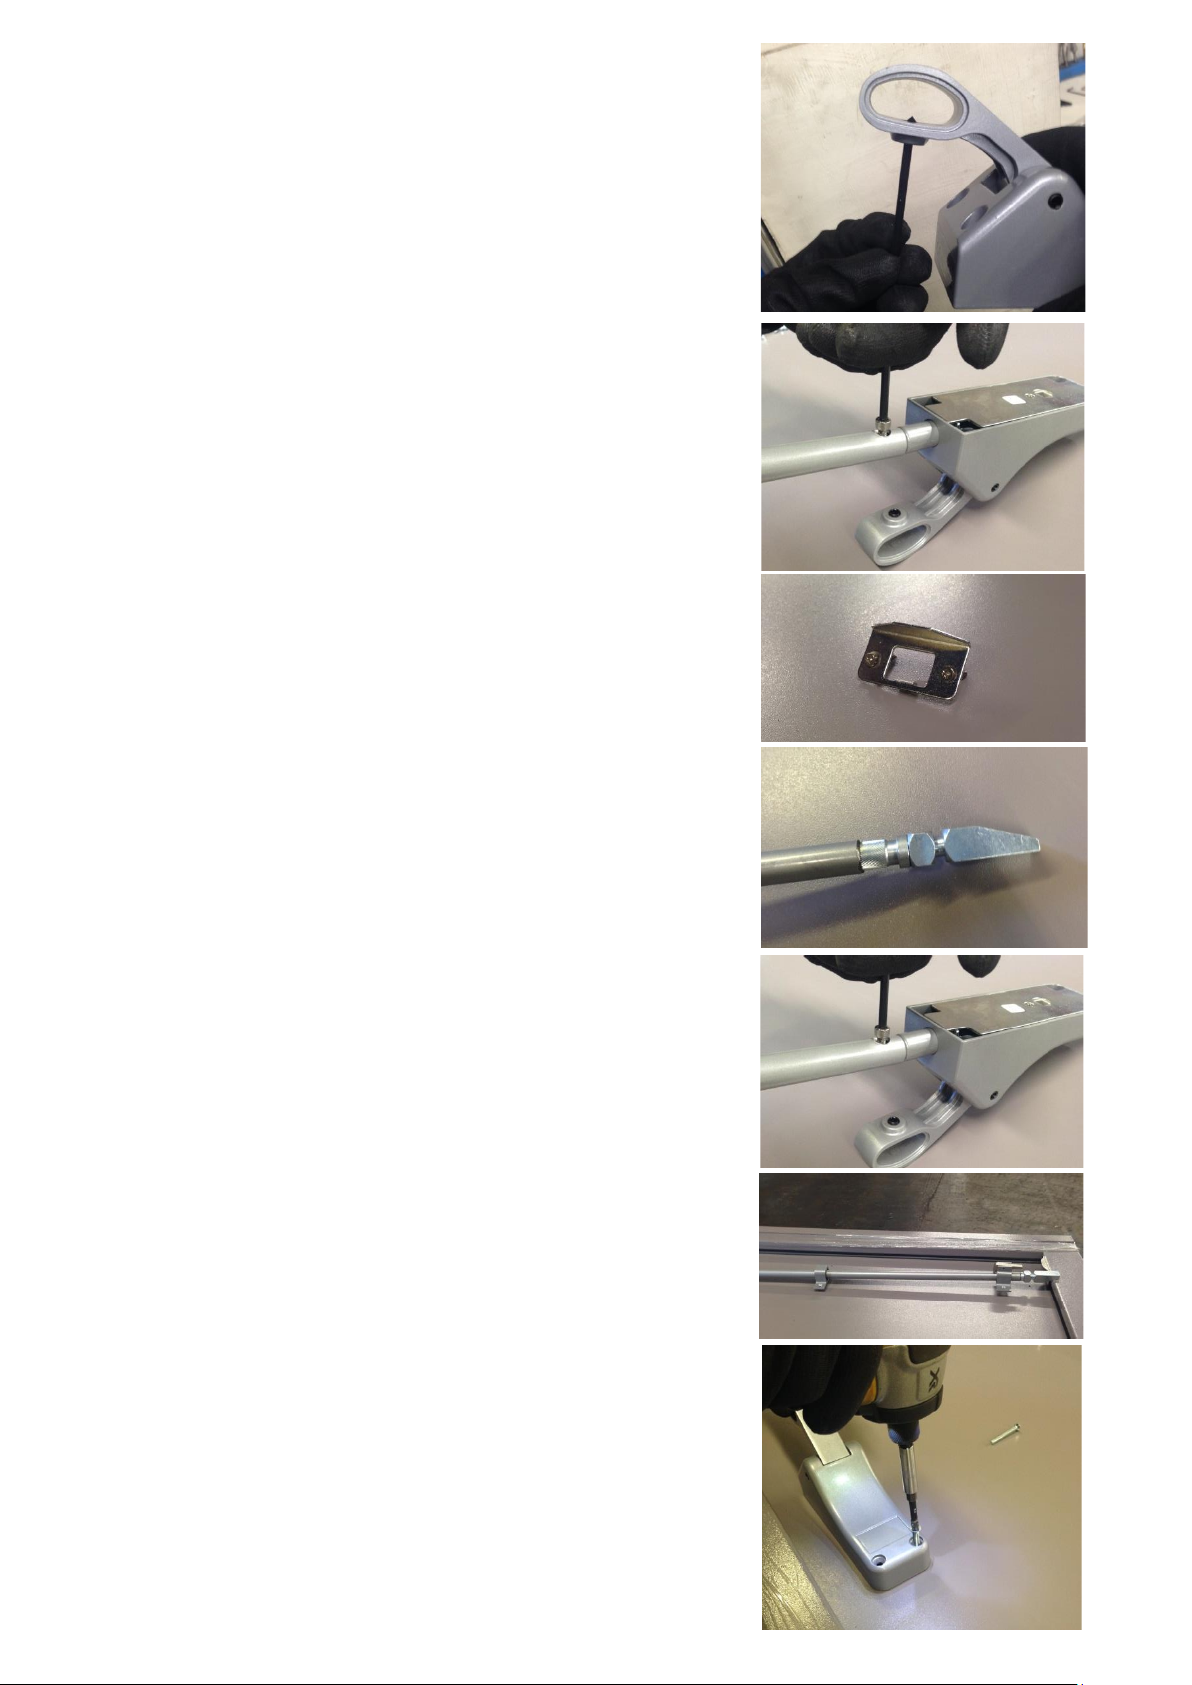
43. Using the Allen key provided release the grub
screw on both the hinge side mechanism box and
lock side mechanism box. This makes it easier to
slide the push bar in place once the boxes are
fitted onto the door.
44. Using the same Allen key remove the bolts from
the lock side mechanism box. This will allow you
to add the tubular rods onto the mechanism.
45. Using a cordless drill and 2 of the screws
provided, insert the top keep into the head of the
door frame.
46. Using your personal template mark out the top
and bottom tubular rod to the correct size.
47. Use an angle grinder to cut down the tubular rods
to the correct size.
48. Use a rubber mallet to add the knurled plugs and
shoot bolts onto the end of the tubular rods.
Make sure to add them onto the correct end
(without the fixing hole) as one end has the holes
for the fixing onto the central bar.
49. Attach the top and bottom tubular rods onto the
lock side mechanism by using the Allen key bolts
previously removed.
50. Slide the plain guides and the top tripper guide
onto the tubular rods. Make sure that the top
tripper guide is added so it is the top bracket on
the upper rod. This is bracket with the latching
mechanism on the end.
51. Using an impact driver and the M5 x 40mm
machine screws attach the lock side mechanism
box and hinge side mechanism box onto the
door. Make sure that when you insert the lock
side mechanism box you line up the spindle with
the spindle hole on the lock side mechanism box
Method Statement for Fitting a 2 point panic device (XDB5760SV)
and external access device (XSA5003SV)
52. Adjust the top and bottom shoot bolts by
twisting them as they are threaded. Twist it to
the desired length so when it is in the set
position the rod locates into the hole the in the
threshold/head of the frame. (this can always
be adjusted at a later date)
53. Using a cordless drill and the screws provided
fix the 3 plain guides and top tripper guide onto
the door leaf.
54. Using a rubber mallet insert one of the plastic
end caps onto the push bar.
55. Insert the push bar into the hinge side
mechanism box and lock side mechanism box.
On the side without the plastic end cap fitted
mark where the push bar needs to be cut down
to allow the plastic end cap to be fitted.
56. Remove the push bar from the hinge side
mechanism box and lock side mechanism box
and cut down using an angle grinder.
57. Insert the push bar back into the hinge side
mechanism box and lock side mechanism box,
use a rubber mallet to attach the plastic end
cap.
58. Use the provided allen key to tighten the grub
screw on the underside of the hinge side
mechanism box and lock side mechanism box
to hold the push bar in place.
59. Using masking tape attach the ‘push bar to
open’ sign onto the push bar.
60. Insert the Easi Exit logo stickers onto the hinge
side mechanism box and lock side mechanism
box. The back of the plate is sticky.
Method Statement for Fitting a 2 point panic device (XDB5760SV)
and external access device (XSA5003SV)
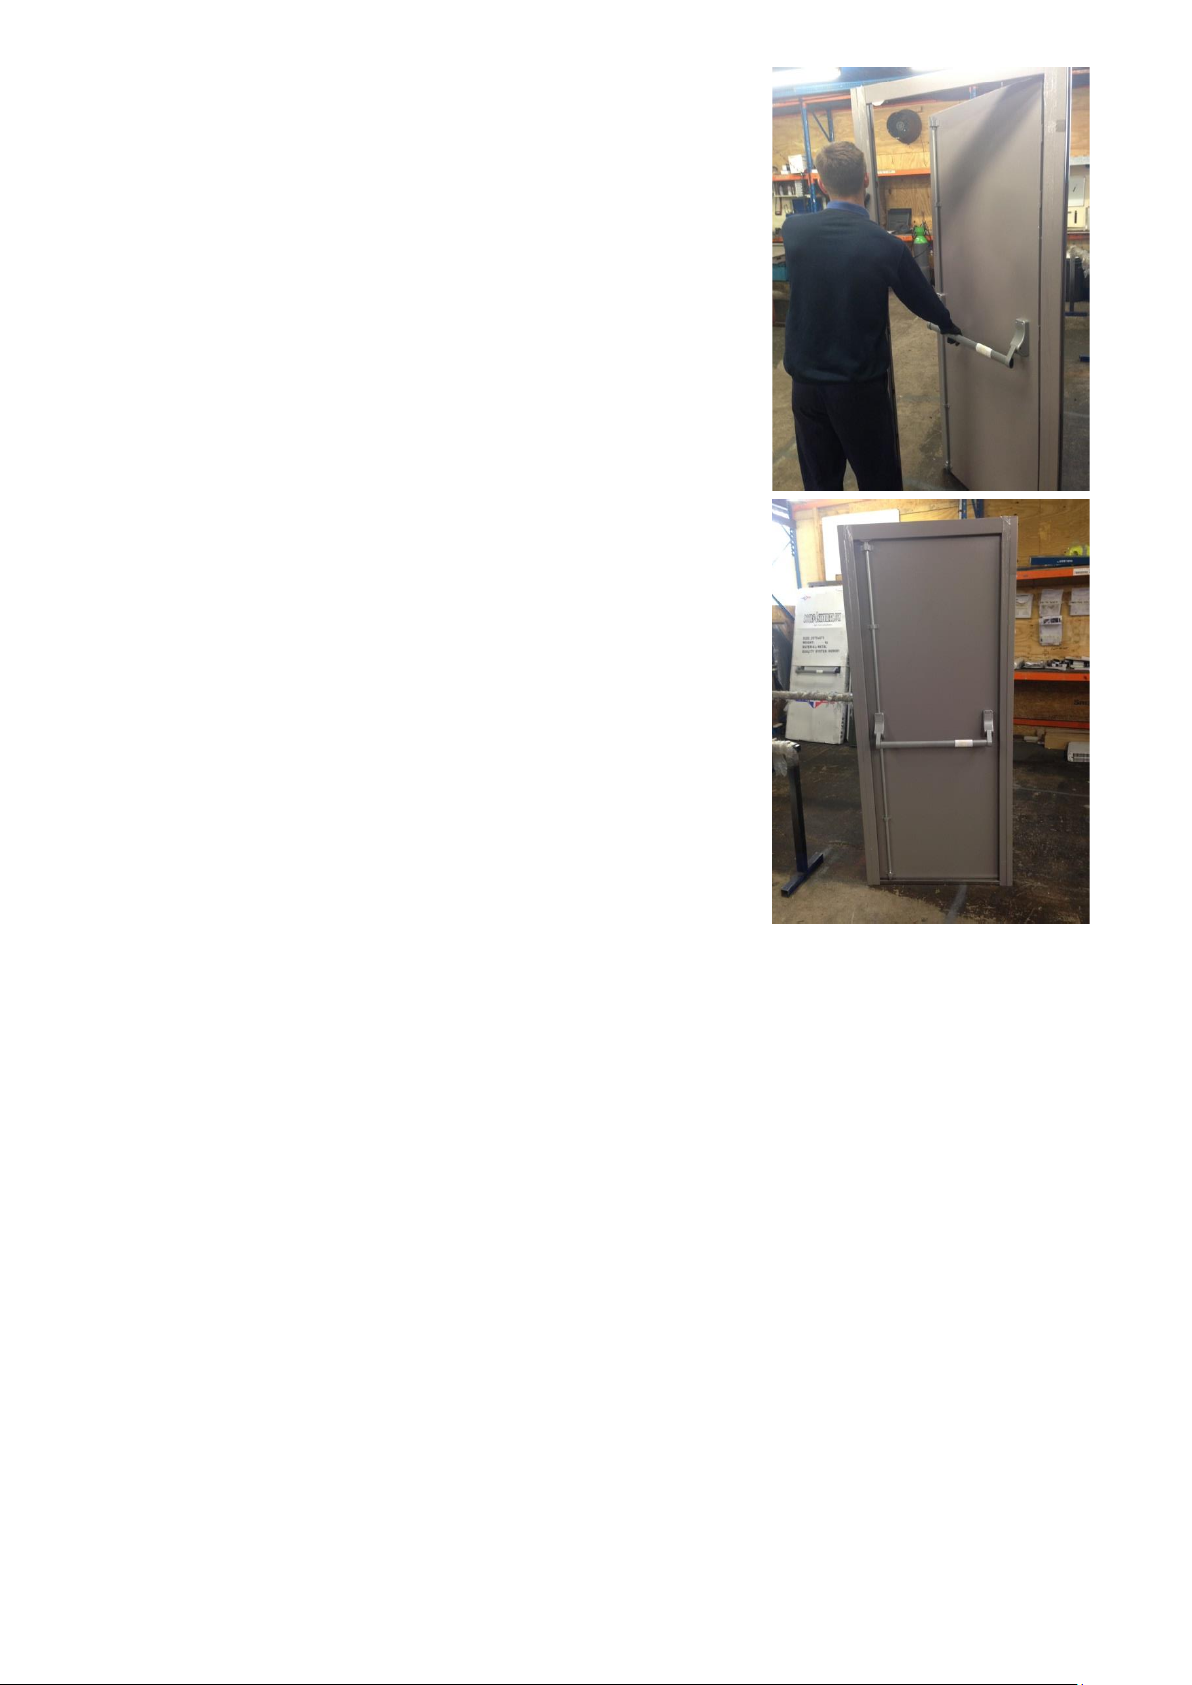
61. Stand the door up and check that the operation
of the panic bar is smooth and releases the door
with little pressure. If the operation is not perfect
then you need to tweak the fitting of the door
until perfect.
62. Make sure that when using the outside access
device it releases the panic bar and retracts the
top and bottom guide rods smoothly.
63. Ask a fully trained member of staff to come and
check your work and sign the job sheet where
necessary.
64. Re-box the door using the previously removed
bubble wrap and cardboard packaging.
65. Palletise the product making sure that it is safe
and secure.
66. Add any spare parts, instructions or other
accessories into a box and secure to the pallet
with the door.
67. Record the batch number of the panic furniture
onto the job sheet in correct place.
This manual suits for next models
1
Table of contents
Other Eurospec Door Opening System manuals

Popular Door Opening System manuals by other brands

Erreka
Erreka Premis PREMIS200 Quick installation and programming guide

Green Brook
Green Brook DW030A quick start guide

Entrematic
Entrematic Ditec DAS801LOK installation manual

FORSTRONG
FORSTRONG FH-6300 installation instructions

B&D
B&D PanelMax SDO-8 installation instructions

Dorma
Dorma 9600 Series installation instructions


PBB
PBB BD5A installation manual

CornellCookson
CornellCookson SGH 30043E Installation instructions and operation manual

GEZE
GEZE TS 5000 L-E-ISM VPK installation instructions

ENFORCER
ENFORCER SM-4302-LQ/W manual

Easi-Exit
Easi-Exit DCF2003 installation instructions

Assa Abloy
Assa Abloy Norton 5630 Series Installation and instruction manual