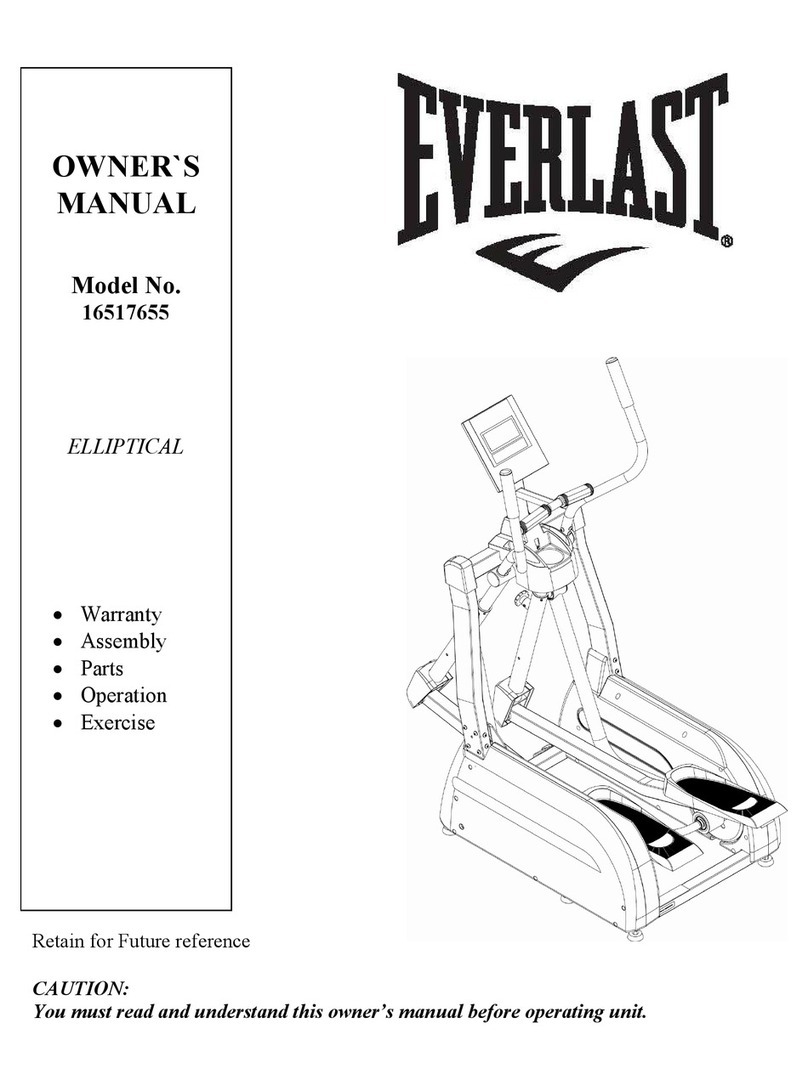
Everlast 16517455 User manual

OWNER’S MANUAL
MODEL NO.
16517455
Assembly
Operation
Trouble –Shooting
Parts
Warranty
CAUTION:
You must read and
understand this owner’s
manual before operating
unit.

Customer Service 1-888-707-1880 Maurice Pincoffs Canada Inc. ©2011
Email: customerservice@pincoffs.ca
1
TABLE OF CONTENTS
SAFETY PRECAUTIONS………………………………………2
IMPORTANT OPERATION INSTRUCTION…………………. 4
GETTING TO KNOW YOUR ELLIPTICAL……………………5
ASSEMBLY INSTRUCTION……………………………………6
COMPUTER INSTRUCTIONS………………………………..13
CARE AND MAINTENANCE………………………………….17
TROUBLE SHOOTING………………………….…………….18
PARTS LIST & DIAGRAM……………………………………..19
TRAINING GUIDELINE………………………………………..21
STRETCHING…………………………………………………..27
WARRANTY………………………………………………….....29

Customer Service 1-888-707-1880 Maurice Pincoffs Canada Inc. ©2011
Email: customerservice@pincoffs.ca
2
IMPORTANT SAFETY INFORMATION
THIS UNIT IS INTENDED FOR HOUSEHOLD USE ONLY
READ ALL INSTRUCTIONS BEFORE USING THIS ELLIPTICAL
CAUTION: Before starting any exercise program, it is recommended that you consult your
physician.
WARNING: Connect this unit to a properly grounded outlet only.
DANGER: To reduce the risk of electric shock, always unplug the treadmill from the electrical
outlet immediately after using and before cleaning.
WARNING
To reduce the risk of injury to persons please read the following precautions:
1. It is the responsibility of the owner to ensure that all users of this elliptical are adequately
informed of all warnings and precautions.
2. The use of an extension cord with this product is not recommended. If an extension cord is
needed, use a short (less than 10 feet) heavy gauge (14 gauge or better) extension cord with
a three prong (grounded) plug and receptacle.
3. Never leave the elliptical unattended when plugged in. Always unplug the power cord
immediately after use and before cleaning the elliptical.
4. Never operate the elliptical if it has a damaged cord or plug, if it is not working properly, if it has
been dropped, damaged, or exposed to water.
5. Do not pull the elliptical by the power supply cord or use cord as a handle. Keep cord away
from heated surfaces and open flames.
6. Fitness equipment must always be installed and used on a flat surface. Do not use outdoors
or near water. Do not place the unit on a loose rug or uneven surface. It is recommended
to use an equipment mat to prevent the unit from moving while it is being used, which could
possibly scratch or damage the surface of your floor. It is recommended to have a minimum
of 3 metres safe clearance on all sides of the elliptical while in use.
7. Keep the elliptical indoors, away from moisture and dust. Do not put the elliptical in a
garage, covered patio or near water.
8. Do not operate the elliptical where aerosol products are used or where oxygen is being
administered.
9. Do not insert any objects into any openings.
10. Inspect and properly tighten all parts of the elliptical regularly.
11. Keep children and pets away from this equipment at all times while exercising.
12. Handicapped individuals should have medical approval and close supervision when using
this elliptical.
13. Do not place hands or feet under the elliptical. Always keep hands and legs off of the
elliptical when others are using it.
14. Always hold the handlebars when mounting, dismounting, or using the elliptical. Keep your
back straight when using your elliptical; do not arch your back. When you stop exercising,
allow the pedals to slowly come to a complete stop. The elliptical does not have a free
wheel; the pedals will continue to move until the flywheel stops.
Customer Service 1-888-707-1880 Maurice Pincoffs Canada Inc. ©2011
Email: customerservice@pincoffs.ca
3
15. To disconnect, turn all controls to the off position, then remove plug from outlet.
16. Use the elliptical only for its intended use as described in this manual. Do not use any
attachments that are not recommended by the manufacturer.
17. User weight should not exceed 350lbs (159 kgs).
18. Never allow more than one person on the elliptical at once.
19. Warm up 5 to 10 minutes before each workout and cool down 5 to 10 minutes afterward.
This allows your heart rate to gradually increase and decrease and will help prevent straining
muscles.
20. Never hold your breath while exercising. Breathing should remain at a normal rate in
conjunction with the level of exercise being performed. If dizziness, nausea, chest pains,
or any other abnormal symptoms are experienced while using this equipment, STOP the
workout at once. CONSULT A PHYSICIAN IMMEDIATELY.
21. The pulse sensor is not a medical device. Various factors, including the user’s movement,
may affect the accuracy of heart rate readings. The pulse sensor is intended only as an
exercise aid in determining heart rate trends in general.
22. Start your program slowly and very gradually increase your speed and distance.
23. Always wear suitable clothing and footwear while exercising. Do not wear loose fitting
clothing that could become entangled with the moving parts of your elliptical. Do not walk or
jog barefoot, in stocking feet or loose fitting shoes or slippers.
WARNING: Before beginning any exercise program consult your physician. This is especially
important for individuals over the age of 35 or persons with pre-existing health problems. Read all
instructions before using any fitness equipment. We assume no responsibility from personal injury
or property damage sustained by or through the use of this product.
SAVE THESE INSTRUCTIONS

Customer Service 1-888-707-1880 Maurice Pincoffs Canada Inc. ©2011
Email: customerservice@pincoffs.ca
4
●
NEVER operate this elliptical without reading and completely understanding the results of any
operational change you request from the computer.
●
Understand that changes in resistance do not occur immediately. Set your desired level on the
computer console and release the adjustment key. The computer will obey the command
gradually.
●
NEVER use your elliptical during an electrical storm. Surges may occur in your household
power supply that could damage elliptical components.
●
Use caution while participating in other activities while using your elliptical such as watching
television, reading, etc. These distractions may cause you to lose balance, resulting in
serious injury.
●
Always hold on to a handrail or handlebar while making control changes.
Your new elliptical is engineered and manufactured to the strictest industry standards and
tolerances. All Elliptical trainers, no matter who the manufacturer, have a multitude of moving
linkages and parts. Be aware that even with the tightest mechanical tolerances there still could
be a slight amount of play between some parts. This inherent play can result in slight noises
during use such as clicks and small thumps. Please expect that the elliptical will not be
completely silent.
Important Operation Instructions
Things To Know

Customer Service 1-888-707-1880 Maurice Pincoffs Canada Inc. ©2011
Email: customerservice@pincoffs.ca
5
HOW THE ELLIPTICAL WORKS
The elliptical allows your feet to move in a natural elliptical path, minimizing the impact on your
knees and ankles.
The elliptical provides smooth, quiet and variable exercise capabilities with:
Dual Action Handles for total body workout
Stationary handlebar for stability
Fan
Consol
Console
Mast
Cover
Front
Stabilizer
Cover
Connecting Arm
Pedal
Arm
Rear Stabilizer
Cover
Adjustable
Pedal
Hand
p
ulse
Console
Mast

Customer Service 1-888-707-1880 Maurice Pincoffs Canada Inc. ©2011
Email: customerservice@pincoffs.ca
6
ASSEMBLY PACK CHECK LIST
STEP 1
STEP 2
STEP 3
#66. M5 × 10m/m
Phillips Head Screw
(4pcs)
#103. 3/8" × 3/4"
Hex Head Bolt (2pcs) #60. 3/8" × 2-1/4"
Hex Head Bolt (1pc)
#96. 3/8" × 2T
Split Washer (1pc)
#79.5/16"×23×1.5T
Flat Washer(2pcs)
#59. 5/16"×15mm
Hex Head Bolt (2 pcs)
#83. Ø 17 Wave
Washer (2 pcs)
#84. 3/8" × 23 × 1.5T
Curved Washer (2pcs)
#104. 5/16" × 1-1/4"
Hex Head Bolt (2 pcs)
#80. 5/16" × 20× 1.5T
Flat Washer (2 pcs)
#71. 5/16" × 7T
Nyloc Nut (2 pcs)

Customer Service 1-888-707-1880 Maurice Pincoffs Canada Inc. ©2011
Email: customerservice@pincoffs.ca
7
STEP 4
Step 4
#87. Ø 3.5×12m/m
Sheet Metal Screw (8pcs)
#105.M5 × 15m/m
Phillips Head Screw (14pcs)
#108. Phillips Head Screw Driver (1 pc) #107. Short Phillips Head Screw Driver (1 pc)
#109. 12m/m Wrench (1pc)
#106. 13/14m/m Wrench
(1pc)
Tools

Customer Service 1-888-707-1880 Maurice Pincoffs Canada Inc. ©2011
Email: customerservice@pincoffs.ca
8
Assembly instructions
STEP 1: CONSOLE MAST ASSEMBLY
1. Locate the Console Mast (12) and Console Mast Cover (41) and slide the Cover onto the
Mast as far as it will go. Make sure the Console Mast Cover is facing the correct way.
2. At the top opening of the Main Frame of the elliptical is a Computer Cable. Unravel and
straighten out the Computer Cable (31) and feed it into the bottom of the console mast
tube and out of the top opening.
3. Install the Console Mast into the receiving bracket in the top of the Main Frame. NOTE:
there is one bolt already installed in the receiving bracket that will engage with the slot at
the bottom of the Console Mast. This needs to be tightened at the end along with the
three other console mast bolts.
4. Put one 3/8"×2T Split Washer (96) onto the 3/8"×2-1/4" Long Hex Head Bolt (60), and the
two 3/8"×23 Curved Washers (84) onto the two 3/8"×3/4" Short Hex Head Bolts (103).
Install, and hand tighten, the Long Hex Head Bolt through the left side of the receiving
bracket into the Console Mast.
5. NOTE: There is an electrical wire running through the Console Mast Tube. Be careful not
to damage or pinch this Computer Cable during this procedure. Damage to the Console
could result. Install, and hand tighten, the two Short Hex Head bolts through the front of
the receiving bracket into the Console Mast.
6. Using the 13/14m/m Wrench (106) tighten the three bolts and the fourth bolt, which is
pre-installed, firmly. These bolts should be tightened as much as you possibly can.
7. There will be three electrical wire connectors at the top opening of the console mast, two
2 pin connectors (hand pulse sensors)(36) and one 10 pin connector (main wire
harness)(31). Connect these to the mating connectors on the back of the electronic
Console (30). The connectors are keyed, you cannot plug them in the wrong way so do
not force them. The two, 2 pin connectors can be plugged into either connector on the
back of the console.
8. Storing the excess wire back into the Console Mast, carefully install the Console onto the
mounting plate of Console Mast and secure using the four M5 × 10m/m Phillips Head
Screws(66). Make sure the wires do not get pinched between the console and mounting
plate.

Customer Service 1-888-707-1880 Maurice Pincoffs Canada Inc. ©2011
Email: customerservice@pincoffs.ca
9

Customer Service 1-888-707-1880 Maurice Pincoffs Canada Inc. ©2011
Email: customerservice@pincoffs.ca
10
STEP 2: HANDLE BAR ASSEMBLY
1. Install the two 17m/m Wave Washers (83) onto the Left and Right side of the Handle Bar
axle.
2. Slide the Left (10) and Right (11) Handle Bars onto the appropriate side of the axle. The
handlebars have a small sticker on them indicating L (left) and R (right).
3. Put the two 5/16"×23×1.5T Flat Washers (79) onto the two 5/16"×15m/m Hex Head Bolts
(59) and install, and tighten, in the threaded holes in the ends of the axle.

Customer Service 1-888-707-1880 Maurice Pincoffs Canada Inc. ©2011
Email: customerservice@pincoffs.ca
11
STEP 3: CONNECTING ARM ASSEMBLY
1. Align the hole in the rod end of the left Connecting arm (8) with the hole in the bracket of the left
Handle Bar (10). The rod end should be on the inner side of the Handle Bar bracket. Make sure
the ty-wrap is removed from the rod end and the sleeve spacer (22) does not fall out during
assembly. Take one 5/16"×1-1/4" Hex Head Bolt (104) and install it through the Handle Bar
bracket and the rod end. Install one 5/16"×20×1.5T Flat Washer (80) and one 5/16"×7mm Nyloc
Nut (71) on the 5/16"×1-1/4" Hex Head Bolt (104) and tighten as tight as possible using the
two12m/m Wrenches provided. Repeat the procedure for the right side Pedal /Connecting Arm.

Customer Service 1-888-707-1880 Maurice Pincoffs Canada Inc. ©2011
Email: customerservice@pincoffs.ca
12
STEP 4: PLASTIC PARTS ASSEMBLY
1. Install the Connecting Arm Covers (2 each 57, 58) over the connection of the rod end and
Handle Bars with four M5×15m/m Phillips Head Screws(105) and two 3.5×12m/m Sheet Metal
Screw (87) by using the Short Phillips Screw Driver.
2. Install the two Wheel Covers (52) using the four M5×15m/m Phillips Head Screws (105).
3. Locate the two Rear Stabilizer Covers (19,20) and two Middle Stabilizer Covers (19,20) for the
Rear Rail Assembly and install with four M5×15m/m Phillips Head Screws (105). Then install
front stabilizer cover (49) with two M5×15m/m Phillips Head Screws (105).
4. Install the Front Handle Bar Covers (54-1 left, 55-1 right) and Rear Handle Bar Cover (54 left,
55 right) over the Handle Bar axle connections with the six 3.5×10m/m Self Tapping
Screws(87).
Note: If the elliptical is wobbly, adjust the rubber feet on the rear rail assembly to level the elliptical.
PLEASE ENSURE THAT ALL NUTS AND BOLTS ARE FIRMLY TIGHTENED BEFORE USING THE
ELLIPTICAL.

Customer Service 1-888-707-1880 Maurice Pincoffs Canada Inc. ©2011
Email: customerservice@pincoffs.ca
13
Power up
The Elliptical is supplied with an external power supply. When power is connected to the Elliptical,
the console will automatically power up. If there is no input to the console for 20 minutes the
console will go to stand-by mode. In stand-by mode the console display will turn off. To turn the
console on press any key.
When initially powered on the console will perform an internal self-test. During this time all the lights
will turn on. When the lights go off the dot matrix display will show a software version (i.e.: VER 1.0)
and the message window will display an odometer reading. The odometer reading displays how
many hours the elliptical has been used and how many virtual km /miles the elliptical has gone. The
time in hours will be to the left and the odometer in km /miles will be displayed to the right.
Displaying of “K” is for metric system and “M” is for imperial system.
The odometer will remain displayed for only a few seconds, then the console will go to the start up
display. The dot matrix display will be scrolling through the different workout profiles of the
programs and the message window will be scrolling the start up message. You may now begin to
use the console.
POWER CONNECTION Front left of machine
Operation of Your Elliptical

Customer Service 1-888-707-1880 Maurice Pincoffs Canada Inc. ©2011
Email: customerservice@pincoffs.ca
14
Starting a program
Quick Start
After the console powers up you may press the Start key to begin, this will initiate the Quick Start
mode. In Quick Start the Time will count up from zero and the workload may be adjusted manually
by pressing the Up/Down buttons. Distance and Calories will accrue, starting from zero.
The Calorie window will switch between Calories and Watts every 5 seconds. The Calorie reading
shows total Calories burned and is an approximate number. The Watt reading indicates how much
work you are doing. If the Watt reading is 100, this means you are doing enough work to light a 100
watt light bulb.
The bottom left data window will switch between RPM and Speed every 5 seconds. RPM is your
actual pedal rotation speed, and the Speed readout is in MPH, indicating approximate road speed
as if pedaling a bicycle in 7
th
gear.
The Distance window shows distance traveled, based on pedal speed, in miles. The Pulse window
will display your heart rate in beats per minute if you are holding the heart rate hand sensors, or
wearing a chest strap transmitter.
Manual
Using the Up/Down keys, highlight the Manual icon at the top of the display and press Enter key.
The profile will be blinking and you may use the Up/Down keys to adjust the program work level
and then press Enter. The Time window will now be blinking. Use the Up/Down keys to adjust the
program Time and then press Enter. The Distance window will now be blinking and you can adjust
a target Distance using the Up/Down keys then press Enter. Calories will now be blinking, repeat
the same process as above to set, then press Enter. The Watt icon will be blinking. If you choose to
set the Watts then the machine will automatically adjust the workload to maintain continuous work.
What this means is that if you set the Watt to 100 the machine will try to keep you working at a rate
of work that equals 100 Watts (or working at a rate that will keep a 100 Watt light bulb burning).
Watts are determined by the amount of work you are doing. On the Elliptical this means the speed
you are pedaling at combined with the workload of the machine. In Watt mode, if you change your
speed the machine will automatically change the workload to maintain the same Watt level. If you
pedal faster the workload will decrease and if you pedal slower the workload increases.
After adjusting all the parameters, press Start to begin your workout.
Preset Programs
There are 12 preset programs to choose from. After power up, or reset, press the Up/Down keys to
highlight the Program icon. Press the Enter key to enter the program mode. The display will show
P1, for two seconds, then change to the P1 program profile. You may keep pressing the Up/Down
keys to scroll through the 12 programs. When you see a program you want, press the Enter key to
enter. At this point you may press start to begin the program with the default settings or you may
customize the program.
To customize the work level, press the Up key. You will see the profile increase in size. When the
work level is where you like it press the Enter key (If you do not want to customize the profile, just
press the Enter key to bypass).
The Time window will now be blinking. Use the Up and Down keys to adjust the workout time and
then press Enter.
The Distance window will now be blinking. Repeat the same process to set the distance to count
down, if desired, and press Enter.
The Calorie window will now be blinking. Repeat the same process then press Enter.

Customer Service 1-888-707-1880 Maurice Pincoffs Canada Inc. ©2011
Email: customerservice@pincoffs.ca
15
The Pulse window will now be blinking. Entering a Pulse number will set an alarm that will beep
when your heart rate reaches the programmed number to let you know you have reached your
target.
Once you have set the data you may press Start to begin the program. You may also press Start at
any time during the programming to begin. Any data that is not programmed at that point will count
up from zero.
When the program ends there is a series of audible beeps. You may press Start to restart the
program or press Reset to return to the start-up screen.
User Program
This mode allows you to build and save your own custom program.
Press the Up or Down key until the User icon at the top of the display is blinking then press Enter.
The first column of the profile will be blinking. Use the Up/Down keys to adjust the work level then
press Enter. The second column will now be blinking. Repeat the same process as above and
press Enter. Repeat this process until all the columns are adjusted to your liking. All the settings will
be saved as a custom program.
Target HR
This program allows you to set a target heart rate and the machine will automatically adjust the
work load to safely reach the target and maintain that target.
Use the Up/Down keys to select the Target HR program and press Enter. The display will show a
number and the age icon at top will be blinking. Use the Up/Down keys to adjust the age and press
Enter. The display will now show a blinking percent number or the letters THR.
You may use the Up/Down keys to choose either 55%, 75%, 90% or THR. The percentage
choices will automatically set the target to a percent of your maximum heart rate, based on your
age. This is why it is important to adjust the age properly. The console will use a formula to
determine the correct percentage: 220 – age = maximum HR. For example a 30 year old persons’
Max HR is 190 BPM (220 – 30 = 190 BPM). If the 30 year old wants to work at 75%, their target HR
will be 142BPM.
If you want to choose to work at 75% - for example - then use the Up/Down arrows to highlight 75%
and press Enter. Now the Time window will be blinking and you can program it and other data the
same as other programs. If you want to set your own custom Target HR then use the Up/Down
arrow to highlight THR and press Enter. The Pulse window will now be blinking. Use the Up/Down
arrows to set your own Target HR and press Enter to continue.
Recovery
Used to measure how fast your heart rate (HR) recovers from exercise. The faster your HR returns
to normal from exercise level, the better aerobic shape you are in. Pressing the recovery button will
start a 60 second count down. Hold the hand pulse sensors and do not exercise during the count
down. At the end of the 60 seconds a score will be displayed ranging from F1 to F6 with F1 being
the highest score and F6 being the lowest.

Customer Service 1-888-707-1880 Maurice Pincoffs Canada Inc. ©2011
Email: customerservice@pincoffs.ca
16
FUNCTIONS
TIME: Count up: accumulates training time from zero to 99:59.
Count down: counts down from preset time to zero.
SPEED/ RPM: Automatically toggles between SPEED and RPM every 6 seconds. Speed is in
miles per hour (or kilometers per hour)
DISTANCE: Count up: accumulates training distance from 0.00 to 99.99 miles.
Count down: counts down from preset distance to zero.
CALORIES: Accumulates calories burned from 0 to 9999. This is an estimated number only
to be used from workout to workout to compare your progress. Actual calorie
burn cannot be measured accurately on any consumer exercise equipment
because every individual burns calories at a different rate.
WATTS: Indicates the amount of work being done in Watts.
PULSE: Displays your current heart rate when you grasp the hand sensors or wear the
chest strap transmitter.
LEVEL: Shown next to the workout profile. Indicates the level of work being done from 1
to 16.

Customer Service 1-888-707-1880 Maurice Pincoffs Canada Inc. ©2011
Email: customerservice@pincoffs.ca
17
Maintenance:
1. Wipe down all areas in the sweat path with a damp cloth after each workout.
2. If a squeak, thump, clicking or rough feeling develops the main cause is most likely one of two
reasons:
i. The hardware was not sufficiently tightened during assembly. All bolts that were
installed during assembly need to be tightened as much as possible. It may be
necessary to use a larger wrench than the one provided if you cannot tighten the bolts
sufficiently. I cannot stress this point enough; 90% of calls to the service department
for noise issues can be traced to loose hardware or the rear rails being dirty.
ii. Dirt build-up on the rear rails and polyurethane wheels are also a source of noise.
Noise from build-up on the rails can cause a thumping sound that you would swear is
coming from inside the main body of the machine because noise travels, and is
amplified in the tubing of the frame. Clean the rails and wheels with a lint free cloth
and rubbing alcohol. Stubborn build-up can be removed with your thumbnail or a
non-metallic scraper, like the back edge of a plastic knife. After cleaning, apply a
small amount of lubricant on the rails with your fingers or a lint free cloth. You only
need a thin coat of lubrication, wipe off any excess.
3. If squeaks or other noises persist, check that the unit is properly leveled before calling the
service department.
Transportation
The
elliptical
is equipped with two transport wheels which are engaged when rear of the elliptical is
lifted.
LUBRICATION
1. Pour 2c.c of the lubricant under the middle of Rail. You must lubricate the rails every three
months.
2. If the user felt the exercise is not smooth or there were some noise during exercising, please
pour 2 c.c.of the lubricant on the middle of Rails.

Customer Service 1-888-707-1880 Maurice Pincoffs Canada Inc. ©2011
Email: customerservice@pincoffs.ca
18
TROUBLE SHOOTING
Problem Cause Correction
Monitor does not
display
Adaptor not plugged in or
batteries not installed
Plug adaptor in or insert batteries
No speed or distance
displays on the monitor
Sending unit not connected Securely plug sending unit into
extension wire and the back of the
monitor
Sending unit not working
properly
Replace sending unit
Monitor not working properly Replace monitor
No tension Gear box wire not connected Securely connect the gear box wires
into the extension gear box wire
Magnetic wheel not working
properly
Replace magnetic wheel
Heart rate not
displaying
Pulse wire not connected not
connected
Securely plug wires together
Hand pulse defective Replace hand pulse grip
Monitor not working properly Replace monitor
Grinding Crank bearing defective Replace crank bearings
Idler pulley defective Replace idler pulley
Mag wheel defective Replace magnetic wheel
Squealing V-belt slipping Adjust v-belt

Customer Service 1-888-707-1880 Maurice Pincoffs Canada Inc. ©2011
Email: customerservice@pincoffs.ca
19
PARTS LIST
NO.
PART NO
DESCRIPTION
O'TY
1
1745501
Main Frame
1
2
1745502
Rear Rail Assembly
1
4
1745504
Cross Bar
2
5
1745505
Bushing Housing, Pedal Arm
2
6
1745506
Pedal Arm (L)
1
7
1745507
Pedal Arm (R)
1
8
17
45508
Connecting Arm (L)
1
9
1745509
Connecting Arm (R)
1
10
1745510
Swing Arm (L)
1
11
1745511
Swing Arm (R)
1
12
1745512
Console Mast
1
13
1745513
Idler Wheel Assembly
1
14
1745514
Crank Axle
1
15
1745515
Adjustable Pedal (L)
1
16
1745516
Adjusta
ble Pedal (R)
1
17
1745517
Locking Pin Assembly
2
18
1745518
WFM
-
2528
-
21_Bushing
4
19
1745519
Rear Stabilizer Cover (A)
2
20
1745520
Rear Stabilizer Cover (B)
2
22
1745522
Rod End Sleeve
3
23
1745523
Carriage Bolt
2
25
1745525
Drive Belt
1
26
17455
26
Drive Pulley
1
27
1745527
Flywheel
1
28
1745528
Magnet
1
29
1745529
7 × 7 × 25L_Woodruff Key
2
30~1
1745530
-
1
Top Console assembly
1
30~2
1745530
-
2
Console Bottom Cover
1
31
1745531
1300m/m_Computer Cable
1
32
1745532
1100m/m_DC Power Cord
1
33
1745533
Gear Motor
1
34
1745534
400m/m_Sensor W/Cable
1
35
1745535
Sensor Rack
1
36
1745536
850m/m_Handpulse W/Cable Assembly
2
36~4
1745536
-
4
Ø3 × 20m/m_Tapping Screw
4
37
1745537
Power Adaptor
1
38
1745538
Transportation Wheel
2
39
1745539
Slide W
heel , Urethane
4
40~1
1745540
-
1
3/8" × 2"_Flat Head Socket Bolt
4
40~2
1745540
-
2
Rubber Foot
4
41
1745541
Console Mast Cover
1
42
1745542
Side Case (L)
1
43 1745543 Side Case (R)
1
Table of contents
Other Everlast Elliptical Trainer manuals
Popular Elliptical Trainer manuals by other brands

Keys Fitness
Keys Fitness Magnetic Elliptical Exercise Trainer ET4000 owner's manual

Spokey
Spokey LEGANES II manual

Freespirit
Freespirit C249 29282 0 owner's manual

Insportline
Insportline Saratosa LIGHT user manual

NordicTrack
NordicTrack E 1000 Elliptical manual

Beny Sports
Beny Sports V-fit CT200 Assembly & user manual