Everlast 16517918 User manual

OWNER’S MANUAL
MODEL NO.
16517918
Assembly
Operation
Trouble –Shooting
Parts
Warranty
CAUTION:
You must read and
understand this owner’s
manual before operating
unit.
Keep this manual for
future reference.
Serial number
_____________________
Write the serial number
in the space above for
reference. Serial number
can be found at the front
bottom section of the
elliptical.

CUSTOMER SERVICE 1-888-707-1880 Dyaco Canada Inc.©2014
1
Manufacture’s Limited Warranty
Dyaco Canada Inc. warrants all its home use elliptical parts for a period of time listed below, from the
date of retail sale, as determined by a sales receipt or in the absence of a sales receipt. Dyaco
Canada Inc.’s responsibilities include providing new or remanufactured parts, at Dyaco Canada Inc.’s
option, and technical support to our independent dealers and servicing organizations. In the absence
of a dealer or service organization, these warranties will be administered by Dyaco Canada Inc.
directly to a consumer. The warranty period applies to the following components:
Home Use Limited WARRANTY
Frame Lifetime
All Other Components 2 Years
Labour 1 Year
This warranty is not transferable and is extended only to the original owner.
The warranty shall not apply to exercise units which are (1) used for commercial or other income
producing purposes, or (2) subject to misuse, neglect, accident or unauthorized repair and alterations.
This warranty provided herein is lieu of all other express warranties, any implied warranties, including
any implied warranties of merchantability of fitness for particular purpose, are limited in duration to the
first 12 months from date of purchase. All other obligations or liabilities, including liability for
consequential damages are hereby excluded.
REPAIR PARTS AND SERVICE
All of the parts for the elliptical shown in figure can be ordered from Dyaco Canada Inc. 6050 DON
MURIE STREET, NIAGARA FALLS, ONTARIO L2G 0B3. When ordering parts, the parts will be sent
and billed at the current prices. Prices may be subject to change without notice. Check or money
order must accompany all orders. Standard hardware items are available at your local hardware store.
To ensure prompt and correct handling of any errors, or to answer any questions, please call our Toll
Free number: 1-888-707-1880, or local number 1-905-353-8955 or fax 1-905-353-8968 or email
customerservice@dyaco.ca. You can visit us at www.dyaco.ca Office hours are from 8:30 AM to 5:00
PM Monday to Friday Eastern Standard Time.
Always include the following information when ordering parts
Model number
Name of each part
Part number of each part
TABLE OF CONTENTS
WARRANTY 1 MAINTENANCE 25-26
SAFETY PRECAUTIONS 2-3 PARTS LIST & DIAGRAM 27-31
IMPORTANT SAFETY INSTRUCTIONS 4-5 USER DIRECTION 32-33
ASSEMBLY PACK CHECKLIST 7-9 TRAINING GUIDELINE 34-36
ASSEMBLY INSTRUCTION 10-14 STRETCHING 37-38
COMPUTER INSTRUCTIONS 15-24

CUSTOMER SERVICE 1-888-707-1880 Dyaco Canada Inc.©2014
2
IMPORTANT SAFETY INFORMATION
THIS UNIT IS INTENDED FOR HOUSEHOLD USE ONLY
READ ALL INSTRUCTIONS BEFORE USING THIS ELLIPTICAL
Thank you for purchasing our product. Even though we go to great efforts to ensure the quality of
each product we produce, occasional errors and /or omissions do occur. In any event should you find
this product to have either a defective or a missing part please contact us for a replacement.
This product has been designed for home use only. Product liability and guarantee conditions
will not be applicable to products being subjected to professional use or products being used in a gym
center.
This exercise equipment was designed and built for optimum safety. However, certain
precautions apply whenever you operate a piece of exercise equipment. Be sure to read the
entire manual before assembly and operation of this machine. Also, please note the following
safety precautions:
WARNING
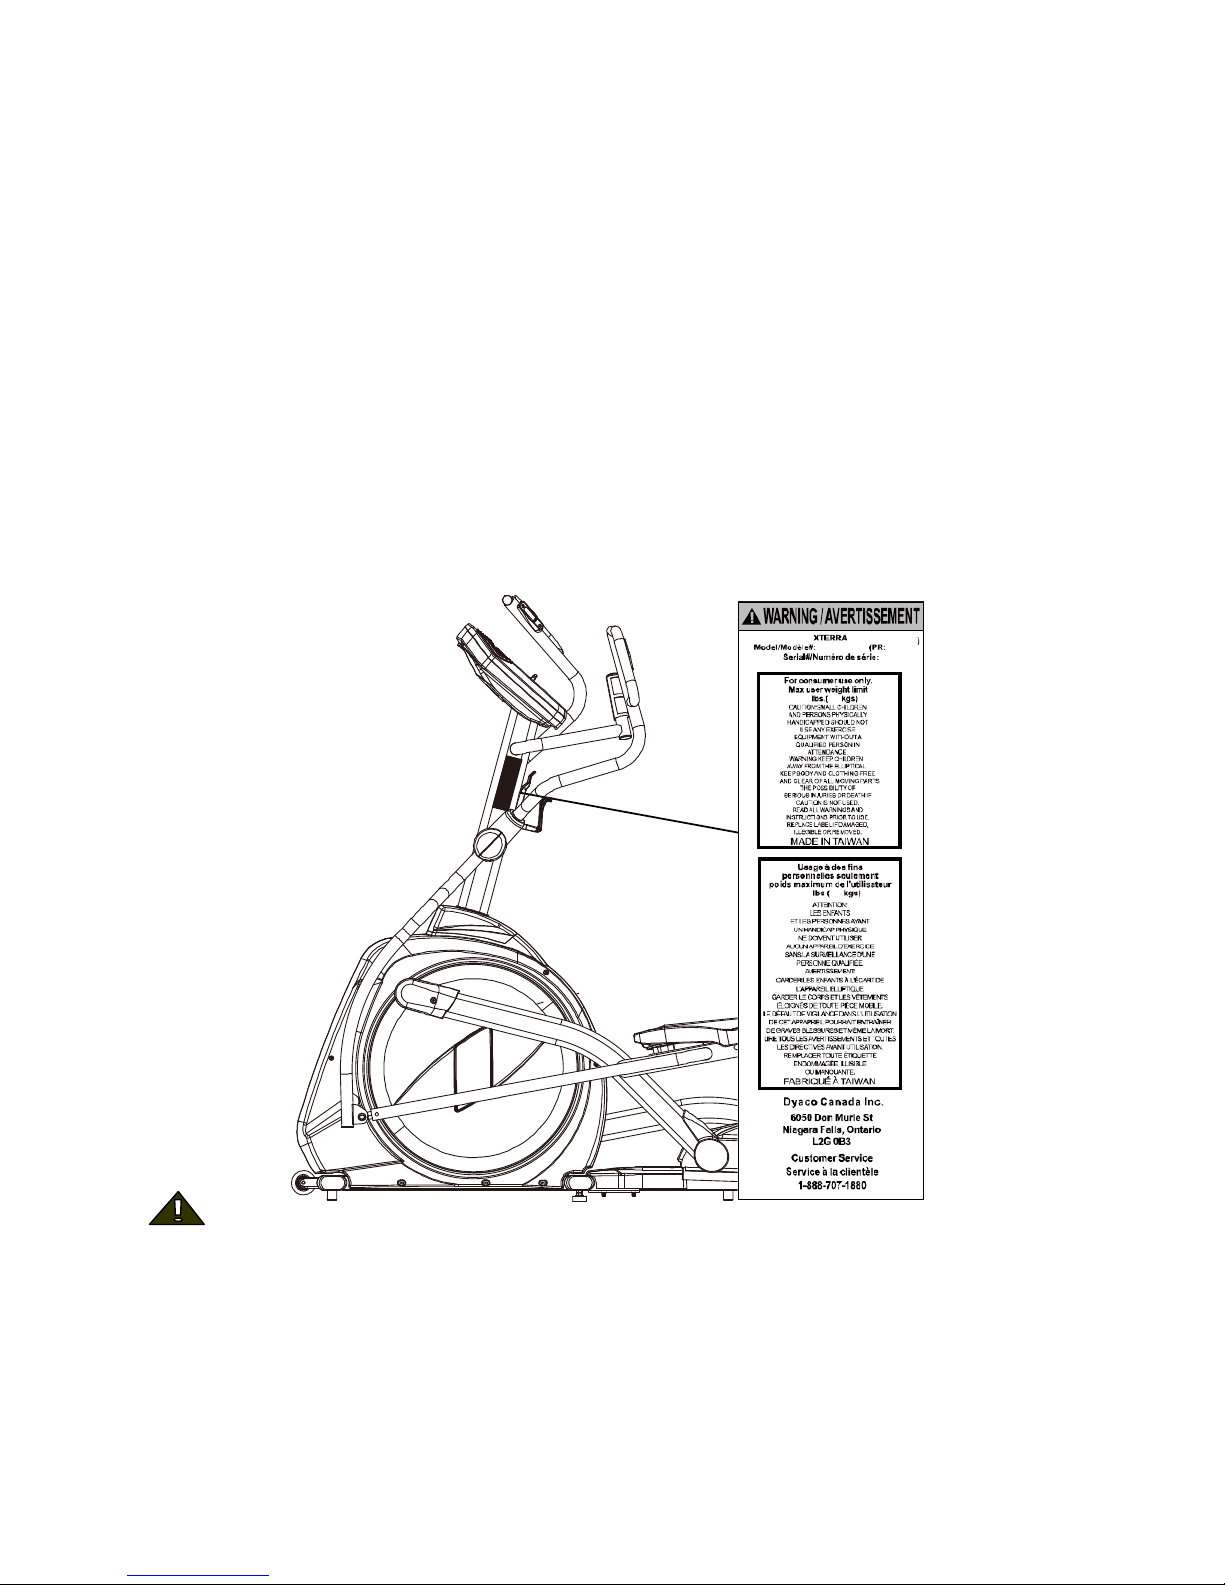
It is the responsibility of the owner to ensure that all users of this elliptical are adequately informed of
all warnings and precautions. Read the OWNER’S OPERATING MANUAL and all warnings posted
on the elliptical and follow it carefully before using your elliptical..
Review all warnings labels that affixed to the elliptical. Inspect your exercise equipment prior to
exercising to ensure that all nuts and bolts are fully tightened before each use. Functional and
1. Functional and visual inspection of the equipment shall be made after assembling your elliptical.
2. Never operate the elliptical if it is not working properly, if it has been dropped, damaged, or
exposed to water.
3. Set up and operate the elliptical on a solid level surface. Do not use outdoors or near water. Do
not place the unit on a loose rug or uneven surface. It is recommended to use an equipment mat
to prevent the unit from moving while it is being used, which could possibly scratch or damage
the surface of your floor. It is recommended to have a minimum of 3 metres safe clearance on
all sides of the elliptical while in use.
4. Keep the elliptical indoors, away from moisture and dust. Do not put the elliptical in a garage,
covered patio or near water.
5. Do not operate the elliptical where aerosol products are used or where oxygen is being
administered.
6. Do not insert any objects into any openings.
7. Inspect and properly tighten all parts of the elliptical regularly.
8. Keep children and pets away from this equipment at all times and while exercising.
9. Handicapped individuals should have medical approval and close supervision when using this
elliptical.
10. Do not place hands or feet under the elliptical. Always keep hands and legs off of the elliptical
when others are using it.
11. Always hold the handlebars when mounting, dismounting, or using the elliptical. Keep your back
straight when using your elliptical, do not arch your back. When you stop exercising, allow the
pedals to slowly come to a complete stop. The elliptical does not have a free wheel, the pedals
will continue to move until the flywheel stops.
12. To disconnect, turn all controls to the off position, then remove plug from outlet.
13. Use the elliptical only for its intended use as described in this manual. Do not use any
attachments that are not recommended by the manufacturer.
14. User weight should not exceed 400lbs (181 kgs).
15. Never allow more than one person on the elliptical at once.
16. Warm up 5 to 10 minutes before each workout and cool down 5 to 10 minutes afterward. This
allows your heart rate to gradually increase and decrease and will help prevent straining muscles.

CUSTOMER SERVICE 1-888-707-1880 Dyaco Canada Inc.©2014
3
Never hold your breath while exercising. Breathing should remain at a normal rate in conjunction with
the level of exercise being performed. If dizziness, nausea, chest pains, or any other abnormal
symptoms are experienced while using this equipment, STOP the workout at once. CONSULT A
PHYSICIAN IMMEDIATELY.
17. The pulse sensor is not a medical device. Various factors, including the user’s movement, may
affect the accuracy of heart rate readings. The pulse sensor is intended only as an exercise aid
in determining heart rate trends in general.
18. Start your program slowly and very gradually increase your speed and distance.
19. Always wear suitable clothing and footwear while exercising. Do not wear loose fitting clothing
that could become entangled with the moving parts of your elliptical. Do not walk or jog barefoot,
in stocking feet or loose fitting shoes or slippers.
20. Always hold on to a handlebar while making control changes
21. Use caution while participating in other activities while using your elliptical such as watching
television, reading, etc. These distractions may cause you to lose balance, resulting in serious
injury.
22. The decal shown below has been placed ons the elliptical. If the decal is missing or illegible,
please call our Customer Service Department toll-free at 1-888-707-1880 to order a replacement
decal. Apply the decal in the location shown.
WARNING: Before beginning any exercise program consult your physician. This is especially
important for individuals over the age of 35 or persons with pre-existing health problems. Read all
instructions before using any fitness equipment. We assume no responsibility from personal injury or
property damage sustained by or through the use of this product.
SAVE THESE INSTRUCTIONS

CUSTOMER SERVICE 1-888-707-1880 Dyaco Canada Inc.©2014
4
Important Safety Instructions
When using an electrical appliance, basic precautions should always be followed, including the
following: Read all instructions before using this appliance.
WARNING - To reduce the risk of burns, fire, electric shock, or injury to persons:
1. An appliance should never be left unattended when plugged in. Unplug from outlet when not in
use, and before repairing or cleaning.
2. Never operate this appliance if it has a damaged cord or plug, if it is not working properly, if it
has been dropped or damaged, or dropped into water. Return the appliance to a service center
for examination and repair.
3. Do not carry this appliance by supply cord or use cord as a handle.
4. Keep the cord away from heated surfaces or flames.
5. Never operate the appliance with the air openings blocked. Keep the air openings free of lint,
hair, and things alike.
6. Connect this appliance to a properly grounded outlet only.
The use of an extension cord with this product is not recommended. If an extension cord is
needed, use a short (less than 10 feet) heavy gauge (14 gauge or better) extension cord with a
three prong (grounded) plug and receptacle
NEVER remove any cover without first disconnecting AC power supply.
If A.C. voltage varies by ten percent (10%) or more, the performance of your
elliptical may be affected. Such conditions are not covered under your warranty. If
you suspect the voltage is low, contact your local power company or a licensed
electrician for proper testing.
NEVER expose this elliptical to rain or moisture. This product is NOT designed for
use outdoors, near a pool or spa, or in any other high humidity environment.
Maximum environmental ratings are 40-120 degrees Fahrenheit, 95% humidity
non-condensing (no water droplets forming on surfaces).
NEVER use your elliptical during an electrical storm. Surges may occur in your
household power supply that could damage elliptical components.
Failure to follow all guidelines may compromise the effectiveness of the exercise experience,
expose yourself (and possibly others) to injury, and reduce the longevity of the equipment.
SAVE THESE INSTRUCTIONS - THINK SAFETY!

CUSTOMER SERVICE 1-888-707-1880 Dyaco Canada Inc.©2014
5
Grounding Instructions
This product must be grounded. If it should malfunction or breakdown, grounding provides a path of
least resistance for electric current to reduce the risk of electric shock. This product is equipped with a
cord having an equipment-grounding conductor and a grounding plug. The plug must be plugged into
an appropriate outlet that is properly installed and grounded in accordance with all local codes and
ordinances. See diagram below for grounding methods.
Improper connection of the equipment-grounding conductor can result
in a risk of electric shock. Check with a qualified electrician or serviceman if you
are in doubt as to whether the product is properly grounded. Do not modify the
plug provided with the product if it will not fit the outlet, have a proper outlet
installed by a qualified electrician.
This product is for use on a nominal 120-volt circuit, and has a grounding plug that looks
like the plug illustrated below. A temporary adapter that looks like the adapter illustrated
below may be used to connect this plug to a 2-pole receptacle as shown below if a
properly grounded outlet is not available. The temporary adapter should be used only
until a properly grounded outlet (below) can be installed by a qualified electrician. The
green colored rigid ear-lug, or the like, extending from the adapter, must be connected to
a permanent ground such as a properly grounded outlet box cover. Whenever the
adapter is used, it must be held in place by a metal screw.
POWER CONNECTOR – FRONT, LEFT SIDE OF UNIT

CUSTOMER SERVICE 1-888-707-1880 Dyaco Canada Inc.©2014
6
HOW THE ELLIPTICAL WORKS
The elliptical allows your feet to move in a natural elliptical path, minimzing the impact on your knees
and ankles.
Dual Action Handles for total body workout
Stationary handlebar for stability
Features
Incline Adjustment
The elliptical has an exciting electronic incline feature that will increase the variety of your workouts.
When the incline is at its lowest position you get a traditional elliptical workout. As the incline
increases you will feel your knees rise higher with each step, which changes the emphasis of the
muscles being used. The power incline is controlled by keys on the console and also automatically
during the built-in workout programs.
Console
Handlebar
Handpulse
Water bottle holder
Console Mast
Console Mast Cover
Pedal
Rear Stabilizer
Cushion Foot pad
Connecting Arm
Transportation
Wheels
Pedal arm

CUSTOMER SERVICE 1-888-707-1880 Dyaco Canada Inc.©2014
7
Assembly Pack Checklist
Hardware Step 1(not shown at actual size)
#102. 5/16” × 2-1/4”
Hex Head Bolt (4 pcs)
#103. 3/8” × 3/4”
Hex Head Bolt (
2
pcs)
#104. 3/8” × 1-1/2”
Hex Head Bolt (
2
pcs)
#105. 3/8” × 2-1/4”
Hex Head Bolt (
1
pc)
#116. M5 × 10mm
Phillips Head Screw
(
4
pcs)
#130. 3/8” × 7T
Nyloc Nut
(
2
pcs)
#137. 3/8” × 19 × 1.5T
Flat
W
a
sher
(
2
pcs)
#142. 5/16” × 20 × 1.5T
Flat
W
asher
(
4
pcs)
#151. 5/16” × 1.5T
Split
W
asher
(
4
pcs)
#152. 3/8” × 2T
Split
W
asher
(
1 pc
)
#153. 3/8” × 23 × 2T
Curved
W
asher
(
2 pcs
)
#154. 5/16”
Star
W
asher
(
4 pcs
)

CUSTOMER SERVICE 1-888-707-1880 Dyaco Canada Inc.©2014
8
Hardware Step 2
Hardware Step 3
Hardware Step 4
#
99
.
5/16”
×
15mm
Hex Head Bolt (2 pcs)
#
150
.
17mm
Wave Washer (4 pcs)
#
141
.
5/16”
×
23
×
1.5
T
Flat Washer (2 pcs)
#101.
5/16” × 1
-
1/4”
Hex Head Bolt (2 pcs)
#192.
5/16” × 9T
Nyloc Nut (2 pcs)
#142
.
5/16” × 20 × 1.5T
Flat Washer (2 pcs)
#127.
5/16” × 7T
Nyloc Nut (6 pcs)
#1
60
.
5/16” × 23 × 1.5T
Curved Washer (4 pcs)
#161.
Switch Wire Cap
(2 pcs)
#159.
5/16” × 1
-
3/4”
Hex Head Bolt (6 pcs)
#115
.
M5
×
15mm
Phillips Head Screw
(14 pcs)
#11
9
.
3.5 × 12mm
Sheet Metal Screw
(8 pcs)
#122.
M6 × 10mm
Phillips Head Screw
(4 pcs)

CUSTOMER SERVICE 1-888-707-1880 Dyaco Canada Inc.©2014
9
Assembly Tools
#157. Phillips
Head Screwdriver
#155. 13/14mm Wrench #158. 12/14mm Wrench

CUSTOMER SERVICE 1-888-707-1880 Dyaco Canada Inc.©2014
10
1
#102. 5/16” × 2-1/4”
Hex Head Bolt (4 pcs)
#103. 3/8” × 3/4”
Hex Head Bolt (2 pcs)
#104. 3/8” × 1-1/2”
Hex Head Bolt (2 pcs)
#105. 3/8” × 2-1/4”
Hex Head Bolt (1 pc)
#116. M5 × 10mm
Phillips Head Screw
(4 pcs)
#130. 3/8” × 7T
Nyloc Nut (2 pcs)
#137. 3/8” × 19 × 1.5T
Flat Washer (2 pcs)
#142. 5/16” × 20 × 1.5T
Flat Washer (4 pcs)
#151. 5/16” × 1.5T
Split Washer (4 pcs)
#152. 3/8” × 2T
Split Washer (1 pc)
#153. 3/8” × 23 × 2T
Curved Washer (2 pcs)
#154. 5/16”
Star Washer (4 pcs)
Assembly Instructions
Rear Rail, Console Mast & Console
1. Slide the Incline Rail Assembly (2) into the U channel of the Main
Frame (1). Be very careful not to damage the wires that exit each
part.
2. Connect the Incline Rail Assembly (2) horizontally to the U channel
of the Main Frame (1) with two Hex Head Bolts (104), two Flat
Washers (137) and two Nyloc Nuts (130). Secure it vertically with
four Hex Head Bolts (102), four Split Washers (151), four Flat
Washers (142) and four Star Washers (154). Tighten using the
Wrenches provided (155 & 158).
3. Connect the Incline Motor wires (49 & 50) to the wiring harness that
exits the Incline Rail Assembly (2), by matching the colors red, white
and black. Push the excess cable inside the U channel. Guide the
twist tie that is attached to the Computer Cable (44) through the
bottom of the Console Mast (12) until it exits the top of the steel tube.
Secure the Console Mast (12) by loosely threading two Hex Head
Bolts (103) from the front and two Curved Washers (153) first. Then
secure the mast from the side by loosely threading a Hex Head Bolt
(105) and a Split Washer (152). Note: There is one bolt already
installed in the receiving bracket that will engage with the slot at the
bottom of the Console Mast. Tighten the two bolts from the left side
last.
4. Tighten the two front bolts first, then the side bolts with the Wrench
(155).
5. Untie the twist tie from around the Computer Cable (44). Plug the
Computer cable (44 - wide white end) & the two Hand Pulse Cables
(47) into the bottom of the Console (43). Insert the Resistance Cable
(165) into the white port labeled “Load” and the Incline Cable (166)
into the Incline port on the back of the Console. Secure the Console
(43) onto the mounting plate with four Phillips Head Screws (116).
Tighten them with the Phillips Head Screw Driver (157).
6. Install the water bottle holder onto the handlebar in any position you
like.
Hardware Step 1

CUSTOMER SERVICE 1-888-707-1880 Dyaco Canada Inc.©2014
11
1Rear Rail, Console Mast & Console

CUSTOMER SERVICE 1-888-707-1880 Dyaco Canada Inc.©2014
12
2Connecting & Lower Swing Arms
Hardware Step 2
##99. 5/16” × 15mm
Hex Head Bolt (2 pcs)
#101. 5/16” × 1-1/4”
Hex Head Bolt (2 pcs)
#192. 5/16”× 9T
Nyloc Nut (2 pcs)
#141. 5/16” × 23 × 1.5T
Flat Washer (2 pcs)
#142. 5/16” × 20 × 1.5T
Flat Washer (2 pcs)
#150. 17mm
Wave Washer (4 pcs)
1. Slide two wave washers (150) onto each side of the Console Mast
axle. Slide the lower Handle Bars (10 Left, 11 Right) onto the axles
and secure with the two Hex Head Bolts (99) and Flat Washers (141).
Do not force the lower Handle Bars onto the axle. They should slide on,
but you may need to jiggle them to get them lined up properly.
The lower Handle Bars have been previously installed at the factory so
they do fit properly.
2. Remove the tie that holds the Sleeve (20) in the rod end located at
the end of the right connecting arm (9) and line up the rod end with
the bracket at the bottom of the lower right Handle Bar (11). Slide
the Hex Head Bolt (101) through the bracket of the lower Handle Bar
and then through the rod end. Install the Flat Washer (142) and
Nyloc Nut (192) on the bolt and tighten as much as possible.
Repeat this step for the left side.

CUSTOMER SERVICE 1-888-707-1880 Dyaco Canada Inc.©2014
13
3Upper Swing Arms
Hardware Step 3
#127. 5/16” × 7T
Nyloc Nut (6 pcs)
#159. 5/16” × 1-3/4” Hex
Head Bolt (6 pcs)
#160. 5/16” × 23 × 7T
Curved Washer (4 pcs)
#161. Switch Wire
Cap (2 pcs)
1. Slide the Swing Arm Bushing (162) onto the left (16) and right (17)
Upper Swing Arms. Make sure the wide part is at the bottom.
2. Attach the wire (166) from the left Upper Swing Arm (16; Incline
buttons on front) to the wire (167) that exits the Console Mast Tube (12).
Slide the switch wire cap (161) onto the wire with the wide side facing
the Swing Arm.
3. Insert the Upper Swing Arm (16) into the Lower Handle Bar. Fasten
together with three Hex Head Bolts (159) and two Curved Washers (160).
4. Repeat steps 3.2 & 3.3 from above on the right side. You will connect
wires (165) to (167).

CUSTOMER SERVICE 1-888-707-1880 Dyaco Canada Inc.©2014
14
4Plastic Covers
Note: Use the Phillips Head Screw Driver (157) to tighten the hardware
in this step.
1. Install the two Wheel Covers (79-Left & 80-Right) with four Phillips
Head Screws (115).
2. Install the Bottom Cover (85) with four Phillips Head Screw (115). You
need to raise the incline to install the Bottom Cover.
3. Install the Handle Bar Covers (81 & 82-Left, 83 & 84-Right) with the
eight Sheet Metal Screws (119).
4. Install the two ‘Z’ shaped Cover Holders (24) as shown with four
Phillips Head Screws (122). The Cover Holders should be installed so
the tab with the tapped hole is pointing toward the rear.
5. Install the Inclinable Rail Cover (87) with two Phillips Head Screws
(115). Install the Rear Bar Cover (88) with four Phillips Head Screws
(115).
Hardware Step 4
#115. M5 × 15mm
Phillips Head Screw
(14 pcs)
#119. 3.5 × 12mm
Sheet Metal Screw
(8 pcs)
#122. M6 × 10mm
Phillips Head Screw
(4 pcs)

CUSTOMER SERVICE 1-888-707-1880 Dyaco Canada Inc.©2014
15
Operation of Your Console
Console
Power Up
Power the elliptical on by plugging it into an appropriate wall outlet. When power is connected to the
elliptical and the switch is on, the console will automatically power up. If there is no input to the
console for 30 minutes, the console will go to stand-by mode to save energy. To turn the console on
press any key.
When initially powered on the console will perform an internal self-test. During this time
all the lights will turn on. When the lights go off the dot matrix display will show a software version
(i.e.: VER 1.0) and the time and distance windows will display an odometer reading. The odometer
reading displays how many hours the elliptical has been used and how many virtual miles the
elliptical has gone.
The odometer will remain displayed for only a few seconds then the console will go to the start up
display. The dot matrix display will be scrolling through the different workout profiles of the programs
and operating instructions. You may now begin to use the console.
NEVER
operate this elliptical without reading and completely understanding the results of any operational
change you request from the computer.
Understand that changes in resistance do not occur immediately. Set your desired level on the
computer console and release the adjustment key. The computer will obey the command gradually.
Integrated
Speakers for
MP3 Player
La
r
ge
LCD
with
scrolling feedback and
scrolling message
center
Swivel
Fan
to keep
you cool
Convenient
ca
r
go
compartment for
phone or MP3 player
Easy
-
T
ouch
Control Buttons
Audio
Input
Jack for
customized listening

CUSTOMER SERVICE 1-888-707-1880 Dyaco Canada Inc.©2014
16
Console Operation
Quick Start Mode
This is the quickest way to start a workout. After the console powers up you just press the Start key to
begin. In Quick Start the time will count up from zero and the Resistance and Incline may be adjusted
manually by pressing the Level Up/Down keys. The dot matrix dis- play will show ½ of the Resistance
profile on each side of the Heart Rate Profile. If you press the Start button during a program, the dot
matrix will switch to the Incline profile (segments are shown the same way as the Resistance profile). If
you press the Start button once more, the Lap track is shown, which is ¼ mile in length. Pressing the
Enter key will switch the data displayed in the Message Window. Initially, the Message Window shows
the program name. Each time the Enter button is pressed the data will change to the following: Speed,
Watts, Laps, Altitude (elevation gain), Current Level/Max Level, Scan, and repeat sequence. To the right
of the dot matrix is a number that indicates your Resistance level. To the left is a number that indicates
your elevation.
Basic Information and Functions:
Data Displayed:
Calories show an accumulation of calories burned (Kcal). The number shown is just an estimate;
your actual calorie burn most likely will be different. The only way to get an accurate calorie reading
is in a laboratory setting connected to a host of machines.
Time shows elapsed time unless you set the timer to count down.
Seg Time counts down the time left in the current segment (column) of the profile.
Pulse indicates your heart rate if you are grasping the hand pulse sensors.
RPM displays your pedaling speed in revolutions per minute.
Speed shows your speed in miles per hour or kilometers per hour if ‘Km’ is displayed.
Incline/Ramp Shows incline level from 1 to 20.
Distance displays accumulated mileage.
The elliptical has a built in Heart Rate Monitoring System. Simply grasping the hand pulse sensors on
the stationary handlebars or by wearing the chest strap will start the heart icon blinking (this may take a
few seconds). The Pulse Display Window will display your heart rate, or pulse, in beats per minute.
The Stop/Reset button actually has several functions. Pressing the Stop/Reset key once during a
program will pause the program for 5 minutes. If you need to get a drink, answer the phone or any of the
many things that could interrupt your workout, this is a great feature. To resume your workout after
pausing just press the Start key. If the Stop/Reset button is pressed twice during a
workout, the program
will end and a summary of your workout will be displayed. If the Stop/Reset key is held down for 3
seconds, the console will perform a complete reset.
There is an Audio Input Jack on the front of the console, and built-in speakers. You may plug any low-
level audio source signal into this port. Audio sources include: MP3 player, iPod, portable radio, CD
player or even a TV or computer.

CUSTOMER SERVICE 1-888-707-1880 Dyaco Canada Inc.©2014
17
Programming The Console
Each of the programs can be customized with your personal information and changed to suit your needs.
Some of the information asked for during programming is necessary to ensure the readouts are correct.
You will be asked for your age and weight. Entering your age is necessary during the Heart Rate
Program to ensure the correct settings are entered in the program. Entering your Weight aides in
calculating a more correct calorie reading; although we cannot provide an exact calorie count we do
want to be as close as possible.
A message about calories: Calorie readings on every piece of exercise equipment, whether it is in a
gym or at home, are not accurate and tend to vary widely. They are meant only as a guide to monitor
your progress from workout to workout. The only way to measure your calorie burn accurately is in a
clinical setting connected to a host of machines. This is because every person is different and burns
calories at a different rate.
Entering a Program/Changing Settings
Press the program keys to scroll through the program selections. The profile for each program will be
displayed in the dot matrix window. Press the Enter key to select a program and begin customizing the
settings. If you want to workout without entering new settings then just press the Start key. This will
bypass the programming of data and take you directly to the start of your workout. If you want to change
the personal settings then just follow the instructions in the message window. If you start a program
without changing the settings, the default settings will be used.
Note: Age and Weight default settings will change when you enter a new number. So the last age and
weight entered will be saved as the new default settings. If you enter an age and weight the first time
you use the elliptical you will not have to enter it every time you work out unless either your age or
weight changes or someone else enters a different age and weight.

CUSTOMER SERVICE 1-888-707-1880 Dyaco Canada Inc.©2014
18
Manual Program
The Manual program works as the name implies, manually. This means that you control the workload
yourself and not the computer.
1. Press the Manual program button then press the Enter key.
2. The message window will ask you to enter your Age. You may adjust the Age setting using the
Level Up/Down keys, then press Enter to continue.
3. The message window will ask you to enter your Weight. You may adjust the Weight setting using
the Level Up/Down keys, then press the Enter key to accept the new number and proceed on to the
next screen.
4. Next is the Time. You may adjust the Time and press Enter to continue.
5. Now you are finished editing the settings and can begin your workout by pressing the Start key.
6. Once the program starts the elliptical will be set to level one for both Incline and Resistance. This is
the easiest level and it is a good idea to stay at level one for a while to warm up. If you want to
increase the work load at any time press the Up key on the console or right swing arm; the Down
key will decrease the workload. You can also increase the Incline at any time by pressing the
Up/Down keys on the console or the left swing arm.
7. During the Manual program you will be able to switch data displayed in the message window by
pressing the Enter key.
8. When the program ends the message window will show a summary of your workout. The summary
will be displayed for a short time then the console will return to the start-up display.
Programming Preset Programs
1. Using the Program Up/Down keys, select the desired program then press the Enter key.
2. The message window will ask you to enter your Age. You may adjust the Age setting, using the
Level Up/Down keys, then press the Enter key to accept the new number and proceed on to the
next screen.
3. You are now asked to enter your Weight You may adjust the Weight setting using the Level
Up/Down keys, then press Enter to continue.
4. Next is time. You may adjust the Time setting and then press Enter to continue.
5. Now you are asked to adjust the Max Level. This is the peak exertion level you will experience
during the program (work level at the top of the hill). Adjust the level and then press Enter.
6. Use the Incline Up/Down keys to adjust the Max Incline for the program, then press Enter.
7. Now you are finished editing the settings and can begin your workout by pressing the Start key.
8. If you want to increase or decrease the workload at any time during the program press the Level
Up/Down key. This will change only the work level during the current segment.
9. During the program you will be able to switch the data displayed by pressing the Enter button.
10. When the program ends the message window will show a summary of your workout. The summary
will be displayed for a short time then the console will return to the start-up display.

CUSTOMER SERVICE 1-888-707-1880 Dyaco Canada Inc.©2014
19
Preset Programs
The elliptical has eight different programs that have been designed to provide a variety of workouts.
These programs have factory preset profiles for achieving different goals.
Ascent
-
W
ork Profile
Ascent
-
Incline Profile
Fat Burn
-
Work Profile
Fat Burn
-
Incline Profile
Glute Blast
-
Work Profile
Glute Blast
-
Incline Profile
Adventure
-
Work Profile
Adventure
-
Incline Profile
Xtreme
-
Work Profile
Xtreme
-
Incl
ine Profile
Table of contents
Other Everlast Elliptical Trainer manuals