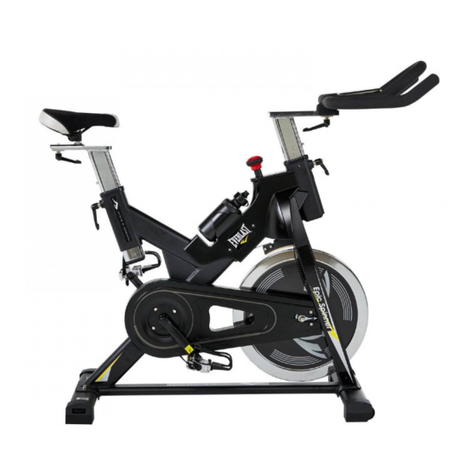
Everlast ULTRA EX BIKE Owner's manual

ULTRA EX BIKE
05AUG2015
Important – Please read these instructions fully before assembly or use
These instructions contain important information which will help you get the best from your equipment and ensure
safe and correct assembly, use and maintenance.
If you need help or have damaged or missing parts, call the Service Centre : 087 997 0865
10364
Assembly & User Instructions - Please keep for future reference

2
Contents
Safety Information 3
Components - Parts 4
Components - Fixings 5
Assembly Instructions 6-11
Exercising Information 12-15
Before starting to exercise 12
Muscle chart 13
Warming up and cooling down exercises 14-15
Care and Maintenance 16
Exploded Parts Diagram 17
Exploded Diagram Parts List 18

3
Safety Information
To reduce the risk of serious injury, read the entire manual before you assemble or operate the Everlast
Ultra Exercise Bike. In particular, note the following safety precautions:
Important – Please read fully before assembly or use
Warning: Before beginning any exercise program, consult your Doctor. This is especially
important for persons over the age of 35 or persons with pre-existing health problems.
You MUST read all instructions before using any fitness equipment. The manufacturer and its
associates and partners assumes no responsibility for personal injury or property damage sustained by
or through the use of this product.
Physician Warning: Not all exercise equipment and training programs are suitable for
everybody.
It is recommended that you consult your physician before using this equipment or beginning this
or any other training program.
Assembly
Using
• Check you have all the components and tools that
are listed, bearing in mind that, for ease of assembly,
some components are pre-assembled.
• Small children and animals should be kept away
from the assembly area as small parts could pose as
potential chocking hazard.
• Make sure you have enough space to layout the
parts before starting.
• Assemble the item as close to its final position (in
the same room) as possible.
• Position the equipment on a clear, level surface.
• Dispose of all packaging carefully and responsibly.
• One person should utilize the treadmill any given
time.
• Keep hands away from all moving parts.
• Always wear appropriate workout clothing when
exercising. Do not wear loose or baggy clothing, as
it may get caught in the equipment. Wear athletic
shoes to protect your feet while exercising.
• Do not place any sharp objects around the
equipment.
• Disabled persons should not use the equipment
without a qualified person or doctor in attendance.
• Maximum user weight for this product is 120kgs.
• This product conforms to: (BS EN957) - PARTS 1 and 5
class (H) - Home Use - Class (C).
• This equipment has passed the required IEC
passed the required IEC and South African LOA
• It is the responsibility of the owner to ensure that all
users of this product are properly informed as to how
to use it safely.
• This product is intended for domestic use only. Do
not use in any commercial, rental, or institutional
setting.
• Before using the equipment to exercise, always do
stretching exercises in order to warm up properly.
• If the user experiences dizziness, nausea, chest
pain, or other abnormal symptoms stop the workout
and seek immediate medical attention.
Note: Cut out this page to help fixing identification during assembly.
0 5 10 15 20 25 30 35 40 45 50 55 60 65 70 75 80 85 90 95 100 110 115 120 125 130 135 140 145 150 155 160 165 170
105
Ruler - Use this ruler to help correctly identify the hardware
4
Components - Parts
Note: Some ofthe smaller components may be pre-fitted to larger components. Please check carefully
before contacting us regarding any missing components.
Please check you have all the parts listed below
If you have damaged or missing
components, call the
Service Centre : 087 997 0865
No.1
Main Frame x 1
No.63
Seat Post x 1
No.16
Handlebar Post x1
No.9
Computer x 1
No.2
Handlebar x1
No.57
Front Stabilizer x1
No.53
Rear Stabilizer x1
No.61
Seat Sliding Tube x 1
No.38
Right Padel x1
No.37
Left Padel x 1
No.58
Seat Post Cover x 1
No.19
Handlebar Post Cover x1
No.
Seat x 1
59

Note: Cut out this page to help fixing identification during assembly.
0 5 10 15 20 25 30 35 40 45 50 55 60 65 70 75 80 85 90 95 100 110 115 120 125 130 135 140 145 150 155 160 165 170
105
Ruler - Use this ruler to help correctly identify the hardware
5
Components - Fixings
Note: Some ofthe fixings are pre-fitted to the larger components. Please check carefully before contacting
us regarding any missing fixings.
Please check you have all the fixings listed below
17
ø20xø8 Big Curve Washer x4pcs
54
M8x70mm Bolt x4pcs
55
M8 Cap Nut x4pcs
64
ø10xø20x2.0T Washer x 1pc
65
M10 Seat Adjustment Knob x1pc
20
M16x1.5 Seat Height Adjustment Knob
x 1pc
68
A/C Adapter x 1pc
Tool Request
6mm Allen Wrench x 1pc Wrench/Screwdriver x 1pc Multi Hex Tool x1pc

34
17
55
53
57
54
54
17
11
55
6
Assembly Instructions
Step 1
a:AttachtheFrontStabilizer(57)
onto the front curve plate of the
MainFrame(34)with2setsxCap
Nuts(55),Bolts(54)andBigCurve
Washers(17).
UNPACK THE CARTON AND
PLACE ALL PARTS ON THE
FLOOR. CAREFULLY
REMOVE ALL PACKING
MATERIAL AND CHECK EACH
PART WITH THE MANUAL FIRST.
REMEMBER SOME PARTS
ARE PRE-FITTED TO LARGER
COMPONENTS.
IMPORTANT
ASSEMBLE WITH ALL NUTS
AND BOLTS LOOSE AT
FIRST, ONLY TIGHTEN AFTER
COMPLETING ALL ASSEMBLY
STEPS.
b:AttachtheRearStabilizer(53)
onto the rear curve plate of the
MainFrame(34)with2setsxCap
Nuts(55),Bolts(54)andBigCurve
Washers(17).
a.
b.

38
34
11
37
7
Step 2
TheLeftPedal(37)andRight
Pedal(38)whicharemarked“L”
and“R”.Connectthemtotheir
appropriateCrankArm(35).
TheRightPedal(38)isontheright
hand side of the cycle as you sit on
it.
Assembly Instructions
Notethattherightpedalshouldbe
threaded on clockwise and the left
pedal on counter-clockwise.

59
61
42
62
63
64
65
58
20
11
34
8
Assembly Instructions
Step 3
Remove 3 x Nylon Nuts (62) and
Flat Washers (42) from underside
of Seat (59).
Remove a Big Flat Washer (64) and
Round Knob (65) from underneath
of the Seat Sliding Tube (61).
a: Attach Seat (59) to triangle plate
of Seat Sliding Tube (61) using 3 x
Nylon Nuts (62) and Flat Washers
(42).
b: Slide the Seat Post Cover (58)
onto the tube of the Main Frame
(34). Insert Seat Post (63) into tube
of Main Frame (34), then screw
Seat Post Adjust Knob (20) into the
Main Frame (34) ensuring it locates
into the desired saddle height
adjustment hole, then tighten to
secure.
Important note : Do not extend
Seat Post (63) beyond the Max
mark line. b.
a.

9
Assembly Instructions
Step 4
Remove4xBolts(7)andBig
CurveWashers(17)fromthetube
oftheMainFrame(34).
a: SlidetheHandlebarPostCover
(19)upfromthebottomendofthe
HandlebarPost(16).
b: ConnecttheSensorWireII(11)
fromtheMainFrame(34)tothe
Sensor Wire I(10)fromthe
HandlebarPost(16).
InserttheHandlebarPost(16)into
thetubeoftheMainFrame(34)
andsecurewith4xBolts(7)and
BigCurveWashers(17)thatwere
removed.
Be careful not to pinch the
cables inside the Handlebar Post
(16) when turning the Bolts (7).
SlidetheHandlebarPostCover
(19)downontothetubeoftheMain
Frame(34)

10
Assembly Instructions
Step 5
Remove 2set x Bolts (7) and Curve
Washers (6) from the Handlebar
Post (16).
a: InserttheHandPulseSensor
Wires(3)intotheholeonthe
HandlebarPost(16)andthenpull
them out from the top end of the
HandlebarPost(16).
AttachtheHandlebar(2)ontothe
HandlebarPost(16)with2setx
Bolts(7)andCurveWashers(6)
that were removed.
Remove 4 x Bolts (8) from the
Computer (9).
b: ConnecttheHandPulseSensor
Wires(3)andSensorWireI(10)
to the wires that come from the
Computer(9).Thenattachthe
Computer(9)ontothetopendof
theHandlebarPost(16)with4x
Bolts(8)thatwereremoved.

11
Assembly Instructions
Step 6
Plug one end of the AC Adapter
(68)intothepowerjackofthe
PowerSupplyWire(13)onthe
back of the Left Shroud.
Before plugging in, make sure to
checkcarefullythespecifications
on the Adapter.
Plug the other end of the AC
Adapter(68)intotheelectricalwall
outlet.

12
Computer Function
Key Functions
START/STOP : 1. Start & Pauses workouts.
2. Start body fat measurement and quit the body fat program.
3.Operatesonlywheninstopmode.Holdingkey3seconds
willresetallfunctionvaluetobezero.
DOWN :Decreasevalueofselectedworkoutparameter:
TIME,DISTANCE,etc.Duringtheworkout,itwilldecreasethe
resistance lode.
UP :Increasesvalueofselectedworkoutparameter.Duringthe
workout,it will increase the resistance load.
ENTER : To input desired value or work out mode.
TEST(RECOVERY) :PresstoenterintoRecoveryfunctionwhencomputerhastheheartratevalue.Recoveryis
Fitness Level 1-6 after 1 minute.F1 is best,and F6 is the worst.
MODE :PresstoswitchdisplayformRPMtoSPEED,ODOtoDIST,WATTtoCaloriesduringworkout.
Workout Selection
Afterpower-upusingUPorDOWNkeystoselectthenpressingENTERtoenterthedesiredmode.
Setting Workout Parameters
After selecting your desired program, you may pre-set several workout parameters for desired results.
WORKOUT PARAMETERS:
TIME / DISTANCE / CALORIES / AGE
Note:Some parameters are not adjustable in certain programs.
Onceaprogramhasbeenselected,pressingENTER,willmake“Time”parameterash.UsingUPORDOWN
KEYyoumayselectdesiredtimevalue.PressENTERKEYtoinputvalue.
Flashingpromptwillmovetothenextparameter.ContinueuseofUPORDOWNKEY.PressSTART/STOPto
start workout.
More About Workout Parameters
Field SettingRange Defaultvalue Increment/Decrement Description
Time 0:00~99:00 00:00 ±1:00 1.When display is 0:00,Time will count up.
2.WhenTimeis1:00~99:00,ItwillcountDownto0.
Distance 0.00~999.0 0.00 ±1.0 1.Whendisplayis0.0,Distancewillcountup.
2.Whendistanceis1.0~999.0,itwillcountDownto0.
Calories 0~9950 0 ±50 1.When display is 0,Calories will count up.
2.WhenCaloriesis50~9950,itwillcountdownto0.
Age 10~99 30 ±1
TargeHRwillbebasedonAge.WhenHeartRate
exceedsTargetH.R,thenumberofHeartRatewillash
in programs.

13
Computer Function
Manual (P1)
Selecting“Manual”usingUPorDOWNKEYthenpressingENTERKEY.1stparameter“Time”willashsovaluecan
beadjustedusingUPorDOWNKEY.PressENTERKEYtosavevalue&movetonextparametertobeadjusted.
Continuethroughalldesiredparameters,pressingSTART/STOPtostartworkout.
Note: One of workout parameters counts down to be zero,it will have bi sounds and stop the workout automatically.
Press START KEY to continue the workout to reach the unnished workout parameter.
Pre-Programs (P2-P7)
There are 6 program proles ready for use.All program proles have 16 level of resistance.
Setting Parameters for Pre-programs
Selectingoneofpre-programsusingUPorDOWNKEYthenpressingENTERKEY.1stparameter“Time”will
ashsovaluecanbeadjustedusingUPorDOWNKEY.PressENTERKEYtosavevalue&movetonextparameter
to be adjusted.
Continuethroughalldesiredparameters,pressingSTART/STOPtostartworkout.
Note: One of workout parameters counts down to be zero, it will have bi sounds and stop the workout automatically.
Press START KEY to continue the workout to reach the unnished workout parameter.
BODY FAT PROGRAM (P8)
Setting Data for Body Fat
Selecting“Body Fat Program”usingUPorDOWNKEYthenpressingENTER.
“Male”willashsoGendercanbeadjustedusingUPorDOWNKEY,pressENTERtosavegender&movetonext
data.
“175”ofHeightwillashsoHeightcanbeadjustedtouseUPorDOWNKEY,pressENTERKEYsavevalue&move
to next data.
“75”ofWeightwillashsoWeightcanbeadjustedtouseUPorDOWNKEY,pressENTERKEYtosavevalue&move
to next data.
“30”ofagewillashsoAgecanbeadjustedusingUPorDOWNKEY,pressENTERtosavevalue.
Press START/STOP to start measurement, please also grasp hand pulse grips.
After15secondsthedisplaywillshowoutBodyFat%,BMR,BMI&BODYTYPE.
NOTE: Body Types: There are 5 body types divided according to the FAT% calculated.
BMR: Basal Metabolism Ratio.
BMI: Body Mass Index.
PressSTART/STOPKEYtoreturnthemainDisplay.
ProgramOperation

14
Computer Function
TARGET HEART RATE Program (P9)
Setting Parameter for TARGET H.R.
Selecting“TARGET H.R.”usingUPORDOWNKEYthenpressingENTERKEY.1stparameter“Time”willashso
valuecanbeadjustedusingUPORDOWNKEY.PressENTERKEYtosavevalue&movetonextparameterto be
adjusted.
Continuethroughalldesiredparameters,pressingSTART/STOPtostartworkout.
Note:If Pulse is above or below (±5) the set TARGET H.R., computer will adjust the resistance load automatically. It will
check every 20 seconds approx. I resistance load will increase or decrease. (Note: Each resistance load represents 2
level of loading)
Oneofworkoutparameterscountsdowntobezero,itwillhavebisoundsandstoptheworkoutautomatically.Press
START/STOPtocontinuetheworkouttoreachunfinishedworkoutparameter.
HEART RATE CONTROL Program (P10-P12)
There are 3 selection for target pulse:
P10-60% TARGET H.R. = 60% of (220-AGE)
P11-75% TARGET H.R. = 75% of (220-AGE)
P12-85% TARGET H.R. = 85% of (220-AGE)
Setting Parameters for HEART RATE CONTROL
Selecting“One of Heart Rate Control Program”usingUPorDOWNKEYthenpressingENTERKEY.1st parameter
“Time”willashsovaluecanbeadjustedusingUPorDOWNKEY.PressENTERKEYtosavevalue&movetonext
parameter to be adjusted.
Continuethroughalldesiredparameters,pressingSTART/STOPtostartworkout.
Note: If Pulse is above or below (±5) the set TARGET H.R., computer will adjust the resistance load automatically.It
will check Every 20 seconds approx. I resistance load will increase or decrease (Note: each resistance load represents
2 level of loading) One of workout parameters counts down to be zero, it will have bi sounds and stop the workout
automatically. Press START/STOP KEY to continue the workout to reach unnished workout parameter.
User Program (P13)
User program allows user to set their own program that can be used immediately.
Setting Parameters for User Program
SelectinguserueingUPorDOWNKEYthenpressingENTERKEY.1stparameter“Time”willashsovaluecanbe
adjustedusingUPorDOWNKEY.PressENTERKEYtosavevalue&movetonextparametertobeadjusted.
Continue through all desired parameters.
Afterfinishedsetupdesiredparameter,thelevel1willash,useUPorDOWNKEYtoajustthenpressing
ENTERuntilfinished.(Therearetotally10times),PressSTART/STOPtostartworkout.
Note: One of workout parameters counts down to be zero, it will have bi sounds and stop the workout automatically.
PressSTART/STOPKEYtocontinuetheworkouttoreachunfinishedworkoutparameter.
ProgramOperation

Computer Function
15
USING THE WIRELESS CHEST BELT HEART RATE TRANSMITTER
(OPTIONAL ACCESSORY):
There is a heart rate receiver inside the computer that can receive heart rate signals when
you wear on the wireless chest belt heart rate transmitter. The split window of PULSE will
display your current heart rate figures in a few seconds after you wear on the wireless chest
belt heart rate transmitter.
For proper operation, the chest belt should be worn with the wireless chest belt heart rate
transmitter strapped across the front of your body just above the chest line and must be tight
and properly placed to receive consistent readout. If the chest strap is too loose or
positioned improperly, you may receive inconsistent heart rate readout. The wireless chest
belt heart rate transmitter needs a little body heat and moisture in order to work properly.
Moisture on the rubber electrodes (2 black areas on the reverse side of the belt and either
side of transmitter) is required for proper operation. It is recommended that you wear the
wireless chest belt heart rate transmitter against your bare skin to ensure the function and
accuracy. However if you wish to wear the transmitter over a shirt, moisten the shirt well
under the electrodes.
Verify that the distance between the wireless chest belt heart rate transmitter and the heart
rate receiver inside the computer is not beyond the recommended range of about 80
centimeters.
WARNING: Signal interference in the environment can be due to electromagnetic
disturbances. These may occur near televisions, computers, or cellular phones. Under
interference, the heart rate readings may become unstable and inaccurate.
Wireless Chest Belt
Heart Rate Transmitter
USING THE WIRELESS CHEST BELT HEART RATE TRANSMITTER

Exercising Information
Howyoubeginyourexerciseprogramdependsonyourphysicalcondition.Ifyouhavebeeninactiveforseveral
years, or are severely overweight, you must start slowly and increase your time on the equipment; a few minutes
per workout.
Initially,youmaybeabletoexerciseonlyforafewminutesinyourtargetzone,however,youraerobicfitnesswill
improveoverthenextsixtoeightweeks.Don’tbediscouragedifittakeslonger.It’simportanttoworkatyourown
pace.Ultimately,you’llbeabletoexercisecontinuouslyfor30minutes.Thebetteryouraerobicfitness,theharder
youwillhavetoworktostayinyourtargetzone.
Please remember these essentials:
• Haveyourdoctorreviewyourtraininganddietprogramstoadviseyouofaworkoutroutineyoushouldadopt.
• Beginyourtrainingprogramslowlywithrealisticgoalsthathavebeensetbyyouandyourdoctor.
• Monitoryourpulsefrequently.Establishyourtargetheartratebasedonyourageandcondition.
• Setupyourequipmentonaatevensurfaceatleast3feetfromwallsandfurniture.
Exercise intensity
Tomaximizethebenefitsofexercising,itisimportanttoexercisewiththeproperintensity.Theproperintensity
level can be found by using your heart rate as a guide. For effective aerobic exercise, your heart rate should be
maintainedatalevelbetween65%and85%ofyourmaximumheartrateasyouexercise.Thisisknownasyour
targetzone.Youcanfindyourtargetzoneinthetablebelow.
Duringthefirstfewmonthsofyourexerciseprogram,keepyourheartratenearthelowendofyourtargetzone
as you exercise. After a few months, your heart rate can be increased gradually until it is near the middle of your
targetzoneasyouexercise.
To measure your heart rate, stop exercising but continue moving your legs
orwalkingaroundandplacetwofingersonyourwrist.Takeasix-second
heartbeatcountandmultiplytheresultsby10tofindyourheartrate.For
example, if your six-second heartbeat count is 14, your head rate is 140
beatsperminute.(Asix-secondscountisusedbecauseyourheartratewill
drop rapidly when you stop exercising.) Adjust the intensity of your exercise
until your heart rate is at the proper level.
Before starting to exercise
80
100
120
140
160
180
200
Beats per minute (bpm)
25
Age
30 35 40 45 50 55 60 70
Cardiovascular
performance
Intermediate aerobic
Effective fat burning
Up to 55%
55% to 65%
65% to 85%
85% to Max
16

Exercising Information
Muscle chart
Weight Training
Along with aerobic exercising which helps get rid of and keep off the excess fat that our bodies can store, weight
training is an essential part of the exercise routine process. Weight training helps tone, build and strengthen
muscle. If you are working above your target zone, you may want to do a lesser amount of reps. As always,
consult your doctor before beginning any exercise program.
Targeted Muscle Groups
The exercise routine that is performed on the Equipment will develop the upper and lower body muscle groups.
These muscle groups are highlighted on the muscle chart below.
A: Trapezius
B: Anterior
C: Pectoralis Major
D: Serratus Anterior
E: Biceps
F: Abdominal
G: Sartorius
H: Quadriceps
I: Tibialis
J: Trapezius
K: Posterior
L: Triceps
M: Latissimus Dorsi
N: Gluteals
O: Hamstrings
P: Gastrocnemius
A
B
C
E
F
G
H
I
J
K
L
M
N
O
P
D
Front Back
Aerobic Exercise
Aerobic exercise improves the condition of your lungs and heart, two of your body’s most important functions.
Aerobic exercise fitness is promoted by any activity that uses your large muscles (arms, legs, or buttocks). During
an aerobic workout your heart beats quickly and you breathe deeply. An aerobic exercise should be a part of your
entire exercise routine.
17

Exercising Information
Warming up and Cooling down exercises
Each workout should include the following three parts:
1. A warm-up, consisting of 5 to 10 minutes of stretching and light exercise. A proper warm-up increases your body
temperature, heart rate, and circulation in preparation for exercise.
2.Trainingzoneexercise,consistingof20to30minutesofexercisingwithyourheartrateinyourtrainingzone.
(Note:Duringthefirstfewweeksofyourexerciseprogram,donotkeepyourheartrateinyourtrainingzonefor
longer than 20 minutes.)
3.Acool-down,with5to10minutesofstretching.Thiswillincreasetheexibilityofyourmusclesandwillhelpto
prevent post-exercise problems.
Exercise Frequency
To maintain or improve your condition, plan three workouts each week, with at least one day of rest between
workouts.Afterafewmonthsofregularexercise,youmaycompleteuptofiveworkoutseachweek,ifdesired.
Remember,thekeytosuccessismakeexercisearegularandenjoyablepartofyoureverydaylife.
Suggested Stretches
For a correct warm up, see the following basic stretching exercises. Move slowly as you stretch, never bounce.
Toe touch stretch
Hamstringstretch
Stand with your knees bent slightly and slowly
bend forward from your hips. Allow your back and
shoulders to relax as you reach down toward your
toes as far as possible.
Holdfor15counts,thenrelax.
Repeat3times.
Stretches:Hamstrings,backofkneesandback.
Sit with one leg extended. Bring the sole of the
opposite foot toward you and rest it against the inner
thighofyourextendedleg.Reachtowardyourtoes
as far as possible.
Holdfor15counts,thenrelax.
Repeat3timesforeachleg.
Stretches:Hamstrings,lowerbackandgroin.
18

Exercising Information
Calf/achilles stretch
Quadriceps stretch
Inner thigh stretch
With one leg in front of the other, reach forward and
placeyourhandsagainstawall.Keepyourbackleg
straightandyourbackfootatontheoor.Bendyour
front leg, lean forward and move your hips toward the
wall.
Holdfor15counts,thenrelax.
Repeat3timesforeachleg.Tocausefurtherstretching
of the achilles tendons, bend your back leg as well.
Stretches
: Calves, achilles tendons and ankles.
With one hand against the wall for balance, reach back
andgrasponefootwithyourotherhand.Keepingyour
bentkneepointingdirectlydownwardtowardstheoor,
gentle pull your heel towards your buttock until you feel
a gentle stretch in the target area.
Holdfor15counts,thenrelax.
Repeat3timesforeachleg.
Stretches
: Quadriceps and hip muscles.
Sit with the soles of your feet together and your knees
outward. Pull your feet toward your groin area as far as
possible.
Holdfor15counts,thenrelax.
Repeat3times.
Stretches
: Quadriceps and hip muscles.
19

Care and Maintenance
Using the Equipment
1. Examine the equipment
periodically in order to detect any
damage or wear which may have
been produced.
2. Lubricate moving parts with
light oil periodically to prevent
premature wear.
3. Inspect and tighten all parts
before using the equipment,
replace any defective parts
immediately and do not use the
equipment again until it is in
perfect working order.
4. The equipment can be cleaned
using a damp cloth and mild
non-abrasive detergent. Do not
use solvents.
5. Do not attempt to repair this
equipment yourself. Should you
haveanydifficultywithassembly,
operation or use of your exercise
product or if you think that you
may have parts missing, contact
the manufacturer, their approved
service agent or the
Service Centre : 087 997 0865
Guarantee:
For guarantee purposes, please
retain your purchase receipt.
20
This manual suits for next models
1
Table of contents
Other Everlast Exercise Bike manuals

Everlast
Everlast EPIC SPINNER User manual

Everlast
Everlast EV320 User manual

Everlast
Everlast 16516632-1 User manual

Everlast
Everlast 16516696 User manual

Everlast
Everlast VECTOR BIKE User manual

Everlast
Everlast 16516896 User manual

Everlast
Everlast 16205577260 User manual

Everlast
Everlast FUSION EX BIKE User manual

Everlast
Everlast RYDER EXERCISE BIKE User manual