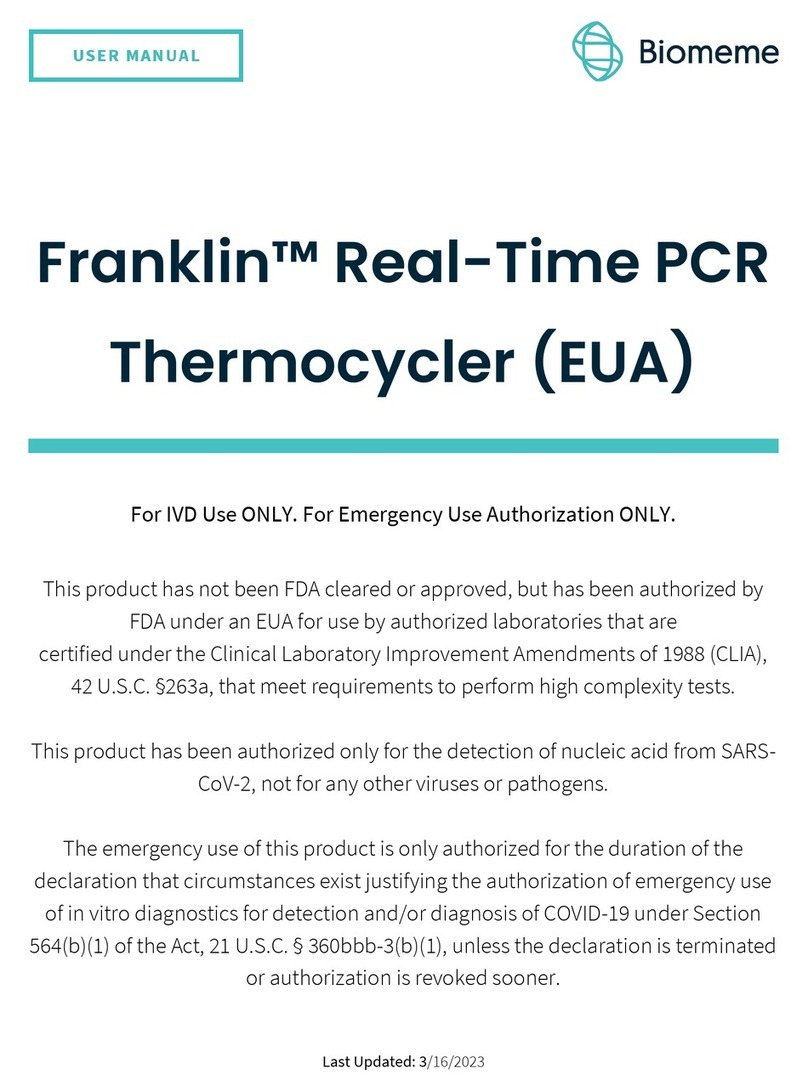
Exigo H400 User manual

Exigo H400 User Manual
Veterinary Hematology Analyzer

Page ii

© Boule Medical AB, March 2018. Article no. 1504496 Page iii
Table of Contents
TABLE OF CONTENTS
Section 1. Introduction 5
Exigo H400 System ............................................... 5
Contact Details................................................... 5
Analyzer Overview ............................................... 6
Consumable Overview ............................................. 8
Reagent Consumption Specications .................................. 9
Regulatory Requirements ........................................... 9
Specications .................................................... 9
Performance .....................................................11
Parameter Ranges.................................................11
Safety Instructions ............................................... 12
Warranty Limitations ............................................. 15
Section 2. Installation and Reagent Setup 16
Unpack and Check Components ..................................... 16
Analyzer Placement and Environment .................................17
Installation Checklist and Menu ......................................17
Section 3. Operation (Sample Analysis) 23
Preparations before Analysis ....................................... 23
Startup Sequence ................................................ 23
Background Count ............................................... 24
Analyzing Sample (Open Tube) ..................................... 25
Analyzing Sample (Micro Pipette Adapter, MPA) ....................... 27
Results ........................................................ 29
Section 4. Sample Collection 33
Venous Blood Sample Collection .................................... 33
Handling of venous blood samples ................................... 33
Handling of capillary blood samples. . . . . . . . . . . . . . . . . . . . . . . . . . . . . . . . . . 33
Section 5. Quality Control 36
Analyzing Control Sample ......................................... 36
Quality Assurance Functions ....................................... 39
Section 6. Calibration 43
Calibration ..................................................... 43
Section 7. Menu Structure and Advanced Setup 49
Menu Structure ................................................. 49
Advanced Parameter Setup......................................... 53

Page iv © Boule Medical AB, March 2018. Article no. 1504496
Table of Contents
Section 8. Technology 73
Measuring Principles ............................................. 73
Counting Time RBC and WBC ..................................... 73
WBC Dierentials ............................................... 74
Photometric Method – HGB Hemoglobin .............................. 74
Measurement of Eosinophils ....................................... 75
Section 9. Troubleshooting and System Messages 76
Troubleshooting ................................................. 76
System Information Messages ...................................... 78
Sample Pathology Messages and Flag Indicators ........................ 79
Section 10. Analyzer Care and Maintenance 85
Cleaning....................................................... 85
Transport (Short-term and Long-term) ................................ 86
Maintenance/Service ............................................. 89
Disposal Information ............................................. 89
Appendix 91
Index 94

© Boule Medical AB, March 2018. Article no. 1504496 Page 5
1. Introduction
Exigo H400 System
SECTION 1. INTRODUCTION
This user manual contains instructions for the operation of the Exigo H400 system for the factory
setting animal proles: Dog, Cat, Horse, Rabbit, Goat, Cattle, Ferret, Sheep, Pig, Mouse, Rat and
New World Camel. Dog, Cat and Horse proles allow for a 4-part WBC dierential. See Section 7
for further information regarding addition of new prole or activating/deactivating a prole.
Please read this guide for the correct safety, installation, and operation instructions before using
the analyzer.
Exigo H400 System
Product Code Product Name
1420001 Exigo H400
Current Software Version:
Software version 2.2
Contact Details
Manufacturer:
Boule Medical AB
Domnarvsgatan 4
SE-163 53 Spånga, Sweden
Websites:
www.boule.com
www.exigo-vet.com
Distributor and Technical Support:
Please contact Boule for information.

Page 6 © Boule Medical AB, March 2018. Article no. 1504496
1. Introduction
Analyzer Overview
Analyzer Overview
3
2
1
7
6
4
5
Figure 1: Analyzer front view
Part Description/Function
1Display TFT-LCD Touch screen which displays patient and QC data, allows
operator to enter setup and testing instructions, and prompts operator on
next step. See section 7 for menu structure.
2 Blood tube mixer Uniformly mixes samples before analysis.
3Whole blood sample probe Aspirates whole blood for analysis (Open Tube).
4 Start Plate, Open Tube Plate pressed to begin Open Tube aspiration.
5Wash cup Reservoir where uid is removed after sample probe is washed.
6MPA Micro Pipette Adapter enables analysis using 20 µL of blood.
7USB port Connects analyzer to USB devices.

© Boule Medical AB, March 2018. Article no. 1504496 Page 7
1. Introduction
Analyzer Overview
5
67
1
3
4
2
Figure 2: Analyzer cable and interface connections
Part Description/Function
1 USB host ports Connects analyzer to USB devices.
2 USB device port Connects analyzer to USB host.
3Electronic sensors Connects Reagent level sensors to analyzer.
4Power supply port Connects Main power outlet to analyzer.
5Power switch Switches power On and O.
6 LAN port Connects analyzer directly to a computer.
7 Waste tube connection Connects Waste tube to analyzer.
8 Reagent tube connections Connects Lyse (yellow), Cleaner (blue), EOS regent (green) and Diluent
(red) to analyzer
Figure 3: Barcode reader/RFID reader
Part Description/Function
1Barcode Reader Enables operator to quickly enter patient, sample and control identications.
2RFID Reader Enables operator to quickly enter reagent RFID tags
8

Page 8 © Boule Medical AB, March 2018. Article no. 1504496
1. Introduction
Consumable Overview
Consumable Overview
Reagents
31
Figure 4: Reagents
Part Description/Function
1Diluent Isotonic diluting solution.
2Lyse Lytic solution.
3Cleaner Enzymatic Cleaner
4EOS EOS Reagent
QC Material
Figure 5: QC Material
Part Description/Function
1Boule Control QC material to verify analyzer operation.
2Boule Calibrator QC material to calibrate analyzer.
2
4

© Boule Medical AB, March 2018. Article no. 1504496 Page 9
1. Introduction
Reagent Consumption Specications
Reagent Consumption Specications
Diluent Consumption: ≤ 25 mL per analysis cycle (with both EOS and non-EOS incubaton
enabled). ≤ 55 mL per analysis cycle with Exigo EOS incubation enabled.
Lyse Consumption: ≤ 5.2 mL per analysis cycle.
EOS Consumption: ≤ 4.0 mL per analysis cycle.
Cleaner Consumption: ≤ 35 mL during standby and power o cycles.
For additional information regarding the consumption of cleaning solutions please refer to the Boule
Cleaning Kit instruction. (Supplied with the Boule Cleaning Kit).
Regulatory Requirements
The Exigo H400 system fullls the following International standards and regulations:
SS-EN ISO 18113-3:2011
EN 61326-1 (2013) (EMC 2014/30/EU)
2012/19/EU WEEE
IEC 61010-1:2001
UL 61010-1:2004 and CAN/CSA-C22.2 No. 61010-1:2004
IEC 61010-2-081:2001 + A1:2003
IEC 61010-2-101:2002
2011/65/EU RoHS-directive
Specications
Physical
Size (Instrument version without sampler) HWD ≤ 395 × 295 × 475 mm
Weight (Instrument) ≤ 18 kg
Display Depth: True color (24-bit);
Resolution: 800 × 480 pixels
Keyboard Virtual incorporated keyboard
Communication interface ports 1 USB device/4 USB host/1 LAN port
Barcode reader input Yes (via USB)
RFID reader input Yes (via USB)
Operating Environment
Te mpe r at u re 18–32 °C
Humidity 10%–90%

Page 10 © Boule Medical AB, March 2018. Article no. 1504496
1. Introduction
Specications
Electrical
Mai n Volt age 100–240 V
Frequency 50–60 Hz
Noise level ≤ 67 dB(A)
Maximum power consumptions
Running: average 25W, peak 30W
Ready: 15W
Standby: 10W
Measuring principles
MCV, MPV, RBC, WBC, and PLT Impedance
HGB Photometric
Floating RBC/PLT discriminator Yes (position printed)
Programmable WBC discriminator Yes
Mathematical 3-part di. WBC Yes
EOS Impedance
Parameters Reported 19 parameters:
WBC, LYM, LYM%, MON, MON%, GRA/NEU*, GRA/
NEU%*, EOS, EOS%, HGB, MCH, MCHC, RBC, MC V,
HCT, RDW%, RDW, PLT, MPV
*If EOS parameter is activated, NEU and EOS will be
displayed instead of GRA.
Performance
Sample volume (Open Tube) ≤ 125 µL
Sample volume (Micro Pipette Adapter) 20 µL
Number of Samples per hour (Open Tube, Whole Blood) ≥ 50 samples (3-part)
Analysis time (Open Tube, Whole Blood) ~ 1 minute
Analysis time including EOS (Open Tube, Whole Blood) ~ 4 minutes
Built-in test / adjustment programs Yes
QC capabilities Mean, SD, CV, Levey-Jennings
System Information Indicators on parameter
abnormalities
Yes
Memory capacity
≤ 50,000 samples
Reagent Shelf Life
36 months, 24 months for EOS lyse

© Boule Medical AB, March 2018. Article no. 1504496 Page 11
1. Introduction
Performance
Performance
Parameter Correlation (r) Carry-over (%) Reproducibility (CV%)
RBC 1.0 0 ≤ 2 0.8
MCV 0.94 N/A 0.3
HGB 1.00 ≤ 1 0.9
PLT 0.98 ≤ 2 4.6
WBC 0.99 ≤ 1 3.5
Correlation
Correlation is performed using a reference analyzer compared with the Exigo H400 system run in
open tube mode with Dog prole.
Carry-over
Based on CLSI Standard H26-A2, using dog venous whole blood in open tube mode.
Reproducibility
Measured as an average of 10 measurements each on 9 dierent dog venous blood in K2-EDTA
collected normal samples, on 3 instruments, in open tube mode.
Parameter Ranges
Parameter Displayed Range
RBC 0.00–24.99 × 10¹²/L
MCV 15.0–250.0 fL
HGB 0.0–35.0 g/dL
PLT 0–5000 × 109/L
WBC 0.00–150.0 × 10⁹/L
Displayed Range
Total range in which results are reported, also outside of linearity range.

Page 12 © Boule Medical AB, March 2018. Article no. 1504496
1. Introduction
Safety Instructions
Safety Instructions
Boule incorporates safety features within the analyzer in order to protect the operator from injury,
the analyzer from damage and the test results from inaccuracies.
Intended Use
The Exigo H400 system is an automated hematology analyzer for in vitro diagnostic use under
laboratory conditions. The Exigo H400 is used for enumeration of white blood cells (WBC);
the absolute number and percentage concentration for granulocytes/neutrophils (GRA/NEU),
lymphocytes (LYM), monocytes (MON); eosinophils (EOS); red blood cells (RBC); hemoglobin
(HGB); mean cell volume of red cells (MCV); hematocrit (HCT); mean cell hemoglobin (MCH);
mean cell hemoglobin concentration (MCHC); red cell distribution relative and absolute widths
(RDW%, RDWa); platelets (PLT); and mean platelet volume (MPV) in K2EDTA and K3EDTA anti-
coagulated veterinary blood samples.
Operator Requirements
Operator must have basic laboratory skills and be aware of good laboratory practice.
Read user manual prior to use.
Analyzer Restrictions
Do not use the analyzer outdoors.
Do not modify the analyzer.
Do not remove the cover. (Authorized personnel only)
Do not use the analyzer for other purposes than described in this manual or by Boule technical
bulletin covering an application.
Do not spill liquids on the analyzer in such a way that it can leak through the analyzer casing.
Do not drop or place objects on the analyzer.
Do not use this device in close proximity to sources of strong electromagnetic radiation
(e.g. unshielded intentional RF sources), as these can interfere with the proper operation.
Do not use power supply other than supplied by Boule.
Limitations
Boule products do NOT make diagnoses on patients. Boule intends its diagnostic products
(systems, software and hardware) to be used to collect data reecting the patient’s hematological
status. This data, in conjunction with other diagnostic information and the evaluation of the
patient’s condition, can be used by a trained clinician to establish a patient’s diagnosis and to
dene clinical treatment.
Reagent Precautions
If a reagent comes in contact with eyes, rinse with running water for several minutes. If
symptoms occur seek medical attention.
If the reagent comes into contact with skin, wash aected area with water.
If swallowed, rinse out mouth. If persistent symptoms occur seek medical attention.

© Boule Medical AB, March 2018. Article no. 1504496 Page 13
1. Introduction
Safety Instructions
SDS are available for all reagents.
Biohazards
As there are no assurances of the absence of HIV, Hepatitis B or C viruses or other infectious
agents in veterinary blood samples, controls, calibrators and waste these products should be
handled as potentially biohazardous.
Handle any exposure according to established laboratory protocol regulations.
The instructions for analyzer decontamination and disposal can be found on the Exigo home
page, www.exigo-vet.com under Support.
Emergency Procedure
If there are any obvious signs of malfunction such as smoke or liquid leaking out of the analyzer
proceed as follows:
Disconnect the main power supply immediately by pulling out the power cord from the
main supply outlet and contact your authorized distributor.
Figure 6: Signs on Equipment

Page 14 © Boule Medical AB, March 2018. Article no. 1504496
1. Introduction
Safety Instructions
Signs on Equipment and Consumables
Signs placed on the instrument dene areas that need special attention or areas that contain danger.
See gures 6 and 7.
Batch code Serial number Catalogue number Manufacturer
Authorized Representative
in the European
Community
Biological Risk Fragile, handle with care Use by
Radio-frequency
identication
Lower limit of
temperature
Upper limit of temperature Temperature limitation
CONTROL N 16
CAL
Consult instructions
for use
Control Normal control,
16 parameters
Calibrator
CONT
Content Recycling WEEE Warning or Caution
Figure 7: IVD Symbol Table

© Boule Medical AB, March 2018. Article no. 1504496 Page 15
1. Introduction
Warranty Limitations
Warranty Limitations
Service must be performed by Boule authorized service personnel.
Use only Boule authorized reagents, controls, and calibrators. If these products are substituted it
may void the warranty.
Operators and laboratory supervisors are responsible that Boule products are operated and
maintained according to the procedures described in manuals and control inserts.
Each Exigo H400 system is tested using recommended reagents, controls, calibrators and
cleaners. All performance claims are generated as part of this complete system.

Page 16 © Boule Medical AB, March 2018. Article no. 1504496
2. Installation and Reagent Setup
Unpack and Check Components
SECTION 2. INSTALLATION AND
REAGENT SETUP
Unpack and Check Components
Reagent bottle tray Service Part
User Manual Quick Reference Guide
AC power adapter Power cord
RFID reader MPA kit
Reagent tube assemblies x 4 Waste tube
Figure 8: Analyzer packaging components
Please open the analyzer box and check all the components against those in gure 8.
Should any of these components be missing or if packaging is damaged please contact your
local distributor.
The analyzer is packed in a specically designed protective box, please save this original
packaging.

© Boule Medical AB, March 2018. Article no. 1504496 Page 17
2. Installation and Reagent Setup
Analyzer Placement and Environment
Analyzer Placement and Environment
The analyzer should be placed in a laboratory environment according to the guidelines below:
Place the analyzer on a clean horizontal surface.
Avoid direct exposure to sunlight.
Make sure the analyzer has access to proper ventilation: 5 cm of free space above it and 10 cm
of free space behind it.
Indoor Use with grounded mains supply
Evaluate the electromagnetic environment prior to installation.
Temperature: 18 – 32 °C
Humidity: 10% – 90%
Installation Checklist and Menu
Follow the quick Installation Checklist and Installation Menu step by step for best installation results.
Installation Checklist
Complete Unpack and Check Components / Analyzer Placement and Environment instructions.
Connect power adapter to the power supply port on the back of the analyzer, but do not plug in power cord yet.
Connect the RFID reader to one of the USB host ports on the back of the analyzer.
Connect the printer to either the USB host port or USB device port (depending on printer type) on the back of
the analyzer (if applicable).
Connect the analyzer to computer system using either one of the USB host ports or USB device port
(depending on computer connection type) on the back of the analyzer (if applicable).
Install the reagent bottle tray. Remove foam from tray.
Connect the waste tube to the analyzer and plumb to waste container or drain.
Connect the Lyse reagent tube assembly (yellow) and electronic sensor to the analyzer.
Connect the Diluent reagent tube assembly (red) and electronic sensor to the analyzer.
Connect the Cleaner reagent tube assembly (blue) and electronic sensor to the analyzer.
Connect the EOS reagent tube assembly (green) and electronic sensor to the analyzer.
Plug one end of the power cord to the power adapter and the other to a surge protected power outlet, then turn
power switch to ON position.
After system initialization, follow Installation Menu instructions below.
Post-Installation Recommendations
After initial setup, it is recommended to print all analyzer settings and keep for personal records. Select
System Info from Main Menu and then Print All Settings.
Sample analysis modes (Open Tube and MPA) are factory calibrated. However, calibration should always be
checked upon installation. See section 5 for more details.

Page 18 © Boule Medical AB, March 2018. Article no. 1504496
2. Installation and Reagent Setup
Installation Checklist and Menu
After completing the following eight Installation Menu steps, the system will be ready for the rst
sample analysis.
XInstallation Menu
1Set Language Choose language and press Save.
Figure 9: Installation menu Figure 10: Language menu
2Set Time In this menu 4 dierent options are available:
Select either 12h or 24h.
To change the time select the hour or minute box and use the
or ―signs to change.
To change the divider select the divider box and use the use
the or ―signs to change.
Select the time zone box and click in the circle next to the
correct time zone and then press Save.
3Set Date
Figure 11: Date and Time menu
In this menu 3 dierent options are available:
To change the date format select the date format box and use
the or arrows to change.
To change the date select the year, month, or day box and
use the or arrows to change.
To change the divider select the divider box and use the use
the or ―signs to change.
Press Save and return to Installation Menu.
Figure 12: Reagent RFID entry Figure 13: Reagent RFID entry success

© Boule Medical AB, March 2018. Article no. 1504496 Page 19
2. Installation and Reagent Setup
Installation Checklist and Menu
4Enter Reagent RFID tags For RFID tag entry with a RFID reader:
Place the tag reader on the marked position on the reagent
container you want scan in. When the reagent tag has been
read a screen will display that the tag has been accepted.
After a RFID tag has been accepted it is now possible
to read another reagent, Enter another tag, or to exit to
previous menu, by pressing Exit.
5 Connect Reagent tube
assemblies to reagents
After reagents are scanned, loosen reagent container caps,
remove factory seals, and connect the reagent tube assembly to
respective container based on color-coding.
Figure 14: Connect Reagents Figure 15: Enter Control barcodes
6Enter Control barcodes Scan Control Assay Sheet to enter assay value ranges into the
system for the lot of Control being used.
Scan barcodes 1–9, in that order, from the assay sheet.
Once accepted, press Exit to return to Installation Menu.
7Waste Counter See Chapter 7, waste counter setup.
8 Fill the liquid system To ll the system with reagents, select Fill System. This cycle
will last for approximately 3 minutes.
Figure 16: Daily Startup Figure 17: Completed Installation Menu
9 The installation sequence is
now complete.
To prepare the Exigo H400 to
analyze a sample perform one
of the following:
Option 1 (recommended):
Select Startup Sequence. This sequence guides the operator
through the beginning of the day startup routine for the
analyzer.

Page 20 © Boule Medical AB, March 2018. Article no. 1504496
2. Installation and Reagent Setup
Installation Checklist and Menu
9 There are two simple steps to follow which take the user
through a background and control analysis sequence with
detailed guidance at each step.
When complete select OK to return to Start Menu and
analyze sample.
Option 2:
Select Exit to return to Start Menu.
Go to section 3 and follow instruction for Background
analysis.
Go to section 5 and follow instruction for analyzing
Controls.
Return to section 3 to analyze a sample.
Reagent Setup
The Exigo H400 system is interlocked with specied Boule reagents, Exigo Diluent, Exigo Lyse,
Exigo Cleaner and Exigo EOS (hereafter referred to as Diluent, Lyse, Cleaner and EOS), for optimal
performance. The reagent containers must be identied by the analyzer before analysis of samples
can begin.
Reagent Installation
This section describes the placement and connection of reagent containers:
It is recommended that all reagent bottles are placed in the reagent bottle tray in the correct order
corresponding with the color/label on the bottle and the color/label on the reagent bottle tray. A
separate diluent box should be placed at the same level or maximum 1 meter below the instrument.
Not placing the reagent bottles in the correct order or in the reagent bottle tray could cause
system ow issues, analyzer malfunction, erroneous parameter results and is not recommended.
XReagent Installation
1 Connect the Lyse reagent tube assembly (yellow) and electronic sensor to the analyzer.
2 Connect the Diluent reagent tube assembly (red) and electronic sensor to the analyzer.
3 Connect the Cleaner reagent tube assembly (blue) and electronic sensor to the analyzer.
4 Connect the EOS reagent tube assembly (green) and electronic sensor to the analyzer.
XConnecting Reagent Bottle Tray
Carefully lift up right-hand side of analyzer about 1 inch o the countertop. Slide the metal plate
of reagent bottle tray underneath the analyzer so that the feet align with corresponding holes in the
metal plate. Carefully set analyzer down.
Table of contents
Popular Laboratory Equipment manuals by other brands

Belden
Belden HIRSCHMANN RPI-P1-4PoE installation manual

Koehler
Koehler K1223 Series Operation and instruction manual

Cole Parmer
Cole Parmer Stuart SB3/1 instruction manual

Parr Instrument
Parr Instrument 4560 Operating instructions manual

Labnet
Labnet Rocker 35 EZ instruction manual
PreOmics
PreOmics PreON user manual
DLAB Laboratory Instruments
DLAB Laboratory Instruments DM0412S user manual
Beckman Coulter
Beckman Coulter CytoFLEX Instructions for use
illumina
illumina MiniSeq System guide
SICCO
SICCO V 1953-07 operating instructions
MELAG
MELAG Vacuklav 41 B Plus Evolution user manual
Thermo Scientific
Thermo Scientific DensityPRO-T installation guide
