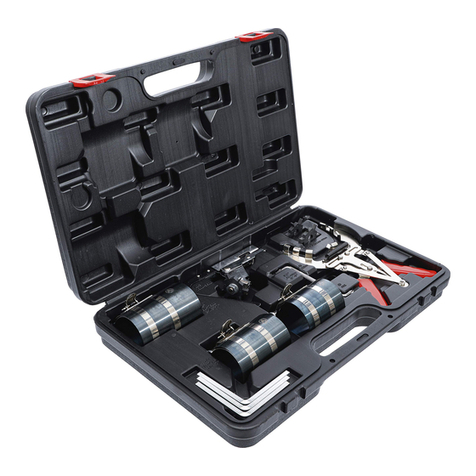
Expondo MSW-BG-655 User manual

User manual | Instrukcja obsługi | Návod k použití | Manuel d'utilisation | Istruzioni per l‘uso | Manual de instrucciones
BEDIENUNGSANLEITUNG
EXPONDO.DE
FENDER REFORMING TOOL
MSW-BG-655

2
BEDIENUNGSANLEITUNG
3
Rev. 27.09.2018
Rev. 27.09.2018
INHALT | CONTENT | TREŚĆ | OBSAH | CONTENU | CONTENUTO | CONTENIDO
PRODUKTNAME BÖRDELGERÄT FÜR KOTFLÜGEL
PRODUCT NAME FENDER REFORMING TOOL
NAZWA PRODUKTU NARZĘDZIE DO REFORMOWANIA BŁOTNIKA
NÁZEV VÝROBKU NÁSTROJ PRO ÚPRAVU BLATNÍKŮ
NOM DU PRODUIT OUTIL DE DÉBOSSELAGE D'ARRONDI DES AILES
NOME DEL PRODOTTO DISPOSITIVO DI REGOLAZIONE PER PARABORDI
NOMBRE DEL PRODUCTO HERRAMIENTA PARA ENSANCHAR GUARDABARROS
MODELL
MSW-BG-655
PRODUCT MODEL
MODEL PRODUKTU
MODEL VÝROBKU
MODÈLE
MODELLO
MODELO
NAME DES HERSTELLERS
EXPONDO POLSKA SP. Z O.O. SP. K.
MANUFACTURER NAME
NAZWA PRODUCENTA
NÁZEV VÝROBCE
NOM DU FABRICANT
NOME DEL PRODUTTORE
NOMBRE DEL FABRICANTE
ANSCHRIFT DES HERSTELLERS
UL. NOWY KISIELIN-INNOWACYJNA 7, 66-002 ZIELONA GÓRA | POLAND, EU
MANUFACTURER ADDRESS
ADRES PRODUCENTA
ADRESA VÝROBCE
ADRESSE DU FABRICANT
INDIRIZZO DEL FORNITORE
DIRECCIÓN DEL FABRICANTE
2.1 SICHERHEIT AM ARBEITSPLATZ
a) Halten Sie Ihren Arbeitsplatz sauber und gut
beleuchtet. Unordnung oder schlechte Beleuchtung
können zu Unfällen führen. Seien Sie voraussichtig,
beobachten Sie, was getan wird und bewahren
Sie Ihren gesunden Menschenverstand bei der
Verwendung des Gerätes.
b) Im Falle eines Schadens oder einer Störung sollte das
Gerät sofort ausgeschaltet und dies einer autorisierten
Person gemeldet werden.
c) Wenn Sie nicht sicher sind, ob das Gerät
ordnungsgemäß funktioniert, wenden Sie sich an den
Service des Herstellers.
d) Reparaturen dürfen nur vom Service des Herstellers
durchgeführt werden. Führen Sie keine Reparaturen
auf eigene Faust durch!
e) Kinder und Unbefugte dürfen am Arbeitsplatz nicht
anwesend sein (unachtsamkeit kann zum Verlust der
Kontrolle über das Gerät führen).
Parameter – Beschreibung Parameter – Wert
Produktname Bördelgerät für Kotügel
Modell MSW-BG-655
Höchstlänge [mm] 570
Mindestlänge [mm] 370
Verstellungsbereich [mm] 140
Innendurchmesser [mm] 73
Außendurchmesser [mm] 150
Gewicht [kg] 6,54
TECHNISCHE DATEN
1. ALLGEMEINE BESCHREIBUNG
Diese Anleitung ist als Hilfe für eine sichere und
zuverlässige Nutzung gedacht. Das Produkt wurde strikt
nach den technischen Vorgaben und unter Verwendung
modernster Technologien und Komponenten sowie unter
Wahrung der höchsten Qualitätsstandards entworfen und
angefertigt.
VOR INBETRIEBNAHME MUSS DIE ANLEITUNG
GENAU DURCHGELESEN UND VERSTANDEN
WERDEN.
Für einen langen und zuverlässigen Betrieb des Geräts muss
auf die richtige Handhabung und Wartung entsprechend
den in dieser Anleitung angeführten Vorgaben geachtet
werden. Die in dieser Anleitung angegebenen technischen
Daten und die Spezikation sind aktuell. Der Hersteller
behält sich das Recht vor, im Rahmen der Verbesserung
der Qualität Änderungen vorzunehmen.
Erläuterung der Symbole
Die originale Anweisung ist die deutschsprachige Fassung.
Sonstige Sprachfassungen sind Übersetzungen aus der
deutschen Sprache.
2. NUTZUNGSSICHERHEIT
Der Begri "Gerät" oder "Produkt" in den Warnungen
und Beschreibung des Handbuchs bezieht sich auf das
Bördelgerät für Kotügel.
Gebrauchsanweisung beachten.
ACHTUNG! oder WARNUNG! oder HINWEIS! um
auf bestimmte Umstände aufmerksam zu machen
(Allgemeines Warnzeichen).
Handschutz benutzen.
ACHTUNG! Warnung vor Handverletzungen.
ACHTUNG! Lesen Sie alle Sicherheitshinweise und
alle Anweisungen durch. Die Nichtbeachtung der
Warnungen und Anweisungen kann zu schweren
Verletzungen bis hin zum Tod führen.
HINWEIS! In der vorliegenden Anleitung sind
Beispielbilder vorhanden, die von dem tatsächlichen
Aussehen des Produkts abweichen können.
HINWEIS! Kinder und Unbeteiligte müssen bei der
Arbeit mit diesem Gerät gesichert werden.
2.2. PERSÖNLICHE SICHERHEIT
a) Es ist nicht gestattet, das Gerät im Zustand der
Ermüdung, Krankheit, unter Einuss von Alkohol,
Drogen oder Medikamenten zu betreiben, wenn diese
die Fähigkeit das Gerät zu bedienen, einschränken.
b) Die Maschine darf nur durch entsprechend
geschulte, zur Bedienung geeignete und physisch
gesunde Personen bedient werden, die die
vorliegende Anleitung gelesen haben und die
Arbeitsschutzanforderungen kennen.
c) Das Gerät ist nicht dazu bestimmt, durch Personen
(darunter Kinder) mit eingeschränkten physischen,
sensorischen und geistigen Fähigkeiten bzw. durch
Personen ohne entsprechende Erfahrung und/oder
entsprechendes Wissen bedient zu werden, es sei
denn es gibt eine für ihre Aufsicht und Sicherheit
zuständige Person bzw. sie haben von dieser Person
entsprechende Hinweise in Bezug auf die Bedienung
das Gerät erhalten.
d) Seien Sie aufmerksam und verwenden Sie Ihren
gesunden Menschenverstand beim Betreiben des
Gerätes. Ein Moment der Unaufmerksamkeit während
der Arbeit kann zu schweren Verletzungen führen.
e) Benutzen Sie persönliche Schutzausrüstung, die für
den Betrieb des Gerätes entsprechend den in Punkt
1 der Symbolerläuterungen vorgegebenen Maßgaben
erforderlich ist. Die Verwendung geeigneter und
zertizierter persönlicher Schutzausrüstung verringert
das Verletzungsrisiko.
f) Überschätzen Sie Ihre Fähigkeiten nicht. Halten Sie
Balance und Gleichgewicht während der Arbeit. Dies
gibt Ihnen eine bessere Kontrolle über das Gerät im
Falle unerwarteter Situationen.
2.3. SICHERE ANWENDUNG DES GERÄTS
a) Überhitzen Sie das Gerät nicht. Verwenden Sie
geeignete Werkzeuge für die entsprechende
Anwendung. Richtig ausgewählte Geräte und der
sorgsame Umgang mit ihnen führt zu besseren
Arbeitsergebnissen.
b) Nicht verwendete Werkzeuge sind außerhalb
der Reichweite von Kindern sowie von Personen
aufzubewahren, welche weder das Gerät selbst, noch
die entsprechende Anleitung kennen. In den Händen
3
6
9
12
15
18
21
Deutsch
English
Polski
Česky
Français
Italiano
Español

54 Rev. 27.09.2018
Rev. 27.09.2018
Verzeichnis des Bestandteile:
Nr. Teil Beschreibung Anzahl/
Stck.
1 Befestigungsring 1
2 Schraube 2
3 Bolzen 1
4 Gewindestange 1
5 Hebel 1
6 Hebelknopf 2
7 Führungswalze 1
8 Mutter 1
9 Verbindungswalze 1
10 Feststellmutter 1
11 Einstellmutter 1
12 Armkörper 1
13 Verstellbarer Arm 1
14 Feststellschraube 1
15 Schraube 2
16 Rollenachse 1
17 Rollenaufnahme 1
18 Lager 2
19 Rolle 1
ACHTUNG! Die Zeichnungen von diesem
Produkt benden sich auf der letzte Seite der
Bedienungsanleitung S. 24.
unerfahrener Personen können derlei Geräte eine
Gefahr darstellen.
c) Halten Sie das Gerät im einwandfreien Zustand.
Überprüfen Sie vor jeder Arbeit, ob allgemeine
Schäden vorliegen oder Schäden an beweglichen
Teilen (Bruch von Teilen und Komponenten oder
andere Bedingungen, die den sicheren Betrieb der
Maschine beeinträchtigen könnten). Im Falle eines
Schadens muss das Gerät vor Gebrauch in Reparatur
gegeben werden.
d) Halten Sie das Gerät außerhalb der Reichweite von
Kindern.
e) Reparatur und Wartung von Geräten dürfen nur
von qualiziertem Fachpersonal und mit Original-
Ersatzteilen durchgeführt werden. Dadurch wird die
Sicherheit bei der Nutzung gewährleistet.
f) Das Gerät regelmäßig reinigen, damit sich kein
Schmutz auf Dauer festsetzen kann.
g) Bei der Montage und Demontage der Vorrichtung
am Fahrzeug ist besondere Vorsicht zu bewahren.
Die Vorrichtung kann herunterfallen, wenn sie nicht
richtig montiert oder bei der Montage/Demontage
nicht richtig gestützt ist
h) Es ist kein zu großer Druck mit der Vorrichtung
auszuüben. Das kann zur Beschädigung der
Vorrichtung oder des Fahrzeugs führen.
i) Beim Umgang mit der Vorrichtung ist Vorsicht zu
bewahren. Bei der Einstellung oder beim Betrieb kann
es zur Quetschung der Hand zwischen der Rolle und
dem Kotügel kommen. Es sind Schutzhandschuhe zu
benutzen.
3. NUTZUNGSBEDINGUNGEN
Das Bördelgerät für Kotügel wurde entwickelt, um die
Kotügel zu formen, d.h. Verformungen zu beseitigen
und den Raum unter dem Kotügel für die Autoräder zu
vergrößern.
Für alle Schäden bei nicht sachgemäßer Verwendung
haftet allein der Betreiber.
3.1. GERÄTEBESCHREIBUNG
ACHTUNG! Obwohl das Gerät mit dem Gedanken an
die Sicherheit entworfen wurde, besitzt es bestimmte
Schutzmechanismen. Trotz der Verwendung
zusätzlicher Sicherheitselemente besteht bei der
Bedienung immer noch ein Verletzungsrisiko. Es wird
empfohlen, bei der Nutzung Vorsicht und Vernunft
walten zu lassen.
d) Die Rolle (19) der Vorrichtung so einstellen, dass
sie parallel zum Arm der Vorrichtung (12) ist. Die
Einstellung mit der Feststellschraube (14) vornehmen.
e) Mit dem Hebel (4) die Rolle (19) in Richtung des
Kotügels anheben und mit leichtem Druck den Arm
der Vorrichtung in beide Richtungen bewegen.
f) Der Kotügel ist schrittweise zu formen und der Druck
der Rolle (19) auf den Kotügel von Zeit zu Zeit mit
dem Hebel (4) einzustellen.
g) Der Abstand der Rolle (19) zum Einstellring (1) ist mit
der Andrückschraube (11) und dem verstellbaren Arm
(13) je nach Form des Kotügels einzustellen.
3.4. REINIGUNG UND WARTUNG
• Verwenden Sie zum Reinigen der Oberäche
ausschließlich Mittel ohne ätzende Inhaltsstoe.
• Lassen Sie nach jeder Reinigung alle Teile gut
trocknen, bevor das Gerät erneut verwendet wird.
• Bewahren Sie das Gerät an einem trockenen, kühlen,
vor Feuchtigkeit und direkter Sonneneinstrahlung
geschütztem Ort auf.
• Hinsichtlich der technischen Ezienz und eventueller
Schäden sollte eine regelmäßige Überprüfung des
Gerätes durchgeführt werden.
• Bewegliche Elemente regelmäßig schmieren, je nach
Häugkeit der Bedienung.
ZUSAMMENSTELLUNGSZEICHNUNGEN
e
g
d
f
12
3
6
4
7
1
5
14
19
13
11
9
Die Benennungen der einzelnen Teile benden sich in der
Tabelle der Zusammenstellungszeichnung am Ende der
Anleitung.
3.2. VORBEREITUNG ZUM BETRIEB
Aufbau des Gerätes:
a) Den Armkörper (12) am Befestigungsring (1) mit dem
Bolzen (3) montieren.
b) Die Gewindestange (4) und die Führungswalze (7) so
eindrehen, dass das Ende der Gewindestange auch
durch die Verbindungswalze (9) geht. Die Verbindung
mit der Mutter (10) und der Unterlegscheibe (8)
sichern.
c) Den Hebelknopf (6) abschrauben und die darauf
gelagerten Muttern abnehmen.
d) Den Hebel (5) durch die Önung in der
Gewindestange (4) stecken. Den Knopf (6) auf den
Hebel (5) aufschrauben.
e) Den verstellbaren Arm (13) in den Armkörper (12)
einführen.
f) Die Verbindung mit der Andrückschraube (11) sichern.
3.3. ARBEIT MIT DEM GERÄT
a) Das Fahrzeug mit einer geeigneten Vorrichtung (z.B.
Wagenheber) anheben
b) Das Fahrzeugrad abschrauben und abnehmen.
c) Die Vorrichtung mit dem Befestigungsring (1) an
der Stelle des Rades befestigen. Die Verbindung mit
Muttern und Unterlegscheiben sichern.

USER MANUAL
6 7
Rev. 27.09.2018
Rev. 27.09.2018
going on and use common sense when working with
the device.
b) Upon discovering damage or irregular operation,
immediately switch the device o and report it to
a supervisor without delay.
c) If there are any doubts as to the correct operation
of the device, contact the manufacturer's support
service.
d) Only the manufacturer's service point may repair the
device. Do not attempt any repairs independently!
e) Children or unauthorised persons are forbidden from
entering a work station (a distraction may result in
a loss of control over the device).
Parameter description Parameter value
Product name Fender Reforming Tool
Model MSW-BG-655
Maximum length [mm] 570
Minimum length [mm] 370
Range of adjustment [mm] 140
Inside diameter [mm] 73
Outside diameter [mm] 150
Weight [kg] 6,54
TECHNICAL DATA
1. GENERAL DESCRIPTION
The user manual is designed to assist in the safe and
trouble-free use of the device. The product is designed
and manufactured in accordance with strict technical
guidelines, using state-of-the-art technologies and
components. Additionally, it is produced in compliance
with the most stringent quality standards.
DO NOT USE THE DEVICE UNLESS YOU HAVE
THOROUGHLY READ AND UNDERSTOOD THIS
USER MANUAL.
To increase the product life of the device and to ensure
a trouble-free operation, use it in accordance with this user
manual and regularly perform the maintenance tasks. The
technical data and specications in this user manual are
up to date. The manufacturer reserves the right to make
changes associated with quality improvement.
Legend
The original operation manual is in German. Other
language versions are translations from German.
2. USAGE SAFETY
Whenever "device" or "product" are used in the warnings
and instructions, it shall mean Fender Reforming Tool.
2.1. SAFETY AT THE WORKPLACE
a) Make sure the workplace is orderly and well lit.
A messy or poorly lit workplace may lead to accidents.
Try to anticipate what may happen, observe what is
Read instructions before use.
WARNING! or CAUTION! or REMEMBER!
Applicable to the given situation (general warning
sign).
Wear protective gloves.
ATTENTION! Danger of hand crushing.
ATTENTION! Read all safety warnings and all
instructions. Failure to follow the warnings and
instructions may result in serious injury or even
death.
PLEASE NOTE! Drawings in this manual are for
illustration purposes only and in some details it may
dier from the actual product.
REMEMBER! When using the device, protect
children and other bystanders.
2.2. PERSONAL SAFETY
a) Do not use the device when tired, ill or under the
inuence of alcohol, narcotics or medication which
can signicantly impair the ability to operate the
device.
b) The machine may be operated by physically t
persons who are able to handle the machine and
properly trained and who reviewed this operating
manual and received training in occupational health
and safety.
c) The device is not designed to be handled by persons
(including children) with limited mental and sensory
functions or persons lacking relevant experience and/
or knowledge unless they are supervised by a person
responsible for their safety or they have received
instructions on how to operate the device.
d) When working with the device, use common sense
and stay alert. Temporary loss of concentration whilst
using the device may lead to serious injuries.
e) Use personal protection equipment as required
for working with the device, specied in section 1
(Legend). The use of correct, approved personal
protection equipment reduces the risk of suering an
injury.
f) Do not overestimate your abilities. When using the
device keep your balance and remain stable at all
times. This will ensure better control over the device
in unexpected situations.
2.3. SAFE DEVICE USE
a) Do not overload the device. Use appropriate tools for
the given task. A correctly selected device will perform
the task for which it was designed better and in a safer
manner.
b) When not in use, store in a safe place, away from
children and people not familiar with the device, who
have not read the user manual. The device may pose
a hazard in the hands of inexperienced users.
c) Maintain the device in a good technical state. Before
each use check for general damage and especially
check for cracked parts or elements and for any other
conditions which may impact the safe operation of the
device. If damage is discovered, hand over the device
for repair before use.
d) Keep the device out of the reach of children.
e) Device repair or maintenance should be carried out by
qualied persons, only using original spare parts. This
will ensure safe use.
f) Clean the device regularly to avoid a durable
encrustation of dirt.
g) Exercise special care during device assembly on /
disassembly from the vehicle. The device can fall if it
is installed improperly or without any support during
assembly / disassembly.
h) Do not exert too much pressure with the device. This
can result in damage of the vehicle or the device itself.
i) Exercise care when using the device. Your hand can
be crushed between the roll and the fender during
adjustment and device operation. Use the protective
gloves.
3. USE GUIDELINES
The Fender Reforming Tool is designed to shape car fenders,
i.e. to remove deformations and to increase the space under
the fender for car wheels.
The user is liable for any damage resulting from
nonintended use of the device.
3.1. DEVICE DESCRIPTION
ATTENTION! Despite the safe design of the device
and its protection facilities and despite the use of
additional elements protecting the operator, there is
still a slight risk of an accident or injury when using
the device. When using the device stay alert and use
common sense.
d) Place the device roll (19) in parallel to the device arm
(12). Adjust using the locking screw (14).
e) By means of the lever (4), raise the roll (19) towards
the fender and move the device arm asunder while
pressing it slightly.
f) Shape the fender gradually and, from time to time,
adjust roll (19) pressure on the fender using the lever
(4).
g) Adjust distance of the roll (19) from the adjustment
ring (1) using the clamping screw (11) and the
adjustable arm (13) depending on the fender shape.
3.4. CLEANING AND MAINTENANCE
• Use cleaners without corrosive substances to clean
each surface.
• After cleaning the device, all parts should be dried
before reusing it.
• Store the unit in a dry, cool place, free from moisture
and direct exposure to sunlight.
• Regular inspections of the device must be carried out
in terms of its technical eciency and any damages
• Grease the movable elements regularly depending on
frequency of their use.
ASSEMBLY DRAWINGS
e
g
d
f
12
3
6
4
7
1
5
14
19
13
11
9
Names of individual elements are listed in the assembly
drawing table at the end of the instructions.
3.2. PREPARING FOR USE
Assembly of the device:
a) Attach the arm body (12) to the fastening ring (1)
using the pin (3).
b) Screw the threaded roller (4) into the leading roller (7)
so as the threaded roller end goes also through the
connecting roller (9). Secure the connection by means
of the nut (10) and washer (8).
c) Unscrew the lever knob (6) and remove the nuts
stored on it.
d) Insert the lever (5) into the hole in the threaded roller
(4). Screw the knob (6) onto the lever (5).
e) Insert the adjustable arm (13) in the arm body (12).
f) Secure the connection using the clamping screw (11).
3.3. DEVICE USE
a) Lift the car using a suitable device (eg. a jack or a car
elevator).
b) Unscrew and remove a car wheel.
c) Fasten the device instead of the car wheel using the
fastening ring (1). Secure the connection by means of
nuts and washers.
ATTENTION! This product’s exploded view can be
found on the last page of the operating instructions
(pp. 24).

INSTRUKCJA OBSŁUGI
98 Rev. 27.09.2018
Rev. 27.09.2018
List of elements:
Number
of part
Description Number
of pieces
1 Fastening ring 1
2 Bolt 2
3 Clevis pin 1
4 Threaded roller 1
5 Lever 1
6 Lever knob 2
7 Leading roller 1
8 Nut 1
9 Connecting roller 1
10 Lock nut 1
11 Adjustment screw 1
12 Arm body 1
13 Adjustable arm 1
14 Mandrel locking screw 1
15 Bolt 2
16 Roll axle 1
17 Roll holder 1
18 Bearing 2
19 Roll 1
2.1 BEZPIECZEŃSTWO W MIEJSCU PRACY
a) Utrzymuj porządek w miejscu pracy i dobre
oświetlenie. Nieporządek lub złe oświetlenie może
prowadzić do wypadków. Należy być przewidującym,
obserwować co się robi i zachowywać rozsądek
podczas używania urządzenia.
b) W razie stwierdzenia uszkodzenia lub nieprawidłowości
w pracy urządzenia należy je bezzwłocznie wyłączyć
i zgłosić to do osoby uprawnionej.
c) W razie wątpliwości, czy urządzenia działa poprawnie,
należy skontaktować się z serwisem producenta.
d) Naprawy urządzenia może wykonać wyłącznie
serwis producenta. Nie wolno dokonywać napraw
samodzielnie!
e) Na stanowisku pracy nie mogą przebywać dzieci ani
osoby nieupoważnione. Nieuwaga może spowodować
utratę kontroli nad urządzeniem.
Opis parametru Wartość parametru
Nazwa produktu Narzędzie do
reformowania błotnika
Model MSW-BG-655
Długość maksymalna [mm] 570
Długość minimalna [mm] 370
Zakres regulacji [mm] 140
Średnica wewnętrzna [mm] 73
Średnica zewnętrzna [mm] 150
Ciężar [kg] 6,54
DANE TECHNICZNE
1. OGÓLNY OPIS
Instrukcja przeznaczona jest do pomocy w bezpiecznym
i niezawodnym użytkowaniu. Produkt jest zaprojektowany
i wykonany ściśle według wskazań technicznych przy
użyciu najnowszych technologii i komponentów oraz przy
zachowaniu najwyższych standardów jakości.
PRZED PRZYSTĄPIENIEM DO PRACY NALEŻY
DOKŁADNIE PRZECZYTAĆ I ZROZUMIEĆ NINIEJSZĄ
INSTRUKCJĘ.
Dla zapewnienia długiej i niezawodnej pracy urządzenia
należy dbać o jego prawidłową obsługę oraz konserwację
zgodnie ze wskazówkami zawartymi w tej instrukcji. Dane
techniczne i specykacje zawarte w tej instrukcji obsługi są
aktualne. Producent zastrzega sobie prawo dokonywania
zmian związanych z podwyższeniem jakości.
Objaśnienie symboli
Instrukcją oryginalną jest niemiecka wersja instrukcji.
Pozostałe wersje językowe są tłumaczeniami z języka
niemieckiego.
Termin „urządzenie” lub „produkt” w ostrzeżeniach
i w opisie instrukcji odnosi się do NARZĘDZIE DO
REFORMOWANIA BŁOTNIKA. Nie wkładać rąk, ani innych
części ciała pomiędzy ostrza urządzenia.
2. BEZPIECZEŃSTWO UŻYTKOWANIA
Przed użyciem należy zapoznać się z instrukcją.
UWAGA! lub OSTRZEŻENIE! lub PAMIĘTAJ!
opisująca daną sytuację (ogólny znak
ostrzegawczy).
Stosuj rękawice ochronne.
UWAGA! Niebezpieczeństwo zgniecenia dłoni.
UWAGA! Przeczytaj wszystkie ostrzeżenia
dotyczące bezpieczeństwa oraz wszystkie instrukcje.
Niezastosowanie się do ostrzeżeń i instrukcji może
spowodować ciężkie obrażenia ciała lub śmierć.
UWAGA! Ilustracje w niniejszej instrukcji obsługi
mają charakter poglądowy i w niektórych
szczegółach mogą różnić się od rzeczywistego
wyglądu produktu.
PAMIĘTAJ! Należy chronić dzieci i inne osoby
postronne podczas pracy urządzeniem.
2.2. BEZPIECZEŃSTWO OSOBISTE
a) Niedozwolone jest obsługiwanie urządzenia
w stanie zmęczenia, choroby, pod wpływem alkoholu,
narkotyków lub leków, które ograniczają w istotnym
stopniu zdolności obsługi urządzenia.
b) Maszynę mogą obsługiwać osoby sprawne zycznie,
zdolne do jej obsługi i odpowiednio wyszkolone,
które zapoznały się z niniejszą instrukcją oraz zostały
przeszkolone w zakresie bezpieczeństwa i higieny
pracy.
c) Urządzenie nie jest przeznaczone do tego, by było
użytkowane przez osoby (w tym dzieci) o ograniczonych
funkcjach psychicznych, sensorycznych i umysłowych
lub nieposiadające odpowiedniego doświadczenia
i/lub wiedzy, chyba że są one nadzorowane przez
osobę odpowiedzialną za ich bezpieczeństwo lub
otrzymały od niej wskazówki dotyczące tego, jak
należy obsługiwać urządzenie.
d) Należy być uważnym, kierować się zdrowym
rozsądkiem podczas pracy urządzeniem. Chwila
nieuwagi podczas pracy, może doprowadzić do
poważnych obrażeń ciała.
e) Należy używać środków ochrony osobistej wymaganych
przy pracy urządzeniem wyszczególnionych w punkcie
1 objaśnienia symboli. Stosowanie odpowiednich,
atestowanych środków ochrony osobistej zmniejsza
ryzyko doznania urazu.
f) Nie należy przeceniać swoich możliwości. Utrzymywać
balans i równowagę ciała przez cały czas pracy.
Umożliwia to lepszą kontrolę nad urządzeniem
w nieoczekiwanych sytuacjach.
2.3. BEZPIECZNE STOSOWANIE URZĄDZENIA
a) Nie należy przeciążać urządzenia. Używać narzędzi
odpowiednich do danego zastosowania. Prawidłowo
dobrane urządzenie wykona lepiej i bezpieczniej pracę
dla którego zostało zaprojektowane.
b) Nieużywane urządzenia należy przechowywać
w miejscu niedostępnym dla dzieci oraz osób
nie znających urządzenia lub tej instrukcji
obsługi. Urządzenia są niebezpieczne w rękach
niedoświadczonych użytkowników.
c) Utrzymuj urządzenie w dobrym stanie technicznym.
Sprawdzaj przed każdą pracą czy nie posiada
uszkodzeń ogólnych lub związanych z elementami
ruchomymi (pęknięcia części i elementów lub wszelkie

10 11
Rev. 27.09.2018
Rev. 27.09.2018
inne warunki, które mogą mieć wpływ na bezpieczne
działanie urządzenia). W przypadku uszkodzenia,
oddaj urządzenie do naprawy przed użyciem.
d) Urządzenie należy chronić przed dziećmi.
e) Naprawa oraz konserwacja urządzeń powinna być
wykonywana przez wykwalikowane osoby przy
użyciu wyłącznie oryginalnych części zamiennych.
Zapewni to bezpieczeństwo użytkowania.
f) Należy regularnie czyścić urządzenie, aby nie dopuścić
do trwałego osadzenia się zanieczyszczeń.
g) Należy zachować szczególną ostrożność podczas
montowania i demontowania urządzenia z pojazdu.
Urządzenie może spaść jeśli będzie niepoprawnie
zamontowane lub nie będzie miało podparcia w tracie
montażu/demontażu.
h) Nie należy wywierać zbyt dużego nacisku za pomocą
urządzenia. Może to doprowadzić do uszkodzenia
pojazdu lub samego urządzenia.
i) Należy zachować ostrożność używając urządzenia.
Istnieje możliwość zgniecenia dłoni pomiędzy
rolką, a błotnikiem w trakcie regulacji oraz pracy
z urządzeniem. Należy używać rękawic ochronnych.
3. ZASADY UŻYTKOWANIA
Narzędzie do reformowania błotnika przeznaczone jest
do nadawania kształtu błotnikom samochodowym tzn.
usuwania deformacji oraz powiększania przestrzeni pod
błotnikiem dla kół samochodowych.
Odpowiedzialność za wszelkie szkody powstałe
w wyniku użytkowania niezgodnego z przeznaczeniem
ponosi użytkownik.
3.1. OPIS URZĄDZENIA
UWAGA! Pomimo iż urządzenie zostało
zaprojektowane tak aby było bezpieczne, posiadało
odpowiednie środki ochrony oraz pomimo użycia
dodatkowych elementów zabezpieczających
użytkownika, nadal istnieje niewielkie ryzyko
wypadku lub odniesienia obrażeń w trakcie pracy
z urządzeniem. Zaleca się zachowanie ostrożności
i rozsądku podczas jego użytkowania.
Nazwy poszczególnych elementów znajdują się w tabeli
rysunku złożeniowego na końcu instrukcji.
3.2. PRZYGOTOWANIE DO PRACY
Montaż urządzenia:
a) Zamocować korpus ramienia (12) do pierścienia
mocującego (1) za pomocą sworznia (3).
b) Wkręcić wałek gwintowany (4) w wałek prowadzący (7)
tak, by kocówka wałka gwintowanego przeszła także
przez wałek łączący (9). Zabezpieczyć połączenie za
pomocą nakrętki (10) oraz podkładki (8).
c) Odkręcić gałkę dźwigni (6) i zdjąć zmagazynowane na
niej nakrętki.
d) Przełożyć dźwignię (5) przez otwór w wałku
gwintowanym (4). Wkręcić gałkę (6) na dźwignię (5).
e) Wsunąć regulowane ramię (13) w korpus ramienia
(12).
f) Zabezpieczyć połączenie za pomocą śruby zaciskowej
(11).
3.3. PRACA Z URZĄDZENIEM
a) Unieść samochód za pomocą odpowiedniego
urządzenia (np. lewarek lub podnośnik samochodowy)
b) Odkręcić i zdjąć koło samochodu.
c) Zamocować urządzenie za pomocą pierścienia
mocującego (1) w miejsce koła samochodu.
Zabezpieczyć połączenie za pomocą nakrętek oraz
podkładek.
d) Ustawić rolkę (19) urządzenia tak, by była równoległa
do ramienia urządzenia (12). Regulacji dokonać za
pomocą śruby blokującej (14)
e) Za pomocą dźwigni (4) unieść rolkę (19) w stronę
błotnika i wywierając lekki nacisk poruszać ramieniem
urządzenia na boki.
f) Błotnik należy kształtować stopniowo, co pewien
czas regulując nacisk rolki (19) na błotnik za pomocą
dźwigni (4).
g) Należy regulować odległość rolki (19) od pierścienia
regulującego (1) za pomocą śruby zaciskowej (11)
oraz regulowanego ramienia (13) w zależności od
kształtu błotnika.
e
g
d
f
12
3
6
4
7
1
5
14
19
13
11
9
3.4. CZYSZCZENIE I KONSERWACJA
• Do czyszczenia powierzchni należy stosować
wyłącznie środki niezawierające substancji żrących
• Po każdym czyszczeniu wszystkie elementy należy
dobrze wysuszyć, zanim urządzenie zostanie
ponownie użyte.
• Urządzenie należy przechowywać w suchym
i chłodnym miejscu chronionym przed wilgocią
i bezpośrednim promieniowaniem słonecznym.
• Należy wykonywać regularne przeglądy urządzenia
pod kątem jego sprawności technicznej oraz
wszelkich uszkodzeń.
• Elementy ruchome należy regularnie smarować
w zależności od częstotliwości użytkowania.
RYSUNKI ZŁOŻENIOWE
Lista elementów:
Numer
części
Opis Ilość
1Pierścień mocujący 1
2Śruba 2
3Sworzeń 1
4Wałek gwintowany 1
5Dźwignia 1
6Gałka dźwigni 2
7Wałek prowadzący 1
8Nakrętka 1
9Wałek łączący 1
10 Nakrętka blokująca 1
11 Śruba regulująca 1
12 Korpus ramienia 1
13 Regulowane ramię 1
14 Śruba blokująca 1
15 Śruba 2
16 Oś rolki 1
17 Uchwyt rolki 1
18 Łożysko 2
19 Rolka 1
UWAGA! Rysunek złożeniowy produktu znajduje
się na końcu instrukcji na stronie 24.

NÁVOD K POUŽITÍ
12 13
Rev. 27.09.2018
Rev. 27.09.2018
b) Pokud zjistíte, že zařízení nepracuje správně, nebo
je poškozeno, ihned jej vypněte a poruchu nahlaste
autorizované osobě.
c) Pokud máte pochybnosti o tom, zda zařízení funguje
správně, kontaktujte servis výrobce.
d) Opravy zařízení může provádět pouze servis výrobce.
Opravy neprovádějte sami!
e) Na pracovišti se nesmí zdržovat děti a nepovolané
osoby (nepozornost může způsobit ztrátu kontroly
nad zařízením).
Popis parametru Hodnota parametru
Název výrobku Nástroj pro úpravu blatníků
Model MSW-BG-655
Maximální délka [mm] 570
Minimální délka [mm] 370
Rozsah regulace [mm] 140
Vnitřní průměr [mm] 73
Vnější průměr [mm] 150
Hmotnost [kg] 6,54
TECHNICKÉ ÚDAJE
1. VŠEOBECNÝ POPIS
Návod slouží jako nápověda pro bezpečné a spolehlivé
používání. Výrobek je navržen a vyroben přesně podle
technických údajů s použitím nejnovějších technologií
a komponentů a se zachováním nejvyšších jakostních
standardů.
PŘED ZAHÁJENÍM PRÁCE SI DŮKLADNĚ PŘEČTĚTE
TENTO NÁVOD A SNAŽTE SE JEJ POCHOPIT.
Pro zajištění dlouhého a spolehlivého fungování zařízení
provádějte pravidelný servis a údržbu v souladu s pokyny
uvedenými v tomto návodu. Technické údaje a specikace
uvedené v návodu k obsluze jsou aktuální. Výrobce si
vyhrazuje právo provádět změny pro zvýšení kvality.
Vysvětlení symbolů
Originálním návodem je německá verze návodu. Ostatní
jazykové verze jsou překladem z německého jazyka.
2. BEZPEČNOST POUŽÍVÁNÍ
Pojem „zařízení“ nebo „výrobek“ v bezpečnostních
pokynech a návodu se vztahuje na Nástroj pro úpravu
blatníků.
2.1. BEZPEČNOST NA PRACOVIŠTI
a) Na pracovišti udržujte pořádek a dobré osvětlení.
Nepořádek nebo špatné osvětlení mohou vést
k úrazům. Buďte předvídaví a sledujte, co se během
práce kolem vás děje. Při práci se zařízením vždy
zachovávejte zdravý rozum.
Před použitím se seznamte s návodem.
UPOZORNĚNÍ! nebo VAROVÁNÍ! nebo
PAMATUJTE! popisující danou situaci (všeobecná
výstražná značka).
Používejte ochranné rukavice.
VAROVÁNÍ! Nebezpečí pohmoždění rukou.
POZNÁMKA! Přečtěte si tento návod včetně všech
bezpečnostních pokynů. Nedodržování návodu
a výstrah může způsobit těžký úraz nebo smrt.
POZOR! Obrázky v tomto návodu jsou ilustrační.
V některých detailech se od skutečného vzhledu
stroje mohou lišit.
PAMATUJTE! Při práci se zařízením chraňte děti
a jiné nepovolané osoby.
2.2. OSOBNÍ BEZPEČNOST
a) Nepoužívejte zařízení, jste-li unaveni nebo pod vlivem
drog, alkoholu nebo léků, které významně snižují
schopnost ovládat zařízení.
b) Zařízení smí obsluhovat fyzicky zdatné osoby, které
s ním umí zacházet, byly příslušně vyškoleny k jeho
obsluze, seznámily se s tímto návodem a byly také
proškoleny v oblasti bezpečnosti a ochrany zdraví při
práci.
c) Zařízení není určen k tomu, aby jej používaly osoby
(včetně dětí) s omezenými psychickými, smyslovými
nebo duševními schopnostmi nebo osoby bez
příslušných zkušeností a/nebo znalostí, ledaže
jsou pod dohledem osoby zodpovědné za jejich
bezpečnost nebo od ní obdržely pokyny, jak zařízení
obsluhovat.
d) Při práci se zařízením buďte pozorní, řiďte se zdravým
rozumem. Chvilka nepozornosti při práci může vést
k vážnému úrazu.
e) Používejte osobní ochranné pomůcky vyžadované pro
práci se zařízením, specikované v bodě 1 vysvětlením
symbolů. Používání vhodných, atestovaných osobních
ochranných prostředků snižuje nebezpečí úrazu.
f) Nepřeceňujte své schopnosti. Udržujte stabilní postoj
a rovnováhu po celou dobu práce. To vám umožní
lépe ovládat zařízení v neočekávaných situacích.
2.3. BEZPEČNÉ POUŽÍVÁNÍ ZAŘÍZENÍ
a) Zařízení nepřetěžujte. Pro daný úkol používejte vždy
správný typ nářadí. Správně zvolené nářadí lépe
a bezpečněji provede práci, pro kterou bylo navrženo.
b) Nepoužívaná zařízení uchovávejte mimo dosah dětí
a osob, které nejsou seznámeny se zařízením nebo
návodem k obsluze. Zařízení jsou nebezpečná v rukou
nezkušených uživatelů.
c) Zařízení udržujte v dobrém technickém stavu.
Kontrolujte před každou prací jeho celkový stav
i jednotlivé díly a ujistěte se, že je vše v dobrém
stavu, a nehrozí tak uživateli při práci se zařízením
žádné nebezpečí. V případě zjištění poškození nechte
zařízení opravit.
d) Udržujte zařízení mimo dosah dětí.
e) Opravu a údržbu zařízení by měly provádět pouze
kvalikované osoby za výhradního použití originálních
náhradních dílů. Zajistí to bezpečné používání zařízení.
f) Pravidelně čistěte zařízení, aby nedošlo k trvalému
usazovaní nečistot.
g) Při montáži a demontáži zařízení z vozu zachovejte
zvýšenou opatrnost. Zařízení může spadnout, pokud
je nesprávně namontováno nebo pokud nebude mít
podporu během montáže/demontáže.
h) Nepoužívejte příliš velký tlak na zařízení. Mohlo by
dojít k poškození vozidla nebo samotného zařízení.
i) Zařízení používejte opatrně. Existuje možnost
rozdrcení rukou mezi válcem a blatníkem během
regulace a práce se zařízením. Používejte ochranné
rukavice.
3. ZÁSADY POUŽÍVÁNÍ
Nástroj pro úpravu blatníků je navrženo tak, aby tvarovalo
blatníky vozidla, tzn. odstranilo deformace a zvětšilo prostor
pod blatníkem pro kola.
Odpovědnost za veškeré škody vzniklé v důsledku
použití zařízení v rozporu s určením nese uživatel.
3.1. POPIS ZAŘÍZENÍ
POZNÁMKA! Přestože zařízení bylo navrženo tak,
aby bylo bezpečné, mělo vhodná zabezpečení
i přes použití dodatečných zabezpečovacích prvků
uživatele, nadále existuje malé nebezpečí úrazu
nebo poranění při práci se zařízením. Doporučuje se
zachovat opatrnost a zdravý rozum při jeho používání.
d) Umístěte válec (19) zařízení tak, aby byl rovnoběžný
s ramenem zařízení (12). Proveďte regulaci pomocí
zajišťovacího šroubu (14).
e) Pomocí zvedáku (4) zvedněte válec (19) směrem
k blatníku a lehce zatlačte na boční strany ramene
zařízení.
f) Blatník by měl být tvarován postupně, je potřeba
co nějakou dobu regulovat tlak válce (19) na blatník
pomocí zvedáku (4).
g) Nastavte vzdálenost válce (19) od regulačního kroužku
(1) pomocí upínacího šroubu (11) a nastavitelného
ramene (13) v závislosti na tvaru blatníku.
3.4. ČIŠTĚNÍ A ÚDRŽBA
• K čištění povrchů používejte výhradně prostředky
neobsahující žíravé látky
• Po každém čištění je nutno všechny prvky dobře
osušit, než bude zařízení opět použito.
• Zařízení skladujte na suchém a chladném místě,
chráněném proti vlhkosti a přímému slunečnímu svitu.
• Provádějte pravidelné prohlídky zařízení, zda je
technicky způsobilé a není poškozeno.
• Pohyblivé součásti musíte mazat pravidelně podle
frekvence využití nástroje.
VÝKRES SESTAVENÍ
e
g
d
f
12
3
6
4
7
1
5
14
19
13
11
9
Názvy jednotlivých částí se nachází v tabulce pod obrázkem
na konci návodu.
3.2. PŘÍPRAVA K PRÁCI
Montáž zařízení:
a) Připevněte konstrukci ramene (12) k upevňovacímu
kroužku (1) pomocí šroubu (3).
b) Závitovou hřídel (4) našroubujte do vodící hřídele
(7) tak, aby špička závitové hřídele také procházela
spojovací hřídelí (9). Upevněte spojení pomocí matice
(10) a podložky (8).
c) Odšroubujte hlavici zvedáku (6) a vyjměte matice,
které jsou na něm upevněny.
d) Zvedák (5) zasuňte do otvoru v závitové hřídeli (4).
Nasaďte hlavici (6) na zvedák (5).
e) Vsuňte nastavitelné rameno (13) do konstrukce
ramene (12).
f) Zajistěte spojení upínacím šroubem (11).
3.3. PRÁCE SE ZAŘÍZENÍM
a) Zvedněte vozidlo vhodným zařízením (např. heverem
nebo zvedákem)
b) Odšroubujte a vyjměte kolo vozu.
c) Připevněte zařízení pomocí upevňovacího kroužku (1)
na místo kola
POZNÁMKA! Nákres tohoto produktu naleznete na
konci návodu na str. 24.

14
MANUEL D'UTILISATION
15
Rev. 27.09.2018
Rev. 27.09.2018
Seznam dílů:
Číslo dílu Popis Počet kusů
1Upevňovací kroužek 1
2 Šroubek 2
3 Šroub 1
4Závitová hřídel 1
5Zvedák 1
6Hlavice zvedáku 2
7Vodící hřídel 1
8 Matice 1
9Spojovací hřídel 1
10 Zajišťovací klíč 1
11 Regulační kroužek 1
12 Konstrukce ramene 1
13 Regulační rameno 1
14 Zajišťovací šroub 1
15 Šroub 2
16 Osa válce 1
17 Úchyt válce 1
18 Ložisko 2
19 Válec 1
2.1 SÉCURITÉ AU TRAVAIL
a) Veillez à ce que votre poste de travail soit toujours
propre et bien éclairé. Le désordre ou un éclairage
insusant peuvent entraîner des accidents. Soyez
prévoyant, observez les opérations et faites preuve de
bon sens lorsque vous utilisez l’appareil.
b) En cas de dommages ou de mauvais fonctionnement,
l’appareil doit être mis hors tension immédiatement
et la situation doit être rapportée à une personne
compétente.
c) Si vous n’êtes pas sûr que l'appareil fonctionne
correctement, contactez le service client du fabricant.
d) Seul le service du fabricant peut eectuer des
réparations. Ne tentez aucune réparation par vous-
même!
e) Aucun enfant ni personne non autorisée ne doit se
trouver sur les lieux de travail (le non-respect de
cette consigne peut entraîner la perte de contrôle sur
l'appareil).
Description des paramètres Valeur des paramètres
Nom du produit Outil de débosselage
d'arrondi des ailes
Modèle MSW-BG-655
Longueur maximale [mm] 570
Longueur minimale [mm] 370
Plage de réglage [mm] 140
Diamètre intérieur [mm] 73
Diamètre extérieur [mm] 150
Poids [kg] 6,54
DÉTAILS TECHNIQUES
1. DESCRIPTION GÉNÉRALE
L'objectif du présent manuel est de favoriser une utilisation
sécuritaire et able de l'appareil. Le produit a été conçu
et fabriqué en respectant étroitement les directives
techniques applicables et en utilisant les technologies et
composants les plus modernes. Il est conforme aux normes
de qualité les plus élevées.
LISEZ ATTENTIVEMENT LE PRÉSENT MANUEL ET
ASSUREZ-VOUS DE BIEN LE COMPRENDRE AVANT
LA PREMIÈRE UTILISATION.
An de garantir le fonctionnement able et durable de
l'appareil, il est nécessaire d'utiliser et d'entretenir ce
dernier conformément aux consignes gurant dans le
présent manuel. Les caractéristiques et les spécications
contenues dans ce document sont à jour. Le fabricant se
réserve le droit de procéder à des modications à des ns
d’amélioration du produit.
Symboles
La version originale de ce manuel a été rédigée en
allemand. Toutes les autres versions sont des traductions
de l'allemand.
2. CONSIGNES DE SÉCURITÉ
Les notions d'« appareil » et de « produit » gurant dans
les descriptions et les consignes du manuel se rapportent
à l'outil de débosselage d'arrondi des ailes.
Respectez les consignes du manuel.
ATTENTION!, AVERTISSEMENT et REMARQUE!
attirent l'attention sur des circonstances
spéciques (symboles d'avertissement généraux).
Portez des protections pour les mains.
ATTENTION! Mise en garde liée à un risque de
blessures des mains.
ATTENTION! Veuillez lire attentivement toutes les
consignes de sécurité et toutes les instructions. Le
non-respect des instructions et des consignes de
sécurité peut entraîner des blessures graves ou la mort.
REMARQUE! Les illustrations contenues dans le
présent manuel sont fournies à titre explicatif. Votre
appareil peut ne pas être identique.
REMARQUE! Veillez à ce que les enfants et les
personnes qui n'utilisent pas l'appareil soient en
sécurité durant le travail.
2.2. SÉCURITÉ DES PERSONNES
a) N’utilisez pas l’appareil lorsque vous êtes fatigué,
malade, sous l’eet de drogues ou de médicaments
et que cela pourrait altérer votre capacité d’utiliser
l’appareil.
b) Seules des personnes ayant suivi une formation
appropriée, qui sont aptes à se servir de l'appareil et
en bonne santé physique peuvent utiliser la machine.
En outre, ces personnes doivent avoir lu le présent
manuel et connaître les exigences liées à la santé et
à la sécurité au travail.
c) Cet appareil n'est pas conçu pour être utilisé par les
personnes dont les facultés physiques, sensorielles
ou mentales sont limitées (enfants y compris), ni par
des personnes sans expérience ou connaissances
adéquates, à moins qu'elles se trouvent sous
la supervision et la protection d'une personne
responsable ou qu'une telle personne leur ait transmis
des consignes appropriées en lien avec l'utilisation de
l’appareil.
d) Soyez attentif et faites preuve de bon sens lors que
vous utilisez l’appareil. Un moment d'inattention
pendant le travail peut entraîner des blessures graves.
e) Utilisez l'équipement de protection individuel
approprié pour l'utilisation de l'appareil,
conformément aux indications faites dans le tableau
des symboles, au point 1. L'utilisation de l'équipement
de protection individuel adéquat certié réduit le
risque de blessures.
f) Ne surestimez pas vos capacités. Adoptez toujours
une position de travail stable vous permettant de
garder l'équilibre. Vous aurez ainsi un meilleur
contrôle en cas de situations inattendues.
2.3. UTILISATION SÉCURITAIRE DE L'APPAREIL
a) Ne faites pas surchauer l'appareil. Utilisez les outils
appropriés à l'usage que vous en faites. Le choix
d'appareils appropriés et l'utilisation soigneuse de
ceux-ci produisent de meilleurs résultats.
b) Les outils qui ne sont pas en cours d'utilisation
doivent être mis hors de portée des enfants et des
personnes qui ne connaissent ni l'appareil, ni le
mode d'emploi s'y rapportant. Entre les mains de

1716 Rev. 27.09.2018
Rev. 27.09.2018
Nomenclature:
No de
pièce
Description Nombre/
quantité
1Anneau de xation 1
2 Vis 2
3 Boulon 1
4Tige letée 1
5 Levier 1
6 Pommeau du levier 2
7 Cylindre-guide 1
8 Écrou 1
9 Cylindre de liaison 1
10 Écrou de blocage 1
11 Vis de blocage 1
12 Corps de bras 1
13 Bras réglable 1
14 Vis de serrage 1
15 Vis 2
16 Axe du rouleau 1
17 Logement du rouleau 1
18 Palier 2
19 Rouleau 1
ATTENTION! Les schémas du produit se trouvent
à la dernière page du manuel d’utilisation, p. 24.
g) Selon la forme de l'aile, réglez la distance séparant
le rouleau (19) de l'anneau (1) à l'aide de la vis de
blocage (11).
3.4. NETTOYAGE ET ENTRETIEN
• Pour nettoyer les diérentes surfaces, n'utilisez que
des produits sans agents corrosifs.
• Laissez bien sécher tous les composants de l’appareil
après chaque nettoyage avant de le réutiliser.
• Conservez l’appareil dans un endroit frais et sec,
à l’abri de l’humidité et des rayons directs du soleil.
• Contrôlez régulièrement l'appareil pour vous assurer
qu'il fonctionne ecacement et ne présente aucun
dommage.
• Lubriez régulièrement les pièces mobiles en
fonction de la fréquence d’utilisation de l'appareil.
SCHÉMAS D’ASSEMBLAGE
personnes inexpérimentées, ce genre d'appareils
peut représenter un danger.
c) Maintenez l'appareil en parfait état de marche. Avant
chaque utilisation, vériez l’absence de dommages
généraux et au niveau des pièces mobiles (assurez-
vous qu’aucune pièce ni composant n’est cassé et
vériez que rien ne compromet le fonctionnement
sécuritaire de l’appareil). En cas de dommages,
l’appareil doit impérativement être réparé avant
d’être utilisé de nouveau.
d) Tenez l'appareil hors de portée des enfants.
e) La réparation et l'entretien des appareils doivent
être eectués uniquement par un personnel qualié,
à l'aide de pièces de rechange d'origine. Cela
garantit la sécurité d’utilisation.
f) Nettoyez régulièrement l'appareil pour en prévenir
l’encrassement.
g) Lors du montage et du démontage de l'appareil
sur le véhicule, faites preuve d’une prudence
particulière. L'appareil peut tomber s'il n'est pas
installé ou soutenu correctement au moment du
montage/démontage
h) N'exercez aucune pression excessive sur l’appareil.
Cela peut endommager l'appareil ou le véhicule.
i) Lors de la manipulation de l’appareil, faites preuve
de prudence. Lors du réglage et de l'utilisation, il
existe un risque d'écrasement des mains entre le
rouleau et l’aile. Portez des gants de protection.
3. CONDITIONS D’UTILISATION
L'outil de débosselage d'arrondi des ailes a été conçu
pour le formage des ailes, c'est-à-dire pour éliminer les
déformations de la tôle et agrandir l’espace sous le garde-
boue où se trouve la roue.
L’utilisateur porte l’entière responsabilité en cas de
dommages attribuables à un usage inapproprié.
3.1. DESCRIPTION DE L'APPAREIL
ATTENTION! Bien que l'appareil ait été conçu en
accordant une attention spéciale à la sécurité et qu'il
comporte des dispositifs de protection ainsi que des
caractéristiques de sécurité supplémentaires, il n’est
pas possible d’exclure entièrement tout risque de
blessure lors de son utilisation. Nous recommandons
de faire preuve de prudence et de bon sens lorsque
vous utilisez l’appareil.
d) Réglez le rouleau (19) de l’appareil de sorte qu’il
soit parallèle au bras de l’appareil (12). Eectuez le
réglage à l'aide de la vis de serrage (14).
e) À l’aide du levier (4), soulevez le rouleau (19) vers
l'aile. Déplacez ensuite le bras de l'appareil dans une
direction, puis dans l'autre, en exerçant une légère
pression.
f) Formez l'aile par étapes, en réglant la pression
appliquée par le rouleau (19) de temps en temps au
moyen du levier (4).
e
g
d
f
12
3
6
4
7
1
5
14
19
13
11
9
La description des composants se trouve dans le tableau du
schéma d'assemblage, à la n du manuel.
3.2. PRÉPARATION À L'UTILISATION
Montage de l'appareil:
a) Posez le corps du bras (12) sur l’anneau de xation (1)
à l'aide du boulon (3).
b) Tournez la tige letée (4) et le cylindre-guide (7)
de sorte que l'extrémité de la tige traverse aussi le
cylindre de liaison (9). Fixez le tout à l'aide d'un écrou
(10) et d'une rondelle (8).
c) Dévissez le pommeau du levier (6) et déposez les
écrous se trouvant sur le levier.
d) Insérez le levier (5) dans l'orice de la tige letée (4).
Vissez le pommeau (6) sur le levier (5).
e) Insérez le bras réglable (13) dans le corps du bras (12).
f) Fixez le tout à l'aide de la vis de blocage (11).
3.3. UTILISATION DE L'APPAREIL
a) Soulevez le véhicule à l'aide d'un dispositif de levage
approprié (p. ex. un pont basculant)
b) Dévissez et déposez la roue du véhicule.
c) Fixez l'anneau de xation (1) de l'appareil à la place de
la roue. Fixez le tout à l'aide d'écrous et de rondelles.

ISTRUZIONI PER L‘USO
18 19
Rev. 27.09.2018
Rev. 27.09.2018
2.1. SICUREZZA SUL LAVORO
a) Mantenere il posto di lavoro pulito e ben illuminato.
Il disordine o una scarsa illuminazione possono
condurre a incidenti. Prestare sempre attenzione,
osservare che cosa viene fatto e utilizzare il buon
senso quando si adopera il dispositivo.
b) In caso di danni o malfunzionamento, il dispositivo
deve essere spento immediatamente e segnalato
a una persona autorizzata.
c) Se non si è sicuri del corretto funzionamento del
dispositivo, rivolgersi al servizio assistenza del
fornitore.
d) Le riparazioni devono essere eseguite esclusivamente
dal servizio clienti del fornitore. Non eseguire le
riparazioni da soli!
e) I bambini e le persone non autorizzate non devono
essere presenti sul posto di lavoro (la disattenzione può
causare la perdita di controllo dell'apparecchiatura).
Parametri – Descrizione Parametri – Valori
Nome del prodotto Flangiatubo per
parafango
Modello MSW-BG-655
Lunghezza massima [mm] 570
Lunghezza minima [mm] 370
Campo di regolazione [mm] 140
Diametro interno [mm] 73
Diametro esterno [mm] 150
Peso [kg] 6,54
DATI TECNICI
1. DESCRIZIONE GENERALE
Questo manuale è stato concepito come aiuto per un uso
sicuro ed adabile del dispositivo. Il prodotto è stato
rigorosamente progettato e realizzato secondo le direttive
tecniche e attraverso l'utilizzo delle più moderne tecnologie
e componenti, seguendo gli standard di qualità più elevati.
PRIMA DELL'USO LEGGERE E COMPRENDERE
ATTENTAMENTE LE ISTRUZIONI.
Per un funzionamento lungo e adabile del prodotto,
è necessario prestare attenzione alle indicazioni. Ciò
garantisce una corretta gestione e manutenzione del
dispositivo, in conformità con le istruzioni fornite in questo
manuale. I dati tecnici e le speciche riportati in questo
manuale sono aggiornati. Il produttore si riserva il diritto di
apportare modiche come parte del miglioramento della
qualità del prodotto.
Spiegazione dei simboli
Il manuale originale è stato scritto in tedesco. Le versioni in
altre lingue sono traduzioni dalla lingua tedesca.
2. SICUREZZA NELL'IMPIEGO
Il termine "apparecchio" o "prodotto" nelle avvertenze
e descrizioni contenute nel manuale si riferisce al
angiatubo per parafango.
Leggere attentamente le istruzioni.
ATTENZIONE! o AVVERTIMENTO! o NOTA!
Per prestare attenzione a situazioni speciche
(simbolo di avvertimento generale).
Utilizzare dei guanti protettivi.
ATTENZIONE! Pericolo di lesioni alle mani.
ATTENZIONE! Leggere tutte le istruzioni d'uso e di
sicurezza. Non prestare attenzione alle avvertenze
e alle istruzioni può condurre a gravi lesioni
o addirittura al decesso.
ATTENZIONE! Le immagini in questo manuale
sono puramente dimostrative per cui le immagini
riportate possono dierire dall'aspetto reale del
prodotto.
ATTENZIONE! Quando si lavora con questo
dispositivo, i bambini e le persone non coinvolte
devono essere protetti.
2.2. SICUREZZA PERSONALE
a) Non è consentito l'uso del dispositivo in stato di
aaticamento, malattia, sotto l'inuenza di alcol,
droghe o farmaci, se questi limitano la capacità di
utilizzare il dispositivo.
b) Il dispositivo deve essere utilizzato solo da personale
adeguatamente istruito, sicamente in grado di
utilizzare il dispositivo e in buona salute che abbia
letto questo manuale e conosca le normative sulla
sicurezza sul posto di lavoro.
c) Questo dispositivo non è adatto per essere utilizzato
da persone, bambini compresi, con ridotte capacità
siche, sensoriali o mentali, così come da persone
prive di adeguata esperienza e/o conoscenza. Fatta
eccezione per coloro i quali siano sorvegliati da un
responsabile qualicato che si prenda carico della
loro sicurezza e abbia ricevuto istruzioni dettagliate al
riguardo.
d) Fare attenzione e usare il buon senso quando si
utilizza il dispositivo. Un momento di disattenzione
durante il lavoro può causare gravi lesioni.
e) Utilizzare gli strumenti di protezione individuale
necessari per il funzionamento dell'apparecchio
conformemente alle speciche indicate nella
spiegazione dei simboli al punto 1. L'uso di strumenti
di protezione individuale adeguati e certicati riduce il
rischio di lesioni.
f) Non sopravvalutare le proprie abilità. Mantenere
l'equilibrio durante il lavoro. In questo modo
è possibile controllare meglio il dispositivo in caso di
situazioni impreviste.
2.3. USO SICURO DEL DISPOSITIVO
a) Non far surriscaldare il dispositivo. Utilizzare strumenti
appropriati per un uso appropriato. Dispositivi
opportunamente selezionati. Un attento utilizzo degli
stessi portano a risultati migliori.
b) Gli strumenti inutilizzati devono essere tenuti fuori
dalla portata dei bambini e delle persone che non
hanno familiarità con l'unità e le istruzioni. Nelle
mani di persone inesperte questo apparecchio può
rappresentare un pericolo.
c) Mantenere l'apparecchio in perfette condizioni. Prima
di ogni utilizzo, vericare che non vi siano danni
generali o danni alle parti mobili (frattura di parti
e componenti o altre condizioni che potrebbero
compromettere il funzionamento sicuro della
macchina). In caso di danni, l'unità deve essere
riparata prima dell'uso.
d) Tenere il dispositivo fuori dalla portata dei bambini.
e) La riparazione e la manutenzione dell'attrezzatura
devono essere eseguite esclusivamente da personale
specializzato qualicato e con pezzi di ricambio
originali. Ciò garantisce la sicurezza durante l'uso.
f) Pulire regolarmente l'apparecchio in modo da evitare
l'accumulo di sporcizia.
g) Prestare particolare attenzione durante il montaggio
e lo smontaggio del dispositivo sul veicolo. Il
dispositivo può cadere se non correttamente
installato o se non correttamente supportato durante
il processo montaggio/smontaggio.
h) Non esercitare una pressione eccessiva con il
dispositivo. Ciò potrebbe danneggiare il dispositivo,
così come il veicolo.
i) Prestare attenzione durante la manipolazione del
dispositivo. Durante la regolazione o il funzionamento,
la mano potrebbe rimanere schiacciata tra il rullo e il
parafango. Utilizzare guanti di protezione.
ATTENZIONE! Anche se l'apparecchiatura è stata
progettata per essere sicura, sono presenti degli
ulteriori meccanismi di sicurezza. Malgrado
l'applicazione di misure supplementari di sicurezza,
permangono dei rischi per la sicurezza personale. Si
raccomanda inoltre di usare cautela e buon senso.
d) Regolare il rullo (19) del dispositivo in modo che sia
parallelo al braccio del dispositivo (12). Regolare con
la vite di blocco (14).
e) Usando la leva (4), sollevare il rullo (19) nella direzione
del parafango e con una leggera pressione spostare il
braccio del dispositivo in entrambe le direzioni.
f) Formare gradualmente il parafango e di tanto in tanto
regolare la pressione del rullo (19) sul parafango con
la leva (4).
g) Regolare la distanza del rullo (19) sull'anello di
regolazione (1) con la vite di pressione (11) e il braccio
regolabile (13) in base alla forma del parafango.
3.4. PULIZIA E MANUTENZIONE
• Per pulire la supercie utilizzare solo detergenti senza
sostanze corrosive.
• Dopo la pulizia, prima di utilizzare di nuovo
l'apparecchio, asciugare tutte le parti.
e
g
d
f
12
3
6
4
7
1
5
14
19
13
11
9
I nomi delle singole parti sono riportati nella tabella nella
rappresentazione nale, al termine di questo libretto.
3.2. PREPARAZIONE AL FUNZIONAMENTO
Montaggio del dispositivo:
a) Montare il corpo del braccio (12) sull'anello di
montaggio (1) con il bullone (3).
b) Inlare l'asta lettata (4) sul rullo guida (7) in modo
che anche l'estremità dell'asta lettata passi attraverso
il rullo di collegamento (9). Proteggere la connessione
con il dado (10) e la rondella (8).
c) Svitare il pomello della leva (6) e rimuovere i dadi su di
esso.
d) Inserire la leva (5) attraverso l'apertura nell'asta
lettata (4). Avvitare la manopola (6) sulla leva (5).
e) Inserire il braccio regolabile (13) nel corpo del braccio
(12).
f) Fissare il collegamento con la vite di pressione (11).
3.3. LAVORARE CON IL DISPOSITIVO
a) Sollevare il veicolo con un dispositivo adatto (un
giusto sollevatore).
b) Svitare e rimuovere la ruota del veicolo.
c) Fissare il dispositivo con l'anello di ssaggio (1) al
posto della ruota. Assicurare la connessione con il
dado (10) e la rondella (8).
3. CONDIZIONI D'USO
Il angiatubo per parafango è stato concepito per formare
i parafanghi, eliminare le deformazioni dello stesso
e aumentare lo spazio sotto il parafango per le ruote.
L'operatore è responsabile di tutti i danni derivanti da
un uso improprio.
3.1. DESCRIZIONE DEL DISPOSITIVO

MANUAL DE INSTRUCCIONES
20 21
Rev. 27.09.2018
Rev. 27.09.2018
Indice delle parti:
Numero
di parti
Descrizione Numero/
pezzi
1Anello di ssaggio 1
2 Vite 2
3 Bulloni 1
4Asta lettata 1
5 Leva 1
6 Pomello leva 2
7 Rullo di guida 1
8 Dado 1
9 Rullo di collegamento 1
10 Ghiera 1
11 Dado di regolazione 1
12 Corpo del braccio 1
13 Braccio regolabile 1
14 Vite di blocco 1
15 Vite 2
16 Asse del rullo 1
17 Appoggio rullo 1
18 Appoggio 2
19 Rullo 1
ATTENZIONE! Le illustrazioni di questo prodotto si
trovano sull'ultima pagina del manuale d'istruzioni,
vedi pag. 24.
• Tenere l'apparecchio in un luogo asciutto, fresco,
protetto dall'umidità e dalla luce diretta del sole.
• Eettuare controlli regolari del dispositivo per
mantenerlo eciente e privo di danni.
• Lubricare regolarmente gli elementi mobili,
a seconda della frequenza di funzionamento.
DISEGNI DI ASSEMBLAGGIO
2.1. SEGURIDAD EN EL PUESTO DE TRABAJO
a) Mantenga el lugar de trabajo limpio y bien iluminado.
El desorden o la mala iluminación pueden provocar
accidentes. Tenga cuidado, preste atención al trabajo
que está realizando y use el sentido común cuando
utilice el dispositivo.
b) En caso de avería o mal funcionamiento, apague el
aparato y contacte con el servicio técnico autorizado.
c) Si no está seguro de que la unidad funcione
correctamente, póngase en contacto con el servicio
técnico del fabricante.
d) Las reparaciones solo pueden ser realizadas por
el servicio técnico del fabricante. ¡No realice
reparaciones por su cuenta!
e) Se prohíbe la presencia de niños y personas no
autorizadas en el lugar de trabajo (la falta de atención
puede llevar a la pérdida de control del equipo).
Parámetro – Descripción Parámetro – Valor
Nombre del producto Herramienta para
ensanchar guardabarros
Modelo MSW-BG-655
Longitud máxima [mm] 570
Longitud mínima [mm] 370
Gama de ajuste [mm] 140
Diámetro interior [mm] 73
Diámetro exterior [mm] 150
Peso [kg] 6,54
DATOS TÉCNICOS
1. DESCRIPCIÓN GENERAL
Este manual ha sido elaborado para favorecer un empleo
seguro y able. El producto ha sido estrictamente diseñado
y fabricado conforme a las especicaciones técnicas y para
ello se han utilizado las últimas tecnologías y componentes,
manteniendo los más altos estándares de calidad.
ANTES DE LA PUESTA EN FUNCIONAMIENTO,
LEA LAS INSTRUCCIONES MINUCIOSAMENTE Y
ASEGÚRESE DE COMPRENDERLAS.
El texto en alemán corresponde a la versión original. Los
textos en otras lenguas son traducciones del original en
alemán.
2. SEGURIDAD
Conceptos como "aparato" o "producto" en las advertencias
y descripciones de este manual se reeren a la herramienta
para ensanchar guardabarros.
Para garantizar un funcionamiento duradero y able del
aparato, el manejo y mantenimiento deben llevarse a cabo
de acuerdo con las instrucciones de este manual. Los
datos técnicos y las especicaciones de este manual están
actualizados. El fabricante se reserva el derecho de realizar
modicaciones para mejorar la calidad.
Explicación de los símbolos
Respetar las instrucciones de uso.
¡ATENCIÓN!, ¡ADVERTENCIA! o ¡NOTA! para
llamar la atención sobre ciertas circunstancias
(señal general de advertencia).
¡Utilizar guantes de protección!
¡ATENCIÓN! Advertencia de lesiones en manos.
¡ATENCIÓN! Lea todas las instrucciones
e indicaciones de seguridad. La inobservancia de
las advertencias e instrucciones al respecto puede
provocar lesiones graves o incluso la muerte.
¡ADVERTENCIA! En este manual se incluyen fotos
ilustrativas, que podrían no coincidir exactamente
con la apariencia real del producto.
¡ADVERTENCIA! Los niños y las personas no
autorizadas deben estar asegurados cuando trabajen
con esta unidad.
2.2. SEGURIDAD PERSONAL
a) No está permitido utilizar el aparato en estado de
fatiga, enfermedad, bajo la inuencia del alcohol,
drogas o medicamentos, ya que estos limitan la
capacidad de manejo del aparato.
b) La máquina debe ser manipulada exclusivamente por
operarios con la formación adecuada para el manejo
y físicamente sanos, que haya leído las presentes
instrucciones y conozca los requisitos en materia de
seguridad y salud.
c) Este aparato no debe ser utilizado por niños ni
personas con capacidades físicas, sensoriales
o mentales reducidas o con falta de experiencia
y/o conocimiento, a menos que sean supervisadas
por una persona responsable de su seguridad.
d) Actúe con precaución y use el sentido común
cuando maneje este producto. La más breve falta de
atención durante el trabajo puede causar lesiones
graves.
e) Utilice el equipo de protección personal necesario
para el empleo de este dispositivo, de acuerdo con
las especicaciones del punto 1 de las explicaciones
de los símbolos. El uso de un equipo de protección
personal apropiado y certicado reduce el riesgo de
lesiones.
f) No sobreestime sus habilidades. Mantenga el
equilibrio durante el trabajo. Esto le da un mejor
control sobre el dispositivo en caso de situaciones
inesperadas.
2.3. MANEJO SEGURO DEL APARATO
a) No permita que el aparato se sobrecargue. Utilice
las herramientas apropiadas para cada trabajo.
Debe seleccionarse el aparato adecuado para cada
aplicación y utilizarse conforme al n para el que ha sido
diseñado, para conseguir así los mejores resultados.
b) Mantenga las herramientas fuera del alcance de los
niños y de las personas que no estén familiarizadas
con el equipo en sí o no hayan recibido instrucciones
pertinentes para su uso. En manos de personas
inexpertas este equipo puede representar un peligro.
c) Mantenga el aparato en perfecto estado
de funcionamiento. Antes de cada trabajo,
compruébelo en busca de daños generales o en
piezas móviles (fractura de piezas y componentes

22 23
Rev. 27.09.2018
Rev. 27.09.2018
Indice delle parti:
N° de
pieza
Descripción Cantidad
de piezas
1Anillo de jación 1
2 Tornillo 2
3 Perno 1
4 Barra roscada 1
5 Palanca 1
6 Topes de palanca 2
7 Rodillo de guía 1
8 Tuerca 1
9 Rodillo conector 1
10 Tuerca 1
11 Tuerca de ajuste 1
12 Cuerpo del brazo 1
13 Brazo ajustable 1
14 Tornillo de jación 1
15 Tornillo 2
16 Eje del rodillo 1
17 Soporte del rodillo 1
18 Cojinete 2
19 Rodillo 1
¡ATENCIÓN! El despiece de este producto se
encuentra en las últimas páginas de las instrucciones
p. 24.
• Almacene el aparato en un lugar seco, fresco
y protegido de la humedad y la radiación solar directa.
• En lo que respecta a la eciencia técnica y posibles
daños, el dispositivo debe ser revisado regularmente.
• Engrasar los elementos móviles regularmente,
dependiendo de la frecuencia de uso.
DESPIECE
u otras condiciones que puedan perjudicar
el funcionamiento seguro de la máquina). En
caso de daños, el aparato debe ser reparado
antes de volver a ponerse en funcionamiento.
d) Mantenga la unidad fuera del alcance de los niños.
e) La reparación y el mantenimiento de los equipos
solo pueden ser realizados por personal cualicado
y siempre empleando piezas de repuesto originales.
Esto garantiza la seguridad durante el uso.
f) Limpie regularmente el dispositivo para evitar
que la suciedad se incruste permanentemente.
g) Preste especial atención cuando monte
y desmonte este dispositivo en el vehículo. El
dispositivo podría caer en caso de estar mal
montado o bien durante el montaje/desmontaje
si no hubiera sido convenientemente asegurado.
h) No ejerza presión excesiva sobre el dispositivo. Esto
podría causar daños al dispositivo e incluso al vehículo.
i) Se ruega actúe con precaución cuando utilice el
dispositivo. Durante el ajuste y el funcionamiento, ya
que la mano podría quedar atrapada entre el rodillo y el
guardabarros.Esnecesarioutilizarguantesprotectores.
¡ATENCIÓN! Aunque en la fabricación de
este aparato se ha prestado gran importancia
a la seguridad, dispone de ciertos mecanismos de
protección extras. A pesar del uso de elementos de
seguridad adicionales, existe el riesgo de lesiones
durante el funcionamiento, por lo que se recomienda
proceder con precaución y sentido común.
d) Colocar el rodillo (19) de forma que quede en paralelo
al brazo del dispositivo (12). Ajústelo utilizando el
tornillo de jación (14).
e) Con ayuda de la palanca (4), eleve el rodillo (19) hacia
el guardabarros y mueva el brazo del dispositivo en
ambas direcciones mientras lo presiona ligeramente.
f) Dé forma al guardabarros de forma gradual y, de
vez en cuando, ajuste la presión del rodillo (19) al
guardabarros mediante la palanca (4).
g) Ajuste la distancia del rodillo (19) al anillo de jación
(1) por medio del tornillo de bloqueo (11) y amolde el
brazo ajustable (13) a la forma del guardabarros.
3.4. LIMPIEZA Y MANTENIMIENTO
• Para limpiar la supercie, utilice solo productos que
no contengan sustancias corrosivas.
• Después de cada limpieza, deje secar bien todas las
piezas antes de volver a utilizar el aparato.
e
g
d
f
12
3
6
4
7
1
5
14
19
13
11
9
Las designaciones de cada pieza se encuentran listadas en la
tabla de componentes al nal de las instrucciones.
3.2. PREPARACIÓN PARA LA PUESTA EN MARCHA
Montaje de la máquina
a) Montar el cuerpo del brazo (12) al anillo de jación (1)
con ayuda del perno (3).
b) Atornillar la barra roscada (4) y el rodillo guía (7)
de manera que la barra roscada también atraviese
el rodillo conector (9). Asegurar la conexión con la
tuerca (10) y la arandela (8).
c) Desatornillar los topes de la palanca (6) y retirar las
tuercas almacenadas en ellos.
d) Introducir la palanca (5) por la abertura en la barra
roscada (4). Enroscar los topes (6) a la palanca (5).
e) Insertar el brazo ajustable (13) en el cuerpo del brazo
(12).
f) Asegurar la conexión con el tornillo de bloqueo (11).
3.3. MANEJO DEL APARATO
a) Eleve el vehículo utilizando un dispositivo apropiado
(por ejemplo, un elevador para coches).
b) Retirar la rueda.
c) Fijar el dispositivo al lugar donde va la rueda por
medio del anillo de jación (1). Asegurar la conexión
con tuercas y arandelas.
3. INSTRUCCIONES DE USO
Esta herramienta ha sido desarrollada para dar forma
a guardabarros, esto es, para eliminar deformaciones
o aumentar el espacio para las ruedas bajo los guardabarros.
El usuario es responsable de los daños derivados de un
uso inadecuado del aparato.
3.1. DESCRIPCIÓN DEL APARATO

2524
NOTES/NOTIZEN
Rev. 27.09.2018
Rev. 27.09.2018
Zusammensetzen des Geräts | Folding the equipment | Składanie sprzętu | Skládání zařízení
Assemblage de l‘appareil | Montaggio del dispositivo | Montaje del equipo
11
12
13 14
15
16
17
18
19
18
6
5
4
6
2
1
2
3
7
8
9
10

2726 Rev. 27.09.2018
Rev. 27.09.2018
NOTES/NOTIZENNOTES/NOTIZEN

expondo.de
CONTACT
expondo Polska sp. z o.o. sp. k.
ul. Nowy Kisielin-Innowacyjna 7
66-002 Zielona Góra | Poland, EU
e-mail: info@expondo.de
UNSER HAUPTZIEL IST DIE ZUFRIEDENHEIT UNSERER KUNDEN!
BEI FRAGEN KONTAKTIEREN SIE UNS BITTE UNTER:
OUR CUSTOMERS‘ SATISFACTION IS OUR MAIN GOAL!
PLEASE CONTACT US WITH QUESTIONS AT:
NASZYM GŁÓWNYM CELEM JEST SATYSFAKCJA KLIENTÓW
W PRZYPADKU PYTAŃ PROSIMY O KONTAKT Z PRZEDSTAWICIELEM
W DANYM KRAJU:
NAŠÍM HLAVNÍM CÍLEM JE SPOKOJENOST NAŠICH ZÁKAZNÍKŮ! V PŘÍPADĚ OTÁZEK
NÁS PROSÍM KONTAKTUJTE NA:
NOTRE BUT PREMIER EST VOTRE SATISFACTION!
POUR TOUTE QUESTION, CONTACTEZ NOUS SUR:
I NOSTRO PRINCIPALE OBIETTIVO È LA SODDISFAZIONE DEI NOSTRI CLIENTI!
PER EVENTUALI DOMANDE PER FAVORE, CI CONTATTINO SOTTO:
NUESTRO OBJETIVO PRINCIPAL ES LA SATISFACCIÓN DE NUESTROS CLIENTES!
SI TIENE PREGUNTAS, POR FAVOR PÓNGANSE EN CONTACTO CON NOSTROS EN:
Table of contents
Languages:
Other Expondo Tools manuals
