2
CCI Pro 700 • Setup Guide (Continued)
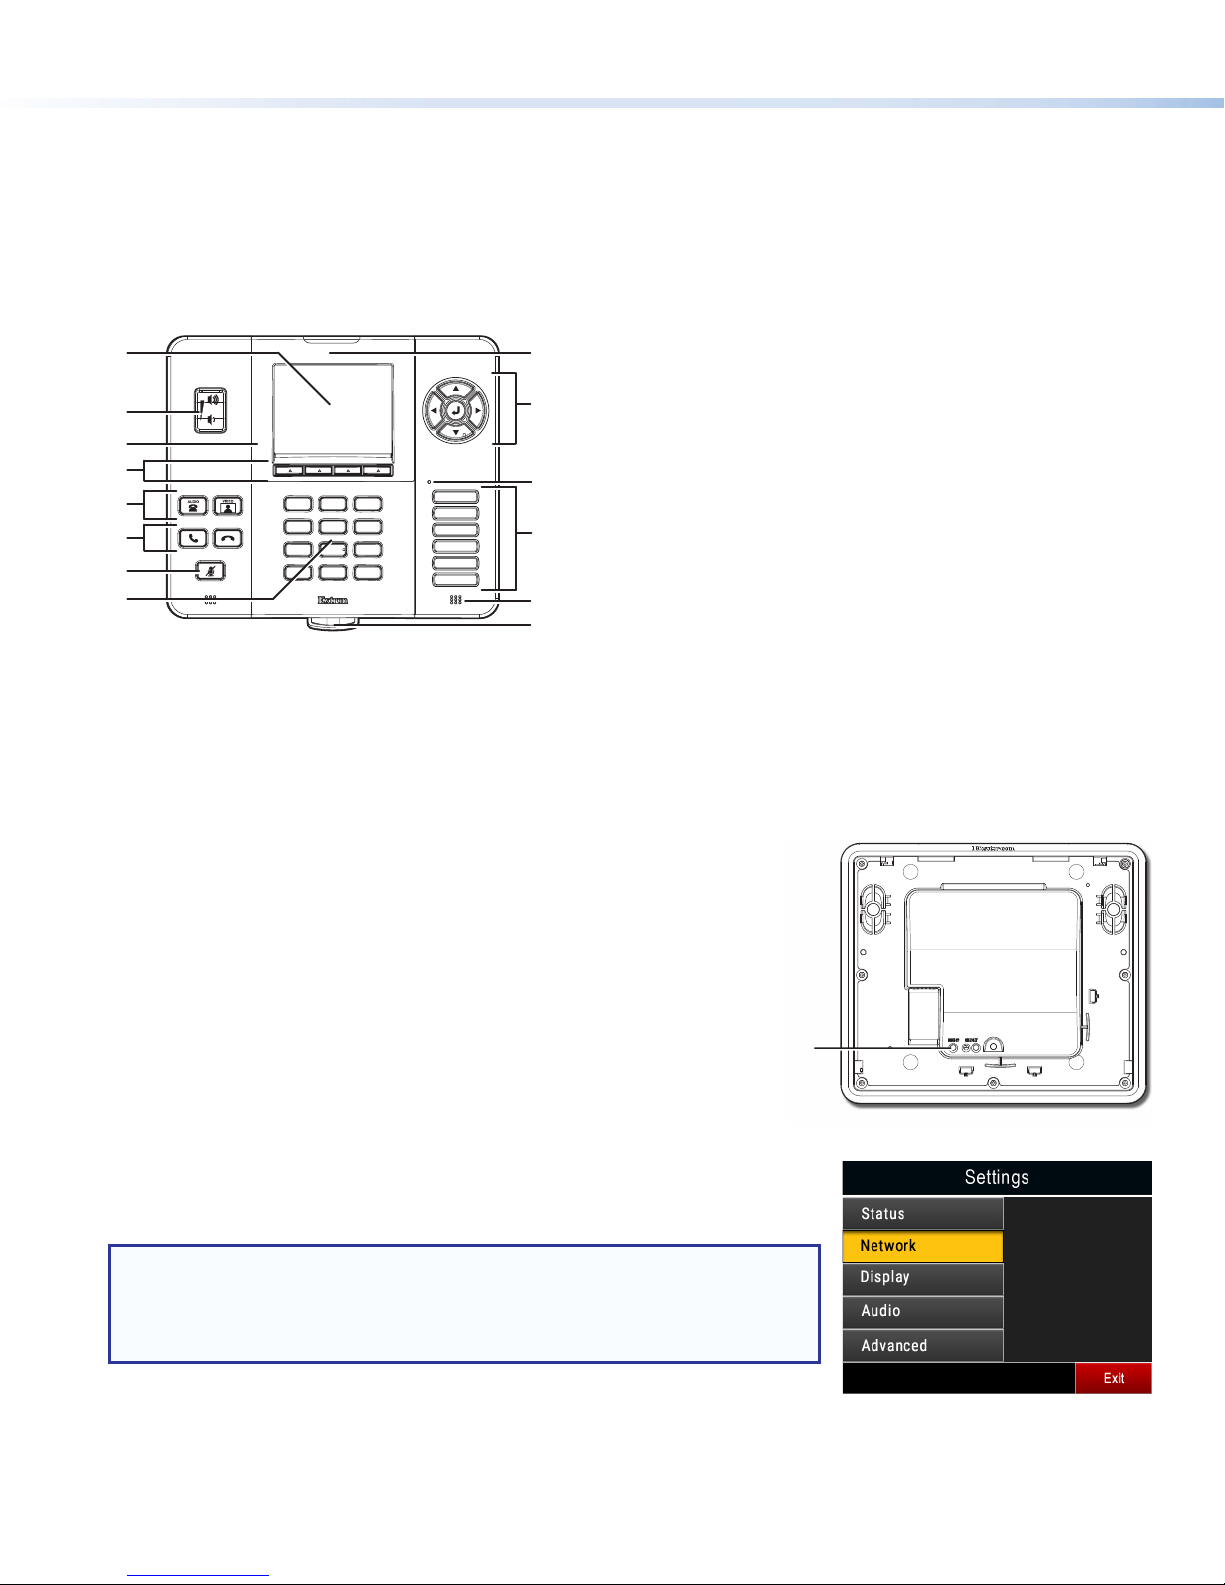
Front Panel Features
The CCI Pro 700 comes with installed buttons for common
functions (see the CCI Pro 700 User Guide for information
on changing the buttons). However, button functions are not
assigned until they are congured in Global Congurator
Plus and Professional (see the Global Configurator Help le).
See gure 1 for front panel features and common button
functions.
DEF
3
MNO
6
WXYZ
9
#
*
ABC
2
JKL
5
TUV
8
OPER
0
PQRS
7
GHI
4
_,@
1
I
J
K
L
N
M
Figure 1. Front Panel Features
Configuration
Setup Menu
The setup menu provides local, basic conguration options for the CCI Pro 700.
When the CCI Pro 700 is initially powered on, use the setup menu to establish
network settings, set display settings, set the output volume, and set a lockout PIN.
To access the setup menu, use an Extron Tweeker or small screwdriver to press the
rear panel Menu button (see gure 2, Ato the right). The setup menu opens to the
Status page.
At a minimum, set the network settings with the setup menu (see Network settings
on page 3). For information about the other submenus, see the CCI Pro 700 User
Guide on the Extron website, www.extron.com.
Menu navigation
Press the Navigation buttons (see gure 1, I) to navigate the setup menu
system. Use the directional Navigation buttons (▲, ▼, ►, ◄) to highlight desired
menus and settings. Press the ]Navigation button to select highlighted menus or
settings. When applicable, additional options appear on the screen above the Context
buttons (see gure 1, D). Press the Context button directly below the option to select
that option.
NOTE: Some settings or menus are located on additional pages of the same menu
or submenu. When applicable, use the ▲and ▼ Navigation buttons or the
Context buttons below Page Down and Page Up to access more options.
Within submenus, press the Context button below Main to return to the main
menu without making changes.
To exit the setup menu, press the Context button below Exit from the main menu.
A LCD screen — Provides a 320x240, 3.5 inch diagonal
display.
B Volume button — Controls volume.
C Ambient light sensor — Detects room lighting changes
and adjusts button and LCD screen illumination levels
accordingly.
D Context buttons — Select specified options on the bottom
of the LCD screen or the setup menu.
E Mode buttons — Configure the conference mode.
F Dial buttons — Start or end conference calls.
G Mic mute button — Mutes the microphone.
H Keypad buttons — Enters values or dials numbers.
I Navigation buttons — Navigate the setup menu.
J Transmit LED indicator — Lights according to Function
button activity.
K Function buttons — Select inputs or other configurable
functions.
L Motion sensor — Detects motion to wake the LCD screen
and button illumination from Sleep mode.
M Pull-out tray — Provides a small tray to house important
information.
N Status indicator — Lights green or red for configurable
conference room conditions.
A
Figure 2. Rear Panel Menu Button


