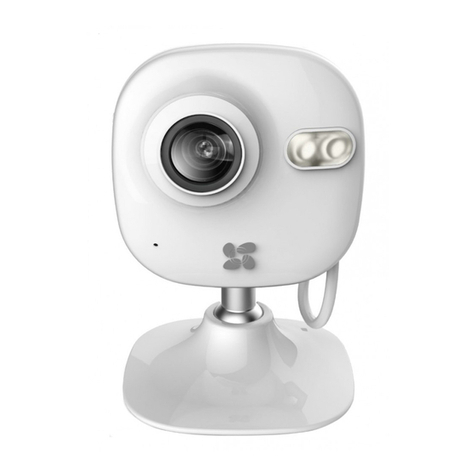
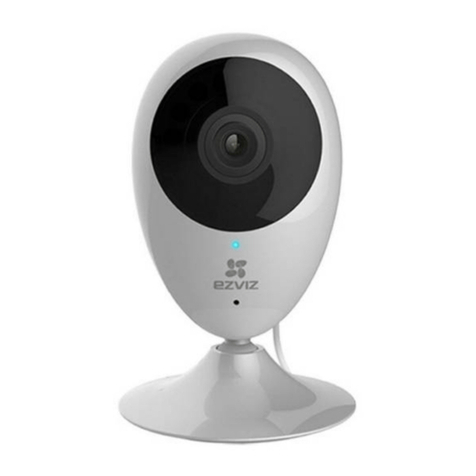
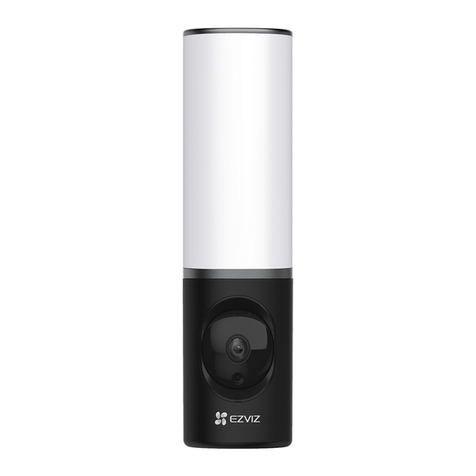
Ezviz LC1C User manual

Scan the QR code with the EZVIZ App
to add the device to your account.
Please keep it for further reference.
www.ezvizlife.com


COPYRIGHT © Hangzhou EZVIZ Software Co., Ltd.. ALL RIGHTS RESERVED.
Any and all information, including, among others, wordings, pictures, graphs are the properties of Hangzhou EZVIZ Software Co., Ltd.
(hereinafter referred to as “EZVIZ”). This user manual (hereinafter referred to as “the Manual”) cannot be reproduced, changed, translated, or
distributed, partially or wholly, by any means, without the prior written permission of EZVIZ. Unless otherwise stipulated, EZVIZ does not make
any warranties, guarantees or representations, express or implied, regarding to the Manual.
About this Manual
The Manual includes instructions for using and managing the product. Pictures, charts, images and all other information hereinafter are for
description and explanation only. The information contained in the Manual is subject to change, without notice, due to rmware updates or
other reasons. Please nd the latest version in the ™ website (http://www.ezvizlife.com).
Revision Record
New release – January, 2019
Trademarks Acknowledgement
™ , ™ , and other EZVIZ’s trademarks and logos are the properties of EZVIZ in various jurisdictions. Other trademarks and logos
mentioned below are the properties of their respective owners.
Legal Disclaimer
TO THE MAXIMUM EXTENT PERMITTED BY APPLICABLE LAW, THE PRODUCT DESCRIBED, WITH ITS HARDWARE, SOFTWARE AND
FIRMWARE, IS PROVIDED “AS IS”, WITH ALL FAULTS AND ERRORS, AND EZVIZ MAKES NO WARRANTIES, EXPRESS OR IMPLIED, INCLUDING
WITHOUT LIMITATION, MERCHANTABILITY, SATISFACTORY QUALITY, FITNESS FOR A PARTICULAR PURPOSE, AND NON-INFRINGEMENT
OF THIRD PARTY. IN NO EVENT WILL EZVIZ, ITS DIRECTORS, OFFICERS, EMPLOYEES, OR AGENTS BE LIABLE TO YOU FOR ANY SPECIAL,
CONSEQUENTIAL, INCIDENTAL, OR INDIRECT DAMAGES, INCLUDING, AMONG OTHERS, DAMAGES FOR LOSS OF BUSINESS PROFITS,
BUSINESS INTERRUPTION, OR LOSS OF DATA OR DOCUMENTATION, IN CONNECTION WITH THE USE OF THIS PRODUCT, EVEN IF EZVIZ
HAS BEEN ADVISED OF THE POSSIBILITY OF SUCH DAMAGES.
TO THE MAXIMUM EXTENT PERMITTED BY APPLICABLE LAW, IN NO EVENT SHALL EZVIZ’S TOTAL LIABILITY FOR ALL DAMAGES EXCEED
THE ORIGINAL PURCHASE PRICE OF THE PRODUCT.
EZVIZ DOES NOT UNDERTAKE ANY LIABILITY FOR PERSONAL INJURY OR PROPERTY DAMAGE AS THE RESULT OF PRODUCT INTERRUPTION
OR SERVICE TERMINATION CAUSED BY: A) IMPROPER INSTALLATION OR USAGE OTHER THAN AS REQUESTED; B) THE PROTECTION OF
NATIONAL OR PUBLIC INTERESTS; C) FORCE MAJEURE; D) YOURSELF OR THE THIRD PARTY, INCLUDING WITHOUT LIMITATION, USING
ANY THIRD PARTY’S PRODUCTS, SOFTWARE, APPLICATIONS, AND AMONG OTHERS.
REGARDING TO THE PRODUCT WITH INTERNET ACCESS, THE USE OF PRODUCT SHALL BE WHOLLY AT YOUR OWN RISKS. EZVIZ SHALL NOT
TAKE ANY RESPONSIBILITES FOR ABNORMAL OPERATION, PRIVACY LEAKAGE OR OTHER DAMAGES RESULTING FROM CYBER ATTACK,
HACKER ATTACK, VIRUS INSPECTION, OR OTHER INTERNET SECURITY RISKS; HOWEVER, EZVIZ WILL PROVIDE TIMELY TECHNICAL
SUPPORT IF REQUIRED.
SURVEILLANCE LAWS AND DATA PROTECTION LAWS VARY BY JURISDICTION. PLEASE CHECK ALL RELEVANT LAWS IN YOUR JURISDICTION
BEFORE USING THIS PRODUCT IN ORDER TO ENSURE THAT YOUR USE CONFORMS TO THE APPLICABLE LAW. EZVIZ SHALL NOT BE LIABLE
IN THE EVENT THAT THIS PRODUCT IS USED WITH ILLEGITIMATE PURPOSES.
IN THE EVENT OF ANY CONFLICTS BETWEEN THE ABOVE AND THE APPLICABLE LAW, THE LATTER PREVAILS.
Regulatory Information
FCC Information
This device complies with Part 15 of the FCC Rules. Operation is subject to the following two conditions:
(1) This device may not cause harmful interference, and
(2) This device must accept any interference received, including interference that may cause undesired operation.
Note: This product has been tested and found to comply with the limits for a Class B digital device, pursuant to Part 15 of the FCC Rules. These
limits are designed to provide reasonable protection against harmful interference in a residential installation. This product generates, uses,
and can radiate radio frequency energy and, if not installed and used in accordance with the instructions, may cause harmful interference to
radio communications. However, there is no guarantee that interference will not occur in a particular installation. If this product does cause
harmful interference to radio or television reception, which can be determined by turning the equipment off and on, the user is encouraged to
try to correct the interference by one or more of the following measures:
—Reorient or relocate the receiving antenna.
—Increase the separation between the equipment and receiver.
—Connect the equipment into an outlet on a circuit different from that to which the receiver is connected.
—Consult the dealer or an experienced radio/TV technician for help.
Please take attention that changes or modication not expressly approved by the party responsible for compliance could void the
user’sauthority to operate the equipment.
This equipment should be installed and operated with a minimum distance 20cm between the radiator and your body.
EU Conformity Statement
This product and - if applicable - the supplied accessories too are marked with "CE" and comply therefore with the applicable
harmonized European standards listed under the Radio Equipment Directive 2014/53/EU, the EMC Directive 2014/30/EU, the
RoHS Directive 2011/65/EU.
2012/19/EU (WEEE directive): Products marked with this symbol cannot be disposed of as unsorted municipal waste in the
European Union. For proper recycling, return this product to your local supplier upon the purchase of equivalent new equipment,
or dispose of it at designated collection points. For more information see: www.recyclethis.info.
2006/66/EC and its amendment 2013/56/EU (battery directive): This product contains a battery that cannot be disposed of
as unsorted municipal waste in the European Union. See the product documentation for specic battery information. The
battery is marked with this symbol, which may include lettering to indicate cadmium (Cd), lead (Pb), or mercury (Hg). For proper
recycling, return the battery to your supplier or to a designated collection point. For more information see: www.recyclethis.
info.
EC DECLARATION OF CONFORMITY
Hereby, Hangzhou EZVIZ Software Co.,Ltd. declares that the radio equipment type [CS-LC1C] is in compliance with Directive 2014/53/EU.
The full text of the EC DECLARATION OF CONFORMITY is available at the following web link:
http://www.ezvizlife.com/declaration-of-conformity.
Safety Instruction
CAUTION: THE BLUE LIGHT DAMAGE OF THIS PRODUCT TO THE EYES IS CLASSIFIED AS CATEGORY 1. DO NOT OBSERVE THE LIGHT
IN SHORT DISTANCE. DO NOT TURN ON THE LIGHT DURING ASSEMBLY, INSTALLATION AND MAINTENANCE, IF MUST, PLEASE FULLY
PROTECT EYES BY WEARING PROTECTIVE EYEWEAR.
GENERAL: All ELECTRICAL CONNECTIONS MUST BE IN ACCORDANCE WITH LOCAL AND NATIONAL ELECTRICAL CODE (N.E.C) STANDARDS.
IF YOU ARE UNFAMILIAR WITH PROPER ELECTRICAL WIRING CONNECTIONS OBTAIN THE SERVICES OF A QUALIFIED ELECTRICIAN.
WARNING-TO HELP PREVENT THE POSSIBILITY OF ELECTRICAL SHOCK, THE USE OF RUBBER SOLE SHOES IS RECOMMENDED. EXERCISE
CARE, UDE WORK GLOVES WHEN HANDLING THE FIXTURE TO AVOID CUTS OR ABRASIONS.
Due to the product shape and dimension, the name and address of the importer/manufacturer are printed on the package.
Customer Service
For more information, please visit www.ezvizlife.com.
Need help? Please visit “www.ezvizlife.com/inter/page/contact-us” for our local contact details.

1
What's in the Box
Security Light Camera Screw Kit Quick Start Guide
Security Light Camera
Security Light
Light Adjustment Collar (Rotation)
Light Adjustment Knob (Tilt)
Camera Adjustment Collar
Lens
Micro SD Card Slot
(Behind the Cover)
Reset Button
PIR
Base Screw Cap
Name Description
Light Adjustment Knob (Tilt) Loosen the adjustment knob and tilt the light up to 180°. Tighten the adjustment knob when you have the light in the
position you want.
Light Adjustment Collar
(Rotation)
Loosen the adjustment collar and rotate the light up to 360°. Tighten the adjustment collar when you have the light in
the position you want.
Camera Adjustment Collar Loosen the adjustment collar and rotate the camera up to 360°. Tighten the adjustment collar when you have the
camera in the position you want.
Micro SD Card
(sold separately)
Initialize the card in the EZVIZ app before using it.
Reset Button Hold for 5 seconds to restart and reset all parameters to default.
PIR With the PIR (Passive Infrared), the device can detect a human body, animals, or other objects.

2
Get the EZVIZ app
1. Connect your mobile phone to Wi-Fi using your 2.4GHz network.
2. Search for “EZVIZ” in App Store or Google PlayTM.
3. Download and install the EZVIZ app.
4. Launch the app, and register an EZVIZ user account.
Installation
• Installation height affects motion detection, security light camera recommended installation height: 3 m (10 feet) above the ground.
• Camera recommended setting angle: 22 degree as shown below.
22°
Step 1 Shut off the electricity at the breaker that controls security light's circuit.
• If you don’t know where your breaker is or how to turn off power to your oodlight circuit, consult with a licensed electrician.
• Keep the breaker off at any time during the installation process.
Step 2 Install Micro SD Card (Optional).
1. Remove the cover on the side of the camera.
2. Insert a micro SD card (sold separately) into the slot until a click.
3. Place the cover back on.
After installing the micro SD card, you should initialize the card in the EZVIZ app before using it. For detailed operation, refer to page 5:
Initialize
Micro SD Card
.

3
Step 3 Separate the mounting bracket from the security light camera.
1. Unscrew the 2 base screw caps.
2. Pull the security light camera off the mounting bracket, and
unplug the wire connector from the bracket.
3. After separating the mounting bracket from the camera, the
resulting picture is shown as below.
Mounting Bracket Base Screw Cap
Wire Connector
Mounting Posts
Keep the mounting posts stay in the bracket.
Step 4 Install the mounting bracket.
• When installing the mounting bracket, make sure the logo (UP) faces upward.
• Make sure the wall/ceiling is strong enough to withstand three times the weight of the security light camera.
The security light camera can be mounted on the wall or ceiling. Here we take wall mounting as an example.
1. Pick a clean and at surface.
2. Drill two holes on the wall and insert anchors.
3. Take the wires from the wall through the rubber of the mounting bracket.
4. Fix the mounting bracket to the wall with mounting screws.
Anchor Mounting screw
UP
Step 5 Connect the wires.
Follow the steps to connect the wires from your wall to the wires on your security camera, as shown in the gure below.
1. Attach the ground (or yellow-green) wire from your wall to the yellow-green wire on your security light camera.
2. Attach the hot (or brown) and neutral (or blue) wires from your wall to the brown and blue wires on your security light camera respectively.
3. Secure them using screwdriver (sold separately).

4
Figure :Connect the Wires
Step 6 Snap the wire connector into place.
After securing the wires, snap the wire connector into the base of the mounting bracket.
UP
Mounting Bracket
Wire Connector
Step 7 Place security light camera on the bracket.Step 8 Restore power at the breaker.
Align the mounting posts with the holes on security light camera
and press together, securing the base screw caps.
Turn on power to your security light’s circuit.
Base Screw Cap
Wires from your wall Connect to Matching Wire on Camera
Yellow-green-Ground Yellow-green
Brown-Hot Brown
Blue-Neutral Blue

5
Step 9 Conrm the security light camera has power
1. After restoring power, the security light camera will be ready for setup when the lights are on and the LED indicator on the front of the
camera fast ashes blue.
LED Indicator
Add a security light camera to EZVIZ
1. Log in the EZVIZ app.
2. From the EZVIZ app Home screen, tap “+” on the upper-right hand corner to go to the scan QR code interface.
3. Scan the QR Code on the security light camera.
4. Follow the EZVIZ app wizard to nish Wi-Fi conguration.
• If you want to change your security light camera's Wi-Fi, press and hold the reset button for 5s and repeat this part.
• The security light camera works with 2.4GHz Wi-Fi signals. If you have a dual-band router with separate 2.4GHz and 5GHz networks,
make sure your phone is connected to the 2.4GHz one.
• If your Wi-Fi network signal is less than 50% where you want to install the security light camera, a Wi-Fi signal extender is recommended
to boost the signal at the installation point.
Initialize Micro SD Card
1. In the EZVIZ app, check the memory card status by tapping on the Storage Status in the Device Settings interface.
2. If the memory card status displays as Uninitialized, tap to initialize it. The status will then change to Normal.
LED Indicator Status
Red • Solid Red: Camera is starting up.
• Slow-ashing Red: Wi-Fi connection has failed.
• Fast-ashing Red: Camera exception (e.g. Micro
SD card error).
Blue • Solid Blue: Video is being viewed or played back
in EZVIZ App.
• Slow-ashing Blue: Camera is running properly.
• Fast-ashing Blue: Camera is ready for Wi-Fi
connection.
For detailed information, please visit www.ezvizlife.com.

6
구성품
보안등 카메라 나사 세트 빠른 시작 가이드
보안등 카메라
보안등
라이트 위치 조정 고리(회전 방식)
라이트 위치 조정 손잡이(틸트 방식)
카메라 위치 조정 고리
렌즈
마이크로 SD 카드 슬롯
(커버 뒤)
초기화 버튼
PIR
베이스 나사 캡
이름 설명
라이트 위치 조정 손잡이(틸트
방식)
위치 조정 손잡이를 풀고 라이트를 최대 180°까지 기울입니다. 라이트를 원하는 위치에 놓고 위치 조정 손잡이를 조입니다.
라이트 위치 조정 고리(회전
방식)
위치 조정 고리를 풀고 라이트를 최대 360°까지 돌립니다. 라이트를 원하는 위치에 놓고 위치 조정 고리를 조입니다.
카메라 위치 조정 고리 위치 조정 고리를 풀고 카메라를 최대 360°까지 돌립니다. 카메라를 원하는 위치에 놓고 위치 조정 고리를 조입니다.
마이크로 SD 카드
(별도 판매)
사용하기 전에 EZVIZ 앱에서 카드를 초기화하십시오.
초기화 버튼 재시작하고 모든 특성을 기본값으로 초기화하려면 5초동안 누릅니다.
PIR 패시브 적외선(PIR)을사용할 경우 장치는 인체, 동물 또는 기타 물체를 감지할 수있습니다.

7
EZVIZ 앱설치
1. 2.4GHz 네트워크를 사용해 모바일 폰을 Wi-Fi에연결합니다.
2. App Store 또는 Google PlayTM에서 "EZVIZ"를검색합니다.
3. EZVIZ 앱을 다운로드해 설치합니다.
4. 앱을 실행한 다음 EZVIZ 사용자 계정을 등록합니다.
설치
• 설치 높이는 동작 감지에 영향을 줍니다. 보안등 카메라 권장 설치 높이: 지상 3미터 (10피트)
• 카메라 권장 설정 각도: 아래와 같이 22도
22°
1단계 보안등의 회로를 제어하는 차단기에서 전기를 차단합니다.
• 차단기의 위치 또는 투광 조명 회로의 전원을 끄는 방법을 모르는 경우 면허를 보유한 전기 기사에게 문의하십시오.
• 설치 프로세스 중에는 항상 차단기를 꺼둡니다.
2단계 마이크로 SD 카드를 설치합니다(선택 사항).
1. 카메라 측면 커버를 제거합니다.
2. 딸깍 소리가 날때까지 마이크로 SD 카드(별도 판매)를슬롯에 삽입합니다.
3. 커버를 다시 닫습니다.
마이크로 SD 카드를 삽입한 후, 사용하기 전에 EZVIZ 앱에서 카드를 초기화해야 합니다. 자세한 작동 방법은 10페이지를 참조하십시오.
마이크로 SD
카드를 초기화합니다
.

8
3단계 마운팅 브래킷을 보안등 카메라에서 분리합니다.
1. 베이스 나사 캡2개를 풉니다.
2. 마운팅 브래킷에서 보안등 카메라를 빼낸 다음 브래킷에서 전선
커넥터를 분리합니다.
3. 카메라에서 마운팅 브래킷을 분리한 후의 결과물은 다음과 같습니다.
마운팅 브래킷 베이스 나사 캡
전선 커넥터
마운팅 포스트
마운팅 포스트는 브래킷에서 떼어내지 마십시오.
4단계 마운팅 브래킷을 설치합니다.
• 마운팅 브래킷을 설치할 때는 로고(UP)가위를 향하도록 합니다.
• 벽/천장이 보안등 카메라 무게의 3배를 견딜 수있는지 확인합니다.
본보안등 카메라는 벽또는 천장에 설치할 수있습니다. 여기에서는 벽면 설치를 예로 들어 설명합니다.
1. 깨끗하고 평평한 표면을 선택합니다.
2. 벽에 구멍 2개를 뚫은 다음 앵커를 삽입합니다.
3. 마운팅 브래킷의 고무를 활용해 벽면의 전선을 가져옵니다.
4. 제공된 나사를 사용해 마운팅 브래킷을 벽에 고정합니다.
앵커 마운팅 나사
UP
5단계 전선을 연결합니다.
아래 그림에서 보이는 것처럼 설치 순서에 따라 벽면의 전선을 보안 카메라의 전선과 연결합니다.
1. 벽면의 접지선(또는 연두색 전선)을보안등 카메라의 연두색 전선에 부착합니다.
2. 벽면의 전압선(또는 갈색 전선)과중성선(또는 파란색 전선)을보안등 카메라의 갈색 전선과 파란색 전선에 각각 부착합니다.
3. 드라이버(별도 판매)를사용하여 고정합니다.

9
그림: 전선 연결
6단계 전선 커넥터를 제자리에 끼웁니다.
전선을 고정한 후에는 전선 커넥터를 마운팅 브래킷 바닥에 끼웁니다.
UP
마운팅 브래킷
전선 커넥터
7단계 브래킷에 보안등 카메라를 고정합니다.8단계 차단기 전원을 켭니다.
마운팅 포스트를 보안등 카메라의 구멍에 맞춘 다음 함께 눌러 베이스
나사 캡을 고정합니다.
보안등 회로의 전원을 켭니다.
베이스 나사 캡
벽면의 전선 카메라의 전선에 일치 시켜 연결
연두색-접지 연두색
갈색-전압 갈색
파란색-중성 파란색

10
9단계 보안등 카메라에 전원이 들어오는지 확인합니다.
1. 전력 복원 후라이트가 켜지고 카메라 전면의 LED 표시기가 파란색으로 빠르게 깜박이면 보안등 카메라를 설정할 준비가 된것입니다.
LED 표시등
EZVIZ에보안등 카메라 추가
1. EZVIZ 앱에 로그인합니다.
2. EZVIZ 앱홈화면의 오른쪽 구석 상단에 있는 "+"를눌러 QR 코드 스캔 인터페이스로 이동하십시오.
3. 보안등 카메라에 있는 QR 코드를 스캔합니다.
4. Wi-Fi 구성을 종료하려면 EZVIZ 앱마법사를 따르십시오.
• 보안등 카메라의 Wi-Fi 를변경하려면 초기화 버튼을 5초동안 누르고 이과정을 반복하십시오 .
• 보안등 카메라는 2.4GHz Wi-Fi 신호와 연동됩니다 . 2.4GHz 및5GHz 네트워크로 분리된 듀얼 밴드 라우터를 사용하는 경우 휴대폰이 2.4GHz 에
연결되어 있는지 확인하십시오 .
• Wi-Fi 네트워크 신호가 보안등 카메라를 설치할 위치의 50% 미만인 경우 Wi-Fi 신호 익스텐더를 사용하여 설치 지점에서 신호를 활성화하는 것이
좋습니다 .
이기기는 가정용으로 전자파적합등록을 한기기로서 주거지역은 물론 모든 지역에서 사용할 수있습니다. 위와 같은 무선설비는 전파혼선의
가능성이 있으므로 인명안전과 관련된 서비스는 할수없습니다.
마이크로 SD 카드를 초기화합니다.
1. EZVIZ 앱에서 Device Settings(장비 설정) 인터페이스의 Storage Status(저장소 상태)를탭하여 메모리 카드 상태를 확인합니다.
2. 메모리 카드 상태가 Uninitialized(초기화되지 않음)로표시되면 탭하여 초기화합니다. 그러면 상태가 Normal(정상)로변경됩니다.
LED 표시등 상태
빨간색 • 빨간불 점등: 카메라가 시동 중입니다.
• 빨간색으로 천천히 깜박임: Wi-Fi 연결에 실패했습니다.
• 빨간색으로 빠르게 깜박임: 카메라 비정상(예: 마이크로 SD 카드
오류).
파란색 • 파란불 점등: EZVIZ 앱에서 비디오를 보고 있거나 재생합니다.
• 파란색으로 천천히 깜박임: 카메라가 정상적으로 작동 중입니다.
• 파란색으로 빠르게 깜박임: 카메라에 Wi-Fi를연결할 준비가
되었습니다.
자세한 정보를 알아보시려면 www.ezvizlife.com을방문해 주십시오.

11
Vật phẩm trong hộp
Camera chiếu sáng an ninh Bộ vít Hướng dẫn sử dụng nhanh
Camera chiếu sáng an ninh
Chiếu sáng an ninh
Vòng điều chỉnh độ sáng (Xoay)
Núm điều chỉnh độ sáng (Nghiêng)
Vòng điều chỉnh camera
Ống kính
Khe cắm thẻ Micro SD
(Phía sau nắp đậy)
Nút khởi động lại
PIR
Nắp vít tấm đế
Tên Mô tả
Núm điều chỉnh độ sáng
(Nghiêng) Nới lỏng núm điều chỉnh và nghiêng đèn một góc 180°. Siết chặt núm điều chỉnh khi bạn đã xoay đèn đến vị trí mong
muốn.
Vòng điều chỉnh độ sáng
(Xoay)
Nới lỏng vòng điều chỉnh và xoay đèn, có thể xoay tối đa 360°. Siết chặt vòng điều chỉnh khi bạn đã xoay đèn đến vị trí
mong muốn.
Vòng điều chỉnh camera Nới lỏng vòng điều chỉnh và xoay camera, có thể xoay tối đa 360°. Siết chặt vòng điều chỉnh khi bạn đã xoay camera
đến vị trí mong muốn.
Thẻ micro SD
(bán riêng) Khởi tạo thẻ trong ứng dụng EZVIZ trước khi sử dụng.
Nút khởi động lại Giữ trong 5 giây để khởi động lại và đặt lại tất cả tham số về mặc định.
PIR Với PIR (Hồng ngoại thụ động), thiết bị này có thể phát hiện thấy người, động vật, hoặc những vật thể khác.

12
Tải ứng dụng EZVIZ
1. Kết nối điện thoại di động của bạn với Wi-Fi bằng mạng 2.4GHz .
2. Tìm kiếm ứng dụng “EZVIZ” trên App Store hoặc Google PlayTM.
3. Tải về và cài đặt ứng dụng EZVIZ.
4. Khởi chạy ứng dụng và đăng ký tài khoản người dùng trên EZVIZ.
Lắp đặt
• Chiều cao lắp đặt ảnh hưởng đến tính năng phát hiện chuyển động, chiều cao lắp đặt được đề xuất cho camera chiếu sáng an ninh là: 3 m
(10 feet) so với mặt đất.
• Góc lắp đặt camera được đề xuất: 22 độ như minh họa dưới đây.
22°
Bước 1 Tắt nguồn điện tại cầu dao điều khiển mạch của đèn an ninh.
• Nếu bạn không biết vị trí của cầu dao hoặc cách tắt nguồn mạch đèn pha, hãy tham khảo ý kiến của thợ điện có bằng cấp.
• Tắt cầu dao vào bất cứ lúc nào trong quá trình lắp đặt.
Bước 2 Lắp thẻ Micro SD (Tùy chọn).
1. Tháo nắp đậy ở mặt bên của camera.
2. Đưa thẻ micro SD (bán riêng) vào khe cắm cho đến khi nghe thấy tiếng tách.
3. Lắp nắp đậy lại.
Sau khi lắp thẻ micro SD, khởi tạo thẻ trong ứng dụng EZVIZ trước khi sử dụng. Để xem thao tác vận hành chi tiết, hãy tham khảo trang 15:
Khởi
tạo Thẻ Micro SD
.

13
Bước 3 Tách giá gắn khỏi camera chiếu sáng an ninh.
1. Tháo 2 nắp vít tấm đế.
2. Kéo camera chiếu sáng an ninh ra khỏi giá gắn và tháo đầu nối
dây ra khỏi giá.
3. Sau khi tách giá gắn ra khỏi camera thì tình trạng sẽ giống như hình
minh họa sau.
Giá gắn Nắp vít tấm đế
Đầu nối dây
Trụ gắn
Hãy giữ các trụ gắn ở trong khung giá.
Bước 4 Lắp đặt giá gắn.
• Khi lắp đặt giá gắn, hãy đảm bảo logo (UP) hướng lên trên.
• Đảm bảo tường/trần đủ khỏe để chịu được ba lần trọng lượng của camera chiếu sáng an ninh.
Camera chiếu sáng an ninh có thể được gắn lên tường hoặc trần. Ở đây chúng tôi lấy gắn tường làm ví dụ.
1. Chọn bề mặt bằng phẳng và sạch sẽ.
2. Khoan hai lỗ trên tường rồi lắp đinh móc.
3. Tháo các dây ra khỏi tường qua lớp cao su của giá gắn.
4. Lắp giá gắn cố định vào tường bằng vít lắp.
Nở vít Vít lắp
UP
Bước 5 Nối các dây.
Làm theo các bước sau để nối các dây trên tường với các dây trên camera an ninh của bạn như hình minh họa dưới đây.
1. Nối dây tiếp địa (hoặc dây vàng-xanh lá) trên tường với dây vàng-xanh lá trên camera chiếu sáng an ninh của bạn.
2. Nối các dây nóng (hoặc dây nâu) và dây trung tính (hoặc dây xanh dương) trên tường với các dây nâu và dây xanh dương trên camera chiếu
sáng an ninh tương ứng.
3. Siết chặt dây bằng tua vít (bán riêng).

14
Hình: Nối các dây
Bước 6 Cắm đầu nối dây vào đúng vị trí.
Sau khi siết chặt các dây, hãy cắm đầu nối dây vào tấm đế của giá gắn.
UP
Giá gắn
Đầu nối dây
Bước 7 Đặt camera chiếu sáng an ninh lên giá gắn.Bước 8 Khôi phục nguồn điện cầu dao.
Điều chỉnh các trụ gắn sao cho khớp với các lỗ trên camera chiếu
sáng an ninh và nhấn cùng lúc, đồng thời siết chặt nắp vít tấm đế. Bật nguồn cho mạch của đèn an ninh.
Nắp vít tấm đế
Các dây trên tường nhà bạn Nối với dây tương ứng trên Camera
Tiếp địa vàng-xanh lá Vàng-xanh lá
Nóng-nâu Nâu
Trung tính-xanh dương Xanh dương

15
Bước 9 Đảm bảo rằng camera an ninh kiêm đèn chiếu sáng có điện
1. Sau khi khôi phục nguồn điện, bạn đã có thể lắp đặt camera chiếu sáng an ninh khi thấy đèn bật và đèn LED chỉ báo ở mặt trước camera nhấp
nháy nhanh màu xanh dương.
Đèn báo LED
Thêm camera an ninh kiêm đèn chiếu sáng vào EZVIZ
1. Đăng nhập vào ứng dụng EZVIZ.
2. Từ màn hình Trang chủ của ứng dụng EZVIZ, nhấn vào biểu tượng “+” ở góc trên cùng bên phải để chuyển đến giao diện quét mã QR.
3. Quét mã QR trên camera an ninh kiêm đèn chiếu sáng.
4. Làm theo hướng dẫn của ứng dụng EZVIZ để hoàn thành công đoạn kết nối Wi-Fi.
• Nếu bạn muốn thay đổi Wi-Fi của camera an ninh kiêm đèn chiếu sáng, nhấn và giữ nút đặt lại trong 5 giây và lặp lại phần này.
• Camera an ninh kiêm đèn chiếu sáng tương thích với tín hiệu Wi-Fi 2.4GHz. Nếu bạn có bộ định tuyến băng tần kép cùng các mạng 2.4GHz
và 5GHz riêng rẽ, đảm bảo điện thoại của bạn được kết nối với mạng 2.4GHz.
• Nếu bạn muốn lắp đặt camera an ninh kiêm đèn chiếu sáng ở nơi có tín hiệu mạng Wi-Fi thấp hơn 50%, chúng tôi khuyên bạn nên sử
dụng một bộ mở rộng tín hiệu Wi-Fi để tăng cường tín hiệu tại điểm lắp đặt.
Khởi tạo Thẻ Micro SD
1. Trong ứng dụng EZVIZ, hãy kiểm tra trạng thái thẻ nhớ bằng cách chạm vào Storage Status (Trạng thái Bộ nhớ) trong giao diện Device Settings
(Cài đặt Thiết bị).
2. Nếu thẻ nhớ hiển thị ở trạng thái Uninitialized (Chưa được khởi tạo), chạm để khởi tạo. Khi đó trạng thái sẽ chuyển sang Normal (Bình thường).
Đèn báo LED Trạng thái
Đỏ • Đỏ không nháy: Camera đang khởi động.
• Đỏ nháy chậm: Kết nối Wi-Fi không thành công.
• Đỏ nháy nhanh: Ngoại vi camera (ví dụ: lỗi thẻ
Micro SD).
Xanh dương • Xanh dương không nháy: Video đang được xem
hoặc phát trên ứng dụng EZVIZ.
• Xanh dương nháy chậm: Camera đang hoạt động
tốt.
• Xanh dương nháy nhanh: Camera đã sẵn sàng để
kết nối Wi-Fi.
Để biết thông tin chi tiết, vui lòng truy cập www.ezvizlife.com.

16
PIR
PIR
Table of contents
Languages:
Other Ezviz Security Camera manuals
Popular Security Camera manuals by other brands

COP Security
COP Security 15-CD55TWAI Installation and operation manual

Axis
Axis DROP CEILING P5522-E installation guide

Starlight Xpress
Starlight Xpress TRIUS PRO-814C manual

System Q
System Q Nite Devil 24 C SEE702 instruction manual

StarDot Technologies
StarDot Technologies NetCam SC user manual

CCTV Center
CCTV Center AP-B9550VRTL user manual