5
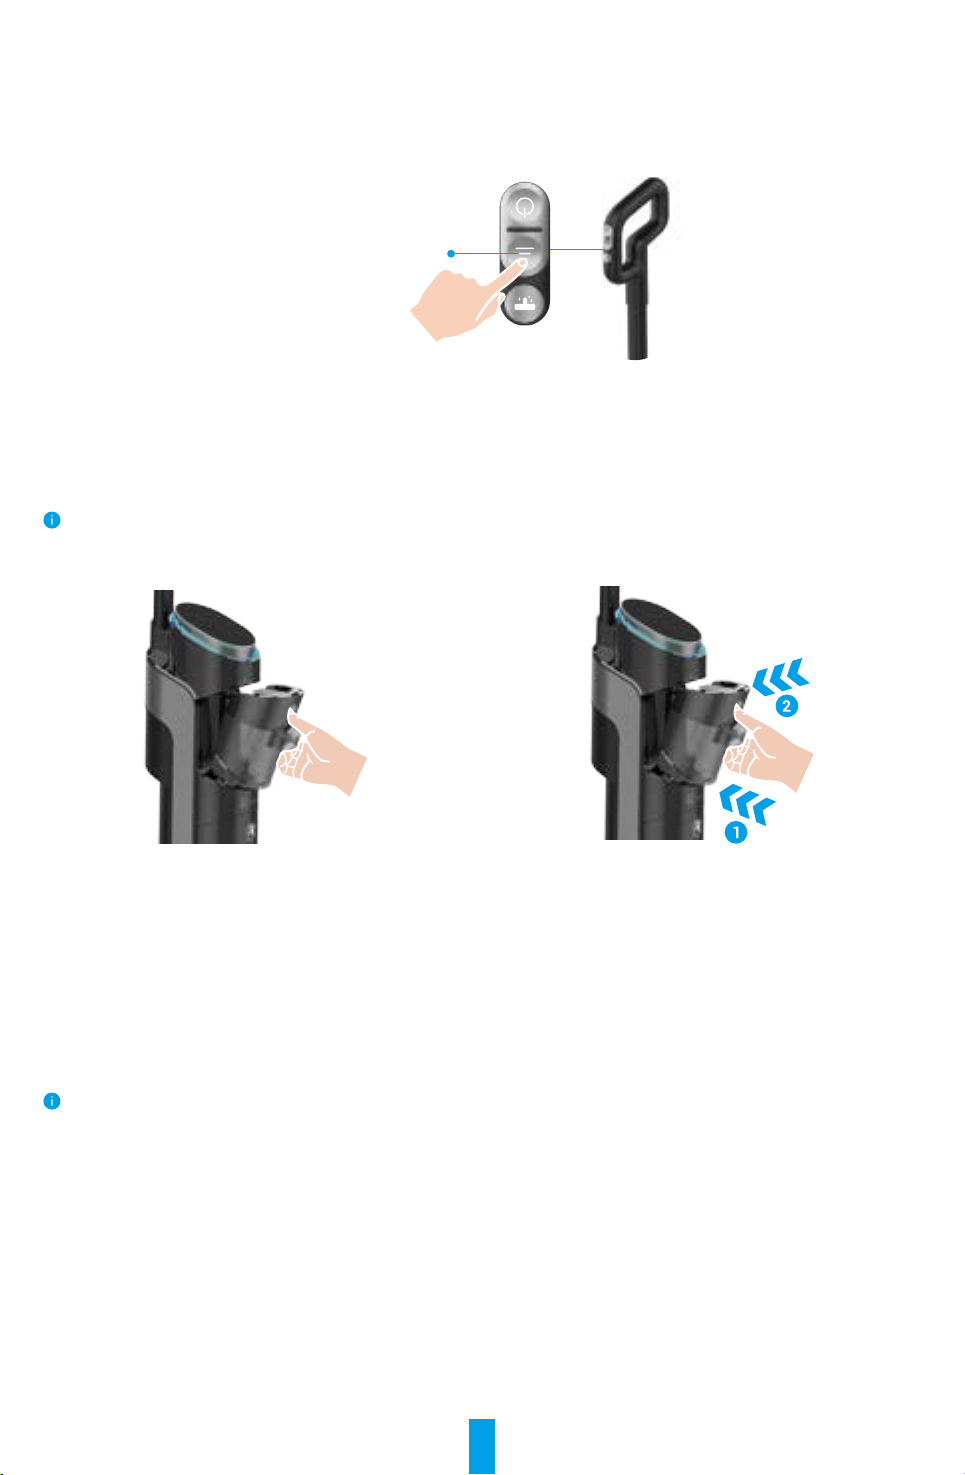
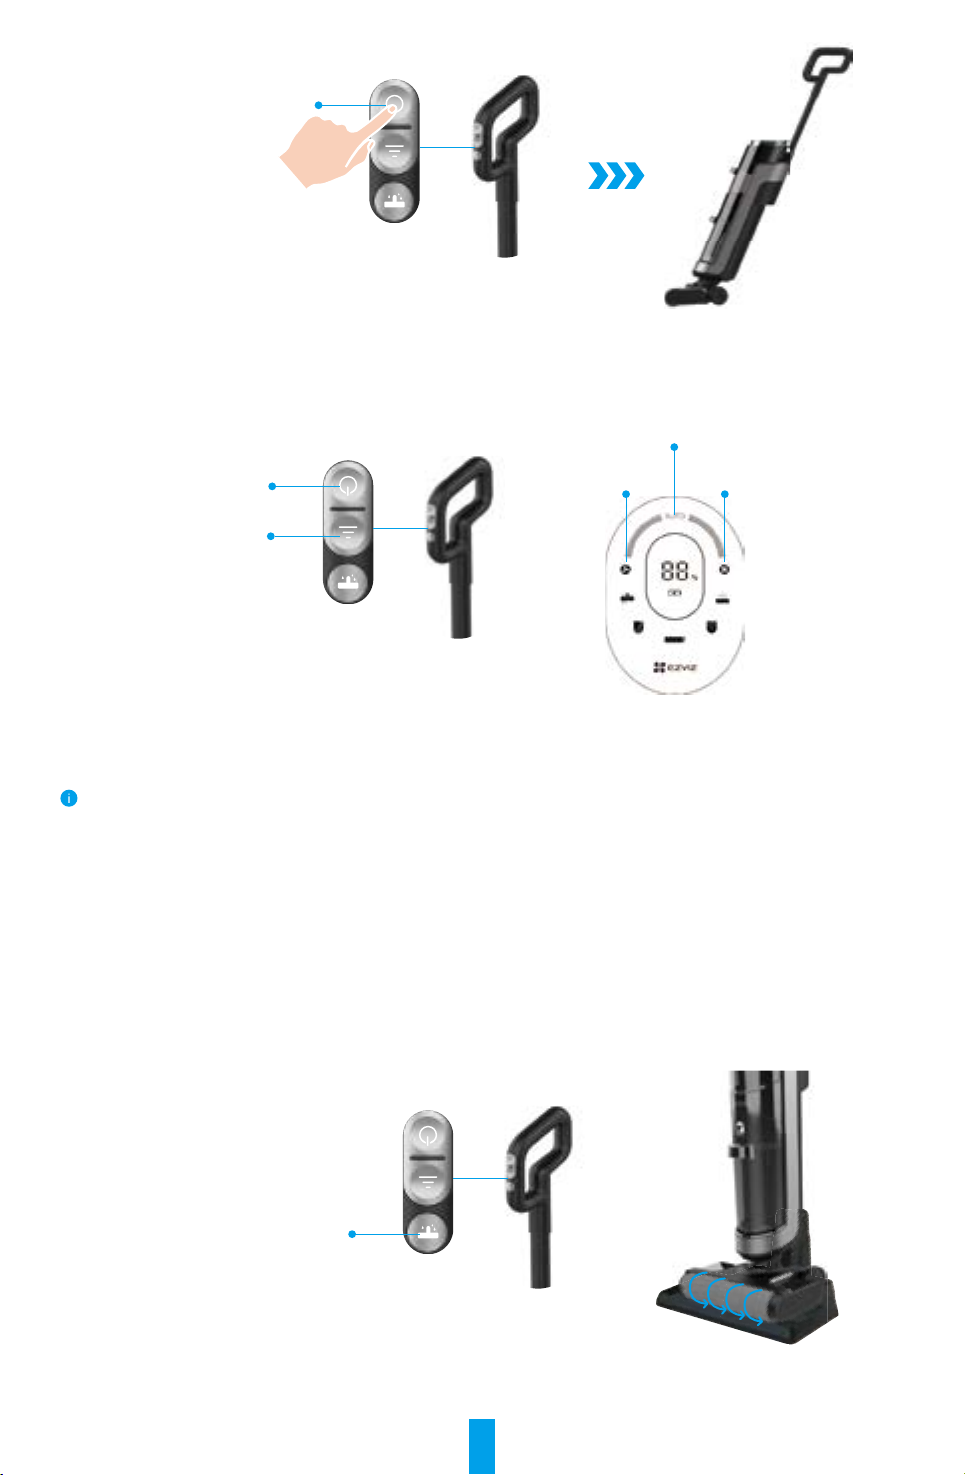
3� Change Language
When device charging, press and hold the Mode Button for 3 seconds to enter language changing mode
(Language order: English, French, German, Italian ). Please press Mode Button to change to a different
language and press and hold the Mode Button for 3 seconds to exit.
The default language is English.
Mode Button
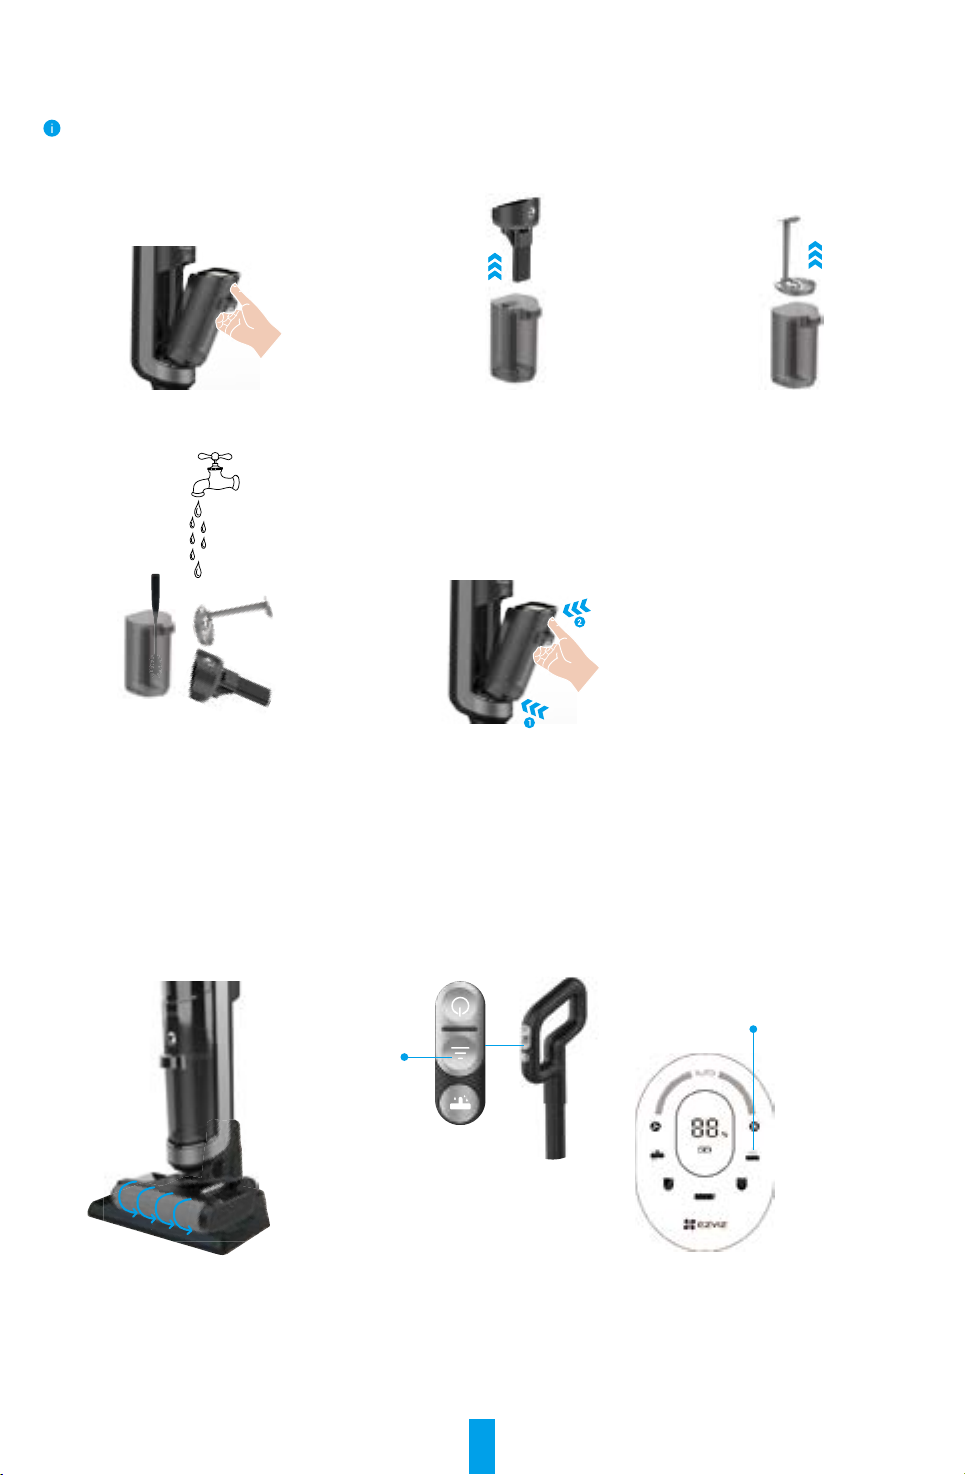
4� Add Clean Water
Take off the clean water bucket and open the bucket cover, and then add clean water and half a bottle
cap of cleaning solution (about 3.5ml), and close the bucket cover and then install the bucket back to the
device.
The water temperature should be lower than 60°C (140°F).
1. Take off the clean water bucket and ll it up with
clean water and half a bottle cap of cleaning solution
(about 3.5ml).
2. Install the bucket back to the device, you can
hear 'click' sound. Make sure the cover is tight.
5� Start Cleaning
Take the device off from the charging base and gently step on the brush heads after placing it on the ground,
and then tilt the device backward; press the Power Button for about 3s to start the device.
The default working mode is Auto Mode. Press the Power Button to stop working.
Please do not clean alcohol, foam liquid and etc. with the device.
WARNING:
• Do not use on foam liquid. Power Mode is recommended to be used in
heavily soiled environments.
• This appliance comes with a vertical switch. When working, please lean
it before you use it. The tilt angle cannot exceed 140 degrees in case of
water leaking.