F.F. Group RH 24/720 PRO User manual

ORIGINAL INSTRUCTIONS
EN
NOTICE ORIGINALE
FR
ISTRUZIONI ORIGINALI
IT
EL
ORIGINALNO UPUTSTVO ZA RAD
SR
RO
BG
ORIGINALNE UPUTE ZA RAD
HR
RH 24/720 PRO

EN
FR
IT
EL
SR
RO
BG
Rotary Hammer............................................ 04
Marteau Perforateur.................................. 08
Martello Perforatore.................................. 12
16
Bušilica 21
Ciocan Rotopercutor................................... 25
29
2

32
1
4
5
6
7
8
9
10
www.ffgroup-tools.com
3

| English4
GENERAL POWER TOOL SAFETY WARNINGS
Read all safety warnings and all instructions. Failure
to follow the warnings and instructions may result
warnings and instructions for future reference. The
term “power tool” in the warnings refers to your
mains-operated (corded) power tool or battery-op-
erated (cordless) power tool.
Work area
Keep work area clean and well lit. Cluttered or dark
-
-
uids, gases or dust. Power tools create sparks which
may ignite the dust or fumes.
Keep children and bystanders away while operating a
power tool. Distractions can cause you to lose control.
Electrical safety
modify the plug in any way. Do not use any adapt-
er plugs with earthed (grounded) power tools. Un-
risk of electric shock.
-
faces, such as pipes, radiators, ranges and refriger-
ators. There is an increased risk of electric shock if
your body is earthed or grounded.
Do not expose power tools to rain or wet condi-
tions. Water entering a power tool will increase
the risk of electric shock.
-
rying, pulling or unplugging the power tool. Keep
parts. Damaged or entangled cords increase the risk
of electric shock.
When operating a power tool outdoors, use an ex-
tension cord suitable for outdoor use. Use of a cord
suitable for outdoor use reduces the risk of electric
shock.
If operating a power tool in a damp location is un-
-
tected supply. Use of an RCD reduces the risk of
electric shock.
Personal safety
-
mon sense when operating a power tool. Do not use
-
ence of drugs, alcohol or medication. A moment of
inattention while operating power tools may result
mask, non-skid safety shoes, hard hat, or hearing pro-
tection used for appropriate conditions will reduce
-
ing the power tool on. A wrench or a key left at-
tached to a rotating part of the power tool may
-
ance at all times. This enables better control of the
power tool in unexpected situations.
-
extraction and collection facilities, ensure these
are connected and properly used. Use of dust col-
lection can reduce dust-related hazards.
Power tool use and care
Do not force the power tool. Use the correct power
tool for your application. The correct power tool will
was designed.
Do not use the power tool if the switch does not turn
with the switch is dangerous and must be repaired.
the battery pack from the power tool before making
-
duce the risk of starting the power tool accidentally.
and do not allow persons unfamiliar with the power
tool or these instructions to operate the power tool.
Power tools are dangerous in the hands of untrained
users.
Maintain power tools. Check for misalignment or
-
paired before use. Many accidents are caused by
poorly maintained power tools.
Keep cutting tools sharp and clean. Properly main-
tained cutting tools with sharp cutting edges are less
likely to bind and are easier to control.
Use the power tool, accessories and tool bits etc.
in accordance with these instructions, taking into
account the working conditions and the work to be
performed. Use of the power tool for operations
-
ardous situation.
Service
-
pair person using only identical replacement parts.
This will ensure that the safety of the power tool
is maintained.
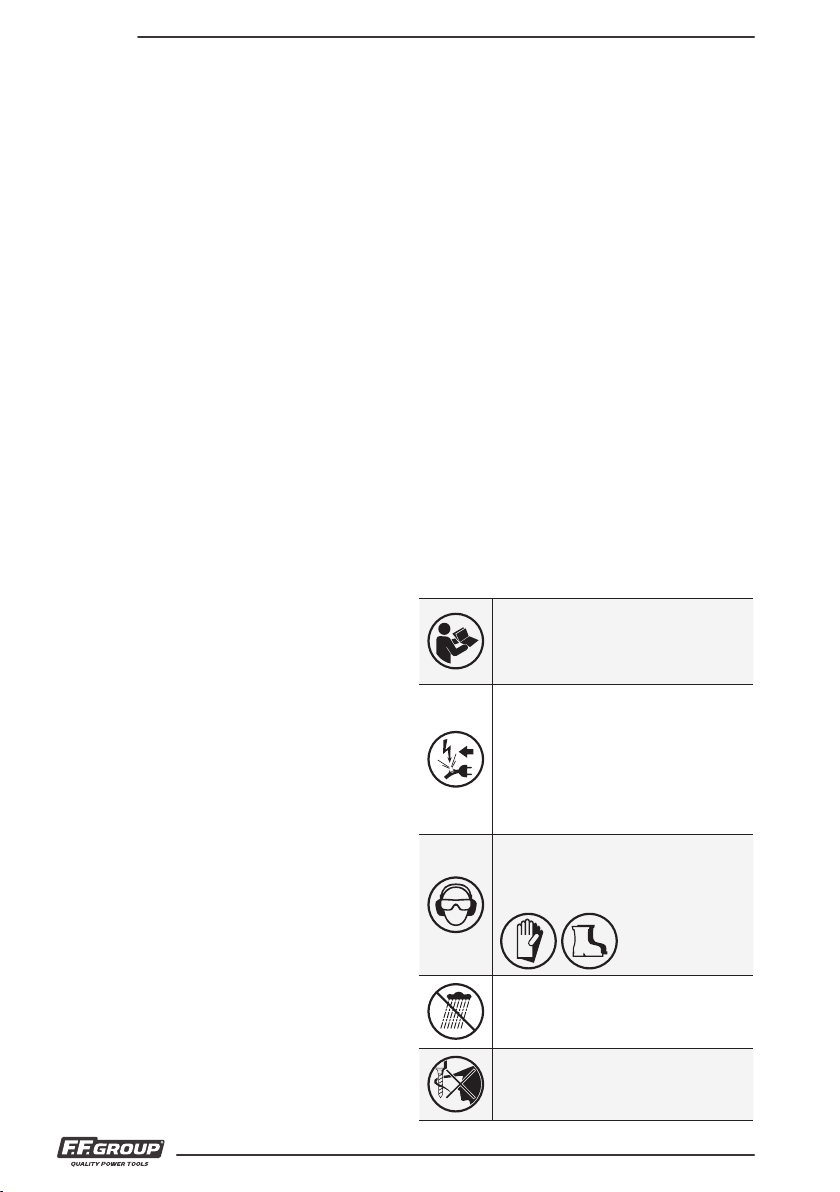
FOR YOUR SAFETY
ENGLISH
Working safely with this machine possi-
ble only when the operating and safety
information are read completely and the
instructions contained therein are strictly
followed.

English | 5
www.ffgroup-tools.com
Connect the mains plug only when the tool is
Always direct the cable to the rear away from the
machine.
Do not carry the machine by the cable.
-
During pauses in the work, when not in use or during
work on the machine itself (e.g., changing of the
mains plug.
Persons under 16 year of age are not permitted to
operate this machine.
Keep the tool accessories out of the reach of children.
Only use original accessories
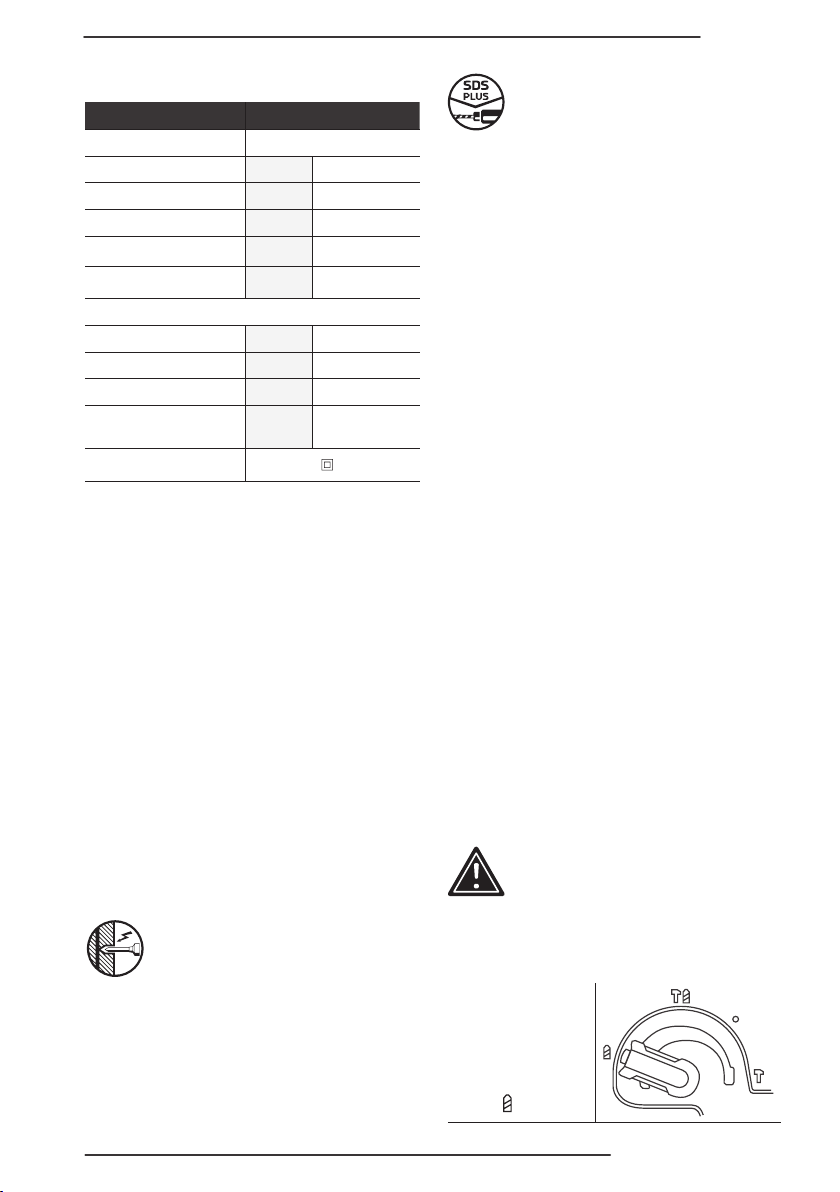
PRODUCT SPECIFICATIONS
Article number 41 379
Chuck type
Rated power input W 720
Voltage
No load speed min-1 0-1300
Impact rate min-1 0-4500
Impact energy J 2.6
Max. drilling diameter:
Concrete mm 24
mm 13
Wood mm 30
Weight (without
accessories) approx. kg 2.7
Protection class
Intended Use
The machine is intended for hammer drilling in con-
crete, brick and stone. It is likewise suitable for drilling
without impact in wood, metal, ceramic and plastic.
Product Elements
1.
2.
3. Dust protection cap
4.
5. Depth stop
6. Auxiliary handle
7. Operational mode selection switch
8.
9.
10.
Not all the accessories illustrated or described in-
cluded in standard delivery.
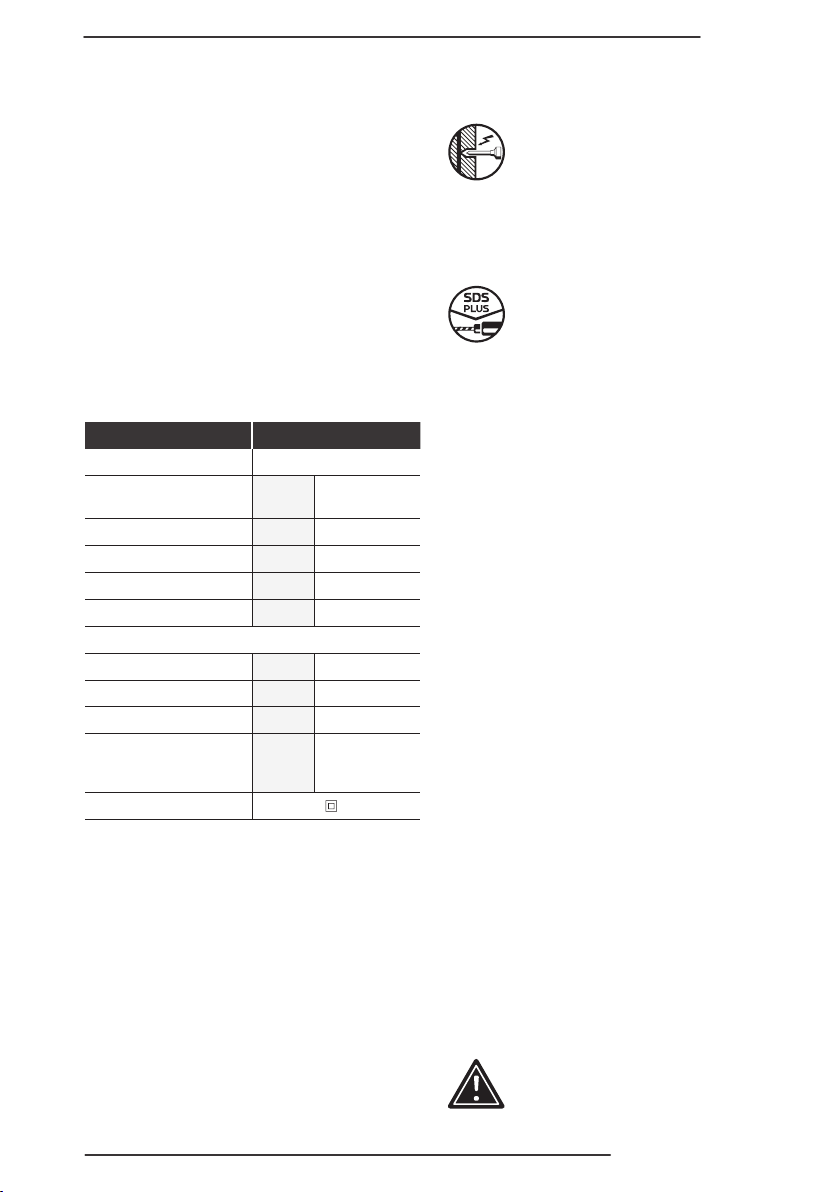
BEFORE USE
Be careful of hidden electrical lines or gas
and water pipes. Check the working area, e.g.
with a metal detector. Always use the correct
the nameplate of the machine.
Tool Changing
Take care that the dust protection cap 3is not dam-
aged when changing tools.
SDS - Plus Tools
-
tomatically centers itself during operation.
Inserting
Clean and lightly grease the tool before inserting.
Insert the dust-free tool into the tool holder 2with
twisting manner until it latches. The tool locks it-
self. Check the locking by pulling on the tool.
Removing
4to the rear and hold while
Putting into Operation
Switching on: 10
10
10, push the
lock-on button 9 -
10 or when it is
locked with the lock-on button 9
10 and then release it.
WORKING INSTRUCTIONS
Overload Clutch
to the drill spindle is interrupted.
• Because of the forces that occur as a result,
always hold the machine with both hands and
take a secure stance. The machine should be
used only with an auxiliary handle.
Auxiliary Handle 6. You will be able to obtain a
practical demonstration. If the cable is
damaged or cut through while working,
do not touch the cable but immediately
machine with a damaged cable.
and sturdy shoes. Wear ear protection
The machine must not be damp and
-
ment.
Keep long hair away from the machine.
Do not operate while wearing loose
clothing.
| English6
safe position when working by rotating the handle
-
ment in an anticlockwise direction.
Depth Stop 5.
auxiliary handle 6
depth stop 5. Retighten the winged screw.
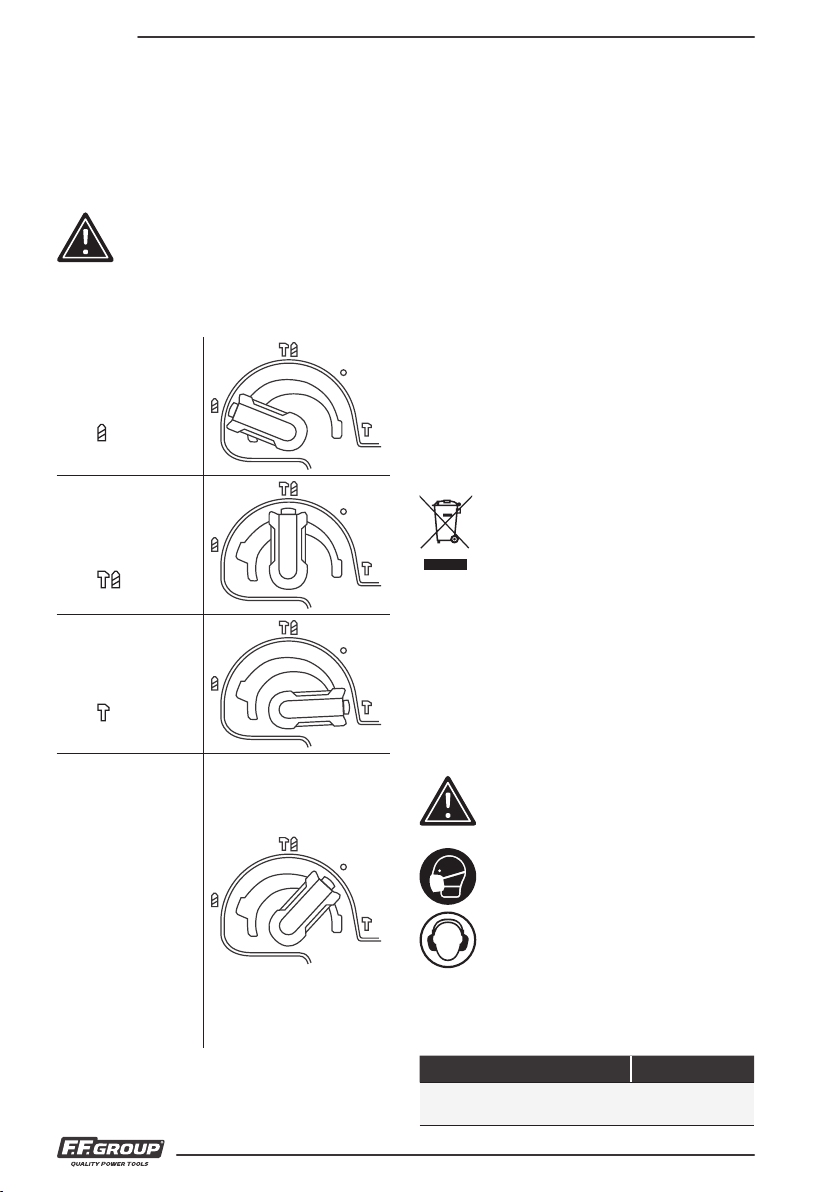
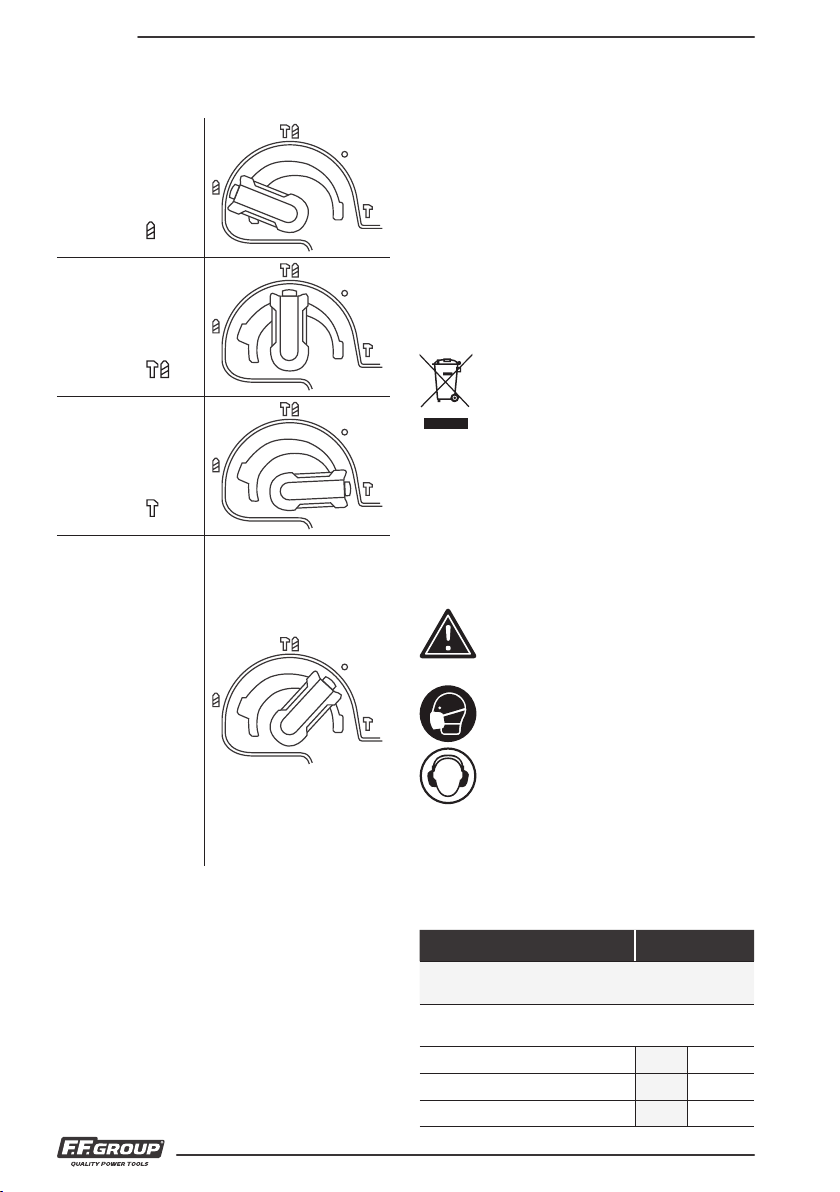
OPERATING MODES
Warning!
Change the operating mode only when
the machine can be damaged
Please trigger the release button of the operational
mode selection switch slightly.
1. Drill mode:
Turn the mode
selector switch 7
to direction.
2. Hammer drill
mode:
Turn the mode
selector switch 7
to direction.
3. Chisel mode
Turn the mode
selector switch 7
to direction.
4. Changing the
chiseling posi-
tion
The chisel can be
locked in 8posi-
tions. In this man-
ner, the optimum
working position
can be set for
each application.
Insert the chisel
into the tool
chiseling position
to your desired
angle, then switch
to chisel mode to
apply.
Sharpening the Chiseling Tools
-
on a grinding wheel (e.g. alumina oxide) with con-
stant water supply.
Maintenance and Cleaning
mains plug. For safe and proper working, always
Clean the tool mount daily.
Replacing the Dust Protection Cap. Damaged
dust protection caps should be replaced as soon as
possible since dust that enters the tool holder can
cause malfunctions. Pull back and hold the locking
43with a suitable tool.
machine should happen to fail despite the care taken
in manufacture and testing, repair should be carried
power tools. For all correspondence and spare parts
orders, always include the 9-digit serial number of
the machine.
ENVIRONMENTAL PROTECTION
Recycle raw materials instead of disposing as
waste. Machine, accessories and packaging
recycling. The plastic components are labeled
for categorized recycling.
GUARANTEE
This product is warranted in accordance with the
improper handling will be excluded from the guar-
antee. In case of a claim, please send the machine,
completely assembled, to your dealer or the ser-
Residual risks
Even when the tool is used as prescribed it
is not possible to eliminate all residual
risk factors. The following hazards may
arise in connection with the tool’s con-
struction and design:
is not worn.
protection is not worn.
maintained.
Rotary Hammer RH 24/720 PRO

Français | 7
www.ffgroup-tools.com
60745-1; it may be used to compare one tool with
another and as a preliminary assessment of exposure
mentioned.
-
-
pending on the ways in which the tool is used. There
is the need to identify safety measures to protect
the operator that are based on an estimation of ex-
posure in the actual conditions of use (taking account
of all parts of the operating cycle such as the times
idle in addition to the trigger time).
WARNING! This machine produces an electromag-
medical implants. To reduce the risk of serious or fa-
-
plants to consult their physician and the medical im-
plant manufacturer before operating this machine.
DECLARATION OF CONFORMITY
• We declare under our sole responsibility that this
product is in conformity with the following stan-
•
19300, Aspropyrgos-Greece
product are:
dB(A) 91
dB(A) 102
Uncertainty K dB 3
Wear hearing protection!
60745-1
Hammer drilling in concrete:
ah213,2
K21,5
Chiselling:
ah29,9
K21,5
AVERTISSEMENTS DE SÉCURITÉ GÉNÉRAUX
POUR L’OUTIL
-
-
Sécurité de la zone de travail
-
-
pices aux accidents.
Sécurité électrique
-
des outils à branchement de terre. Des fiches non
-
Ne pas exposer les outils à la pluie ou à des condi-
-
-
-
Sécurité des personnes
FRANÇAIS

| Français8
-
-
-
sonnes.
-
masser ou de le porter. Porter les outils en ayant le
-
cidents.
-
personnes.
-
-
-
-
Utilisation et entretien de l’outil
-
construit.
-
-
enfants et ne pas permettre à des personnes ne
De nombreux accidents sont dus à des outils mal en-
tretenus.
-
-
-
dangereuses.
Maintenance et entretien
-
maintenue.
POUR VOTRE SÉCURITÉ
-
sation.
-
-
des enfants.
-
-
de protection et des chaussures robustes.
-
-
ment humide.
Français | 9
www.ffgroup-tools.com
SPÉCIFICATIONS DU PRODUIT
Utilisation prévue
-
Éléments du produit
1.
2.
3. Capuchon antipoussière
4. Manchon de blocage
5.
6.
7. -
nement
8.
9. Bouton de blocage
10.
Tous les accessoires illustrés ou décrits ne sont
pas inclus avec le produit.
AVANT TOUTE UTILISATION
-
Changement d'outil
3ne soit
SDS - Outils Plus
N° d’ article 41 379
Mandrin Plus
Puissance nominale W 720
Tension
Vitesse hors charge min-1
Vitesse de percussion min-1
Force de percussion J 2,6
Diamètre de perçage max.:
mm 24
Acier mm 13
Bois mm 30
Poids (sans
kg 2,7
Classe de protection
-
Insertion
-
poussière dans le porte-outil 2
-
Retrait
4
le maintenir dans cette position pendant le retrait
Utilisation
Mettre en marche:
10
Éteindre: 10
-
10, appuyer sur le bouton
de blocage en le poussant 9-
arrêt 10-
arrêt 10
INSTRUCTIONS POUR LE TRAVAIL
Dispositif de sécurité contre les surcharges
la broche de perçage est interrompu.
•
Poignée auxiliaire 6
-
Butée de profondeur 5
6
profondeur 5
MODES DE FONCTIONNEMENT
Avertissement!
Ne changez le mode de fonctionnement
que lorsque l’outil électroportatif est
-
rait être endommagé.
du mode fonctionnement.
1. Mode perçage:
Tourner le bouton
-
ner le mode de
fonctionnement 7
dans la direc-
tion

| Français10
-
Entretien et nettoyage
-
cher la prise secteur. -
Remplacement du capuchon antipoussière.
-
manchon de blocage 4. Retirer le capuchon an-
ti-poussière 3
PROTECTION ENVIRONNEMENTALE
Recycler les matières premières au lieu de
-
-
GARANTIE
Tout dommage attribuable à une usure normale,
à une surcharge ou à une utilisation incorrecte de
-
Risques résiduels
Même lorsque l'outil est utilisé tel que
tous les facteurs de risques résiduels.
Les risques suivants peuvent survenir en
raison de la construction et la concep-
tion de l'outil:
Dommages aux poumons si un masque
Dommages à l'audition si une protection
-
NIVEAU SONORE ET VIBRATIONS
Marteau perforateur RH 24/720 PRO
dB(A) 91
dB(A) 102
Incertitude K dB 3
Portez une protection acoustique!
-
rielle des trois axes directionnels) et incertitude K
2. Mode marteau
perforateur/
perceuse à per-
cussion:
Tourner le bouton
-
ner le mode de
fonctionnement 7
dans la direction
3. Mode burinage:
Tourner le bouton
-
ner le mode de
fonctionnement 7
dans la direction
4. Changer la posi-
tion de burinage
dans 8positions
cette manière, la
optimale peut
être obtenue pour
dans le porte-outil.
de burinage à
passer en mode
burinage pour

Italiano | 11
www.ffgroup-tools.com
-
-
-
AVERTISSEMENT! -
-
commandons aux personnes ayant des implants
DÉCLARATION DE CONFORMITE
•
-
• Dossier technique auprès de:
19300, Aspropyrgos-Greece
ah213,2
K21,5
Buriner:
ah29,9
K21,5
AVVERTENZE GENERALI DI PERICOLO PER
ELETTROUTENSILI
-
potrà creare il pericolo di scosse elettriche, incendi
alimentati dalla rete (con linea di allacciamento) ed
ad utensili elettrici alimentati a batteria (senza linea
di allacciamento).
Sicurezza dell' area di lavoro
illuminata. Il disordine oppure zone della postazione
-
cidenti.
-
-
li producono scintille che possono far infiammare la
Tenere lontani i bambini ed altre persone durante
elettroutensile
Sicurezza elettrica
-
-
tamente di apportare modifiche alla spina. Non
impiegare spine adattatrici assieme ad elettrou-
modificate e le prese adatte allo scopo riducono il
rischio di scosse elettriche.
terra, come tubi, riscaldamenti, cucine elettriche e
-
triche nel momento in cui il corpo è messo a massa.
-
troutensile aumenta il rischio di una scossa elettrica.
ed, in particolare, non usarlo per trasportare o per
a fonti di calore, olio, spigoli taglienti e neppure a
-
sicurezza riduce il rischio di una scossa elettrica.
ITALIANO
| Italiano12
Sicurezza delle persone
È importante concentrarsi su ciò che si sta facendo
-
-
-
-
-
gliamento di protezione personale come la masche-
elmetto di protezione oppure protezione acustica a
-
sile, si riduce il rischio di incidenti.
Prima di collegarlo alla rete di alimentazione elettrica
-
pure prima di iniziare a trasportarlo, assicurarsi che
-
-
-
-
-
-
zioni inaspettate.
-
-
stiti lenti, gioielli o capelli lunghi potranno impigliarsi
-
Trattamento accurato ed uso corretto degli
elettroutensili
-
-
-
Non utilizzare mai elettroutensili con interruttori di-
Prima di procedere ad operazioni di regolazione sulla
macchina, prima di sostituire parti accessorie oppure
estrarre sempre la spina dalla presa della corrente
-
siano abituate ad usarlo o che non abbiano letto le
presenti istruzioni. Gli elettroutensili sono macchine
dotate di sufficiente esperienza.
-
mobili della macchina funzionino perfettamente, che
-
-
causati da elettro tensili la cui manutenzione è stata
effettuata poco accuratamente.
Mantenere gli utensili da taglio sempre affilati e puli-
ti. Gli utensili da taglio curati con particolare attenzio-
-
gli utensili per applicazioni specifiche ecc., sempre
attenendosi alle presenti istruzioni. Così facendo,
situazioni di pericolo.
Assistenza
-
te da personale specializzato e solo impiegando
pezzi di ricambio originali. In tale maniera potrà es-
PER LA VOSTRA INCOLUMITÀ
intero le informazioni di uso e sicurezza
e solo nel rispetto scrupoloso delle
-
zione pratica dello stesso. Nel caso
danneggiato.
Indossare occhiali di sicurezza, guanti
di protezione e scarpe rinforzate. Per
protettori auricolari.
Tenere i capelli lunghi lontano dalla
Italiano | 13
www.ffgroup-tools.com
PRIMA DELL’USO
-
li. Usare sempre la tensione di alimentazione
Sostituzione dell’apparecchio
3non sia danneggiato.
Utensili SDS - Plus
-
-
-
mette la precisione di foratura.
Inserimento
-
portautensile 2-
Rimozione
4e tener-
Messa in funzione
Accensione: -
sto 10
Spegnimento:
arresto 10
-
sto 109.
-
10
con il pulsante di blocco 9
10
ISTRUZIONI DI LAVORO
Frizione di sicurezza contro il sovraccarico
inceppa o rimane bloccata.
• -
-
trambe le mani e assumere una posizione sicura.
ausiliaria.
Impugnatura ausiliaria 6
-
Battuta di profondità 5
-
ria 6. Regolare la profondità di foratura sulla battu-
ta di profondità 5
MODALITÀ DI FUNZIONAMENTO
quando l’elettroutensile è spento! In caso
contrario l’elettroutensile può subire dei
danni.
lontano dalla macchina.
Quando la macchina è in uso, tenerla sempre sal-
damente con entrambe le mani e assumere una
caso di sostituzione, riparazione, pulizia, regolazio-
dalla rete.
16 anni.
-
la portata dei bambini.
Usare solo accessori originali
SPECIFICHE DEL PRODOTTO
Destinazione d’uso
-
struzzo, laterizio e pietra. È utile anche per foratura
senza impatto su legno, metallo, ceramica e plastica.
Elementi del prodotto
1.
2.
3.
4. Guaina di bloccaggio
5. Battuta di profondità
6. Impugnatura ausiliaria
7.
8.
9. Pulsante di blocco
10.
Non tutti gli accessori illustrati o descritti sono in-
clusi nella dotazione standard.
Codice prodotto 41 379
Tipo di mandrino
Potenza nominale
assorbita W 720
Tensione
min-1 0-1300
min-1 0-4500
Forza colpo singolo J 2,6
Diametro max. foratura:
Calcestruzzo mm 24
Acciaio mm 13
mm 30
Peso (senza
accessori) approssima-
kg 2,7
Classe di sicurezza
| Italiano14
-
-
-
Manutenzione e pulizia
-
le feritoie di aerazione sempre pulite. Pulire giornal-
Sostituzione del cappuccio antipolvere.
-
tautensile può causare malfunzionamenti. Tirare e
mantenere tirata la guaina di bloccaggio 4
3con un apparecchio adatto.
Con la guaina di bloccaggio tirata indietro, spingere
-
la cura adottata in fase di produzione e collaudo, le
Per ogni comunicazione e per tutti gli ordini di parti
cifre della macchina.
PROTEZIONE DELL’AMBIENTE
Riciclare le materie prime e non smaltire
-
gli accessori e gli imballaggi dismessi. I com-
ponenti in plastica sono contrassegnati per il
riciclaggio selezionato.
GARANZIA
-
a un centro assistenza per apparecchiature elettriche.
Rischi residui
Anche quando l’apparecchio venga usato
-
minare completamente tutti i fattori di
rischio residui. Potrebbero insorgere i se-
guenti pericoli in relazione alla struttura
e al design dell’apparecchio:
-
-
periodi o non è adeguatamente manipolato e man-
tenuto.
INFORMAZIONI SULLA RUMOROSITÀ E
SULLA VIBRAZIONE
1. Modalità fora-
tura:
-
ruttore di selezi-
one modalità 7in
posizione
2. Modalità foratu-
ra battente:
-
ruttore di selezio-
ne modalità 7in
posizione
3. Modalità scalpel-
latura
-
ruttore di selezio-
ne modalità 7in
posizione
4. Cambio della
posizione di
scalpellatura
-
sere bloccato in 8
modo, è possibile
regolare la posi-
zione ottimale di
applicazione. Inse-
rire lo scalpello nel
porta-apparecchio.
Regolare la posizio-
ne di scalpellatura
desiderata, passare
poi a modalità
scalpellatura per
confermare.
Martello perforatore RH 24/720 PRO
-
ammonta normalmente a
dB(A) 91
dB(A) 102
Incertezza della misura K dB 3
Ελληνικά | 15
www.ffgroup-tools.com
in conformità a un test standardizzato stabilito dalla
-
-
cazioni menzionate.
-
-
-
-
AVVISO! -
-
consigliamo alle persone con impianti medici di con-
-
DICHIARAZIONE DEI CONFORMITÀ
• Dichiaramo, assumendo la piena responsabilità
di tale dichiarazione, che il prodotto è conforme
-
• Fascicolo tecnico presso:
19300, Aspropyrgos-Greece
Usare la protezione acustica!
-
riale delle tre direzioni) e incertezza della misura K
Forature battenti nel calcestruzzo:
ah213,2
K21,5
ah29,9
K21,5
-
-
-
-
-
-
-
-
-
-
-
-
-
-
-
-
-
-
-

| Ελληνικά16
-
-
-
-
-
-
-
-
-
-
-
-
-
-
-
-
-
-
-
-
-
-
-
-
-
-
-
-
-
Service
-
-
-
-

Ελληνικά | 17
www.ffgroup-tools.com
• -
•
•
•
• -
-
-
• -
•
•
1.
2.
3.
4.
5.
6.
7.
41 379
W 720
min-1 0-1300
min-1 0-4500
J 2,6
mm 24
mm 13
mm 30
-
kg 2.7
-
8.
9.
10.
-
-
-
-
-
-
Plus
-
-
-
2
4
10
10 -
10,
9 -
10
9
10-
-
• -
-

| Ελληνικά18
6
-
-
-
-
7
7
8
-
-
-
-
-
-
-
4
3-
-
-
-
-
-
-
-
-
-
-
-
-
-

Ελληνικά | 19
www.ffgroup-tools.com
-
-
-
-
-
-
-
-
-
-
RH 24/720 PRO
60745-1
dB(A) 91
dB(A) 102
dB 3
-
ah213,2
K21,5
ah29,9
K21,5
-
-
-
•
•

| Srpski20
Sigurnost na radnom mestu
-
-
-
gubiti kontrolu nad aparatom.
-
-
-
-
•
-
-
Sigurnost osoblja
-
-
-
SRPSKI
-
-
-
-
-
-
nim alatima
-
-
nog alata.
-
-
neiskusne osobe.
-
-
-
-
Servisi
-
-
na sigurnost aparata.
Other manuals for RH 24/720 PRO
1
This manual suits for next models
1
Table of contents
Languages:
Other F.F. Group Rotary Hammer manuals


