manuals.online logo
Brands
  1. Home
  2. •
  3. Brands
  4. •
  5. Farenheit
  6. •
  7. Car Video System
  8. •
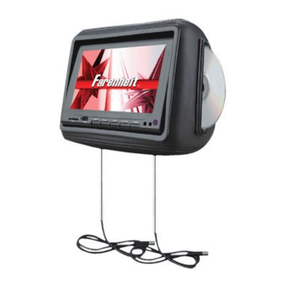
  9. Farenheit H-950BK User manual

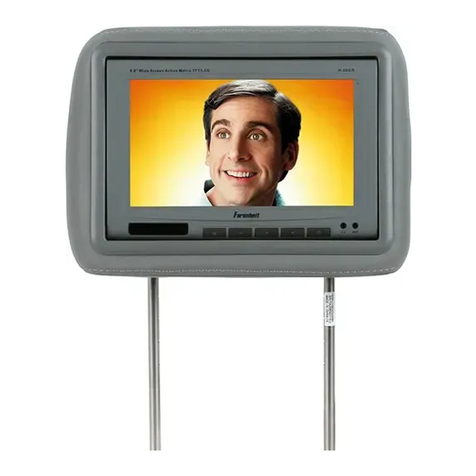
Farenheit H-950BK User manual

H-950GR H-950BG
A GRA DE SC REEN CO NST ITU TE NO M ORE T HAN 3 M IXI NG PI XEL S
YOU'RE NOW READY FOR MORE FUN ON THE ROAD THAN EVER BEFOR
Please read the manual in detail before using this product.
Adjustable Universal Headrest
Please keep the unit away from moisture.
MENU
IR
H-9 50BK
H-950BK H-950GRDK
7
8
91 0
1 1
1 2
1 31 4
1 5
A
MENU
IR
A
1
2
3
4
5
Earphone
transmit window
1.
2.
3.
4.
5.
6
7
Up
Menu
Down
ON/OFF
IR for re mote contro l
AV1 Audio rig ht input
AV1 Audio left input
AV1 Video input
AV2 Audio rig ht input
AV2 Audio left input
AV2 Video input
Video outp ut
Audio left outp ut
Audio rig ht outp ut
12V power input
.
.
8.
9.
10.
11.
12.
13.
14.
15.
4.75 To 7.5
It is p le ased t hat you use t he LCD products . To ensure a lo ng t erm lif e of the
product and your complete use in the product, you shall read th e instructio n
carefully and save it in good conditio n fo r demand in the future.
APPEARANCE AND FUNCTION
6
You may adjust the stainless steel by adjusting the
tube until the headrest indicator can fit on the back seat
(Maximum adjustment width is 7CM)
NAME: HEADREST MONITOR
RESOLUTION:640xR.G.BX480
SYSTEM: PAL/NTSC
POWER: DC12V+10%
POWER CONSUMPTION:10.8W
VIDEO INPUT:AV1+AV2
SCREEN SIZE : 9 INCH (16:9)
REMOTE CONTROL: Full function remote control within 6 M
SPECIFICATION
OPERATING
1.Please conn ec t the po wer line and the video line for the un it and
the power box. Put ting through the six core cables of the unit to the
six core conn ec tor on the power box. The ye llow jack of the po wer
box will be connec t to the out put of the VCD or DVD for the si gnal
of video.
2.Power co nn ec tion , co nn ec t power with 3-p ca bl e, Red for po wer
on or off, Yel low for +12 v, Bl ac k for GND.
3.It will be auto ident ify for the PAL sy st em an d NTS C system. If the
connec tion is correct it will be show the pi ct ur e wi th clearly and
colorful.
4.To ad jus t the brightness , co nt ras t, co lor, tint for the best res ul t tha t
you need .
1.BRIGHTNESS
2.CONTRAST
3.COLOR
4.TINT ONLY NTSC SYSTEM
5.FREQUENCY
6.LANGUAGE
7.MODE
8.RESET
9.EXIT
Operation: Press the “menu” on the LCD or the “VIDEO SELECT' on
the remote control to select the AV input mode. If connect to the VCD
or DVD correctly, then will show picture normally. If not connect to the
VCD, DVD or no signal, then will be show the character of AV on the
top left corner, and also show “no signal”.
All the above functions are can to control by the unit or the manual on
the remote control.
Operation
12
AV Mode
H-95 0BK
ATTENTION
To receive the IR signal for the
wireless headphone,please use
A channel ( right 2.3 MHz,
left 2.8MHz) on the monitor.
Reference picture 1.
1.V1/V2 SELECT
2.UP
3.MENU
4.DOWN
5.ON/OFF
6.MODE (16:9/4:3)
Precaution
1.Be sure to distinguish the anode and the cathode when connect the power.
2.Keep this machine away from too hot, or under effect of moisture, dust or oil smoke, avoid this machine
from dropping or impacting, never extrude or chafe this machine with sharp objects.
3.Dangerous high voltages are present inside the enclosure. Do not open the cabinet, Refer servicing to
qualified personnel only.
4.Installation should be very fasten. Preventing the fallen unit hurt people when moving on or a sudden
brake.
5.DC12v should best be connected to the power adapter to prevent from the over-voltage drop the may
influence the normal work of the monitor.
6.A few high lights or dark spots may occur on the LCD screen. It is a very common phenomenon to the
active matrix display technology, and never necessary means any defects or faults.
TROUBLE SHOOTING
WARNING
For the sake of your safety,
never watch the video during driving.
34
PROBLEM
DARK
SCREEN
NO PICTURE
NO COLOR
WITH A LITTLE REGULAR
LIGHT SPOTS OR BLACK
HORIZONTAL LINE IN THE PICTURE
UNCLEAR
PICTURE
THE OUTER COVER OF THE
MONITOR HAS BEEN DEFORMED
POSSIBLE
REASON SOLUTION
CHECK THE POWER FUSE OR POWER SWI TCH
CHECK THE VIDEO LINE PLUG IS FLEX IBLE OR NOT.
INCREASE THE BRIGHTNESS A ND CONTRA ST RATIO
1 VIDEO SOURCES HAVE NO OUTPUT
2 THE VIDEO CONCENT RIC PLUG
BECOMES FLEXIBL E.
CHECK THE OUTPU T OF VCD
OR DVD REPLACE WI TH THE
NEW VIDEO CABLE T IGHTEN
THE VIDEO INPUT C ABLE
1 VIDEO SOURCES IS
NOT COLORFUL
2 COLOR RATIO SHOULD
BE RE-ADJUSTED
CHECK THE VIDEO
SOURCES ENTER INTO
THE MENU TO RE-ADJUST
IT IS VERY COMMON
PHENOMENON TO
THE ACTIVE MATRIX
DISPLAY TECHNOLOGY.
IT'S NORMAL THAT THERE'S
SOME LIGHT SPOTS IN THE
VISION RANGE OF LCD SCREEN
1 POOR QUALITY OF
THE VIDEO SOURCES
2 BRIGHTNESS AND CONTRAST ARE
NOT IN THE GOOD CONDITION .
REPLACE WITH THE
HIGH QUALITY VIDEO DISC
1 EXTERNA L TEMPE RATURE I S TOO HIGH
2 THE POWER H AS NOT BEEN
SWITCH OF F FOR A LONG TIME
THE SURROUND TEMPERATURE
COULD NOT EXCEED TO 0-60
DEGREE TURN OFF THE POWER
AFTER USING THE UNIT
1 NO 12V VOLTAGE
2 BRIGHTENSS OR
CONTRAST RATION IS TOO SMALL
3 NO HIGH VOLTAGE
2
1
3
4
5
6
USI NG REMOTE
CON TROL UNIT
Insert your finger nails into
A and B on the diagram below.
Press A according to the direction,
then pull out the battery
holder. Reference picture 1.
Reference picture 3
Fit th e batte ry hold er
back to its place.
Refe rence picture 3.
Reference picture 2.
Remove the old battery,
then insert the new battery
into the battery holder with the side
facing upwards. Reference picture 2.
To prevent leakage of fluid from the lithium battery, remove the
battery when not using the remote control unit for long periods of time (one month or more).
If the battery leaks fluid, carefully wipe it out of the battery case, then change to a new lithium battery.
1.
“ ”“-” “ ”“ ”
2.
“ ”“-” “ ”“ ”
3.
“ ”“-” “ ”“ ”
4.
“ ”“-” “ ”“ ”
5.Channel
“ ”“-” “ ”“ ”
6.
“ ”“-” “ ”“ ”
7.
“ ”“-”
8.
“ ”“-” “ ”“ ”
9.
Brightness: please press the manual of unit or the remote control, then
press + on the unit or   on the remote control to select
you need.
Contrast: please press the manual of unit or the remote control twice,
then press + on the unit or   on the remote control to
select you need.
Color: please press the manual of unit or the remote control thrice, then
press + on the unit or   on the remote control to select
you need.
Tint: please press the manual of unit or the remote control four times,
then press + on the unit or   on the remote control to
select you need.
select: please press the manual of the unit or remote control
five times, then press + on the unit or   on the remote
control to select you need.
Language : please press the manual of unit or the remote control six
times, then press + on the unit or   on the remote control
to select you need.
Mode: please press the manual of unit or remote control seven times, then
press + on the unit or “mode” on the remote control to select
you need.
Reset: please press the manual of unit or the remote control eight times,
then press + on the unit or   to resent originally setup.
Exit: Exit the manual

This manual suits for next models

3

Other Farenheit Car Video System manuals

Farenheit T-7005CM User manual

Farenheit

Farenheit T-7005CM User manual

Farenheit TID-893 User manual

Farenheit

Farenheit TID-893 User manual

Farenheit Mobile Video System User manual

Farenheit

Farenheit Mobile Video System User manual

Farenheit 6.5" TFT-LCD Wide Screen Module User manual

Farenheit

Farenheit 6.5" TFT-LCD Wide Screen Module User manual

Farenheit MD-1000CM User manual

Farenheit

Farenheit MD-1000CM User manual

Farenheit T-6201HR User manual

Farenheit

Farenheit T-6201HR User manual

Farenheit T-1200CM User manual

Farenheit

Farenheit T-1200CM User manual

Farenheit 10.4" TFT LCD Ceiling Monitor User manual

Farenheit

Farenheit 10.4" TFT LCD Ceiling Monitor User manual

Farenheit PTID-5000 User manual

Farenheit

Farenheit PTID-5000 User manual

Farenheit MD-1020CM User manual

Farenheit

Farenheit MD-1020CM User manual

Farenheit T-8006 User manual

Farenheit

Farenheit T-8006 User manual

Farenheit MD-1120CMX User manual

Farenheit

Farenheit MD-1120CMX User manual

Farenheit TID-8940 User manual

Farenheit

Farenheit TID-8940 User manual

Farenheit T-7000MHR User manual

Farenheit

Farenheit T-7000MHR User manual

Farenheit MD-830CM User manual

Farenheit

Farenheit MD-830CM User manual

Farenheit Elite 2013 Installation guide

Farenheit

Farenheit Elite 2013 Installation guide

Farenheit T-6202TS User manual

Farenheit

Farenheit T-6202TS User manual

Farenheit PTID-7000 User manual

Farenheit

Farenheit PTID-7000 User manual

Farenheit 4" TFT Kid View Mirror Monitor User manual

Farenheit

Farenheit 4" TFT Kid View Mirror Monitor User manual

Farenheit H-88BK User manual

Farenheit

Farenheit H-88BK User manual

Farenheit LP-1CA User manual

Farenheit

Farenheit LP-1CA User manual

Farenheit TID-360 User manual

Farenheit

Farenheit TID-360 User manual

Farenheit MD-1510CM User manual

Farenheit

Farenheit MD-1510CM User manual

Farenheit MD-900CM User manual

Farenheit

Farenheit MD-900CM User manual

Popular Car Video System manuals by other brands

Mazda Connect manual

Mazda

Mazda Connect manual

RCA DRC97983 Manual de usuario

RCA

RCA DRC97983 Manual de usuario

Panasonic CY-VHD9401U Service manual

Panasonic

Panasonic CY-VHD9401U Service manual

Stinger HEIGH10 RB10RAM13B installation manual

Stinger

Stinger HEIGH10 RB10RAM13B installation manual

Alpine IVA-W203 - 6.5" Touch Screen 2-DIN DVD In-Dash... owner's manual

Alpine

Alpine IVA-W203 - 6.5" Touch Screen 2-DIN DVD In-Dash... owner's manual

Eonon E1057 instructions

Eonon

Eonon E1057 instructions

Milion D2223 user manual

Milion

Milion D2223 user manual

Metra Electronics 99-8153 installation instructions

Metra Electronics

Metra Electronics 99-8153 installation instructions

Voxx Electronics HR8MA1 owner's manual

Voxx Electronics

Voxx Electronics HR8MA1 owner's manual

Axxera AV604Bi quick start guide

Axxera

Axxera AV604Bi quick start guide

Clarion NX706E owner's manual

Clarion

Clarion NX706E owner's manual

Pyle view PLDN74BTi owner's manual

Pyle view

Pyle view PLDN74BTi owner's manual

Clarion NX602 quick start guide

Clarion

Clarion NX602 quick start guide

RCA DRC6296 - Twin 9" Mobile DVD System Manual Del Usuario

RCA

RCA DRC6296 - Twin 9" Mobile DVD System Manual Del Usuario

Fiat Uconnect 5.0 manual

Fiat

Fiat Uconnect 5.0 manual

Lanzar SVDVD5 owner's manual

Lanzar

Lanzar SVDVD5 owner's manual

Eonon E1060 instructions

Eonon

Eonon E1060 instructions

Macrom M-AN900 user manual

Macrom

Macrom M-AN900 user manual

manuals.online logo
manuals.online logoBrands
  • About & Mission
  • Contact us
  • Privacy Policy
  • Terms and Conditions

Copyright 2025 Manuals.Online. All Rights Reserved.