manuals.online logo
Brands
  1. Home
  2. •
  3. Brands
  4. •
  5. Farmcomp
  6. •
  7. Farm Equipment
  8. •
  9. Farmcomp Wile 25 User manual

Farmcomp Wile 25 User manual

Popular Farm Equipment manuals by other brands

Schaffert Rebounder Mounting instructions

Schaffert

Schaffert Rebounder Mounting instructions

Stocks AG Fan Jet Pro Plus 65 Original Operating Manual and parts list

Stocks AG

Stocks AG Fan Jet Pro Plus 65 Original Operating Manual and parts list

Cumberland Integra Feed-Link Installation and operation manual

Cumberland

Cumberland Integra Feed-Link Installation and operation manual

BROWN BDHP-1250 Owner's/operator's manual

BROWN

BROWN BDHP-1250 Owner's/operator's manual

Molon BCS operating instructions

Molon

Molon BCS operating instructions

Vaderstad Rapid Series instructions

Vaderstad

Vaderstad Rapid Series instructions

HighLine BM1400 operating manual

HighLine

HighLine BM1400 operating manual

GSi PNEG-2314 installation manual

GSi

GSi PNEG-2314 installation manual

Checchi & Magli TEXDRIVE owner's manual

Checchi & Magli

Checchi & Magli TEXDRIVE owner's manual

Amazone Cenius 4003-2TX operating manual

Amazone

Amazone Cenius 4003-2TX operating manual

MASSEY FERGUSON MF 9313S Operator's manual

MASSEY FERGUSON

MASSEY FERGUSON MF 9313S Operator's manual

Cima BLITZ Maintenance Instruction

Cima

Cima BLITZ Maintenance Instruction

Amazone CombiDisc 3000 Original operating manual

Amazone

Amazone CombiDisc 3000 Original operating manual

HE-VA Disc-Roller XL Contour Operating instructions/spare parts list

HE-VA

HE-VA Disc-Roller XL Contour Operating instructions/spare parts list

AGT AGT-SSFM product manual

AGT

AGT AGT-SSFM product manual

Milestone 72-84 manual

Milestone

Milestone 72-84 manual

KUHN Hector 3000 Complementary instructions

KUHN

KUHN Hector 3000 Complementary instructions

Krone X-Disc 6200 operating instructions

Krone

Krone X-Disc 6200 operating instructions

manuals.online logo
manuals.online logoBrands
  • About & Mission
  • Contact us
  • Privacy Policy
  • Terms and Conditions

Copyright 2025 Manuals.Online. All Rights Reserved.

EN Operating instructions
Wile 25 OPERATING INSTRUCTIONS
1. ox Contets
–wile 25 moisturemeter
–carrying case
–carying strap
–operating instructions
–9 v 6F22 (installed)
2. Features
The Wile-25 will provide moisture
content information for hay silage and
forage when measuring bales of hay
forage in a bucket and also loose hay.
There are two different probes
available for W-25. Wile 251 probe for
measuring bales and Wile 253 dishprobe
for measuring loose hay (probes needs
to be ordered separetly).
The meter shows the water content of
the sample in percentage of weight. The
definition of moisture is based on
measuring the loss of a high frequency
alternating current signal (capacitance)
in the sample. The repeatability of the
result is +/- 2 0 percent of moisture or
better
Wile 25 meter is calibrated to give
uniform results with the official methods
that are used for defining the moisture
content in hay and silage.
The calibrations are defined with
samples that represent the most
common available qualities of hay silage
and other variaties of grass.
Moisture range:
loosehay: 13-85 %
baled hay: 10-73 %
ale density
80-250 kg/m3 (with 10 kg
gradueting)
Features
- Automatic compensation of the
temperature difference of the
meter and the environment
- Average calculation of
measurements
-Adjust calibration to match the
meter reading with a reference
result.
3. MEASUREMENT
3.1 Preparation
When the meter is not used for a long
time:
- Replace battery (See 6. " attery")
- Read this manual
- Check you meter (See 5. "Control care
and maintenance")
3.1.1 ales and measurements
In big bales the chances of varying
moisture is greater so always make 5
readings per bale to get an average.
In small traditional bales it is normally
enough to do one measurement.
Always double check any high readings
when you deal with dry hay or straw.
If you find moist spots immediately take
action to prevent further damage.
Please note that spoiling hay may heat
up dangerously.
3.1.2 Choosing probe
Read the instructions printed on the side
of the moisture meter when choosing the
right probe.
Probe1 – wile 251 for baled hay
Wile 251, length 45 cm is ment for big
and small rektangular or round bales.
( see 3.2.2 baled hay)
Probe 2- wile 252
Wile 252, length 90 cm for baled
hay. Outbound product at the factory.
Probe 3 – wile 253 for loose hay
Wile 253, dishprobe for loose silage or
hay. Measuring in a bucket (see 3.2.1
loose hay).
3.2 Processing the sample and using
the probe
3.2.1 Loose hay
Always do several measurements of the
chosen batch.Take a handful from
different plases of the swoth and fill a
bucket. Press the hay or silage in to
dense layers in the bucket with your
hand before measuring. Press the
dishprobe(number 3 in the meter) into
the bucket with a force of 20 kg.
Its imporant to press the dishprobe the
whole measuring time (20sek.)
3.2.2 aled hay
Choose wile 251 probe for baled hay
(number one 1 in meter).
In smaller bales its enough to meaasure
once but in bigger bales you need to
have several measurements. Take the
readings from different spots from the
bale.
When measuring round bales you need
to take readings from several spots.
You need to estimate the density of the
bale to get correct moisture readings.
3.2.3 Define the density of the bale
To define the density you need to know
the weight and volume of the bale.
Divide the weight of the bale (kg) with its
volume (m3) the result is the bale
density in kg/m3
Rectangular bales
Length x Height x Width = Volume
Weight ÷ Volume = Density kg/m3.
Large round bales
Distance across the bale centre ÷ 1.273
x Width = Volume
Weight ÷ Volume = Density kg/m3.
3.3 Measuring
Connnect the right probe to the meter
and then press P. Meter shows now the
number of the probe that is connected.
When needed change the number
according to chapter 3.4.1( Choosing
probe in the meter). The meter will now
show you the densityreading. When
needed change densityreading
according to chapter 3.4.2 (density
settings). The meter starts measuring
and shows moisturereadings shortly. The
meter considers thetemperature of the
sample and how it effects the
moisturereadings. The meter turns off
itself after the measuring. Always do
several measurings cause moisture can
vary in differnt parts of the bale.
3.4 Measuring Instructions
Press P to turn meter on. Meter sjows
shortly all the availalble symbols and
marks.
Probe in use follows in display
Density for the bale follws ex. 120kg/m³.
Change density when needed.
Run apperas in display and meter starts
measuring the moisture content.
Moisturereadings shown in percentage
ex 28.8
After measuring meter turns of itself. The
meter is now ready for the next
measurement.
By doing several measurements from the
sample you insure the average quality of
the bale.
3.4.1 Choosing probe in the meter
The liste of the availalble probes is on
the side of the meter. Choose the right
probe. Ther is also a ”probe 0” ( basic
scale) that wile - service will use.
”Probe – 0” is a basic scale that can
also be used for table scales. When
using Probe – 0 you do an ordinary
measuring and see the identical
mositurereadings from the table. You will
get the tablescales from the
manufacturer or the local wile-dealer
also see www.wile.fi.
Check the number of the probe when
probe connected by pressing P. You will
shortly see the number of the probe in
the display. Ex -1-
You can change the probe by pressing F.
After this meter shows densitysettings
and run. Meter is ready for measuring.
3.4.2 Density settings
After calculated the density of the bale
set the right density in the meter.
Press p to turn meter on. Meter shows
now probe in use an dthe the density
used last time ex. 120 kg/m3.
You can change density by pressing F
and increase 10 kg/m3 by every press.
(250 is the last value)
4. Processing of the results
4.1 Average calculation
The meter can store and calculate an av-
erage value of several measurements.
After a measurement you can add the
result to the average calculation.
4.1.1 Adding a result to the average
calculation
When the result is shown on the display
Press F. Now A will be on the display the
meter has included the latest result to
the average.
Calculation is ready when A05 and 28 8
are alterning on the display
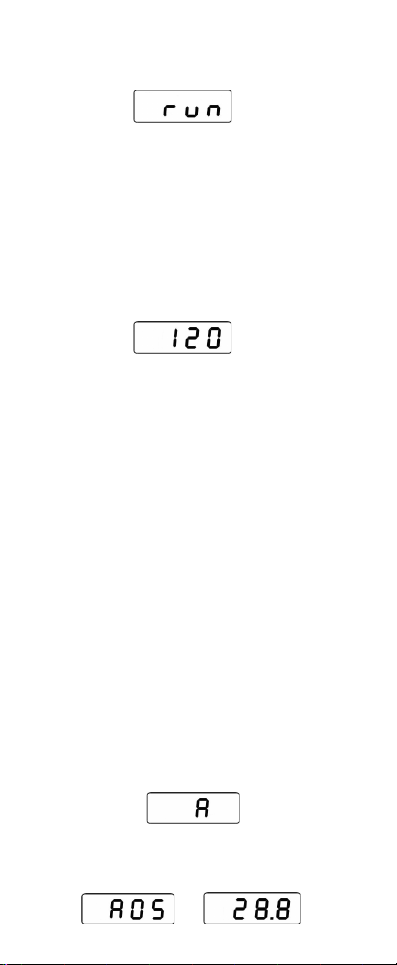
It means the following:
A05 – The avg. is based on 5 measures
28,8 - The avg. moisture % of the
results.
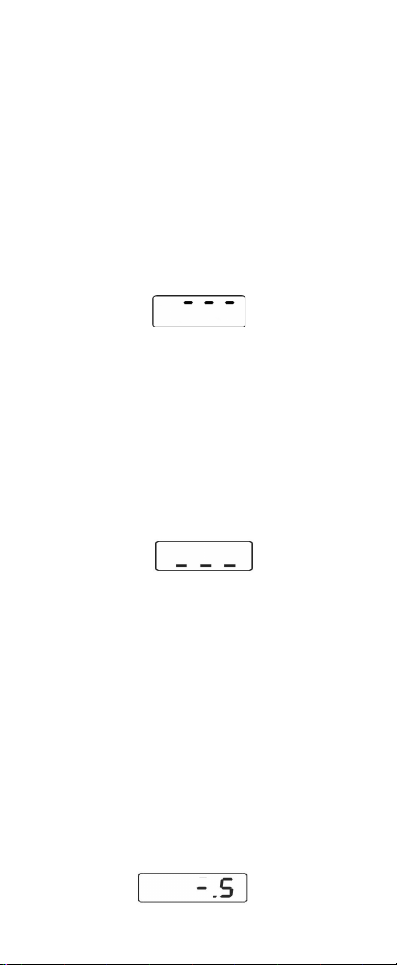
If you don't want to include the results
just wait and the meter will automatically
switch off. Then just start again.
Before using the average calculation
always check that the average memory
is empty. Delete if necessary.
4.1.2 Delete the average memory
Method 1. When the average value is
displayed press F and keep it pressed
until you see 0 and after that A00
Method 2. Press F and keep it
depressed then press P. When you see
A on the display release the F button. If
you now see an average value you can
erase it by keeping the button F
depressed until you see on the display 0
and after that A00.
Please note! It is a good practice to
erase the average memory after
completing a measuring session. This
prevents any old values affecting later
measurements.
The avg. memory blinks If it is full.
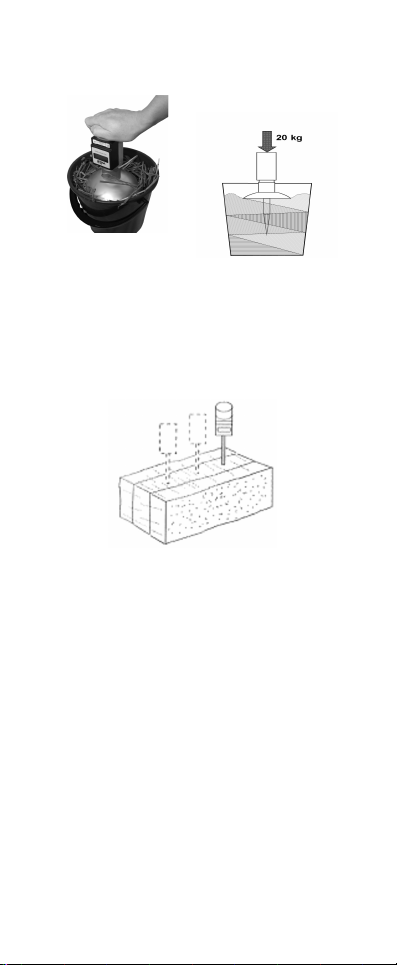
4.2 Adjusting the calibration
If you have had a sample tested in an
oven and the moisture is different to
what the meter reads. Then you can
adjust your meter match the oven test
and this adjustment can remain in the
settings to change future
measurements.
The calibration can be adjusted up and
down.
4.2.1 If you want to add the result
Press F twice when the result is on the
display. Three bars will appear on the top
of the display and after that the moisture
reading. Now add 0 1 percent to the
result with each press of F.
4.2.2 If you want to deduct from the
result
Press F three times when the result is on
the display. Three bars will appear on the
bottom of the display and after that the
moisture reading. Now deduct 0 1
percent from the result with each press
of F.
Please note! The adjustment of the
calibration is specific for each probe.
4.2.3 Adjustment of the calibration
An adjustment to the calibration will
appear on the display after the next run.
E.g. "-.5". - 0 5 per cent units have been
deducted from the result before
displaying it.
Please note: the proceeding zero is not
displayed