Farmi Forest Corporation 351P Guide

Farmi Forest Corporation
Ahmolantie 6
FIN-74510 Iisalmi, Finland
Tel. +358 (0)17 83 241
Fax. +358 (0)17 8324 372
www.farmiforest.
OPERATION, MAINTENANCE
AND SPARE PARTS MANUAL
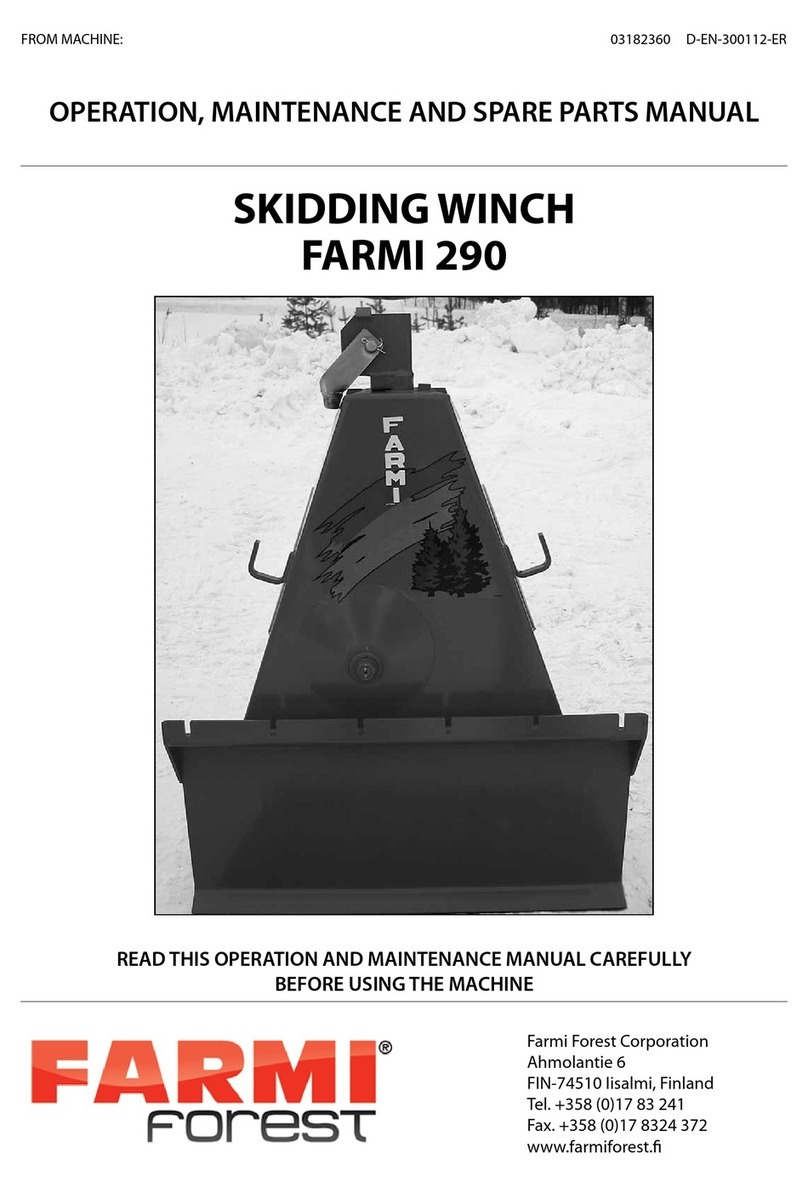
SKIDDING WINCH
FARMI 351P
03182320 E-EN-041212-ER
READ THIS OPERATION AND MAINTENANCE MANUAL CAREFULLY
BEFORE USING THE MACHINE
FROM MACHINE: 3192001-3192094, 3193095 ->
TRANSLATION OF THE INSTRUCTION MANUAL


FARMI 351P
3
INTRODUCTION
This manual includes the information and maintenance instructions required for operating the machine in the
optimal manner.
Although you have experience in using this kind of machinery, read the operation and maintenance instruc-
tions carefully since they include information enabling ecient and safe operation. Regular maintenance is the
best way to guarantee the ecient and economical performance of the machine.
Each and every operator must read, understand, and follow all safety instructions
and procedures.
CUSTOMER FEEDBACK
We are happy to receive your opinions and suggestions for improvements by mail, fax or e-mail.
All implemented suggestions for improvements will be rewarded.
CAUTION!
!
PRODUCT WARRANTY
Farmi provides a 12-months warranty on all Farmi products.
Register on our home page (www.farmiforest.) under FeedBack (”Product Registration” form) within 30 days
after the receipt of the product to get full product warranty and additional information on your product. If it
is not possible for you to register via internet, please register as follows: Complete the registration form on the
last pages of this manual and return it to us within 30 days after the receipt of the product.
WARNING SYMBOLS IN THIS MANUAL
• imminent danger which could cause serious personal injury or death
• danger which could cause personal injury
• conditions or misuse that could damage equipment or machinery
WARNING!
!
CAUTION!
!
!
DANGER!

FARMI 351P
4
Manufacturer:
Farmi Forest Corporation
Ahmolantie 6, FIN-74510 IISALMI, Finland
Person authorized to compile the technical documentation:
Name: Heikki Sirviö
Address: Ahmolantie 6, FIN-74510 IISALMI, Finland
Commercial name:
Farmi
Machine denomination:
Skidding winch
Machine type:
FARMI 351P
Machine series number:
Herewith, we declare that the machine brought into circulation conforms with
the pertinent requirements of the Machinery Directive 2006/42/EC.
The following harmonized standards were used for the conceptional design of
the machine:
EN ISO 12100-1/2, SFS EN ISO 13857, SFS EN ISO 4254-1
Iisalmi 4.12.2012
(Place) (date)
Juha Hallivuori
EC DECLARATION OF CONFORMITY

FARMI 351P
5
When ordering spare parts, please indicate the machine’s type from the machine plate, spare part’s order
number, description and quantity required. Example. JL351P, 92820182, pin, 2 pc
TABLE OF CONTENTS
PRODUCT WARRANTY 3
TABLE OF CONTENTS 5
GENERAL SAFETY INSTRUCTIONS 6
SAFETY INSTRUCTIONS FOR WINCHES 9
STICKERS AND PLATES 10
MAIN PARTS AND ACCESSORIES 13
TECHNICAL SPECIFICATION 14
MOUNTING 15
PRE-OPERATION CHECKS 16
CONTROLS 17
OPERATION 17
PRE-OPERATION CHECKS 18
WINCHING 19
SKIDDING 19
DROPPING THE LOAD 20
TRANSPORTATION 20
MAINTENANCE 21
LUBRICATION 21
CLUTCH ADJUSTMENT 21
ADJUSTING THE ROLLER CHAIN TIGHTNESS 22
ADJUSTING THE DRUM BRAKE 22
REMOVING THE WINCH MECHANISM 22
ASSEMBLY OF THE MECHANISM 23
TROUBLE SHOOTING 24
FRAME 26
MACHINERY 28
PROTECTIVE SCREEN 32
LOWER PROTECTIVE SCREEN 33
COVER OF THE UNIVERSAL SHAFT 33
ACCESSORIES 34
PRODUCT REGISTRATION FORM 38

FARMI 351P
6
GENERAL SAFETY INSTRUCTIONS
These safety instructions are meant for the owners
of FARMI equipment, as well as those who operate,
service or repair it.
The instructions help with:
• using the machine safely, appropriately and eec-
tively.
• identifying, avoiding and preventing potentially
dangerous situations.
The manufacturer supplies an instruction manual,
which must always be available at the place of ope-
ration of the machine. Each user must read the
safety, maintenance and operating instructions
before operating the machine, and comply with
these instructions at all times.
Ensure that every operator of
the machine is familiar with the
content of the instruction manual
and situation-specic safety
instructions, and has been sui-
tably trained before operating
the machine.
The machine complies with technical requirements
and applicable safety regulations. However, incorrect
use, maintenance or repair of the machine may cause
risks.
In addition to the instruction manual, remember to
comply with regulations of the local occupational
health and safety authorities, and with your country’s
laws and decrees.
The manufacturer is not liable for damages caused
by:
• incorrect, negligent or inappropriate use of the
product.
• non-original spare parts.
• normal wear and tear.
• misuse caused by an untrained person’s
improper actions.
• alterations made without the manufacturer’s
permission.
Written authorization must be
requested from the manufacturer
for any alterations to the machine.
STARTING
• Familiarize yourself thoroughly with the use,
operation and controls of the machine and its
equipment before starting.
• Familiarize yourself with the capacities and limi-
tations of the machine and its equipment.
• Do not use the machine unless you are complete-
ly familiar with its operation.
• Be aware of the machine’s danger zones.
• During operation, prevent bystanders from ente-
ring the danger zone.
• Ensure that each operator has the necessary sa-
fety equipment, such as a helmet, safety gogg-
les, work safety boots and suitable protective
clothing.
• Never wear loose clothing around moving parts.
Protect long hair!
• Ensure that work is carried out according to the
stipulations of applicable occupational health
and safety legislation.
• Before starting up or using the machine, ensure
that it cannot cause a risk to other people or pro-
perty.
• Perform a safety check on the machine before
every use. If you observe any faults or decien-
cies, repair the machine immediately.
• Before operating the machine, ensure that there
are no foreign articles in it.
• Place the machine on a hard, level surface for
operation. In the winter avoid working in slippe-
ry areas.
• Before mounting and using the machine, check
the PTO drive shaft for correct condition and
attachment.
• Never use a faulty or decient machine.
CAUTION!
!
CAUTION!
!

FARMI 351P
7
TRANSPORT
• Before driving with the machine, ensure the safe
mounting of the machine. Make sure that the
journals are seating correctly and that the pins are
tight. Check the tension of the lower link stabili-
zers.
• Before driving with the machine, make sure that
the required lamps and reectors as well as the
slow moving vehicle sign are attached correctly.
Moreover, the lamps should be checked for correct
functioning.
• Before driving with the attached machine, make
sure that the hydraulic unit of the machine is
depressurized (unless otherwise instructed in the
operating instructions).
• When driving on public roads, always observe the
valid trac regulations. The travel speed must be
adapted to the specic conditions.
• When driving, please take into consideration the
additional mass resulting from the machine’s
weight. It may aect the reactions, the steerability
and the braking function of the tractor.
• Please note that the machine rear sways when
turning.
• Pay attention to the machine’s height near bridges
or other height restricting objects.
• When backing o, the machine may obstruct the
rear view. Exercise extreme caution. If necessary,
ask a agman to help you; he can indicate the
required distances.
• It is prohibited for other people to ride on the
machine.
OPERATION
Many occupational accidents
take place in abnormal
circumstances. Therefore it is im-
portant to take into account all
the possible circumstances that
may arise during operation of
the machine.
• Depending on the machine’s type, it will have
diverse safety devices and protectors. These are
meant to protect the machine and its operator,
and they must never be removed or altered. Never
start up or use the machine without all the safe-
ty devices and protectors in place. Also check the
universal joint’s safety equipment and joins.
• Never insert any body part into the machine with
the engine running.
• If any faults arise that may jeopardize occupatio-
nal safety, turn o the machine.
• During operation, the machine’s operator is res-
ponsible for safety in the whole work area. Work
may not be carried out in the presence of any fac-
tors that jeopardize occupational safety.
• Exercise extreme caution when hitching / unhit-
ching the machine from a tractor/trailer.
The machine’s operator must
have constant, unobstructed
visibility of the work area. If this
is not possible, the operator must
work with an assistant.
• Look out for moving parts when the machine is in
operation.
• Secure the machine against unauthorized and
accidental operation (e.g. moving when parked)
whenever it is left unattended.
• Never leave the machine running unattended.
• Avoid causing fast, stroke-like loading.
• Never exceed the given operating values.
• All safety and warning signs on and in the machine
must be legible and intact.
• The machine may not be operated by persons
who are unwell or under the inuence of drugs or
alcohol.
MAINTENANCE
• The machine may only be serviced and repaired
by professionals.
• Electrical and hydraulic faults may only be repaired
by authorized professionals.
• In cases requiring welding, contact the manufac-
turer.
• Turn o the tractor engine and disconnect the
universal joint before beginning service or main-
tenance actions.
• Before any maintenance work, turn the main power
switch of the tractor to OFF.
• Ensure that there is no pressure in the hydraulic
system.
• Take out the key from the tractor’s ignition for the
duration of the servicing or maintenance. Check
that the power is o from the machine you are
working on.
!
DANGER!
CAUTION!
!

FARMI 351P
8
• When servicing the machine, place it on a level
surface and ensure that it cannot be moved.
• Observe the service intervals and annual safety
inspections.
• All spare parts and equipment must fulll the
manufacturer’s requirements. This can be guaran-
teed by using original parts.
• Put all safety devices back into place immediately
once servicing or maintenance is complete.
When lifting the machine, check
that the lifting/hoisting equip-
ment is in perfect working order.
Check the weight of the machine
before lifting it. Choose lifting
trajectories so that they do not
cause any danger.
Many countries have specic legislation on lifting,
hoisting cables and hoists. Always comply with local
safety regulations.
OILS AND LUBRICATION
• Always use the oil types recommended by the
manufacturer. Other types of oil may cause
faults or improper operation of the equipment,
which could lead to serious damage to people or
property.
• Never mix dierent liquids or oils.
• Always follow the manufacturer’s lubrication
instructions.
• Use control equipment carefully until the hydraulic
oil has had time to reach its operating tempera-
ture.
SAFETY INSTRUCTIONS FOR HYDRAULIC CIRCUITS
1. Work on hydraulic equipment may only be carried
out by professional hydraulic engineers.
2. Be cautious when using the equipment in cold
conditions.
3. Check the machine for leaks. Do not use the
machine if there is a leak from any system. Check
all hydraulic hoses – particularly those which are
bent during use – and replace any that are in poor
condition or have leaks. Ensure that all joins are
tight and that the lines are not damaged. Check
that all protective caps and ller caps are closed
properly. Check the hose sheathing for damage.
4. Check that all hose connectors, lengths and
qualities comply with applicable requirements.
When replacing or repairing hoses, use original
parts or hoses and connectors recommended
by the manufacturer. Check particularly that the
pressure classes of the hoses and connectors are
suitable to the operating pressure levels.
5. Check that all safety devices such as pressure
relief valves, etc., are in place and work properly.
Familiarize yourself with their use. Safety systems
may never be bypassed.
6. Check the main hydraulic parts daily, and always
after a fault. Replace any damaged parts imme-
diately.
7. If a component is damaged, clean it before
repairing it. Do not use solvents when cleaning
parts.
8. Do not attempt to carry out repairs that you are
not fully familiar with.
9. Never carry out repairs of the hydraulic circuit
when the system is pressurized. When pressuri-
zed, the oil spray can penetrate the skin and cau-
se mortal danger.
10. Neverworkbelowadeviceorcomponentthatison-
ly being held up by hydraulics. Use separate sup-
ports when carrying our maintenance or repairs.
Do not disconnect cylinders or their valves until
the machine is well supported.
11. Most hydraulic oils do not evaporate easily. Risk
factors include hot oil, spills and oil mist (pressu-
rized).
12. If oil gets into your eyes, rinse with plenty of water
and contact a doctor.
13. Avoid prolonged or repeated contact with your
skin.
14. If sprays or contact with the skin cannot be
avoided, use protective gloves, goggles and
clothing as necessary. Do not use oily clothing.
CAUTION!
!

FARMI 351P
9
15. Avoid discharging hydraulic oil into the
environment, as it can pollute waterways and the
groundwater. If biodegradable oil is to be used,
please contact the manufacturer beforehand and
have the suitability of your equipment for the ope-
ration with biodegradable oil conrmed by him
before such oil is used.
16. Store the oil in sealed containers provided by the
manufacturer. Try to transfer the oil directly from
its container into the tank.
17. If the oil must be passed through other containers,
ensure that they are completely clean. Caps, fun-
nels, sieves and lling holes must also be clean.
18. Never store oil outdoors, as water could condense
in it.
19. Always dispose of oil in a suitable container, never
into the environment!
SAFETY INSTRUCTIONS FOR WINCHES
• Check that the wire cable is in good condition
before using the winch (check for corrosion, sharp
bends, breakage and thickness of strands). If a
cable snaps, it can whip towards the operator or
away from the winch.
• Operate the winch with a guide cable at least 2
meters away to the side of the machine. Do not
operate the winch from the tractor cabin unless
a safety net has been installed.
• When winching downhill, the pulling must be
done from the side using an additional idler.
• When winching on a hill, do not follow the load
from below.
• Side-winching must not be done at angles of
more than 30 degrees.
• It is extremely dangerous to be in the space bet-
ween a load attached to the wire cable and the
winch.
• Check that all bystanders are at a safe distance of
at least 15 meters whenever the machine is run-
ning. Place warning signs on approaching roads.
• Never touch the wire cable by hand during
winching.
• The maximum load must be adjusted to condi-
tions.
• Check that the winching chains are carefully at-
tached. Do not attach the wire cable directly to
the load.
• The safety coecient must be 2.5 for cable-type
fasteners and 2 for chain-type fasteners.
• Disconnect the transmission before examining
the machine in the case of any faults.
• Ensure the wire cable is as short as possible during
transport.
• The winch may only be used for winching and
hauling. Do not use the winch for lifting loads.

FARMI 351P
10
3
2
6
5
1
4
7
8
The following plates and labels must be correctly attached to the machine.
Missing safety plates / labels must be replaced immediately.
STICKERS AND PLATES
1. Machine plate JL351P (41012010)
2. Note! See manual for operation and maintenance.
(41014750)

FARMI 351P
11
3. Nr 41014740
Falling danger!
Do not work in an oblique position.
Crushing danger!
Do not use the winch for the lifting.
Watch out for a breaking cable!
Always use the protective screen.
4. Nr 41014730
Note!
Before doing maintenance work turn o the motor,
remove the ignition key and disengage the P.T.O.
Accident danger!
Keep the safety equipment where it belongs.
Winding danger!
Do not wear too loose clothes and keep the hair bound
inside the cap.

FARMI 351P
12
5. Nr 41014720
Falling danger!
Do not winch at sideways angles exceeding
30 degrees.
Crushing danger!
Do not stand in front of the winch when working. Stand
on the side at a distance of at least
6 ft from the winch.
Crushing danger!
Do not winch downhill.
6. Maximum rpm (42381474)
7. Sticker FARMI Forest (40147110)
8. Sticker 351P (40147250)

FARMI 351P
13
MAIN PARTS AND ACCESSORIES
Snatch block
Lower diverting pulley
Cable
(optional)
Upper diverting pulley
Drive shaft
Clutch engagement lever
Latch rope
Control rope
Cable drum
Finger protection
Dozer blade
Drum
locking latch
Accessories are separately specied.

FARMI 351P
14
1320
1650
380
445
TECHNICAL SPECIFICATION FARMI 351P
Tractive power Cable drum empty ( Maximum)
Cable drum full (Minimum)
35 kN
13 kN
Cable capacity
Ultimate strength of the cable 1,96 kN/mm2
recommendation 60 m of ø 10 mm cable
Winching speed 540 rpm 0,5 - 1,3 m/s
Weight( without cable) 170 kg
Clutch Mechanical friction plate clutch with heat sink
Power transmission Universal shaft from tractor
Mounting To 3-point hitch(Kat.I)
Power needed min. 10 kW (14 hp)
DIMENSIONS

FARMI 351P
15
A
A
20
12
SHORTEN THE DRIVE SHAFT
Both PTO halves must be shorte-
ned by equal amounts.
Fig. 1. Measure A when the drive shafts are nearest to
each other.
Fig. 2. Shorten the drive shaft
• First cut the thicker cover to a correct lenght (1).
Remember 20 mm (0.78”) clearance. Then cut
away the same amount from the form pipe. Make
a similar shortening to the second half of the PTO
shaft. Remove the burr with the le.
• Connect the PTO shafts within each other.
Make sure by moving eevator carefully up and
down that the shortening of the axis is sucient.
Check that the axis have 20 mm (0.78”) latitude.
MOUNTING TO THE 3-POINT HITCH
The winch can be mounted to the 3-point linkage of
any tractor. Power transmission is obtained through
universal shaft from tractor.
ASSEMBLY OF THE PTO SHAFT
If the PTO shaft is too long it may
get pressed when the three point
hitch is lifted up. This may cause
damage to the bearings of the
winch or to the PTO of the trac-
tor. The PTO shaft must not be
too short in any position.
The PTO length is suitable, if the pipes do not reach
the bottom.
PTO is optional equipment.
1. Mount the winch to the 3-point hitch of the
tractor.
2. Raise the winch high enough to get the PTO shaft
of the tractor and the winch to a horizontal level.
3. If you have a shortened PTO shaft available, put
one end into the drive shaft and check that the
distance of the locking of the other end. Take into
account the additional clearance of approx. 20
mm (0.78”).
4. Fasten the other end of the PTO shaft in its place
and also move the winch sideways at the same
time securing that the axis does not base.
MOUNTING
CAUTION!
!
CAUTION!
!

FARMI 351P
16
FASTENING THE CABLE TO THE DRUM
1. Tape the cable end to prevent loosening of the
core wires.
2. Pass the cable through the hole in cable guard,
over the upper snatch block and then inside the
winch.
3. Insert the cable from behind the roll of the drum
brake.
4. Pull the cable onto the drum from the left hand
side (the same side as the clutch lever).
5. Pass the cable end through the hole in the drum
plate, pull about 15 cm (6”), and insert under the
wedge of the cable lock device. See g. 3.
6. Tighten the cable lock screw.
7. Winch the cable on the drum. BUT REMEMBER
THAT THE CABLE HAS TO BE LOADED HEAVILY,
WHEN WINCHING THE CABLE BACK ON THE DRUM.
Fig. 3. Fastening the cable
Do not use longer cable than needed. With
correct length you achieve good pulling strength and
proper winding of the cable.
PRE-OPERATION CHECKS
CABLE
Check that:
• the cable is faultless (breakage risk).
• there are no twists or kinks (breakage risk) in the
cable.
• the cable has been properly fastened to the winch.
WINCH
Check that:
• all the pins and lynch pins are in place.
• all bolts and nuts have been tightened.
• roller chain is tight.
• the drum brake has been properly adjusted.
• the clutch has been correctly adjusted.
• lubrication is carried out correctly. See lubricating
instructions.
MOUNTING TO THE TRACTOR
Check that:
• the tractor’s top link point is locked. (with the help
of a support, if necessary).
• the pins are properly secured.
• the sway bars or turnbuckles are suitably tight.
• the PTO-shaft is suitably long, properly fastened
and the shield chains attached.
• the support leg of the winch is turned upward.

FARMI 351P
17
CONTROLS
Get acquainted with the control-
lers of the winch before the use,
tests the stopping functions of
the winch and the tractor and all
other functions. Each function
has to be in perfect condition.
PULLING OUT THE CABLE
• The cable can be freely drawn out if the drum has
not been locked with a latch.
WINCHING
• The winch is equipped with a clutch, which will
be used by the control rope. When the user draws
the control rope, the winch begings to draw in
the cable. Winching will stop when the rope is re-
leased.
• The end of the cable drum is equipped with a fric-
tion clutch, which slips, if the load is too heavy.
This prevents cable break or damages if the load
gets caught.
Fig. 4. Controls
OPERATION
SAFETY PRECAUTIONS
Read the operation instructions
before operating this machine!
It is the owner’s responsibility to
instruct all equipment operators
and support personnel in the
operation of this winch.
1. Choose a horizontal, hard based skidding ro-
ute for the tractor. Avoid steep slopes,
especially when winching from the side.
Check that the winching trail is clear and
that the tractor’s parking brake is on. Do not
run the tractor at a high idle when winching.
Maximum P.T.O speed is 540 rpm. Ensure that
the logs can be drawn freely. Be especially
careful when working on slopes.
Avoid winching sideways at angles exceeding
30 degrees. Use snatchblock which is fastened to
the tree if needed. (See g. 7.)
2. The safest place for the operator is at the back left
side of the winch, allowing good visibility. See g.
21. Take care that there is no one in the working
area.
3. The tractor must have a ROPS cab and front end
weights.
• Always position the tractor on a at ground in
line with the direction of the pull (see g. 5.).
Avoid working in steep terrain. Ensure nothing is
blocking the path of trees.
• Avoid an unnecessarily strong pulls,
the tractor may roll over.
• Adjust the tractors rpm’s according to the condi-
tions.
• Use a shield between the seat and the winch (e.g.
safety cab or protective screen) if you run the
winch from the tractor seat.
• Use agreed signals when working in groups.
4. When you use a light tractor, there is a very big
risk that the tractor will roll over. To avoid that
risk, you must add extra weight to the front of the
tractor.
WARNING!
!
Latch rope
Control rope
WARNING!
!

FARMI 351P
18
• The falling danger of the tractor can be reduced by
winching through the lower diverting pulley.
Fig. 5.
Fig. 6. Do not winch sideways at angles exceeding
30 degrees. The tractor can tilt.
Fig. 7. Use a diverting pulley to avoid winching sideways.
PRE-OPERATION CHECKS
MOUNTING AND USE OF THE LOWER DIVERTING
PULLEY
• Usually the logs are winched in through the
upper pulley of the winch. This lifts the logs
and they dig less into the ground. The weight
of the load also pushes the blade into the
ground thus anchoring the winch and the
tractor to the ground.
• The winch has a lower diverting pulley. The main
use of the lower diverting pulley is to lower the
pulling point. This enables larger loads to be skid-
ded out. For skidding out the load the cable is
transferred to the lower diverting pulley.
• Several logs can be hooked up and winched in at
one time by means of keyhole sliders on the cable.
The skidding chain should have a pin on the end,
which makes it easier to pass the chain underne-
ath the tree. See g. 8.
When using the lower diverting
pulley make sure that it follows
the direction of the cable. Other-
wise the cable will be damaged,
when it is pressed between the
diverting pulley and the lower
diverting pulley frame.
When wInching an unloaded
cable, make sure that the nger
guard doesn’t rise up with cable
and doesn’t cause cable to cross-
cut.
Fig. 8. Use a keyhole sliders to winch several logs at one
time.
CAUTION!
!
CAUTION!
!

FARMI 351P
19
WINCHING
Before using the winch, you have
to pull the cable completely out
of the drum and winch the cable
back on the drum with a heavy
load. Otherwise the cable will be
damaged.
• Park the winch and tractor on level, stable ground.
Lock the brakes of the tractor before winching. Lo-
wer the 3-point hitch so that the dozer blade an-
chors the winch to the ground. See g. 9.
Do not let the dozer blade sink
too deeply into the ground, so
that the PTO shaft is not dama-
ged.
• Before using the skidding winch, make sure that
the lower diverting pulley, the upper diverting
pulley and the nger guard move freely.
Fig. 9. Anchor the dozer blade to the ground.
1. Draw the cable to the load but avoid twitches.
Do not draw out too much cable to avoid loose
spaces when the cable is reeled in.
2. Start the tractor, turn the PTO on. Use the winch
with the control rope and stand in a safe place at
a distance of at least 2 m (6 ft) from the winch. Use
the upper diverting pulley when winching.
3. Operate the clutch rmly. Avoid sliding the clutch
to avoid warming of the clutch. Stop winching by
letting go of the control rope for the leave. The
clutch will slip when the load is heavier than the
selected pull. This prevents damages to the cab-
le or winch. Avoid extra large loads. The winding
speed depends on the number of revolutions of
the tractor. Do not wind too fast.
4. Stop winching when the logs are at about
1,5-3 m (5-10 ft) from the tractor. Install the cable
on the lower diverting pulley.
Fig. 10. Winching over the upper diverting pulley
SKIDDING
Fig. 11. Cable on the lower diverting pulley
1. Turn the P.T.O on. Pull the clutch control rope and
winch the logs to the pulley. Keep the tension on
the cable and pull the thinner rope that operates
the brake ratchet. Stop pulling on the clutch rope
rst. The load is now locked in place. Alternatively
the skidding chains can be attached to the not-
ched beam.
2. Turn o the P.T.O.
3. Raise the 3-point hitch so that the logs come o
ground (g. 12.).
4. Move the logs to the desired place.
CAUTION!
!
CAUTION!
!

FARMI 351P
20
Fig. 12. Winching over the lower diverting pulley
WORKING IN ROUGH TERRAIN
Drop the load before you reach bad terrain. Drive
through the bad spot. Winch in the load again (Fig.
13.).
Fig. 13. Driving through bad terrain
WRONG
RIGHT
IF YOU GET STUCK WITH THE TRACTOR
1. Drop the load. Drive the tractor to rm ground.
Winch in the load.
2. If you cannot move the tractor, release the load
and winch the tractor out. When winching
the tractor out, always run the cable under
the lower pulley.
Fig. 14. Winching the tractor out
DROPPING THE LOAD
1. Let down the 3-point hitch.
2. Pull the clutch rope until the brake ratchet
releases, then stop pulling the clutch rope. The
logs drop to the ground.
TRANSPORTATION
The cable should be run under lower diverting pulley
and locked in place for transportation of the winch.
Table of contents
Other Farmi Forest Corporation Winch manuals
Popular Winch manuals by other brands

Warrior Winches
Warrior Winches T110S12 owner's manual

Rugged Ridge
Rugged Ridge Extreme Heavy Duty 2.0 owner's manual

Ramsey Winch
Ramsey Winch PATRIOT 9500 UT owner's manual

Warrior Winches
Warrior Winches TROJAN 40PUS12 owner's manual

Dover
Dover PULL MASTER H12 Instructions and parts manual

SAHLINS
SAHLINS 3020-1000 instruction manual